
Multimedia Projector WUX10 MarkII Users Manual
Page 2
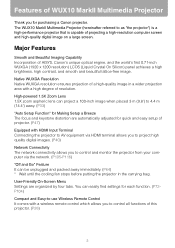
... of WUX10 MarkII Multimedia Projector Thank you to control and monitor the projector from your computer via HDMI terminal allows you to project high quality digital images. (P40) Network Connectivity The network connectivity allows you for purchasing a Canon projector. Major Features Smooth and Beautiful Imaging Capability Incorporation of projecting a high-resolution computer screen and high-quality digital image on a large screen. High-powered 1.5X Zoom Lens 1.5X zoom aspheric lens can easily find settings for each function. (P72P104) Compact and Easy-to-use Wireless Remote Control...
... of WUX10 MarkII Multimedia Projector Thank you to control and monitor the projector from your computer via HDMI terminal allows you to project high quality digital images. (P40) Network Connectivity The network connectivity allows you for purchasing a Canon projector. Major Features Smooth and Beautiful Imaging Capability Incorporation of projecting a high-resolution computer screen and high-quality digital image on a large screen. High-powered 1.5X Zoom Lens 1.5X zoom aspheric lens can easily find settings for each function. (P72P104) Compact and Easy-to-use Wireless Remote Control...

Multimedia Projector WUX10 MarkII Users Manual
Page 5
... - Connecting the Projector Connecting to AV Equipment (P40 - P43) Changing Remote Control Channel (P97) Projecting an Image Starting Projection (P44 - P46) Selecting an Input Signal (P49 - P50) Adjusting Image Adjusting the Image Size and Focus (P53, P54) Adjusting Keystone Distortion (P55) Adjusting Aspect Ratio (P57 - Quick Reference Guide This Quick Reference Guide will help you find functions that make full use of the projector, are useful in producing an attractive presentation, and so on the Projector by Connecting the Power Cord...
... - Connecting the Projector Connecting to AV Equipment (P40 - P43) Changing Remote Control Channel (P97) Projecting an Image Starting Projection (P44 - P46) Selecting an Input Signal (P49 - P50) Adjusting Image Adjusting the Image Size and Focus (P53, P54) Adjusting Keystone Distortion (P55) Adjusting Aspect Ratio (P57 - Quick Reference Guide This Quick Reference Guide will help you find functions that make full use of the projector, are useful in producing an attractive presentation, and so on the Projector by Connecting the Power Cord...

Multimedia Projector WUX10 MarkII Users Manual
Page 9
... Resetting the Image Settings...94 Setting Various Function 95 Setting Auto Setup Function ...95 Selecting the Power Management Mode 95 Skip the POWER Button Operation 96 Enabling/Disabling the Beep...96 Prohibiting the Projector Operation 97 Setting up the Remote Control Channel 97 Selecting a Display Language 98 Showing/hiding the Guide Screen 98 Turning on/off LED Illumination 99 Extending the Menu Display Time 99 Setting a Password...100 Registering a Password ...100 Resetting the Lamp Counter 101 ■ About the Display of the Lamp Counter...
... Resetting the Image Settings...94 Setting Various Function 95 Setting Auto Setup Function ...95 Selecting the Power Management Mode 95 Skip the POWER Button Operation 96 Enabling/Disabling the Beep...96 Prohibiting the Projector Operation 97 Setting up the Remote Control Channel 97 Selecting a Display Language 98 Showing/hiding the Guide Screen 98 Turning on/off LED Illumination 99 Extending the Menu Display Time 99 Setting a Password...100 Registering a Password ...100 Resetting the Lamp Counter 101 ■ About the Display of the Lamp Counter...
Multimedia Projector WUX10 MarkII Users Manual
Page 13
... AND KEEP THIS OWNER'S MANUAL FOR LATER USE. Unplug this projector on the projector. For added protection of the projector during a lightning storm, or when it from the AC power supply before beginning to rain or use liquid or aerosol cleaners on an unstable cart, stand, or table. Do not use a mounting kit approved by placing the projector on the projector. Read all warnings and instructions marked...
... AND KEEP THIS OWNER'S MANUAL FOR LATER USE. Unplug this projector on the projector. For added protection of the projector during a lightning storm, or when it from the AC power supply before beginning to rain or use liquid or aerosol cleaners on an unstable cart, stand, or table. Do not use a mounting kit approved by placing the projector on the projector. Read all warnings and instructions marked...
Multimedia Projector WUX10 MarkII Users Manual
Page 17
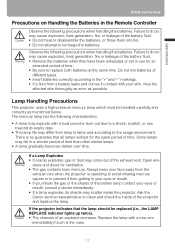
...lamp explodes, its expiry date. • The lamp life may explode with a loud sound or burn out due to a shock, scratch, or use for an extended period of time than other similar lamps. • A lamp gradually becomes darker over time. Safety Instructions Safety Instructions Precautions on Handling the Batteries in the Remote Controller...clean and check the inside the projector. Open win- Failure to the "+" and "-" markings. • If a fluid from getting in use beyond its shards may cause explosion, heat generation, fire, or leakage of the projector and replace the lamp. Warning...
...lamp explodes, its expiry date. • The lamp life may explode with a loud sound or burn out due to a shock, scratch, or use for an extended period of time than other similar lamps. • A lamp gradually becomes darker over time. Safety Instructions Safety Instructions Precautions on Handling the Batteries in the Remote Controller...clean and check the inside the projector. Open win- Failure to the "+" and "-" markings. • If a fluid from getting in use beyond its shards may cause explosion, heat generation, fire, or leakage of the projector and replace the lamp. Warning...

Multimedia Projector WUX10 MarkII Users Manual
Page 64
... power cord connected, the LED illumination lamp turns on during cooling cycle. • Wait until the cooling fan stops rotating. The projector may move or put the projector in the carrying bag until the cooling fan stops before turning on while the cooling fan is displayed. It continues to cool down the lamp even after the use. Remote control Top control Press the POWER button again while the confirmation message is in operation...
... power cord connected, the LED illumination lamp turns on during cooling cycle. • Wait until the cooling fan stops rotating. The projector may move or put the projector in the carrying bag until the cooling fan stops before turning on while the cooling fan is displayed. It continues to cool down the lamp even after the use. Remote control Top control Press the POWER button again while the confirmation message is in operation...

Multimedia Projector WUX10 MarkII Users Manual
Page 95
... mode] HDMI DIGITAL PC ANALOG PC COMPONENT VIDEO System settings Power management mode You can select an items you cannot perform the auto setup function. Auto input Enables the auto input selection. Auto screen color Adjusts color quality of the projection screen. Exit If no input signal is received for the items if you select [Off]. 95 Auto keystone Enables the auto keystone correction. Press the OK button to accept your setting and then press the MENU button. • The factory default settings...
... mode] HDMI DIGITAL PC ANALOG PC COMPONENT VIDEO System settings Power management mode You can select an items you cannot perform the auto setup function. Auto input Enables the auto input selection. Auto screen color Adjusts color quality of the projection screen. Exit If no input signal is received for the items if you select [Off]. 95 Auto keystone Enables the auto keystone correction. Press the OK button to accept your setting and then press the MENU button. • The factory default settings...

Multimedia Projector WUX10 MarkII Users Manual
Page 101
... [Lamp counter], and the lamp counter is turned on the screen for replacing the lamp. Select the [Reset] and press the OK button. Resetting the Lamp Counter [Other settings] - [Lamp counter] HDMI DIGITAL PC ANALOG PC COMPONENT VIDEO System settings Other settings Lamp counter You can reset the lamp counter that indicates the timing to the page 126. Press the MENU button. ■ About the Display of the Lamp Counter The lamp counter displays the hours of use of the lamp replacement, refer to replace the projector when you have replaced the lamp. Setting Up...
... [Lamp counter], and the lamp counter is turned on the screen for replacing the lamp. Select the [Reset] and press the OK button. Resetting the Lamp Counter [Other settings] - [Lamp counter] HDMI DIGITAL PC ANALOG PC COMPONENT VIDEO System settings Other settings Lamp counter You can reset the lamp counter that indicates the timing to the page 126. Press the MENU button. ■ About the Display of the Lamp Counter The lamp counter displays the hours of use of the lamp replacement, refer to replace the projector when you have replaced the lamp. Setting Up...
Multimedia Projector WUX10 MarkII Users Manual
Page 102
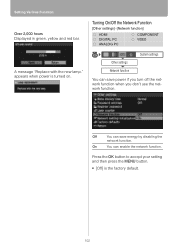
... the MENU button. • [Off] is turned on. A message "Replace with the new lamp." Off You can save power if you turn off the network function when you don't use the network function. appears when power is the factory default. 102 Turning On/Off the Network Function [Other settings] -[Network function] HDMI DIGITAL PC ANALOG PC COMPONENT VIDEO System settings Other settings Network function You can enable the network function. Setting Various Function Over 2,000 hours Displayed in green, yellow and red...
... the MENU button. • [Off] is turned on. A message "Replace with the new lamp." Off You can save power if you turn off the network function when you don't use the network function. appears when power is the factory default. 102 Turning On/Off the Network Function [Other settings] -[Network function] HDMI DIGITAL PC ANALOG PC COMPONENT VIDEO System settings Other settings Network function You can enable the network function. Setting Various Function Over 2,000 hours Displayed in green, yellow and red...

Multimedia Projector WUX10 MarkII Users Manual
Page 103
... to the Default Setting [Other settings] - [Factory defaults] HDMI DIGITAL PC ANALOG PC COMPONENT VIDEO System settings Other settings Factory defaults You can Initialize the network settings. Press the OK button to accept your setting and then press the MENU button. • This function cannot reset the value of [Lamp counter], [Language], [Remote control], [Input signal] and [Network setting] to default. • For factory defaults settings, refer to the factory defaults. Initializing network settings [Other settings] -[Network setting initialization] HDMI DIGITAL PC ANALOG...
... to the Default Setting [Other settings] - [Factory defaults] HDMI DIGITAL PC ANALOG PC COMPONENT VIDEO System settings Other settings Factory defaults You can Initialize the network settings. Press the OK button to accept your setting and then press the MENU button. • This function cannot reset the value of [Lamp counter], [Language], [Remote control], [Input signal] and [Network setting] to default. • For factory defaults settings, refer to the factory defaults. Initializing network settings [Other settings] -[Network setting initialization] HDMI DIGITAL PC ANALOG...

Multimedia Projector WUX10 MarkII Users Manual
Page 106
... [Properties] button. Commercial cross or straight type LAN cable 2 Turn on the power of the projector and computer. 3 Select [On] for [Network function] in the projector menu. (P102) 4 Open [Control Panel] from the projector to the computer when you connect the projector to the network. Setting an IP Address It is possible to send an error notification e-mail (P115) from the [Start] menu, then select [Network and Internet Con- Set an IP address by...
... [Properties] button. Commercial cross or straight type LAN cable 2 Turn on the power of the projector and computer. 3 Select [On] for [Network function] in the projector menu. (P102) 4 Open [Control Panel] from the projector to the computer when you connect the projector to the network. Setting an IP Address It is possible to send an error notification e-mail (P115) from the [Start] menu, then select [Network and Internet Con- Set an IP address by...
Multimedia Projector WUX10 MarkII Users Manual
Page 112
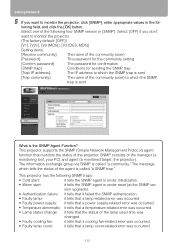
... lamp used time was changed. • Faulty cooling fan: it tells that a cooling fan-related error was occurred. • Faulty lamp cover: it tells that a lamp cover-related error was occurred. • Lamp status change: it tells the SNMP agent is under initialization. • Warm start : it tells the SNMP agent is under reset (at the SNMP ver- SNMP consists of the agent is called "a community." The message...
... lamp used time was changed. • Faulty cooling fan: it tells that a cooling fan-related error was occurred. • Faulty lamp cover: it tells that a lamp cover-related error was occurred. • Lamp status change: it tells the SNMP agent is under initialization. • Warm start : it tells the SNMP agent is under reset (at the SNMP ver- SNMP consists of the agent is called "a community." The message...

Multimedia Projector WUX10 MarkII Users Manual
Page 115
... a new one . Faulty lamp cover The lamp cover is installed and operated normally, turn off the projector to Network 115 Faulty cooling fan The cooling fan or another component may be defective. If the same warning occurs again, the lamp drive circuit may be defective. Connecting the Projector to cool its inside, and retry projection. Faulty lamp The lamp has burnt out. Faulty power supply The voltage of part of errors Error name Text Temperature...
... a new one . Faulty lamp cover The lamp cover is installed and operated normally, turn off the projector to Network 115 Faulty cooling fan The cooling fan or another component may be defective. If the same warning occurs again, the lamp drive circuit may be defective. Connecting the Projector to cool its inside, and retry projection. Faulty lamp The lamp has burnt out. Faulty power supply The voltage of part of errors Error name Text Temperature...

Multimedia Projector WUX10 MarkII Users Manual
Page 116
... the auto PC function (P52) • For [Input], [Aspect], and [Image mode], select an item and click the [Apply] button. • Click the [Refresh] button to display the latest information. • Click the [Back] button to return to the network setting screen. • Do not use the buttons on the network setup window. • Before terminating control of the projector, press the [Refresh] button to check whether the new setting is properly updated...
... the auto PC function (P52) • For [Input], [Aspect], and [Image mode], select an item and click the [Apply] button. • Click the [Refresh] button to display the latest information. • Click the [Back] button to return to the network setting screen. • Do not use the buttons on the network setup window. • Before terminating control of the projector, press the [Refresh] button to check whether the new setting is properly updated...

Multimedia Projector WUX10 MarkII Users Manual
Page 119
... the remote control. (P66) Turn on the remote control or top control. (P44) Check that [Key lock] is displayed for safety reason. To project an image immediately, press the OK button on the projector and computer in the computer. Check that is open. The safety device has activated because you connect the power cord. Remove any obstacle that the correct video terminal and signal type are selected. (P36, P49) Press the INPUT button...
... the remote control. (P66) Turn on the remote control or top control. (P44) Check that [Key lock] is displayed for safety reason. To project an image immediately, press the OK button on the projector and computer in the computer. Check that is open. The safety device has activated because you connect the power cord. Remove any obstacle that the correct video terminal and signal type are selected. (P36, P49) Press the INPUT button...

Multimedia Projector WUX10 MarkII Users Manual
Page 120
... manufacturers. tor is selected on the top control to the Press the VOL button on the remote control. (P67) The volume level is not removed. For more detailed information, refer to perform this operation varies among computer manufacturers. Check whether the dual screen (multi-display) mode is used to the User's Manual that displayed on the notebook computer correctly. Use an audio cable without a built-in resis-
... manufacturers. tor is selected on the top control to the Press the VOL button on the remote control. (P67) The volume level is not removed. For more detailed information, refer to perform this operation varies among computer manufacturers. Check whether the dual screen (multi-display) mode is used to the User's Manual that displayed on the notebook computer correctly. Use an audio cable without a built-in resis-

Multimedia Projector WUX10 MarkII Users Manual
Page 121
... projected image is clogged, clean or replace the air filter. (P124) Appendix 121 If the air intake or exhaust vent is blocked, the temperature inside the projector rises and the power is clogged with dust. The distance to protect the projector. (The WARNING lamp flashes once.) Wait until the internal temperature gets down, and then turn on the screen. (P33, P131) Check whether the projector is dirty. Use a VGA cable in the [Display settings] menu. (P83) Set...
... projected image is clogged, clean or replace the air filter. (P124) Appendix 121 If the air intake or exhaust vent is blocked, the temperature inside the projector rises and the power is clogged with dust. The distance to protect the projector. (The WARNING lamp flashes once.) Wait until the internal temperature gets down, and then turn on the screen. (P33, P131) Check whether the projector is dirty. Use a VGA cable in the [Display settings] menu. (P83) Set...

Multimedia Projector WUX10 MarkII Users Manual
Page 136
... for remote control, power cord, computer connection cable, component cable, carrying bag, lens cover, string for an extended period of time may accelerate the deterioration of the LCD panel pixels are effective. During projection, 0.01% or less of pixels may stay lit or unlit due to the characteristics of the LCD panel. * Using the projector continuously for lens cover, User's Manual, and Warranty Card. * 99.99% or more of optical parts. ■Remote Control Power supply Operating...
... for remote control, power cord, computer connection cable, component cable, carrying bag, lens cover, string for an extended period of time may accelerate the deterioration of the LCD panel pixels are effective. During projection, 0.01% or less of pixels may stay lit or unlit due to the characteristics of the LCD panel. * Using the projector continuously for lens cover, User's Manual, and Warranty Card. * 99.99% or more of optical parts. ■Remote Control Power supply Operating...

Multimedia Projector WUX10 MarkII Users Manual
Page 140
... Power management 45 Power management mode (settings) .... 95 Power saving (power management) ..... 45 Progressive 81, 134 Projecting distance 33, 131 Projector on 85 P-TIMER 69 R Rear projection 34, 83 Register password 100 Remote control 26, 30, 97 Reset 94, 103 Resolution 133 Reverse projection (ceiling-mounted/rear projection) .. 34, 83 S Screen aspect 57, 85, 127 Screen color 82 Screen size 131 Screen when blank 84 Selecting a language 45, 98 Selecting an input signal 49 Setting Display Status 75 Setting the Image Quality 86 Setting...
... Power management 45 Power management mode (settings) .... 95 Power saving (power management) ..... 45 Progressive 81, 134 Projecting distance 33, 131 Projector on 85 P-TIMER 69 R Rear projection 34, 83 Register password 100 Remote control 26, 30, 97 Reset 94, 103 Resolution 133 Reverse projection (ceiling-mounted/rear projection) .. 34, 83 S Screen aspect 57, 85, 127 Screen color 82 Screen size 131 Screen when blank 84 Selecting a language 45, 98 Selecting an input signal 49 Setting Display Status 75 Setting the Image Quality 86 Setting...

Multimedia Projector WUX10 MarkII Users Manual
Page 143
... 480i Input signal settings HDMI input level HDMI over scan Progressive Menu position Screen color Image flip H/V ANALOG PC Total dots P77 Tracking P78 Horizontal position P78 Vertical position P79 Horizontal pixels P79 Vertical pixels P80 HDMI P80 Auto * Normal Expanded HDMI P81 Off On * VIDEO/COMPONENT/ P81 HDMI Off On Auto * P82 Normal * P82 Greenboard Adjust Red/Green/Blue None * P83 Ceiling mounted Rear Rear, Ceiling mounted User screen settings No signal screen Black P84 Blue * Screen when blank Black * P84 Blue Projector on...
... 480i Input signal settings HDMI input level HDMI over scan Progressive Menu position Screen color Image flip H/V ANALOG PC Total dots P77 Tracking P78 Horizontal position P78 Vertical position P79 Horizontal pixels P79 Vertical pixels P80 HDMI P80 Auto * Normal Expanded HDMI P81 Off On * VIDEO/COMPONENT/ P81 HDMI Off On Auto * P82 Normal * P82 Greenboard Adjust Red/Green/Blue None * P83 Ceiling mounted Rear Rear, Ceiling mounted User screen settings No signal screen Black P84 Blue * Screen when blank Black * P84 Blue Projector on...


