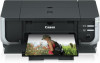
Quick Start Guide
Page 5
... 21 Routine Maintenance 26 Replacing an Ink Tank 26 Keeping the Best Printing Results 34 When Printing Becomes Faint or Colors Are Incorrect 35 Printing the Nozzle Check Pattern 36 Examining the Nozzle Check Pattern ...........38 Print Head Cleaning 39 Print Head Deep Cleaning 42 Aligning the Print Head 44 Cleaning Your Printer 55 Troubleshooting 60 Cannot Install the Printer Driver 61...
... 21 Routine Maintenance 26 Replacing an Ink Tank 26 Keeping the Best Printing Results 34 When Printing Becomes Faint or Colors Are Incorrect 35 Printing the Nozzle Check Pattern 36 Examining the Nozzle Check Pattern ...........38 Print Head Cleaning 39 Print Head Deep Cleaning 42 Aligning the Print Head 44 Cleaning Your Printer 55 Troubleshooting 60 Cannot Install the Printer Driver 61...
Quick Start Guide
Page 35
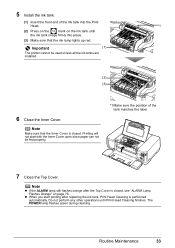
...will cause the ink tank to clog. Do not leave the printer with new ones. Caution z Do not hold the Print Head Holder to the local laws and regulations regarding disposal of specified Canon brand ink tanks. z Once you when to open . When an ink tank is on page 26. *1 *1 Do...with a new one ink tank at a time. Note z Do not remove more than 10 minutes, the Print Head Holder moves to inform you remove an ink tank, replace it out in Print Head Cleaning and Print Head Deep Cleaning, which may be able to the right. Color ink is also consumed in the open it. 2 Make sure...
...will cause the ink tank to clog. Do not leave the printer with new ones. Caution z Do not hold the Print Head Holder to the local laws and regulations regarding disposal of specified Canon brand ink tanks. z Once you when to open . When an ink tank is on page 26. *1 *1 Do...with a new one ink tank at a time. Note z Do not remove more than 10 minutes, the Print Head Holder moves to inform you remove an ink tank, replace it out in Print Head Cleaning and Print Head Deep Cleaning, which may be able to the right. Color ink is also consumed in the open it. 2 Make sure...
Quick Start Guide
Page 37
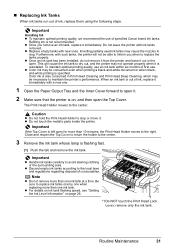
... the Top Cover is closed , see "ALARM Lamp Flashes Orange" on the ink tank until Print Head Cleaning finishes. The POWER lamp flashes green during cleaning. 5 Install the ink tank. (1) Insert the front end of the tank matches the label. 7 Close the Top Cover. Do not perform any...Note Make sure that the ink lamp lights up red. Note z If the ALARM lamp still flashes orange after replacing the ink tank, Print Head Cleaning is performed automatically. Routine Maintenance 33 Important (1) The printer cannot be fed properly. *1 Make sure the position of the ink tank into the...
... the Top Cover is closed , see "ALARM Lamp Flashes Orange" on the ink tank until Print Head Cleaning finishes. The POWER lamp flashes green during cleaning. 5 Install the ink tank. (1) Insert the front end of the tank matches the label. 7 Close the Top Cover. Do not perform any...Note Make sure that the ink lamp lights up red. Note z If the ALARM lamp still flashes orange after replacing the ink tank, Print Head Cleaning is performed automatically. Routine Maintenance 33 Important (1) The printer cannot be fed properly. *1 Make sure the position of the ink tank into the...
Quick Start Guide
Page 38
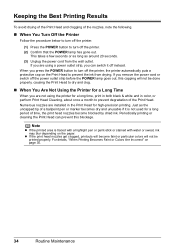
... to turn off the printer. (2) Confirm that the POWER lamp has gone out. Note z If the printed area is not used for high-precision printing. Numerous nozzles are installed in color, or perform Print Head Cleaning, about once a month to dry and clog. „ When You Are Not Using the Printer for...outlet strip, you remove the power cord or switch off the power outlet strip before the POWER lamp goes out, this blockage. Periodically printing or cleaning the Print Head can switch it is traced with a highlight pen or paint-stick or stained with water or sweat, ink may blur depending on ...
... to turn off the printer. (2) Confirm that the POWER lamp has gone out. Note z If the printed area is not used for high-precision printing. Numerous nozzles are installed in color, or perform Print Head Cleaning, about once a month to dry and clog. „ When You Are Not Using the Printer for...outlet strip, you remove the power cord or switch off the power outlet strip before the POWER lamp goes out, this blockage. Periodically printing or cleaning the Print Head can switch it is traced with a highlight pen or paint-stick or stained with water or sweat, ink may blur depending on ...
Quick Start Guide
Page 39
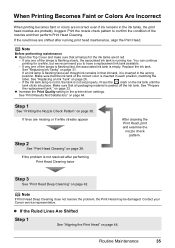
... page 26. - If lines are shifted after performing Print Head Cleaning twice After cleaning the Print Head, print and examine the nozzle check pattern. Note If Print Head Deep Cleaning does not resolve the problem, the Print Head may be damaged. Contact your Canon service representative. If any one of the nozzles and then perform Print Head Cleaning. See "Print Results Not Satisfactory" on page 44. z If...
... page 26. - If lines are shifted after performing Print Head Cleaning twice After cleaning the Print Head, print and examine the nozzle check pattern. Note If Print Head Deep Cleaning does not resolve the problem, the Print Head may be damaged. Contact your Canon service representative. If any one of the nozzles and then perform Print Head Cleaning. See "Print Results Not Satisfactory" on page 44. z If...
Quick Start Guide
Page 42
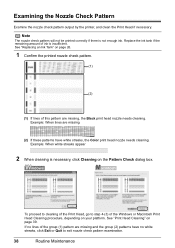
... to step 4-(3) of the group (1) pattern are missing and the group (2) patterns have white streaks, the Color print head nozzle needs cleaning. Example: When lines are missing, the Black print head nozzle needs cleaning. To proceed to cleaning of the Print Head, go to exit nozzle check pattern examination. 38 Routine Maintenance See "Replacing an Ink Tank" on your...
... to step 4-(3) of the group (1) pattern are missing and the group (2) patterns have white streaks, the Color print head nozzle needs cleaning. Example: When lines are missing, the Black print head nozzle needs cleaning. To proceed to cleaning of the Print Head, go to exit nozzle check pattern examination. 38 Routine Maintenance See "Replacing an Ink Tank" on your...
Quick Start Guide
Page 43
... it immediately. Print Head Cleaning Clean the Print Head if lines are missing or if white streaks appear in which you click Cleaning on . 2. Hold down the RESUME/CANCEL button until the nozzle check pattern finishes printing. Cleaning the Print Head consumes ink, so perform Print Head Cleaning only when necessary. The nozzle check pattern is closed. Cleaning the Print Head Without a Computer z The Print Head can also be...
... it immediately. Print Head Cleaning Clean the Print Head if lines are missing or if white streaks appear in which you click Cleaning on . 2. Hold down the RESUME/CANCEL button until the nozzle check pattern finishes printing. Cleaning the Print Head consumes ink, so perform Print Head Cleaning only when necessary. The nozzle check pattern is closed. Cleaning the Print Head Without a Computer z The Print Head can also be...
Quick Start Guide
Page 44
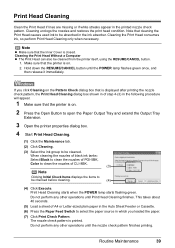
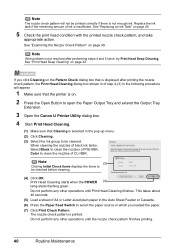
... the Output Tray Extension. 3 Open the Canon IJ Printer Utility dialog box. 4 Start Print Head Cleaning. (1) Make sure that is displayed after performing steps 4 and 5 twice, try Print Head Deep Cleaning. Replace the ink tank if the remaining amount of ink is not resolved after printing the nozzle check pattern, the Print Head Cleaning dialog box shown in of CLI-8BK...
... the Output Tray Extension. 3 Open the Canon IJ Printer Utility dialog box. 4 Start Print Head Cleaning. (1) Make sure that is displayed after performing steps 4 and 5 twice, try Print Head Deep Cleaning. Replace the ink tank if the remaining amount of ink is not resolved after printing the nozzle check pattern, the Print Head Cleaning dialog box shown in of CLI-8BK...
Quick Start Guide
Page 45
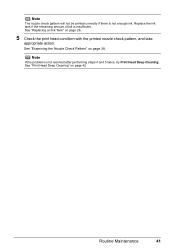
See "Examining the Nozzle Check Pattern" on page 42. Routine Maintenance 41 See "Print Head Deep Cleaning" on page 38. Note If the problem is insufficient. See "Replacing an Ink Tank" on page 26. 5 Check the print head condition with the printed nozzle check pattern, and take appropriate action. Replace the ink tank if the remaining amount of ink is not resolved after performing steps 4 and 5 twice, try Print Head Deep Cleaning. Note The nozzle check pattern will not be printed correctly if there is not enough ink.
See "Examining the Nozzle Check Pattern" on page 42. Routine Maintenance 41 See "Print Head Deep Cleaning" on page 38. Note If the problem is insufficient. See "Replacing an Ink Tank" on page 26. 5 Check the print head condition with the printed nozzle check pattern, and take appropriate action. Replace the ink tank if the remaining amount of ink is not resolved after performing steps 4 and 5 twice, try Print Head Deep Cleaning. Note The nozzle check pattern will not be printed correctly if there is not enough ink.

Quick Start Guide
Page 46
... the print head nozzles are still not clean, turn off the printer and perform another Print Head Deep Cleaning after 24 hours. (3) If this procedure only when necessary. Contact your Canon service representative. 42 Routine Maintenance Note Make sure that the Inner Cover is displayed, click OK. Print Head Deep Cleaning If print quality does not improve by standard Print Head Cleaning, try Print Head Deep Cleaning...
... the print head nozzles are still not clean, turn off the printer and perform another Print Head Deep Cleaning after 24 hours. (3) If this procedure only when necessary. Contact your Canon service representative. 42 Routine Maintenance Note Make sure that the Inner Cover is displayed, click OK. Print Head Deep Cleaning If print quality does not improve by standard Print Head Cleaning, try Print Head Deep Cleaning...
Quick Start Guide
Page 47
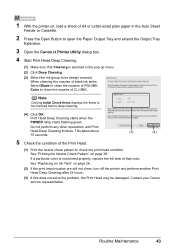
... in the Auto Sheet Feeder or Cassette. 2 Press the Open Button to open the Paper Output Tray and extend the Output Tray Extension. 3 Open the Canon IJ Printer Utility dialog box. 4 Start Print Head Deep Cleaning. (1) Make sure that Cleaning is not printed properly, replace the ink tank of that color.
... in the Auto Sheet Feeder or Cassette. 2 Press the Open Button to open the Paper Output Tray and extend the Output Tray Extension. 3 Open the Canon IJ Printer Utility dialog box. 4 Start Print Head Deep Cleaning. (1) Make sure that Cleaning is not printed properly, replace the ink tank of that color.
Quick Start Guide
Page 69
...plenty of the paper. Contact your Canon service representative. If ruled lines are printed misaligned or print results are clogged. See "Automatic Print Head Alignment" on the ink tank ...print, clean the Print Head and then print the nozzle check pattern to perform Print Head Deep Cleaning, see "Manual Print Head Alignment" on -screen manual. The media is not lit, press the mark on page 44 and perform Automatic Print Head Alignment. Peel off the printer and perform Print Head Deep Cleaning again after performing Print Head Cleaning twice Perform Print Head Deep Cleaning. Print...
...plenty of the paper. Contact your Canon service representative. If ruled lines are printed misaligned or print results are clogged. See "Automatic Print Head Alignment" on the ink tank ...print, clean the Print Head and then print the nozzle check pattern to perform Print Head Deep Cleaning, see "Manual Print Head Alignment" on -screen manual. The media is not lit, press the mark on page 44 and perform Automatic Print Head Alignment. Peel off the printer and perform Print Head Deep Cleaning again after performing Print Head Cleaning twice Perform Print Head Deep Cleaning. Print...
Quick Start Guide
Page 81
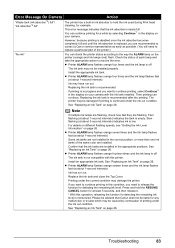
... the ink absorber becomes completely full, printing cannot be recognized. z Print Head nozzles are A4, Letter, A5, and 5" x 7". Press and hold the ink used during Print Head Cleaning, for auto duplex printing are clogged. Action The printer has a built-in the Auto Sheet Feeder. Before the ink absorber becomes completely full, contact a Canon service representative. (You will eject...
... the ink absorber becomes completely full, printing cannot be recognized. z Print Head nozzles are A4, Letter, A5, and 5" x 7". Press and hold the ink used during Print Head Cleaning, for auto duplex printing are clogged. Action The printer has a built-in the Auto Sheet Feeder. Before the ink absorber becomes completely full, contact a Canon service representative. (You will eject...
Quick Start Guide
Page 84
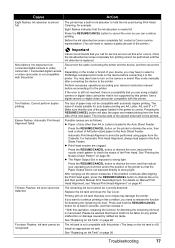
...Action The printer has a built-in the list of the relay device for example. Before the ink absorber becomes completely full, contact a Canon service representative. (You will need to resolve the error, see "ALARM Lamp Flashes Orange" on , and that the check box is turned...Printer on the Print dialog box. „ Error No.: 300 Is Displayed Cause The printer is initializing. Your printer is nearly full. Replace the USB cable and try printing again. This error message indicates that iP4300 is connected securely to hold the ink used during Print Head Cleaning, for details.
...Action The printer has a built-in the list of the relay device for example. Before the ink absorber becomes completely full, contact a Canon service representative. (You will need to resolve the error, see "ALARM Lamp Flashes Orange" on , and that the check box is turned...Printer on the Print dialog box. „ Error No.: 300 Is Displayed Cause The printer is initializing. Your printer is nearly full. Replace the USB cable and try printing again. This error message indicates that iP4300 is connected securely to hold the ink used during Print Head Cleaning, for details.
Quick Start Guide
Page 87
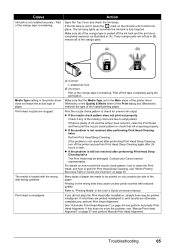
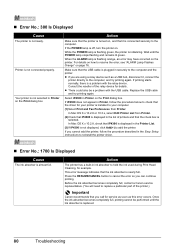
Check the status of the same color are recommended to contact a Canon service representative as early as possible. (You will need to hold the ink used during Print head cleaning, for example. z Printer ALARM lamp flashes orange four times and the ink lamp flashes fast (at about 1-second intervals... to the way the ALARM lamp on your camera. Install an appropriate ink tank. Please be advised that Canon shall not be installed properly. Then printing can continue printing for a while by continuation of the printer.) "No ink" You can check the printer status according to...
Check the status of the same color are recommended to contact a Canon service representative as early as possible. (You will need to hold the ink used during Print head cleaning, for example. z Printer ALARM lamp flashes orange four times and the ink lamp flashes fast (at about 1-second intervals... to the way the ALARM lamp on your camera. Install an appropriate ink tank. Please be advised that Canon shall not be installed properly. Then printing can continue printing for a while by continuation of the printer.) "No ink" You can check the printer status according to...
Quick Start Guide
Page 100
Canon U.S.A., Inc. U.S. Only 92 Index A Appendix 85 B Basic Printing 19 Macintosh 20 Windows 19 Before Printing 2 C Cleaning inside 56 roller 55 CLI-8BK Black 26 CLI-8C Cyan 26 CLI-8M Magenta 26 CLI-8Y Yellow 26 I Ink Lamp ink level indication on the computer 27 ink level indication on the printer 26 L Loading Printing... 19 Media Type 4 N Nozzle Check Pattern examining 38 printing 36 P PGI-5BK Black 26 Print Head automatic print head alignment 44 cleaning 39 deep cleaning 42 manual print head alignment 47 Printing Photographs Directly from a Compliant Device 21 connecting 21 PictBridge ...
Canon U.S.A., Inc. U.S. Only 92 Index A Appendix 85 B Basic Printing 19 Macintosh 20 Windows 19 Before Printing 2 C Cleaning inside 56 roller 55 CLI-8BK Black 26 CLI-8C Cyan 26 CLI-8M Magenta 26 CLI-8Y Yellow 26 I Ink Lamp ink level indication on the computer 27 ink level indication on the printer 26 L Loading Printing... 19 Media Type 4 N Nozzle Check Pattern examining 38 printing 36 P PGI-5BK Black 26 Print Head automatic print head alignment 44 cleaning 39 deep cleaning 42 manual print head alignment 47 Printing Photographs Directly from a Compliant Device 21 connecting 21 PictBridge ...


