User Manual
Page 102
...paper size and print orientation by following the instructions below: Windows 7: 1. From the Start menu, select Control Panel > Hardware and Sound > Printers. 2. Right-click the Canon XXX series FAX icon (where "XXX" is the model name.) Windows Vista: 1. You can also specify the paper size and.... 2. Right-click the Canon XXX series Printer icon and select Printing Preferences, then Canon XXX series FAX. Right-click the Canon XXX series FAX icon (where "XXX" is the model name). 4. Sending a FAX (Fax Driver) You can send faxes using the fax driver from applications that the machine...
...paper size and print orientation by following the instructions below: Windows 7: 1. From the Start menu, select Control Panel > Hardware and Sound > Printers. 2. Right-click the Canon XXX series FAX icon (where "XXX" is the model name.) Windows Vista: 1. You can also specify the paper size and.... 2. Right-click the Canon XXX series Printer icon and select Printing Preferences, then Canon XXX series FAX. Right-click the Canon XXX series FAX icon (where "XXX" is the model name). 4. Sending a FAX (Fax Driver) You can send faxes using the fax driver from applications that the machine...
User Manual
Page 105
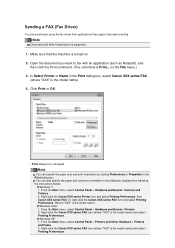
..." is the model name.) • Windows Vista/Windows XP: Right-click the Canon XXX series FAX icon (where "XXX" is the model name) and select Printing Preferences. 3. Open the setting screen of the FAX driver. • Windows 7: Right-click the Canon XXX series Printer icon and select Printing... Preferences, then Canon XXX series FAX. You can send a fax by simply specifying a recipient from it. Click...
..." is the model name.) • Windows Vista/Windows XP: Right-click the Canon XXX series FAX icon (where "XXX" is the model name) and select Printing Preferences. 3. Open the setting screen of the FAX driver. • Windows 7: Right-click the Canon XXX series Printer icon and select Printing... Preferences, then Canon XXX series FAX. You can send a fax by simply specifying a recipient from it. Click...

User Manual
Page 108
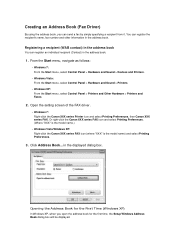
...box, select Show hidden files and folders in an Address Book (Fax Driver) From the Start menu, select Control Panel > Appearance and Personalization > Folder Options. 2. The address book will be reflected in Windows Vista automatically. Add the outside line access number before the fax number ...reflected in Windows Vista. From the Start menu, select XXXX (user name), then double-click AppData > Roaming > Canon > MP5 to open the address book in the following procedure and reflect the information to Windows Vista, the address book you upgrade from an Address Book (Fax Driver) Search ...
...box, select Show hidden files and folders in an Address Book (Fax Driver) From the Start menu, select Control Panel > Appearance and Personalization > Folder Options. 2. The address book will be reflected in Windows Vista automatically. Add the outside line access number before the fax number ...reflected in Windows Vista. From the Start menu, select XXXX (user name), then double-click AppData > Roaming > Canon > MP5 to open the address book in the following procedure and reflect the information to Windows Vista, the address book you upgrade from an Address Book (Fax Driver) Search ...
User Manual
Page 109
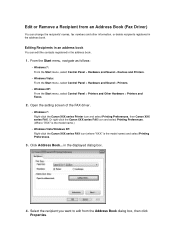
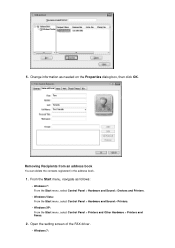
...a Recipient from the Address Book dialog box, then click Properties. Open the setting screen of the FAX driver. • Windows 7: Right-click the Canon XXX series Printer icon and select Printing Preferences, then Canon XXX series FAX. Select the recipient you want to edit from an Address Book (Fax... Driver) You can edit the contacts registered in the address book. 1. Editing Recipients in an address book You ...
...a Recipient from the Address Book dialog box, then click Properties. Open the setting screen of the FAX driver. • Windows 7: Right-click the Canon XXX series Printer icon and select Printing Preferences, then Canon XXX series FAX. Select the recipient you want to edit from an Address Book (Fax... Driver) You can edit the contacts registered in the address book. 1. Editing Recipients in an address book You ...
User Manual
Page 110
..., then click OK. Open the setting screen of the FAX driver. • Windows 7: 5. Removing Recipients from an address book You can delete the contacts registered in the address book. 1. Change information as follows: • Windows 7: From the Start menu, select Control Panel > Hardware and... Sound > Devices and Printers. • Windows Vista: From the Start menu, select Control Panel > Hardware and Sound > Printers. • Windows XP: From the Start menu, select Control ...
..., then click OK. Open the setting screen of the FAX driver. • Windows 7: 5. Removing Recipients from an address book You can delete the contacts registered in the address book. 1. Change information as follows: • Windows 7: From the Start menu, select Control Panel > Hardware and... Sound > Devices and Printers. • Windows Vista: From the Start menu, select Control Panel > Hardware and Sound > Printers. • Windows XP: From the Start menu, select Control ...
User Manual
Page 116
...name) appears. 3. To place a pause at the front of numbers. Keep the following the instructions below to the following number of the Canon XXX series FAX Properties dialog box (where "XXX" is being sent from another computer, a message appears and your fax cannot be sent ... network compatible printer, you cannot send a fax from another computer. • If you assign the fax driver to the Bluetooth port, you cannot send faxes from the Tools menu. 2. Windows 7: 1. Click the Ports tab. To make the number easier to 60 characters * The number of characters ...
...name) appears. 3. To place a pause at the front of numbers. Keep the following the instructions below to the following number of the Canon XXX series FAX Properties dialog box (where "XXX" is being sent from another computer, a message appears and your fax cannot be sent ... network compatible printer, you cannot send a fax from another computer. • If you assign the fax driver to the Bluetooth port, you cannot send faxes from the Tools menu. 2. Windows 7: 1. Click the Ports tab. To make the number easier to 60 characters * The number of characters ...
Troubleshooting Guide
Page 12
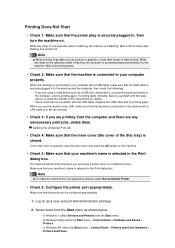
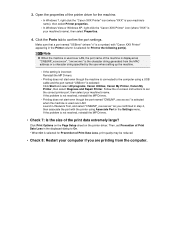
...the USB cable is securely plugged in to the network with the relay device. Select items from the Start menu as shown below. • In Windows 7, select Devices and Printers from the computer and there are any unnecessary print jobs, delete them. Consult the reseller of the disc tray) is ... over LAN, make sure that the machine is connected to the machine and the computer, then check the followings: • If you are using a printer driver for details. • There could also be a problem with the USB cable. While any lamp on the machine. • Check 5: Make sure that your ...
...the USB cable is securely plugged in to the network with the relay device. Select items from the Start menu as shown below. • In Windows 7, select Devices and Printers from the computer and there are any unnecessary print jobs, delete them. Consult the reseller of the disc tray) is ... over LAN, make sure that the machine is connected to the machine and the computer, then check the followings: • If you are using a printer driver for details. • There could also be a problem with the USB cable. While any lamp on the machine. • Check 5: Make sure that your ...
Troubleshooting Guide
Page 13
... Repair Printer. Then, set the correct printer port, then select your machine's name), then select Printer properties. • In Windows Vista or Windows XP, right-click the "Canon XXX Printer" icon (where "XXX" is displayed as you are printing from the MAC address or a character string specified by ...the user when setting up the machine. • If the setting is incorrect: Reinstall the MP Drivers. • Printing does not ...
... Repair Printer. Then, set the correct printer port, then select your machine's name), then select Printer properties. • In Windows Vista or Windows XP, right-click the "Canon XXX Printer" icon (where "XXX" is displayed as you are printing from the MAC address or a character string specified by ...the user when setting up the machine. • If the setting is incorrect: Reinstall the MP Drivers. • Printing does not ...

Troubleshooting Guide
Page 31
How to Open the Printer Driver Setup Window Select Enable bidirectional support in the Ports sheet of the properties dialog box of the Machine Use the printer driver with bidirectional communication. Ink Remaining Level Is Not Displayed on Printer Status Monitor of the printer driver.
How to Open the Printer Driver Setup Window Select Enable bidirectional support in the Ports sheet of the properties dialog box of the Machine Use the printer driver with bidirectional communication. Ink Remaining Level Is Not Displayed on Printer Status Monitor of the printer driver.

Troubleshooting Guide
Page 59
... When the machine is connected to your computer with a LAN cable or is set up correctly. • Check 3: If you are using a printer driver for details. • There could also be a problem with the relay device. Wait until printing starts. • Check 2: Make sure that the machine... Devices and Printers from the computer and there are printing from the Start menu. • In Windows Vista, select the Start menu > Control Panel > Hardware and Sound > Printers. • In Windows XP, select the Start menu > Control Panel > Printers and Other Hardware > Printers and Faxes. If...
... When the machine is connected to your computer with a LAN cable or is set up correctly. • Check 3: If you are using a printer driver for details. • There could also be a problem with the relay device. Wait until printing starts. • Check 2: Make sure that the machine... Devices and Printers from the computer and there are printing from the Start menu. • In Windows Vista, select the Start menu > Control Panel > Hardware and Sound > Printers. • In Windows XP, select the Start menu > Control Panel > Printers and Other Hardware > Printers and Faxes. If...

Troubleshooting Guide
Page 60
...over LAN, the port name of the printer driver for the machine. • In Windows 7, right-click the "Canon XXX Printer" icon (where "XXX" is your machine's name), then select Printer properties. • In Windows Vista or Windows XP, right-click the "Canon XXX Printer" icon (where "XXX" is your... machine's name. If the problem is not resolved, reinstall the MP Drivers. • Printing does not start even though the machine is ...
...over LAN, the port name of the printer driver for the machine. • In Windows 7, right-click the "Canon XXX Printer" icon (where "XXX" is your machine's name), then select Printer properties. • In Windows Vista or Windows XP, right-click the "Canon XXX Printer" icon (where "XXX" is your... machine's name. If the problem is not resolved, reinstall the MP Drivers. • Printing does not start even though the machine is ...
Troubleshooting Guide
Page 65
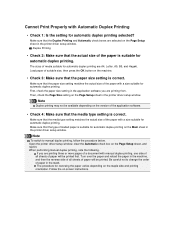
...is correct. Be careful not to manual duplex printing, follow the procedure below. Follow the on the Page Setup sheet in the printer driver setup window. The sizes of loaded paper is suitable for automatic duplex printing. Make sure that the paper size setting matches the actual size of... Printing • Check 1: Is the setting for reversing the paper varies depending on the Page Setup sheet in the printer driver setup window. Open the printer driver setup window, clear the Automatic check box on the Main sheet in the machine, and then the reverse side of all sheets of ...
...is correct. Be careful not to manual duplex printing, follow the procedure below. Follow the on the Page Setup sheet in the printer driver setup window. The sizes of loaded paper is suitable for automatic duplex printing. Make sure that the paper size setting matches the actual size of... Printing • Check 1: Is the setting for reversing the paper varies depending on the Page Setup sheet in the printer driver setup window. Open the printer driver setup window, clear the Automatic check box on the Main sheet in the machine, and then the reverse side of all sheets of ...
Troubleshooting Guide
Page 72
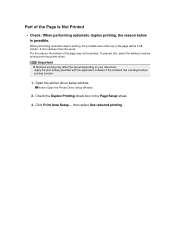
... may affect the layout depending on your document. How to reduce printing from the printer driver. Open the printer driver setup window. Part of the page will be printed. For this , select the setting to Open the Printer Driver Setup Window 2. Click Print Area Setup..., then select Use reduced printing. Check the Duplex Printing check...
... may affect the layout depending on your document. How to reduce printing from the printer driver. Open the printer driver setup window. Part of the page will be printed. For this , select the setting to Open the Printer Driver Setup Window 2. Click Print Area Setup..., then select Use reduced printing. Check the Duplex Printing check...
Troubleshooting Guide
Page 81
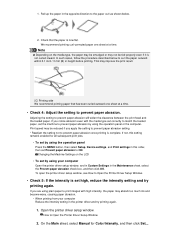
...may be reduced if you apply the setting to prevent paper abrasion setting. * Readjust the setting not to Open the Printer Driver Setup Window 2. Open the printer driver setup window. We recommend printing curl-corrected paper one sheet at a time. In such cases, follow the procedure described below . 2....too much ink and become wavy, causing paper abrasion. • When printing from your computer Open the printer driver setup window, and in Custom Settings in the printer driver and try printing again. On the Main sheet, select Manual for all subsequent print jobs. • To ...
...may be reduced if you apply the setting to prevent paper abrasion setting. * Readjust the setting not to Open the Printer Driver Setup Window 2. Open the printer driver setup window. We recommend printing curl-corrected paper one sheet at a time. In such cases, follow the procedure described below . 2....too much ink and become wavy, causing paper abrasion. • When printing from your computer Open the printer driver setup window, and in Custom Settings in the printer driver and try printing again. On the Main sheet, select Manual for all subsequent print jobs. • To ...
Troubleshooting Guide
Page 82
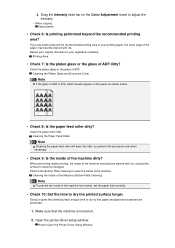
... the inside of your application software. Doing so gives the printed surface enough time to clean the inside of ADF. Open the printer driver setup window. 3. Clean the platen glass or the glass of the machine from stains, set the paper size correctly. • Check 10: ...beyond the recommended printing area of the machine dirty? How to become stained with ink, causing the printout to Open the Printer Driver Setup Window Make sure that paper smudged and scratched are printing beyond the recommended printing area? Resize your original document in your printing paper,...
... the inside of your application software. Doing so gives the printed surface enough time to clean the inside of ADF. Open the printer driver setup window. 3. Clean the platen glass or the glass of the machine from stains, set the paper size correctly. • Check 10: ...beyond the recommended printing area of the machine dirty? How to become stained with ink, causing the printout to Open the Printer Driver Setup Window Make sure that paper smudged and scratched are printing beyond the recommended printing area? Resize your original document in your printing paper,...

Troubleshooting Guide
Page 90
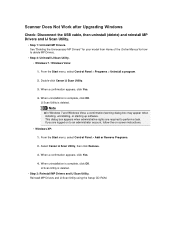
Message Is Displayed Computer Stops Operating during Scanning Scanner Does Not Work after Upgrading Windows Scanned Image Does Not Open Problems with Scanning Scanner Does Not Work ScanGear (Scanner Driver) Does Not Start Error Message Appears and the ScanGear (Scanner Driver) Screen Does Not Appear Cannot Scan Multiple Items at One Time Cannot Scan Properly with Auto Scan Slow Scanning Speed "There is not enough memory."
Message Is Displayed Computer Stops Operating during Scanning Scanner Does Not Work after Upgrading Windows Scanned Image Does Not Open Problems with Scanning Scanner Does Not Work ScanGear (Scanner Driver) Does Not Start Error Message Appears and the ScanGear (Scanner Driver) Screen Does Not Appear Cannot Scan Multiple Items at One Time Cannot Scan Properly with Auto Scan Slow Scanning Speed "There is not enough memory."
Troubleshooting Guide
Page 99
... Scan Utility is complete, click OK. Reinstall MP Drivers and IJ Scan Utility using the Setup CD-ROM. If you are required to delete MP Drivers. • Step 2: Uninstall IJ Scan Utility. • Windows 7 / Windows Vista: 1. Select Canon IJ Scan Utility, then click Remove. 3. From ...the Start menu, select Control Panel > Add or Remove Programs. 2. Double-click Canon IJ Scan Utility. 3. When uninstallation is...
... Scan Utility is complete, click OK. Reinstall MP Drivers and IJ Scan Utility using the Setup CD-ROM. If you are required to delete MP Drivers. • Step 2: Uninstall IJ Scan Utility. • Windows 7 / Windows Vista: 1. Select Canon IJ Scan Utility, then click Remove. 3. From ...the Start menu, select Control Panel > Add or Remove Programs. 2. Double-click Canon IJ Scan Utility. 3. When uninstallation is...
Troubleshooting Guide
Page 102
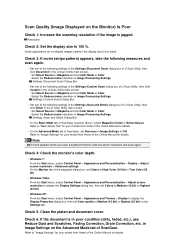
...IJ Scan Utility, then click Stitch in Image Settings on the Advanced Mode tab of ScanGear (scanner driver), select Magazine (Color) in Select Source. Check 4: Check the monitor's color depth. • Windows 7: From the Start menu, select Control Panel > Appearance and Personalization > Display > Adjust screen ...Adjust screen resolution to display the Display Settings dialog box, then set Colors to Medium (16 bit) or Highest (32 bit). • Windows XP: From the Start menu, select Control Panel > Appearance and Themes > Display to display the Display Properties dialog box, then set Color...
...IJ Scan Utility, then click Stitch in Image Settings on the Advanced Mode tab of ScanGear (scanner driver), select Magazine (Color) in Select Source. Check 4: Check the monitor's color depth. • Windows 7: From the Start menu, select Control Panel > Appearance and Personalization > Display > Adjust screen ...Adjust screen resolution to display the Display Settings dialog box, then set Colors to Medium (16 bit) or Highest (32 bit). • Windows XP: From the Start menu, select Control Panel > Appearance and Themes > Display to display the Display Properties dialog box, then set Color...
Troubleshooting Guide
Page 122
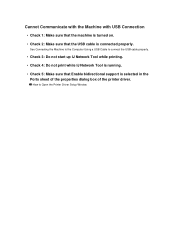
... that the USB cable is selected in the Ports sheet of the properties dialog box of the printer driver. See Connecting the Machine to the Computer Using a USB Cable to Open the Printer Driver Setup Window Cannot Communicate with the Machine with USB Connection • Check 1: Make sure that the machine is turned...
... that the USB cable is selected in the Ports sheet of the properties dialog box of the printer driver. See Connecting the Machine to the Computer Using a USB Cable to Open the Printer Driver Setup Window Cannot Communicate with the Machine with USB Connection • Check 1: Make sure that the machine is turned...

Troubleshooting Guide
Page 126
Printer Status Monitor Is Not Displayed • Check: Is the printer status monitor enabled? Open the printer driver setup window. Select Enable Status Monitor on the Option menu of the printer status monitor. 1. On the Maintenance sheet, click View Printer Status.... 3. How to Open the Printer Driver Setup Window 2. Make sure that Enable Status Monitor is selected on the Option menu if it is not selected.
Printer Status Monitor Is Not Displayed • Check: Is the printer status monitor enabled? Open the printer driver setup window. Select Enable Status Monitor on the Option menu of the printer status monitor. 1. On the Maintenance sheet, click View Printer Status.... 3. How to Open the Printer Driver Setup Window 2. Make sure that Enable Status Monitor is selected on the Option menu if it is not selected.


