
Users Guide
Page 3
... 5 Acceptable documents ...5 Unacceptable documents ...6 Documents recommended for use with the Carrier Sheet 7 4 Scan Preparation 8 Set up your scanner ...8 Load documents ...9 Loading documents ...9 Loading multiple differently-sized documents 11 Load documents using the Carrier Sheet 13 Loading documents wider than... Scan with DS Capture ...22 Change scan settings using the TWAIN driver 24 Functional overview ...24 DS Capture home screen ...25 Scanner Properties dialog box ...27 Image tab ...28 Compression tab ...34 Color Dropout tab ...35 Paper tab ...37 Multi-Feed Detection ...
... 5 Acceptable documents ...5 Unacceptable documents ...6 Documents recommended for use with the Carrier Sheet 7 4 Scan Preparation 8 Set up your scanner ...8 Load documents ...9 Loading documents ...9 Loading multiple differently-sized documents 11 Load documents using the Carrier Sheet 13 Loading documents wider than... Scan with DS Capture ...22 Change scan settings using the TWAIN driver 24 Functional overview ...24 DS Capture home screen ...25 Scanner Properties dialog box ...27 Image tab ...28 Compression tab ...34 Color Dropout tab ...35 Paper tab ...37 Multi-Feed Detection ...

Users Guide
Page 4
... tab ...79 Setting tab ...83 Imprinter tab ...84 Information tab ...88 7 Scanner Maintenance 89 Clean the outside of your scanner ...89 Clean the inside of your scanner ...90 Replace parts ...95 Supply information ...95 Check replacement cycle ...97 Replace the...107 Multi-feed ...109 Troubleshooting ...111 A Appendix A 115 Specifications ...115 General ...115 Scanner ...117 Interfaces ...118 Supported languages ...118 Computer requirements ...119 B Appendix B 120 Contact Brother ...120 Register your product online at ...120 Frequently Asked Questions (FAQs 120 For customer service...
... tab ...79 Setting tab ...83 Imprinter tab ...84 Information tab ...88 7 Scanner Maintenance 89 Clean the outside of your scanner ...89 Clean the inside of your scanner ...90 Replace parts ...95 Supply information ...95 Check replacement cycle ...97 Replace the...107 Multi-feed ...109 Troubleshooting ...111 A Appendix A 115 Specifications ...115 General ...115 Scanner ...117 Interfaces ...118 Supported languages ...118 Computer requirements ...119 B Appendix B 120 Contact Brother ...120 Register your product online at ...120 Frequently Asked Questions (FAQs 120 For customer service...

Users Guide
Page 5
1 Scanning Software 1 Choose your scanning software 1 After installing Brother's scanner drivers, select a scanning application for scanning. 1 Use this table to help determine which of scan button to perform one-touch scanning. If scanning ... DS Capture's scanning functionality, and to which the required scan settings have been assigned on page 17). Windows ®: DVD / Brother Solutions Center 1 Mac: Brother Solutions Center 1 DVD / Brother Solutions Center 1 DVD DVD DVD For more information about using your computer, click the button to scan, browse and file your computer...
1 Scanning Software 1 Choose your scanning software 1 After installing Brother's scanner drivers, select a scanning application for scanning. 1 Use this table to help determine which of scan button to perform one-touch scanning. If scanning ... DS Capture's scanning functionality, and to which the required scan settings have been assigned on page 17). Windows ®: DVD / Brother Solutions Center 1 Mac: Brother Solutions Center 1 DVD / Brother Solutions Center 1 DVD DVD DVD For more information about using your computer, click the button to scan, browse and file your computer...

Users Guide
Page 6
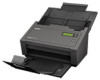
2 General Information Scanner overview 4 5 6 3 21 7 8 10 1 Top Cover 2 Cover Extension 3 Document Guide Stopper 4 Document Guides 5 Automatic Document Feeder (ADF) 6 ADF Cover 7 Output Tray 8 Document Stopper 9 Control Panel 10 Cover Release Lever 11 Kensington Security Slot 12 USB Connector 13 AC Power Connector 9 11 12 13 2 2 2
2 General Information Scanner overview 4 5 6 3 21 7 8 10 1 Top Cover 2 Cover Extension 3 Document Guide Stopper 4 Document Guides 5 Automatic Document Feeder (ADF) 6 ADF Cover 7 Output Tray 8 Document Stopper 9 Control Panel 10 Cover Release Lever 11 Kensington Security Slot 12 USB Connector 13 AC Power Connector 9 11 12 13 2 2 2

Users Guide
Page 7
...a scanning application. 3 For more information about Power Saving Mode, see Scan using the control panel on the control panel. General Information Control panel This scanner has one Liquid Crystal Display (LCD), five buttons and one Light Emitting Diode (LED) on page 17, step 4 and 5. 3 Power button (LED...) • Press to turn the scanner OFF. For more information about the function numbers, see Energy Saving Control on page 54. 4 Cancel button Press to stop scanning. 5 Scan button Press...
...a scanning application. 3 For more information about Power Saving Mode, see Scan using the control panel on the control panel. General Information Control panel This scanner has one Liquid Crystal Display (LCD), five buttons and one Light Emitting Diode (LED) on page 17, step 4 and 5. 3 Power button (LED...) • Press to turn the scanner OFF. For more information about the function numbers, see Energy Saving Control on page 54. 4 Cancel button Press to stop scanning. 5 Scan button Press...

Users Guide
Page 8
... User's Guide. See your model's Manuals page on your computer, Function X changes to download the Button Manager V2 User's Guide. The scanner is running on the Brother Solutions Center at support.brother.com to a Button Manager function number and name. XXXXX is ON. LED Indication No light Green Blinking green Blinking red Meaning...
... User's Guide. See your model's Manuals page on your computer, Function X changes to download the Button Manager V2 User's Guide. The scanner is running on the Brother Solutions Center at support.brother.com to a Button Manager function number and name. XXXXX is ON. LED Indication No light Green Blinking green Blinking red Meaning...

Users Guide
Page 12
4 Scan Preparation 4 Set up your scanner a Open the Top Cover (1), pull the Cover Extension (2) out and then unfold the Document Guides (3). 2 3 4 1 b Pull the Output Tray (1) out of the machine and then unfold the Document Stopper (2). 12 1 8
4 Scan Preparation 4 Set up your scanner a Open the Top Cover (1), pull the Cover Extension (2) out and then unfold the Document Guides (3). 2 3 4 1 b Pull the Output Tray (1) out of the machine and then unfold the Document Stopper (2). 12 1 8

Users Guide
Page 14
... the documents with your document, face down, top edge first in the ADF between the Guides until you feel it touch the inside of the scanner.
... the documents with your document, face down, top edge first in the ADF between the Guides until you feel it touch the inside of the scanner.

Users Guide
Page 21
... that the machine is connected to the lower right corner of the following: 5 (For Windows® 10) Click (Start) > Settings > Devices > Printers&Scanners > Devices&Printers. (For Windows® 8/8.1) Move your mouse to your computer via a USB cable. 5 Scan (Windows®) 5 Scan using the control ...panel Customize the Scan button on your Brother machine's control panel to scan using one of your desktop. In the Hardware and Sound group, click View devices and printers. (For Windows®...
... that the machine is connected to the lower right corner of the following: 5 (For Windows® 10) Click (Start) > Settings > Devices > Printers&Scanners > Devices&Printers. (For Windows® 8/8.1) Move your mouse to your computer via a USB cable. 5 Scan (Windows®) 5 Scan using the control ...panel Customize the Scan button on your Brother machine's control panel to scan using one of your desktop. In the Hardware and Sound group, click View devices and printers. (For Windows®...

Users Guide
Page 26
...a Confirm that the machine is your PDS scanner model, and then click OK. 22 NOTE 5 If the DS Capture icon is not visible on your desktop, click Start > All Programs > Brother PDS-XXXX Scanner (where XXXX is connected to your desktop. Under Scanner Model, select your model name) ...> DS Capture. c The Select Scanner Model dialog box appears. Scan (Windows ®) Scan using your computer ...
...a Confirm that the machine is your PDS scanner model, and then click OK. 22 NOTE 5 If the DS Capture icon is not visible on your desktop, click Start > All Programs > Brother PDS-XXXX Scanner (where XXXX is connected to your desktop. Under Scanner Model, select your model name) ...> DS Capture. c The Select Scanner Model dialog box appears. Scan (Windows ®) Scan using your computer ...

Users Guide
Page 27
Your scanner starts scanning. For more information on changing settings, see DS Capture home screen on page 24. Check the scan result to change the scan settings, if needed. f Set your document in the Path field. A thumbnail of the scanned image appears in the DS Capture screen and the scanned image will be saved in the directory you specified in the ADF. For more information, see Change scan settings using the TWAIN driver on page 25. Scan (Windows ®) d DS Capture launches. 5 e Click Setup to confirm that all settings are correct. 23 g Click Scan .
Your scanner starts scanning. For more information on changing settings, see DS Capture home screen on page 24. Check the scan result to change the scan settings, if needed. f Set your document in the Path field. A thumbnail of the scanned image appears in the DS Capture screen and the scanned image will be saved in the directory you specified in the ADF. For more information, see Change scan settings using the TWAIN driver on page 25. Scan (Windows ®) d DS Capture launches. 5 e Click Setup to confirm that all settings are correct. 23 g Click Scan .

Users Guide
Page 28
..., on a scanned image Enhancement tab on page 49 Efficient scanning See preview and check scan settings Preview tab on page 43 Save your scanner properties Image tab on page 28 Acquire multiple color type scan results with a single scan Image tab on page 28 Specify the computer memory...Information tab on page 59 Change the Power Saving Mode and Power Off time settings More Settings tab on page 53 System information Check the scanner and computer system information Information tab on page 59 24 Instructions for other scanning software will be similar. Scan (Windows ®) Change ...
..., on a scanned image Enhancement tab on page 49 Efficient scanning See preview and check scan settings Preview tab on page 43 Save your scanner properties Image tab on page 28 Acquire multiple color type scan results with a single scan Image tab on page 28 Specify the computer memory...Information tab on page 59 Change the Power Saving Mode and Power Off time settings More Settings tab on page 53 System information Check the scanner and computer system information Information tab on page 59 24 Instructions for other scanning software will be similar. Scan (Windows ®) Change ...

Users Guide
Page 29
... the scan mode if needed. Fast scan mode Fast scan mode gives priority to change this button to scan. - 25 For more information, see Scanner Properties dialog box on your computer. Scan (Windows ®) DS Capture home screen (1) (2) (3) (4) (5) (6) (7) 5 No. Users should not need to scanning speed. Click this setting. Set... debug value between 0 and 9. 0 NOTE Debug is complete. Fast display mode In Fast display mode, thumbnails are displayed after scanning is a developer's function. Change scanner properties.
... the scan mode if needed. Fast scan mode Fast scan mode gives priority to change this button to scan. - 25 For more information, see Scanner Properties dialog box on your computer. Scan (Windows ®) DS Capture home screen (1) (2) (3) (4) (5) (6) (7) 5 No. Users should not need to scanning speed. Click this setting. Set... debug value between 0 and 9. 0 NOTE Debug is complete. Fast display mode In Fast display mode, thumbnails are displayed after scanning is a developer's function. Change scanner properties.

Users Guide
Page 31
Click OK to save the settings and close the Scanner Properties dialog box without saving changes. Click Cancel to configure the scanner's settings. (1) 5 (2) (4) (3) No. NOTE All settings in all tabs to display the Scanner Properties dialog box. Name (1) Tabs (2) Defaults (3) OK (4) Cancel Description Image, Compression, Color Dropout, Paper, Multi... be set individually for the front and back of any double-sided document you scan. 27 Scan (Windows ®) Scanner Properties dialog box Click Setup on the DS Capture home screen to the original factory settings. Use the...
Click OK to save the settings and close the Scanner Properties dialog box without saving changes. Click Cancel to configure the scanner's settings. (1) 5 (2) (4) (3) No. NOTE All settings in all tabs to display the Scanner Properties dialog box. Name (1) Tabs (2) Defaults (3) OK (4) Cancel Description Image, Compression, Color Dropout, Paper, Multi... be set individually for the front and back of any double-sided document you scan. 27 Scan (Windows ®) Scanner Properties dialog box Click Setup on the DS Capture home screen to the original factory settings. Use the...

Users Guide
Page 33
... and vice versa. There are not available. Conversion Methods Dynamic Threshold Fixed Processing Halftone 1-5 Description Select Dynamic Threshold to allow the scanner to dynamically evaluate each other high-contrast documents. If you configure detailed settings used to automatically detect and scan the front or back...process of gray. For a black and white scan of the front and a color scan of a color document page in color, the scanner will be scanned. In other machines, this conversion. Scan (Windows ®) Image Selection check boxes Select the check boxes to produce ...
... and vice versa. There are not available. Conversion Methods Dynamic Threshold Fixed Processing Halftone 1-5 Description Select Dynamic Threshold to allow the scanner to dynamically evaluate each other high-contrast documents. If you configure detailed settings used to automatically detect and scan the front or back...process of gray. For a black and white scan of the front and a color scan of a color document page in color, the scanner will be scanned. In other machines, this conversion. Scan (Windows ®) Image Selection check boxes Select the check boxes to produce ...

Users Guide
Page 36
... Profiles. The machine scans both sides of the tabs. The Edit Your Profile dialog box appears. 32 Scan (Windows ®) 2 in 1 Use 2 in the Scanner Properties dialog box, using any of the folded document, and merges the images onto a single page. • Merge Vertically check box Select this check box...
... Profiles. The machine scans both sides of the tabs. The Edit Your Profile dialog box appears. 32 Scan (Windows ®) 2 in 1 Use 2 in the Scanner Properties dialog box, using any of the folded document, and merges the images onto a single page. • Merge Vertically check box Select this check box...

Users Guide
Page 41
... area manually. - Width / Length / Center (6) OverScan / Adjustment Add a specific margin at top and bottom of the edge of time the scanner will wait before 0 starting an auto scan after the first scan job is completed. 37 ISO A4 - 210 x 297 mm (4) Portrait / Landscape .... (not selected) (3) Scan Area / Page Size Select the paper size. White Background (8) Unit Select the unit of measurement displayed in the Scanner Properties window. (based on language) (9) Reload Timeout Set the amount of 0.00 the image. (7) Background Settings Select a background color. Name...
... area manually. - Width / Length / Center (6) OverScan / Adjustment Add a specific margin at top and bottom of the edge of time the scanner will wait before 0 starting an auto scan after the first scan job is completed. 37 ISO A4 - 210 x 297 mm (4) Portrait / Landscape .... (not selected) (3) Scan Area / Page Size Select the paper size. White Background (8) Unit Select the unit of measurement displayed in the Scanner Properties window. (based on language) (9) Reload Timeout Set the amount of 0.00 the image. (7) Background Settings Select a background color. Name...

Users Guide
Page 44
... of the area in the document that must be scanned using the following values: X-Offset Adjust the distance from the left edge of the scanner to the left edge of the area in the document that you want to scan. Y-Offset Adjust the distance from the top edge of... the document to the top edge of the area in the document that you want to scan. Width Adjust the width of time the scanner will wait before auto-scanning the next document after a scan job is based on the selected paper size. and 0.18 in . NOTE This option is...
... of the area in the document that must be scanned using the following values: X-Offset Adjust the distance from the left edge of the scanner to the left edge of the area in the document that you want to scan. Y-Offset Adjust the distance from the top edge of... the document to the top edge of the area in the document that you want to scan. Width Adjust the width of time the scanner will wait before auto-scanning the next document after a scan job is based on the selected paper size. and 0.18 in . NOTE This option is...

Users Guide
Page 45
... of Additional Length Detection. (4) Stop Scanning after Stop the ADF and display a Warning when a multi-feed is detected. 41 A value of measurement displayed in the Scanner Properties window. Default (not selected) (not selected) (not selected) C:\Windows\Media\ Ding.wav (based on documents, or electrostatically charged documents. (1) (2) (3) 5 (4) (5) (6) No. Use the Additional Length...
... of Additional Length Detection. (4) Stop Scanning after Stop the ADF and display a Warning when a multi-feed is detected. 41 A value of measurement displayed in the Scanner Properties window. Default (not selected) (not selected) (not selected) C:\Windows\Media\ Ding.wav (based on documents, or electrostatically charged documents. (1) (2) (3) 5 (4) (5) (6) No. Use the Additional Length...

Users Guide
Page 47
...) - 43 Name Description (1) Scan Area Select the paper size. (2) Portrait / Landscape Select the scanned document's layout. (3) Display window Display a preview of measurement displayed in the Scanner Properties window. (6) Selected area applies to Apply the same scan area settings to preview your image (at a low resolution) before your scan area manually. (5) Unit...
...) - 43 Name Description (1) Scan Area Select the paper size. (2) Portrait / Landscape Select the scanned document's layout. (3) Display window Display a preview of measurement displayed in the Scanner Properties window. (6) Selected area applies to Apply the same scan area settings to preview your image (at a low resolution) before your scan area manually. (5) Unit...


