
Users Manual
Page 2
... FROM ANY DEFECT OR ERROR IN THIS MANUAL OR PRODUCT. SPECIFICATIONS AND INFORMATION CONTAINED IN THIS MANUAL ARE FURNISHED FOR INFORMATIONAL USE ONLY, AND ARE SUBJECT TO CHANGE AT ANY TIME WITHOUT NOTICE, AND SHOULD NOT BE CONSTRUED AS A COMMITMENT BY ASUS. SERVICE AND SUPPORT Visit our multi-language web site at https://www.asus.com/support 2 ASUS All-in any form...
... FROM ANY DEFECT OR ERROR IN THIS MANUAL OR PRODUCT. SPECIFICATIONS AND INFORMATION CONTAINED IN THIS MANUAL ARE FURNISHED FOR INFORMATIONAL USE ONLY, AND ARE SUBJECT TO CHANGE AT ANY TIME WITHOUT NOTICE, AND SHOULD NOT BE CONSTRUED AS A COMMITMENT BY ASUS. SERVICE AND SUPPORT Visit our multi-language web site at https://www.asus.com/support 2 ASUS All-in any form...
Users Manual
Page 3
... during use...10 Sound Pressure Warning 11 Adapter...11 DC Fan Warning...11 Package contents...12 Chapter 1: Hardware Setup ASUS All-in-One PC...15 Front view...15 Left view...19 Rear view...23 Chapter 2: Using your ASUS All-in-One PC Setting up your ASUS All-in-One PC 27 Installing the stand...27 Connecting the wireless keyboard and mouse 29 Connecting a wired keyboard and mouse 30 Powering on...
... during use...10 Sound Pressure Warning 11 Adapter...11 DC Fan Warning...11 Package contents...12 Chapter 1: Hardware Setup ASUS All-in-One PC...15 Front view...15 Left view...19 Rear view...23 Chapter 2: Using your ASUS All-in-One PC Setting up your ASUS All-in-One PC 27 Installing the stand...27 Connecting the wireless keyboard and mouse 29 Connecting a wired keyboard and mouse 30 Powering on...

Users Manual
Page 4
... Center...53 Other keyboard shortcuts 54 Connecting to wireless networks 56 Wi-Fi...56 Bluetooth...57 Connecting to wired networks 58 Configuring a dynamic IP/PPPoE network connection 58 Configuring a static IP network connection 59 Turning your ASUS All-in-One PC off 60 Putting your ASUS All-in-One PC to sleep 61 Chapter 4: Recovering your system Entering the BIOS Setup 63 Quickly enter the BIOS 63 Recovering your system 64 Performing a recovery option 65 4 ASUS All-in...
... Center...53 Other keyboard shortcuts 54 Connecting to wireless networks 56 Wi-Fi...56 Bluetooth...57 Connecting to wired networks 58 Configuring a dynamic IP/PPPoE network connection 58 Configuring a static IP network connection 59 Turning your ASUS All-in-One PC off 60 Putting your ASUS All-in-One PC to sleep 61 Chapter 4: Recovering your system Entering the BIOS Setup 63 Quickly enter the BIOS 63 Recovering your system 64 Performing a recovery option 65 4 ASUS All-in...
Users Manual
Page 6
.... Chapter 3: Working with information on using Windows® 10 in your ASUS All-in-One PC. 6 ASUS All-in-One PC Chapter 4: Recovering your system This chapter provides recovery options for your ASUS All-in-One PC. About this manual This manual provides information about the hardware and software features of your ASUS All-in-One PC, organized through the following chapters: Chapter 1: Hardware Setup This...
.... Chapter 3: Working with information on using Windows® 10 in your ASUS All-in-One PC. 6 ASUS All-in-One PC Chapter 4: Recovering your system This chapter provides recovery options for your ASUS All-in-One PC. About this manual This manual provides information about the hardware and software features of your ASUS All-in-One PC, organized through the following chapters: Chapter 1: Hardware Setup This...
Users Manual
Page 8
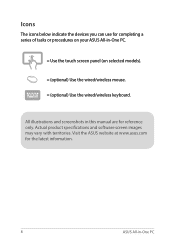
Visit the ASUS website at www.asus.com for completing a series of tasks or procedures on your ASUS All-in-One PC. = Use the touch screen panel (on selected models). = (optional) Use the wired/wireless mouse. = (optional) Use the wired/wireless keyboard. Actual product specifications and software screen images may vary with territories. Icons The icons below indicate the devices you can use for the latest information. 8 ASUS All-in-One PC All illustrations and screenshots in this manual are for reference only.
Visit the ASUS website at www.asus.com for completing a series of tasks or procedures on your ASUS All-in-One PC. = Use the touch screen panel (on selected models). = (optional) Use the wired/wireless mouse. = (optional) Use the wired/wireless keyboard. Actual product specifications and software screen images may vary with territories. Icons The icons below indicate the devices you can use for the latest information. 8 ASUS All-in-One PC All illustrations and screenshots in this manual are for reference only.

Users Manual
Page 9
... read the following safety instructions. Setting up the system on a stable surface. • Openings on the chassis are for information technology equipment. Do not block or cover these openings. Ensure that the total ampere rating of safety for ventilation. ASUS All-in -One PC is important that you operate your system. • Do not use this product near...
... read the following safety instructions. Setting up the system on a stable surface. • Openings on the chassis are for information technology equipment. Do not block or cover these openings. Ensure that the total ampere rating of safety for ventilation. ASUS All-in -One PC is important that you operate your system. • Do not use this product near...
Users Manual
Page 10
... service technician or your system. • When the system is turned off, a small amount of electrical current still remains in -One PC Liquid has been spilled into the system. - Care during use an abrasive cleaner or a coarse cloth when cleaning the screen. • If you follow the operating instructions. - Always unplug all power, modem, and network cables from the power...
... service technician or your system. • When the system is turned off, a small amount of electrical current still remains in -One PC Liquid has been spilled into the system. - Care during use an abrasive cleaner or a coarse cloth when cleaning the screen. • If you follow the operating instructions. - Always unplug all power, modem, and network cables from the power...
Users Manual
Page 18
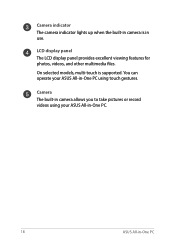
Camera The built-in camera allows you to take pictures or record videos using your ASUS All-in-One PC using touch gestures. On selected models, multi-touch is in use. You can operate your ASUS All-in-One PC. 18 ASUS All-in-One PC LCD display panel The LCD display panel provides excellent viewing features for photos, videos, and other multimedia files. Camera indicator The camera indicator lights up when the built-in camera is supported.
Camera The built-in camera allows you to take pictures or record videos using your ASUS All-in-One PC using touch gestures. On selected models, multi-touch is in use. You can operate your ASUS All-in-One PC. 18 ASUS All-in-One PC LCD display panel The LCD display panel provides excellent viewing features for photos, videos, and other multimedia files. Camera indicator The camera indicator lights up when the built-in camera is supported.

Users Manual
Page 25
... jack. The power adapter may become warm or hot when in use your ASUS All-in -One PC to use . HDMI output port This port allows you to another HDMI-compatible device for file sharing or extending your display monitor. WARNING! Power input The bundled power adapter converts AC power to connect your body. LAN port This 8-pin RJ-45 LAN port supports a standard Ethernet cable for connection to the ASUS All-in -One PC 25 HDMI input port...
... jack. The power adapter may become warm or hot when in use your ASUS All-in -One PC to use . HDMI output port This port allows you to another HDMI-compatible device for file sharing or extending your display monitor. WARNING! Power input The bundled power adapter converts AC power to connect your body. LAN port This 8-pin RJ-45 LAN port supports a standard Ethernet cable for connection to the ASUS All-in -One PC 25 HDMI input port...

Users Manual
Page 33
Place your ASUS All-in-One PC -5O 20O 1. ASUS All-in-One PC 33 Tilt the display to an angle between -5° to an angle beyond the recommended values or you may risk damaging the ASUS All-in-One PC. IMPORTANT! • Use both hands when setting up your ASUS All-in-One PC. • Avoid adjusting the display to 20°. Positioning your ASUS All-in-One PC on a flat surface such as a table or desk. 2.
Place your ASUS All-in-One PC -5O 20O 1. ASUS All-in-One PC 33 Tilt the display to an angle between -5° to an angle beyond the recommended values or you may risk damaging the ASUS All-in-One PC. IMPORTANT! • Use both hands when setting up your ASUS All-in-One PC. • Avoid adjusting the display to 20°. Positioning your ASUS All-in-One PC on a flat surface such as a table or desk. 2.
Users Manual
Page 43
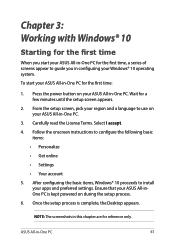
... Desktop appears. Chapter 3: Working with Windows® 10 Starting for the first time When you start your ASUS All-in-One PC for the first time, a series of screens appear to guide you in configuring your Windows® 10 operating system. Press the power button on during the setup process. 6. Ensure that your ASUS All-in-One PC. Follow the onscreen instructions to configure the following basic...
... Desktop appears. Chapter 3: Working with Windows® 10 Starting for the first time When you start your ASUS All-in-One PC for the first time, a series of screens appear to guide you in configuring your Windows® 10 operating system. Press the power button on during the setup process. 6. Ensure that your ASUS All-in-One PC. Follow the onscreen instructions to configure the following basic...

Users Manual
Page 44
... settings. Change account settings, lock, or sign out from your account Launch an app from the Start screen Launch Task view Launch an app from Windows or switch to do these common activities: • Start programs or Windows® apps • Open commonly used programs or Windows® apps • Adjust ASUS All-in-One PC settings • Get help with the Windows operating system • Turn off your ASUS All...
... settings. Change account settings, lock, or sign out from your account Launch an app from the Start screen Launch Task view Launch an app from Windows or switch to do these common activities: • Start programs or Windows® apps • Open commonly used programs or Windows® apps • Adjust ASUS All-in-One PC settings • Get help with the Windows operating system • Turn off your ASUS All...

Users Manual
Page 54
Launches Start menu Launches Action Center Launches the desktop Launches the File Explorer Opens the Share panel Launches Settings Launches Connect panel Activates the Lock screen Minimizes all currently active windows 54 ASUS All-in-One PC Other keyboard shortcuts Using the keyboard, you can also use the following shortcuts to help you launch applications and navigate Windows® 10.
Launches Start menu Launches Action Center Launches the desktop Launches the File Explorer Opens the Share panel Launches Settings Launches Connect panel Activates the Lock screen Minimizes all currently active windows 54 ASUS All-in-One PC Other keyboard shortcuts Using the keyboard, you can also use the following shortcuts to help you launch applications and navigate Windows® 10.

Users Manual
Page 57
... the passcode sent to your ASUS All-inOne PC. Select a device from the Start menu. 2. Launch Settings from the list. NOTE: For some Bluetooth-enabled devices, you may be prompted to search for Bluetooth-enabled devices. Select Devices, then select Bluetooth to key in -One PC 57 Pairing with other Bluetooth-enabled devices You need to pair your devices by using the following steps: 1. Bluetooth Use Bluetooth to facilitate wireless data transfers with other Bluetoothenabled...
... the passcode sent to your ASUS All-inOne PC. Select a device from the Start menu. 2. Launch Settings from the list. NOTE: For some Bluetooth-enabled devices, you may be prompted to search for Bluetooth-enabled devices. Select Devices, then select Bluetooth to key in -One PC 57 Pairing with other Bluetooth-enabled devices You need to pair your devices by using the following steps: 1. Bluetooth Use Bluetooth to facilitate wireless data transfers with other Bluetoothenabled...

Users Manual
Page 59
... needed, you just created. 13. Configuring a static IP network connection 1. ASUS All-in-One PC 59 Select Broadband (PPPoE). 10. Repeat steps 1 to finish the configuration. 12. or 3. Type your user name and password then select Connect to start connecting to the Internet. Select Close to 5 under Configuring a dynamic IP/PPPoE network connection. 2 Select Use the following IP address. Type the IP address, Subnet mask and Default gateway from your service...
... needed, you just created. 13. Configuring a static IP network connection 1. ASUS All-in-One PC 59 Select Broadband (PPPoE). 10. Repeat steps 1 to finish the configuration. 12. or 3. Type your user name and password then select Connect to start connecting to the Internet. Select Close to 5 under Configuring a dynamic IP/PPPoE network connection. 2 Select Use the following IP address. Type the IP address, Subnet mask and Default gateway from your service...
Users Manual
Page 63
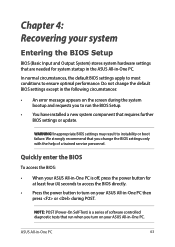
... the power button for system startup in the ASUS All-in -One PC 63 ASUS All-in -One PC. Do not change the BIOS settings only with the help of software controlled diagnostic tests that run when you to run the BIOS Setup. • You have installed a new system component that are needed for at least four (4) seconds to access the BIOS directly. • Press the power button to turn...
... the power button for system startup in the ASUS All-in -One PC 63 ASUS All-in -One PC. Do not change the BIOS settings only with the help of software controlled diagnostic tests that run when you to run the BIOS Setup. • You have installed a new system component that are needed for at least four (4) seconds to access the BIOS directly. • Press the power button to turn...

Users Manual
Page 64
... its default settings and delete other installed apps. • Remove everything - This option resets your ASUS All-in -One PC allows you can restore your ASUS All-in to a power source before resetting your data files before doing any of the following recovery options: • Keep my files - Using this option. 64 ASUS All-in-One PC IMPORTANT! • Backup all your system. You must backup your ASUS All...
... its default settings and delete other installed apps. • Remove everything - This option resets your ASUS All-in -One PC allows you can restore your ASUS All-in to a power source before resetting your data files before doing any of the following recovery options: • Keep my files - Using this option. 64 ASUS All-in-One PC IMPORTANT! • Backup all your system. You must backup your ASUS All...

Users Manual
Page 65
... build. Launch Settings and select Update and security. ASUS All-in -One PC. - Using a USB drive, network connection or Windows recovery DVD to access and use any of these advanced recovery options: System Restore, System Image Recovery, Startup Repair, Command Prompt, UEFI Firmware Settings, and Startup Settings. Using Troubleshoot to enable any of the available recovery options for you want to startup your ASUS All-in -One PC such as: - Performing a recovery option Refer to perform other advanced recovery options on your ASUS All-in...
... build. Launch Settings and select Update and security. ASUS All-in -One PC. - Using a USB drive, network connection or Windows recovery DVD to access and use any of these advanced recovery options: System Restore, System Image Recovery, Startup Repair, Command Prompt, UEFI Firmware Settings, and Startup Settings. Using Troubleshoot to enable any of the available recovery options for you want to startup your ASUS All-in -One PC such as: - Performing a recovery option Refer to perform other advanced recovery options on your ASUS All-in...

Users Manual
Page 73
... European Union announced a framework for the setting of ecodesign requirements for protecting our environment. ASUS All-in different regions. We believe in providing solutions for you to responsibly recycle our products, batteries, other components as well as the packaging materials. Specific Implementing Measures are aimed at https://csr.asus.com/english/article.aspx?id=1555...
... European Union announced a framework for the setting of ecodesign requirements for protecting our environment. ASUS All-in different regions. We believe in providing solutions for you to responsibly recycle our products, batteries, other components as well as the packaging materials. Specific Implementing Measures are aimed at https://csr.asus.com/english/article.aspx?id=1555...

Users Manual
Page 74
... is automatically set to sleep within 30 minutes of user inactivity. To wake your computer, click the mouse, press any key on FreeDOS and Linux-based operating systems. EPEAT Registered Products The public disclosure of user inactivity; All ASUS products with the ENERGY STAR logo comply with the ENERGY STAR standard, and the power management feature is automatically set to the...
... is automatically set to sleep within 30 minutes of user inactivity. To wake your computer, click the mouse, press any key on FreeDOS and Linux-based operating systems. EPEAT Registered Products The public disclosure of user inactivity; All ASUS products with the ENERGY STAR logo comply with the ENERGY STAR standard, and the power management feature is automatically set to the...


