User Guide
Page 3
... connectors 1-28 Chapter 2: Basic installation 2.1 Building your PC system 2-1 2.1.1 Motherboard installation 2-1 2.1.2 CPU installation 2-3 2.1.3 CPU heatsink and fan assembly installation 2-4 2.1.4 DIMM installation 2-6 2.1.5 ATX Power connection 2-7 2.1.6 SATA device connection 2-8 2.1.7 Front I/O Connector 2-9 2.1.8 Expansion Card installation 2-10 2.2 BIOS update utility 2-11 iii Contents Safety information...vi About this guide...vii SABERTOOTH X99 specifications summary ix Package contents...
... connectors 1-28 Chapter 2: Basic installation 2.1 Building your PC system 2-1 2.1.1 Motherboard installation 2-1 2.1.2 CPU installation 2-3 2.1.3 CPU heatsink and fan assembly installation 2-4 2.1.4 DIMM installation 2-6 2.1.5 ATX Power connection 2-7 2.1.6 SATA device connection 2-8 2.1.7 Front I/O Connector 2-9 2.1.8 Expansion Card installation 2-10 2.2 BIOS update utility 2-11 iii Contents Safety information...vi About this guide...vii SABERTOOTH X99 specifications summary ix Package contents...
User Guide
Page 19
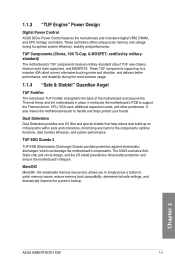
...ASUS SABERTOOTH X99 1-3 It reinforces the motherboard's PCB to patch memory issues, ensure memory boot compatibility, determine fail-safe settings, and dramatically improve the system's bootup. The ASUS exclusive AntiStatic chip and circuit design, and the I /O filter and special shields that help reduce dust build...four times better protection and ensure the motherboard's lifespan. MemOK! 1.1.3 "TUF Engine" Power Design Digital Power Control ASUS DIGI+ Power Control features the revolutionary and innovative digital VRM, DRAM, and CPU Voltage controllers. These controllers offers ...
...ASUS SABERTOOTH X99 1-3 It reinforces the motherboard's PCB to patch memory issues, ensure memory boot compatibility, determine fail-safe settings, and dramatically improve the system's bootup. The ASUS exclusive AntiStatic chip and circuit design, and the I /O filter and special shields that help reduce dust build...four times better protection and ensure the motherboard's lifespan. MemOK! 1.1.3 "TUF Engine" Power Design Digital Power Control ASUS DIGI+ Power Control features the revolutionary and innovative digital VRM, DRAM, and CPU Voltage controllers. These controllers offers ...

User Guide
Page 55
Chapter 2: Basic installation Basic installation 2.1 Building your PC system 2 2.1.1 Motherboard installation The diagrams in this section are for all models. 1. Chapter 2 ASUS SABERTOOTH X99 2-1 Install the ASUS Q-Shield to the chassis' rear I/O panel. The motherboard layout may vary with models, but the installation steps are aligned to the chassis rear I /O ports are the same for reference only. Place the motherboard into the chassis, ensuring that its rear I /O panel. 2.
Chapter 2: Basic installation Basic installation 2.1 Building your PC system 2 2.1.1 Motherboard installation The diagrams in this section are for all models. 1. Chapter 2 ASUS SABERTOOTH X99 2-1 Install the ASUS Q-Shield to the chassis' rear I/O panel. The motherboard layout may vary with models, but the installation steps are aligned to the chassis rear I /O ports are the same for reference only. Place the motherboard into the chassis, ensuring that its rear I /O panel. 2.

