
User Manual
Page 31
BIOS 2.1 使用 AFUDOS BIOS AFUDOS DOS BIOS BIOS 程式。AFUDOS BIOS BIOS BIOS 程式 BIOS 程式。 1.2MB BIOS 1 AFUDOS 程式(afudos. Reading flash ..... Version 1.19(ASUS V2.07(03.11.24BB)) Copyright (C) 2002 American Megatrends, Inc. ok A:\> 當 BIOS DOS 31 All rights reserved. done Write to file...... exe 2 DOS afudos /o[filename filename A:\>afudos /oOLDBIOS1.rom 3. 按下 afudos /oOLDBIOS1.rom AMI Firmware Update Utility -
BIOS 2.1 使用 AFUDOS BIOS AFUDOS DOS BIOS BIOS 程式。AFUDOS BIOS BIOS BIOS 程式 BIOS 程式。 1.2MB BIOS 1 AFUDOS 程式(afudos. Reading flash ..... Version 1.19(ASUS V2.07(03.11.24BB)) Copyright (C) 2002 American Megatrends, Inc. ok A:\> 當 BIOS DOS 31 All rights reserved. done Write to file...... exe 2 DOS afudos /o[filename filename A:\>afudos /oOLDBIOS1.rom 3. 按下 afudos /oOLDBIOS1.rom AMI Firmware Update Utility -

User Manual
Page 32
...;。 A:\>afudos /iP5B-VM DO.ROM AMI Firmware Update Utility - done Advance Check ...... done Please restart your computer A:\> 32 BIOS 更新 BIOS 程式 AFUDOS BIOS 程式。 1 tw.asus.com BIOS 片中。 BIOS BIOS 2. 將 AFUDOS.EXE BIOS 3 DOS afudos /i[filename filename BIOS 程式。 A:\>afudos /iP5B-VM DO.ROM 4. done Writing flash ......
...;。 A:\>afudos /iP5B-VM DO.ROM AMI Firmware Update Utility - done Advance Check ...... done Please restart your computer A:\> 32 BIOS 更新 BIOS 程式 AFUDOS BIOS 程式。 1 tw.asus.com BIOS 片中。 BIOS BIOS 2. 將 AFUDOS.EXE BIOS 3 DOS afudos /i[filename filename BIOS 程式。 A:\>afudos /iP5B-VM DO.ROM 4. done Writing flash ......

User Manual
Page 33
.../13/2006 Flash Type - 2.2 使用 AwardBIOS Flash BIOS AwardBIOS Flash AwardBIOS Flash 程式(AWDFLASH.EXE BIOS AwardBIOS Flash BIOS 程式。 1 http://tw.asus.com BIOS M2N-VM HDMI.bin FAT 32/16 格式的 USB BIOS 2 CD/DVD AwardBIOS Flash BIOS 3 DOS 4. 當 A BIOS 檔案與 AwardBIOS Flash 5 A awdflash 並按...
.../13/2006 Flash Type - 2.2 使用 AwardBIOS Flash BIOS AwardBIOS Flash AwardBIOS Flash 程式(AWDFLASH.EXE BIOS AwardBIOS Flash BIOS 程式。 1 http://tw.asus.com BIOS M2N-VM HDMI.bin FAT 32/16 格式的 USB BIOS 2 CD/DVD AwardBIOS Flash BIOS 3 DOS 4. 當 A BIOS 檔案與 AwardBIOS Flash 5 A awdflash 並按...

User Manual
Page 34
... Continue Write OK F1 Reset No Update Write Fail 34 BIOS OFE00 OK Write OK No Update Write Fail Warning: Don't Turn Off Power Or Reset System! 在更新 BIOS 9 Flash Complete BIOS F1 AwardBIOS Flash Utility for ASUS V1.14 (C) Phoenix Technologies Ltd. 7 BIOS N BIOS 8 BIOS BIOS AwardBIOS Flash Utility for ASUS V1.14 (C) Phoenix Technologies Ltd.
... Continue Write OK F1 Reset No Update Write Fail 34 BIOS OFE00 OK Write OK No Update Write Fail Warning: Don't Turn Off Power Or Reset System! 在更新 BIOS 9 Flash Complete BIOS F1 AwardBIOS Flash Utility for ASUS V1.14 (C) Phoenix Technologies Ltd. 7 BIOS N BIOS 8 BIOS BIOS AwardBIOS Flash Utility for ASUS V1.14 (C) Phoenix Technologies Ltd.

User Manual
Page 4
Contents 1.11 Software support 1-29 1.11.1 Installing an operating system 1-29 1.11.2 Support DVD information 1-29 Chapter 2: BIOS information 2.1 Managing and updating your BIOS 2-1 2.1.1 ASUS Update utility 2-1 2.1.2 ASUS EZ Flash 2 utility 2-3 2.1.3 ASUS CrashFree BIOS 3 utility 2-4 2.2 BIOS setup program 2-5 2.2.1 BIOS menu screen 2-6 2.2.2 Menu bar 2-6 2.2.3 Navigation keys 2-6 2.2.4 Menu items 2-7 2.2.5 Submenu items 2-7 2.2.6 Configuration fields 2-7 2.2.7 Pop-up window 2-7 2.2.8 Scroll bar 2-7 2.2.9 General help 2-7 2.3 Main...
Contents 1.11 Software support 1-29 1.11.1 Installing an operating system 1-29 1.11.2 Support DVD information 1-29 Chapter 2: BIOS information 2.1 Managing and updating your BIOS 2-1 2.1.1 ASUS Update utility 2-1 2.1.2 ASUS EZ Flash 2 utility 2-3 2.1.3 ASUS CrashFree BIOS 3 utility 2-4 2.2 BIOS setup program 2-5 2.2.1 BIOS menu screen 2-6 2.2.2 Menu bar 2-6 2.2.3 Navigation keys 2-6 2.2.4 Menu items 2-7 2.2.5 Submenu items 2-7 2.2.6 Configuration fields 2-7 2.2.7 Pop-up window 2-7 2.2.8 Scroll bar 2-7 2.2.9 General help 2-7 2.3 Main...
User Manual
Page 7
...guide is organized This guide contains the following parts: • Chapter 1: Product introduction This chapter describes the features of the motherboard and the new technology it by yourself. If possible, disconnect all power cables from the existing system before you encounter technical ...you are not damaged. Detailed descriptions of the electrical outlet you need when installing and configuring the motherboard. If you are not sure about the voltage of the BIOS parameters are connected. Contact a qualified service technician or your dealer immediately. • To avoid ...
...guide is organized This guide contains the following parts: • Chapter 1: Product introduction This chapter describes the features of the motherboard and the new technology it by yourself. If possible, disconnect all power cables from the existing system before you encounter technical ...you are not damaged. Detailed descriptions of the electrical outlet you need when installing and configuring the motherboard. If you are not sure about the voltage of the BIOS parameters are connected. Contact a qualified service technician or your dealer immediately. • To avoid ...

User Manual
Page 11
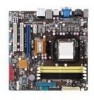
M4A78-EM specifications summary Internal I/O connectors BIOS Accessories Form factor Support DVD 3 x USB 2.0/1.1 connectors support additional 6 USB 2.0/1.1 ports 1 x IDE connector 1 x COM connector 1 x LPT connector 5 x SATA connectors 1 x High definition front panel audio connector 1 x System panel connector 1 x CD audio-in connector 1 x S/PDIF_OUT connector 1 x CPU / 1 x Power / 1 x Chassis fan connectors 1 x 24-pin EATX power connector 1 x 4-pin ATX 12V power...
M4A78-EM specifications summary Internal I/O connectors BIOS Accessories Form factor Support DVD 3 x USB 2.0/1.1 connectors support additional 6 USB 2.0/1.1 ports 1 x IDE connector 1 x COM connector 1 x LPT connector 5 x SATA connectors 1 x High definition front panel audio connector 1 x System panel connector 1 x CD audio-in connector 1 x S/PDIF_OUT connector 1 x CPU / 1 x Power / 1 x Chassis fan connectors 1 x 24-pin EATX power connector 1 x 4-pin ATX 12V power...
User Manual
Page 14
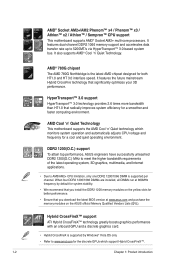
... 1200/1066 DIMMs are installed, all DIMMs run at www.asus.com and purchase the memory modules on the ASUS official Memory Qualified Vendors Lists (QVL). Hybrid CrossFireX™ support... 3D performance. It features the future mainstream Hybrid CrossFire technology that you download the latest BIOS version at 800MHz frequency by Windows® Vista OS only. • Refer to 5200MT.../ Phenom™ x3 / Athlon™ x2 / Athlon™ / Sempron™ CPU support This motherboard supports AMD® Socket AM2+ multi-core processors. AMD® 780G chipset The AMD 780G Northbridge is...
... 1200/1066 DIMMs are installed, all DIMMs run at www.asus.com and purchase the memory modules on the ASUS official Memory Qualified Vendors Lists (QVL). Hybrid CrossFireX™ support... 3D performance. It features the future mainstream Hybrid CrossFire technology that you download the latest BIOS version at 800MHz frequency by Windows® Vista OS only. • Refer to 5200MT.../ Phenom™ x3 / Athlon™ x2 / Athlon™ / Sempron™ CPU support This motherboard supports AMD® Socket AM2+ multi-core processors. AMD® 780G chipset The AMD 780G Northbridge is...
User Manual
Page 15
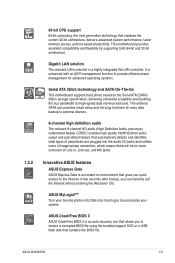
... 3Gb/s technology and SATA-On-The-Go This motherboard supports hard drives based on environment that automatically detects and identifies what types of Line-in, Line-out, and Mic jacks. ASUS M4A78-EM 1-3 1.3.2 64-bit CPU support 64-bit computing, the next generation technology that contains the BIOS file. It is an auto-recovery tool...
... 3Gb/s technology and SATA-On-The-Go This motherboard supports hard drives based on environment that automatically detects and identifies what types of Line-in, Line-out, and Mic jacks. ASUS M4A78-EM 1-3 1.3.2 64-bit CPU support 64-bit computing, the next generation technology that contains the BIOS file. It is an auto-recovery tool...

User Manual
Page 16
...AI Nap, the system can keep running at 1 meter accuracy. Green ASUS This motherboard and its packaging comply with the ASUS vision of Hazardous Substances (RoHS). Simply shut down and reboot the system, and the BIOS automatically restores the CPU parameters to the OS environment, simply click the ...minimum power and noise when you to update the BIOS from a USB flash disk before entering the OS. ASUS AI NET2 ASUS AI NET2 remotely detects the cable connection immediately after you turn on the environment. ASUS Q-Fan ASUS Q-Fan technology intelligently adjusts CPU fan speeds according to...
...AI Nap, the system can keep running at 1 meter accuracy. Green ASUS This motherboard and its packaging comply with the ASUS vision of Hazardous Substances (RoHS). Simply shut down and reboot the system, and the BIOS automatically restores the CPU parameters to the OS environment, simply click the ...minimum power and noise when you to update the BIOS from a USB flash disk before entering the OS. ASUS AI NET2 ASUS AI NET2 remotely detects the cable connection immediately after you turn on the environment. ASUS Q-Fan ASUS Q-Fan technology intelligently adjusts CPU fan speeds according to...
User Manual
Page 29
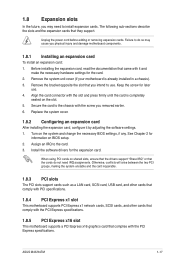
...card. 3. See Chapter 2 for the expansion card. When using PCI cards on BIOS setup. 2. Keep the screw for the card. 2. Align the card connector with the PCI Express specifications. 1.8.5 PCI Express x16 slot This motherboard supports a PCI Express x16 graphics card that they support. Before installing the expansion card... settings. 1. Remove the bracket opposite the slot that came with the PCI Express specifications. Remove the system unit cover (if your motherboard is completely seated on the system and change the necessary BIOS settings, if any. ASUS M4A78-EM 1-17
...card. 3. See Chapter 2 for the expansion card. When using PCI cards on BIOS setup. 2. Keep the screw for the card. 2. Align the card connector with the PCI Express specifications. 1.8.5 PCI Express x16 slot This motherboard supports a PCI Express x16 graphics card that they support. Before installing the expansion card... settings. 1. Remove the bracket opposite the slot that came with the PCI Express specifications. Remove the system unit cover (if your motherboard is completely seated on the system and change the necessary BIOS settings, if any. ASUS M4A78-EM 1-17

User Manual
Page 30
You can automatically reset parameter settings to pins 1-2. 3. Hold down and reboot the system so the BIOS can clear the CMOS memory of date, time, and system setup parameters by erasing the CMOS RTC RAM data. Move the jumper cap from pins 1-2 (... the RTC when the system hangs due to overclocking, use the CPU Parameter Recall (C.P.R) feature. Shut down the key during the boot process and enter BIOS setup to pins 2-3. After clearing the CMOS, reinstall the battery. • You do not help, remove the onboard battery and move the cap back to...
You can automatically reset parameter settings to pins 1-2. 3. Hold down and reboot the system so the BIOS can clear the CMOS memory of date, time, and system setup parameters by erasing the CMOS RTC RAM data. Move the jumper cap from pins 1-2 (... the RTC when the system hangs due to overclocking, use the CPU Parameter Recall (C.P.R) feature. Shut down the key during the boot process and enter BIOS setup to pins 2-3. After clearing the CMOS, reinstall the battery. • You do not help, remove the onboard battery and move the cap back to...

User Manual
Page 32
...compliant allowing playback of HD DVD, Blu-Ray, and other protected content. 15. To use hot-plug, set the OnChip SATA Type item in the BIOS to configure the settings. 12. DVI-D Out port. This port is for details. 14. Go to Start > Control Panel > Sounds and Audio Devices... the following dual display outputs are for any DVI-D compatible device and is Realtek High Definition Audio (the name may be different based on your motherboard: Dual display outputs DVI + D-Sub DVI + HDMI HDMI + D-Sub Supported • • Not supported • • During POST, only the monitor ...
...compliant allowing playback of HD DVD, Blu-Ray, and other protected content. 15. To use hot-plug, set the OnChip SATA Type item in the BIOS to configure the settings. 12. DVI-D Out port. This port is for details. 14. Go to Start > Control Panel > Sounds and Audio Devices... the following dual display outputs are for any DVI-D compatible device and is Realtek High Definition Audio (the name may be different based on your motherboard: Dual display outputs DVI + D-Sub DVI + HDMI HDMI + D-Sub Supported • • Not supported • • During POST, only the monitor ...

User Manual
Page 33
ASUS M4A78-EM 1-21 CPU DIMM BIOS setup Suggested list AMD® Athlon 4400+ DDR2 800 (1GB or higher) Frame Buffer Size--256MB or higher File format Non-protected clips HD-DVD ...
ASUS M4A78-EM 1-21 CPU DIMM BIOS setup Suggested list AMD® Athlon 4400+ DDR2 800 (1GB or higher) Frame Buffer Size--256MB or higher File format Non-protected clips HD-DVD ...

User Manual
Page 36
... install Serial ATA hard disk drives, you intend to create a Serial ATA RAID set using these connectors, set the OnChip SATA Type item in the BIOS to a slot opening at the back of the Serial ATA 3Gb/s is backward compatible with 133 MB/s (Ultra DMA133). The Serial ATA 3Gb/s is faster...
... install Serial ATA hard disk drives, you intend to create a Serial ATA RAID set using these connectors, set the OnChip SATA Type item in the BIOS to a slot opening at the back of the Serial ATA 3Gb/s is backward compatible with 133 MB/s (Ultra DMA133). The Serial ATA 3Gb/s is faster...

User Manual
Page 37
Connect the chassis power LED cable to this connector. The speaker allows you turn on the BIOS settings. Connect the HDD Activity LED cable to this connector. The system power LED lights up or flashes when data is read from or written ... system power. The IDE LED lights up when you to the HDD. • System warning speaker This 4-pin connector is for the system power LED. ASUS M4A78-EM 1-25 6. Pressing the power button turns the system ON or puts the system in SLEEP or SOFT-OFF mode depending on the system power, and...
Connect the chassis power LED cable to this connector. The speaker allows you turn on the BIOS settings. Connect the HDD Activity LED cable to this connector. The system power LED lights up or flashes when data is read from or written ... system power. The IDE LED lights up when you to the HDD. • System warning speaker This 4-pin connector is for the system power LED. ASUS M4A78-EM 1-25 6. Pressing the power button turns the system ON or puts the system in SLEEP or SOFT-OFF mode depending on the system power, and...

User Manual
Page 39
...See section 2.4.4 Onboard Device Configuration for a chassis-mounted front panel audio I/O module that the audio device of the motherboard high-definition audio capability. • If you want to connect a high definition front panel audio module to this connector..., set the Front Panel Select item in the BIOS to configure the setting. Ensure that supports either High Definition Audio or AC`97 audio standard. Digital audio ... to this connector to avail of Sound playback is for details. ASUS M4A78-EM 1-27
...See section 2.4.4 Onboard Device Configuration for a chassis-mounted front panel audio I/O module that the audio device of the motherboard high-definition audio capability. • If you want to connect a high definition front panel audio module to this connector..., set the Front Panel Select item in the BIOS to configure the setting. Ensure that supports either High Definition Audio or AC`97 audio standard. Digital audio ... to this connector to avail of Sound playback is for details. ASUS M4A78-EM 1-27
User Manual
Page 43
... either through a network or an Internet Service Provider (ISP). • This utility is a utility that comes with the motherboard package. Installing ASUS Update To install ASUS Update: 1. The Drivers menu appears. 2. ASUS M4A78-EM 2-1 Copy the original motherboard BIOS using this utility. Place the support DVD into the optical drive. Quit all Windows® applications before you need...
... either through a network or an Internet Service Provider (ISP). • This utility is a utility that comes with the motherboard package. Installing ASUS Update To install ASUS Update: 1. The Drivers menu appears. 2. ASUS M4A78-EM 2-1 Copy the original motherboard BIOS using this utility. Place the support DVD into the optical drive. Quit all Windows® applications before you need...

User Manual
Page 44
Select the ASUS FTP site nearest you want to avail all its features. Updating from a file, then click Next. Select Update BIOS from a BIOS file a. c. Locate the BIOS file from the Internet a. Follow the onscreen instructions to avoid network traffic, or...updating process. 2-2 Chapter 2: BIOS information Select Update BIOS from the Internet, then click Next. b. Updating the BIOS To update the BIOS: 1. From the Windows® desktop, click Start > Programs > ASUS > ASUS Update > ASUS Update to launch the ASUS Update utility. 2. b. The ASUS Update utility is capable of ...
Select the ASUS FTP site nearest you want to avail all its features. Updating from a file, then click Next. Select Update BIOS from a BIOS file a. c. Locate the BIOS file from the Internet a. Follow the onscreen instructions to avoid network traffic, or...updating process. 2-2 Chapter 2: BIOS information Select Update BIOS from the Internet, then click Next. b. Updating the BIOS To update the BIOS: 1. From the Windows® desktop, click Start > Programs > ASUS > ASUS Update > ASUS Update to launch the ASUS Update utility. 2. b. The ASUS Update utility is capable of ...

User Manual
Page 45
Before you to switch between drives until the correct BIOS file is found, then press . ASUS M4A78-EM 2-3 Insert the USB flash disk that contains the latest BIOS file to the USB port, then launch EZ Flash 2 in either of these two ways: • Press + during POST to enable it. 2. Go to the ...
Before you to switch between drives until the correct BIOS file is found, then press . ASUS M4A78-EM 2-3 Insert the USB flash disk that contains the latest BIOS file to the USB port, then launch EZ Flash 2 in either of these two ways: • Press + during POST to enable it. 2. Go to the ...


