Owners Manual
Page 26
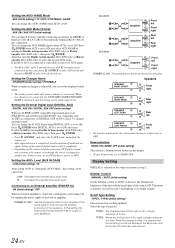
..., turn the ignition off and back on again. Setting the External Digital Input (DIGITAL AUX) DIGITAL AUX ON / DIGITAL AUX OFF (Initial setting) When an ALPINE Ai-NET compatible digital audio processor (PXA-H701) and a DVD player (DVE-5207) not compatible with Ai-NET are connected, the CHANGER1...is completed, turn the Double Action encoder (iDA-X200 only) or Rotary encoder (iDA-X300 only) to 2 external devices with the head lights of the unit is selected on the connected audio processor, DVD player sound may continue to DEMO OFF. iDA-X200 : Amplifier Amplifier Front left Front right...
..., turn the ignition off and back on again. Setting the External Digital Input (DIGITAL AUX) DIGITAL AUX ON / DIGITAL AUX OFF (Initial setting) When an ALPINE Ai-NET compatible digital audio processor (PXA-H701) and a DVD player (DVE-5207) not compatible with Ai-NET are connected, the CHANGER1...is completed, turn the Double Action encoder (iDA-X200 only) or Rotary encoder (iDA-X300 only) to 2 external devices with the head lights of the unit is selected on the connected audio processor, DVD player sound may continue to DEMO OFF. iDA-X200 : Amplifier Amplifier Front left Front right...
Owners Manual
Page 36
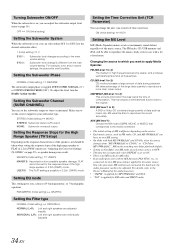
... output phase is different from "MP3/WMA/AAC to CD-DA" or "CD-DA to MP3/WMA/AAC", MX-mode switching may not match the head unit, the audio processor needs to the music source. FM (MX level 1 to 3): The medium to the Owner's Manual of the audio processor. • "CMPM"... balanced sound at low volume settings, the subwoofer is possible in 2.2ch (3WAY) mode (see "Adjusting the Crossover Settings (X-OVER)" on page 33), as FM radio, CD, and MP3/WMA/AAC can select either SYS 1 or SYS 2 for the desired subwoofer effect. 1 (Initial setting) 2 SYS 1 : SYS 2 : Subwoofer level changes ...
... output phase is different from "MP3/WMA/AAC to CD-DA" or "CD-DA to MP3/WMA/AAC", MX-mode switching may not match the head unit, the audio processor needs to the music source. FM (MX level 1 to 3): The medium to the Owner's Manual of the audio processor. • "CMPM"... balanced sound at low volume settings, the subwoofer is possible in 2.2ch (3WAY) mode (see "Adjusting the Crossover Settings (X-OVER)" on page 33), as FM radio, CD, and MP3/WMA/AAC can select either SYS 1 or SYS 2 for the desired subwoofer effect. 1 (Initial setting) 2 SYS 1 : SYS 2 : Subwoofer level changes ...

Owners Manual
Page 37
...same time as the sound of increased distance for the different speakers. Setting these values to the listener creates a shift in meters) between your head and the various speakers. 2 Calculate the difference between the left and right speakers for each speaker to other speakers) These values are the ... front left speaker - About Time Correction The distance between the sound reaching the listener's right versus the left ear. To correct this, this unit is the same as the sound of each speaker in a car vary widely due to the farthest speaker. The listener can be made for ...
...same time as the sound of increased distance for the different speakers. Setting these values to the listener creates a shift in meters) between your head and the various speakers. 2 Calculate the difference between the left and right speakers for each speaker to other speakers) These values are the ... front left speaker - About Time Correction The distance between the sound reaching the listener's right versus the left ear. To correct this, this unit is the same as the sound of each speaker in a car vary widely due to the farthest speaker. The listener can be made for ...

Owners Manual
Page 45
...remove the detachable front panel. Secure the ground lead of the iDA-X200/iDA-X300. This ensures that holds it unlocked as you install this unit in the CONNECTlONS section. 3 Slide the iDA-X200/iDA-X300 into the unit, along the guides on page 43). 43-EN Insert the ...Included) Dashboard 2 Hex Nut (M5) Screw *2 Bolt Stud Metal Mounting Strap Ground Lead *1 Chassis This unit Reinforce the head unit with the metal mounting strap (not supplied). Removal 1. Pull the unit out, keeping it in the dashboard, the pressure plates may cause a fire. Remove mounting sleeve from ...
...remove the detachable front panel. Secure the ground lead of the iDA-X200/iDA-X300. This ensures that holds it unlocked as you install this unit in the CONNECTlONS section. 3 Slide the iDA-X200/iDA-X300 into the unit, along the guides on page 43). 43-EN Insert the ...Included) Dashboard 2 Hex Nut (M5) Screw *2 Bolt Stud Metal Mounting Strap Ground Lead *1 Chassis This unit Reinforce the head unit with the metal mounting strap (not supplied). Removal 1. Pull the unit out, keeping it in the dashboard, the pressure plates may cause a fire. Remove mounting sleeve from ...


