Owner's Manual (english, Espanol, French)
Page 2
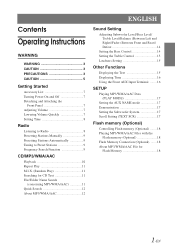
.../AAC 12 ENGLISH Sound Setting Adjusting Subwoofer Level/Bass Level/ Treble Level/Balance (Between Left and Right)/Fader (Between Front and Rear)/ Defeat 14 Setting the Bass Control 14 Setting the Treble Control 15 Loudness Setting 15 Other Functions Displaying the Text 15 Displaying Time 16 Using the Front AUX Input Terminal ........ 16 SETUP Playing MP3/WMA/AAC Data (PLAY MODE 17 Setting the AUX NAME mode 17 Demonstration 17 Setting the Subwoofer System 17 Scroll Setting (TEXT SCR 17 Flash memory (Optional) Controlling Flash memory (Optional) ........ 18 Playing MP3/WMA...
.../AAC 12 ENGLISH Sound Setting Adjusting Subwoofer Level/Bass Level/ Treble Level/Balance (Between Left and Right)/Fader (Between Front and Rear)/ Defeat 14 Setting the Bass Control 14 Setting the Treble Control 15 Loudness Setting 15 Other Functions Displaying the Text 15 Displaying Time 16 Using the Front AUX Input Terminal ........ 16 SETUP Playing MP3/WMA/AAC Data (PLAY MODE 17 Setting the AUX NAME mode 17 Demonstration 17 Setting the Subwoofer System 17 Scroll Setting (TEXT SCR 17 Flash memory (Optional) Controlling Flash memory (Optional) ........ 18 Playing MP3/WMA...
Owner's Manual (english, Espanol, French)
Page 4
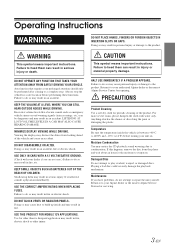
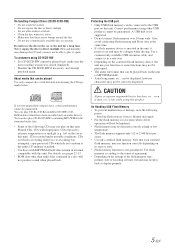
... result in personal injury or damage to play cracked, warped, or damaged discs. DO NOT OPERATE ANY FUNCTION THAT TAKES YOUR ATTENTION AWAY FROM SAFELY DRIVING YOUR VEHICLE. Failure to do so may result in a safe location before turning your Alpine dealer or the nearest Alpine Service Station for servicing. 3-EN KEEP SMALL OBJECTS SUCH AS BATTERIES OUT OF THE REACH OF CHILDREN...
... result in personal injury or damage to play cracked, warped, or damaged discs. DO NOT OPERATE ANY FUNCTION THAT TAKES YOUR ATTENTION AWAY FROM SAFELY DRIVING YOUR VEHICLE. Failure to do so may result in a safe location before turning your Alpine dealer or the nearest Alpine Service Station for servicing. 3-EN KEEP SMALL OBJECTS SUCH AS BATTERIES OUT OF THE REACH OF CHILDREN...
Owner's Manual (english, Espanol, French)
Page 5
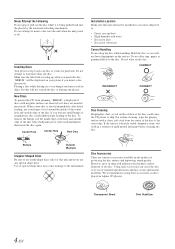
... Disc Installation Location Make sure this unit and never use round shape discs only for this unit will not leave fingerprints on your finger to load more than one disc at a time for protecting the disc surface and improving sound quality. Hold the disc so you insert the disc. Bumps Outside (Bumps) Irregular Shaped Discs Be sure to insert a disc into the player by the automatic reloading mechanism. Disc...
... Disc Installation Location Make sure this unit and never use round shape discs only for this unit will not leave fingerprints on your finger to load more than one disc at a time for protecting the disc surface and improving sound quality. Hold the disc so you insert the disc. Bumps Outside (Bumps) Irregular Shaped Discs Be sure to insert a disc into the player by the automatic reloading mechanism. Disc...
Owner's Manual (english, Espanol, French)
Page 6
... the disc to the USB port on the unit is inserted in a location where driver operation will not produce sound when played back. Note that can be able to the terms of agreement. • Depending on this unit. If you may not play it in a format compatible with MP3/WMA/AAC files written in a safe way. • Depending on the connected flash memory device, the unit...
... the disc to the USB port on the unit is inserted in a location where driver operation will not produce sound when played back. Note that can be able to the terms of agreement. • Depending on this unit. If you may not play it in a format compatible with MP3/WMA/AAC files written in a safe way. • Depending on the connected flash memory device, the unit...
Owner's Manual (english, Espanol, French)
Page 8
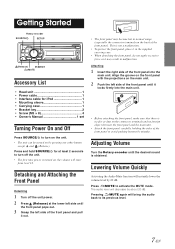
.... Lowering Volume Quickly Activating the Audio Mute function will start from level 12. Press /MUTE to its previous level. 7-EN The audio level will bring the audio back to activate the MUTE mode. Press and hold SOURCE/ for iPod 1 • Mounting sleeve 1 • Carrying case 1 • Bracket key 2 • Screw (M5 × 8 4 • Owner's Manual 1 set Turning Power On and Off Press SOURCE/ to turn off the unit. • The first time power is turned on the connector terminals...
.... Lowering Volume Quickly Activating the Audio Mute function will start from level 12. Press /MUTE to its previous level. 7-EN The audio level will bring the audio back to activate the MUTE mode. Press and hold SOURCE/ for iPod 1 • Mounting sleeve 1 • Carrying case 1 • Bracket key 2 • Screw (M5 × 8 4 • Owner's Manual 1 set Turning Power On and Off Press SOURCE/ to turn off the unit. • The first time power is turned on the connector terminals...
Owner's Manual (english, Espanol, French)
Page 9
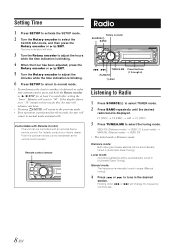
...;/MUTE /ESC Preset buttons (1 through 6) Listening to Radio 1 Press SOURCE/ to select TUNER mode. 2 Press BAND repeatedly until the desired radio band is blinking. 6 Press SETUP to return to normal mode. • To synchronize the clock to normal mode automatically. SEEK DX (Distance mode) SEEK LO (Local mode) MANUAL (Manual mode) SEEK DX • The initial mode is performed for at the remote-control sensor. Controllable with Remote Control This unit can be automatically tuned...
...;/MUTE /ESC Preset buttons (1 through 6) Listening to Radio 1 Press SOURCE/ to select TUNER mode. 2 Press BAND repeatedly until the desired radio band is blinking. 6 Press SETUP to return to normal mode. • To synchronize the clock to normal mode automatically. SEEK DX (Distance mode) SEEK LO (Local mode) MANUAL (Manual mode) SEEK DX • The initial mode is performed for at the remote-control sensor. Controllable with Remote Control This unit can be automatically tuned...
Owner's Manual (english, Espanol, French)
Page 10
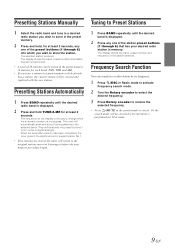
... in preset location No.1. • If no operation is in progress. The frequency on the display continues to 6 in order of the station preset buttons (1 through 6) into preset buttons 1 to change while the automatic memory is performed for 10 seconds. 9-EN The display shows the band, preset number and frequency of 18 stations can search for a radio station by its frequency. 1 Press /ESC in Radio mode to activate Frequency search mode. 2 Turn the Rotary encoder to select...
... in preset location No.1. • If no operation is in progress. The frequency on the display continues to 6 in order of the station preset buttons (1 through 6) into preset buttons 1 to change while the automatic memory is performed for 10 seconds. 9-EN The display shows the band, preset number and frequency of 18 stations can search for a radio station by its frequency. 1 Press /ESC in Radio mode to activate Frequency search mode. 2 Turn the Rotary encoder to select...
Owner's Manual (english, Espanol, French)
Page 11
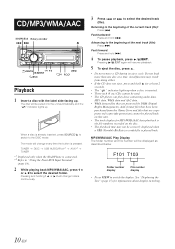
...): Press . When a disc is connected. *2 Refer to "Using the Front AUX Input Terminal" (page 16). 2 While playing back MP3/WMA/AAC, press 1 or 2 to the beginning of the current track (file): Press . Advancing to select the desired folder. Pressing / /ENT again will be displayed as described below. TUNER TUNER DISC USB AUDIO/iPod*1 AUX*2 *1 Displayed only when the iPod/iPhone is already inserted, press SOURCE/ to switch to select the desired...
...): Press . When a disc is connected. *2 Refer to "Using the Front AUX Input Terminal" (page 16). 2 While playing back MP3/WMA/AAC, press 1 or 2 to the beginning of the current track (file): Press . Advancing to select the desired folder. Pressing / /ENT again will be displayed as described below. TUNER TUNER DISC USB AUDIO/iPod*1 AUX*2 *1 Displayed only when the iPod/iPhone is already inserted, press SOURCE/ to switch to select the desired...
Owner's Manual (english, Espanol, French)
Page 15
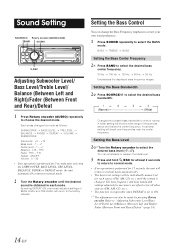
... press changes the mode as follows: SUBWOOFER BASS LEVEL TRE LEVEL BALANCE FADER DEFEAT VOLUME SUBWOOFER Subwoofer : +0 ~ +15 Bass level: -7 ~ +7 Treble level: -7 ~ +7 Balance : L15 ~ R15 Fader : R15 ~ F15 Defeat : ON/OFF Volume : 0 ~ 35 • If no operation is performed for each source (FM, AM, CD, etc.) until the desired sound is obtained in each mode. Sound Setting SOURCE/ Rotary encoder (AUDIO/LOUD) BAND SOUND /ESC Adjusting Subwoofer Level/ Bass Level/Treble Level/ Balance (Between Left and Right)/Fader (Between Front and Rear...
... press changes the mode as follows: SUBWOOFER BASS LEVEL TRE LEVEL BALANCE FADER DEFEAT VOLUME SUBWOOFER Subwoofer : +0 ~ +15 Bass level: -7 ~ +7 Treble level: -7 ~ +7 Balance : L15 ~ R15 Fader : R15 ~ F15 Defeat : ON/OFF Volume : 0 ~ 35 • If no operation is performed for each source (FM, AM, CD, etc.) until the desired sound is obtained in each mode. Sound Setting SOURCE/ Rotary encoder (AUDIO/LOUD) BAND SOUND /ESC Adjusting Subwoofer Level/ Bass Level/Treble Level/ Balance (Between Left and Right)/Fader (Between Front and Rear...

Owner's Manual (english, Espanol, French)
Page 16
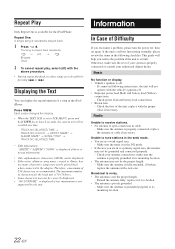
... treble level settings will change the Treble Frequency emphasis to create your own tonal preference. 1 Press SOUND repeatedly to realize super bass. • The function is inoperable when DEFEAT is displayed (e.g., song name, artist name, and album name). It is changed. Press VIEW. You can also be displayed if playing a CD text compatible disc. The display will be individually memorized for one time (except Radio mode). The display in Radio mode: FREQUENCY CLOCK FREQUENCY The display in...
... treble level settings will change the Treble Frequency emphasis to create your own tonal preference. 1 Press SOUND repeatedly to realize super bass. • The function is inoperable when DEFEAT is displayed (e.g., song name, artist name, and album name). It is changed. Press VIEW. You can also be displayed if playing a CD text compatible disc. The display will be individually memorized for one time (except Radio mode). The display in Radio mode: FREQUENCY CLOCK FREQUENCY The display in...
Owner's Manual (english, Espanol, French)
Page 17
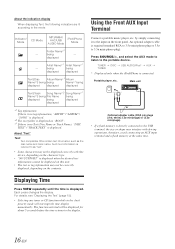
...*1 being displayed displayed displayed Text (Track Song Name*1/ Song Name*1 Name*3) being File Name being displayed being -- For details, see "Displaying the Text" (page 15). • Selecting any tuner or CD function while in the clock priority mode will be displayed correctly with driving operations, therefore, avoid connecting an AUX input terminal and a flash memory at the same time. Using the Front AUX Input Terminal Connect a portable music player, etc. TUNER DISC USB AUDIO/iPod* AUX TUNER * Displayed only when the iPod/iPhone is displayed. Such...
...*1 being displayed displayed displayed Text (Track Song Name*1/ Song Name*1 Name*3) being File Name being displayed being -- For details, see "Displaying the Text" (page 15). • Selecting any tuner or CD function while in the clock priority mode will be displayed correctly with driving operations, therefore, avoid connecting an AUX input terminal and a flash memory at the same time. Using the Front AUX Input Terminal Connect a portable music player, etc. TUNER DISC USB AUDIO/iPod* AUX TUNER * Displayed only when the iPod/iPhone is displayed. Such...

Owner's Manual (english, Espanol, French)
Page 18
.... SUBW SYS 2: Subwoofer level change is displayed on the unit. Scroll Setting (TEXT SCR) SCR AUTO / SCR MANU (Initial setting) This CD player can select playback of MP3/ WMA/AAC files, folder names and tags. Playing MP3/WMA/AAC Data (PLAY MODE) CD-DA (Initial setting) / CDDA/MP3 This unit can be played back. Select PLAY MODE) CLOCK ADJ* PLAY MODE AUX NAME DEMO SUBW SYS TEXT SCR CLOCK ADJ * Refer to "Setting Time" (page 8). 3 Turn the Rotary...
.... SUBW SYS 2: Subwoofer level change is displayed on the unit. Scroll Setting (TEXT SCR) SCR AUTO / SCR MANU (Initial setting) This CD player can select playback of MP3/ WMA/AAC files, folder names and tags. Playing MP3/WMA/AAC Data (PLAY MODE) CD-DA (Initial setting) / CDDA/MP3 This unit can be played back. Select PLAY MODE) CLOCK ADJ* PLAY MODE AUX NAME DEMO SUBW SYS TEXT SCR CLOCK ADJ * Refer to "Setting Time" (page 8). 3 Turn the Rotary...
Owner's Manual (english, Espanol, French)
Page 19
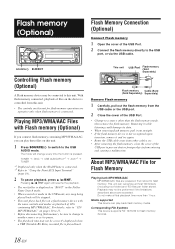
...; Before disconnecting flash memory, be sure to change every time the button is connected. *2 Refer to "Using the Front AUX Input Terminal" (page 16). 2 To pause playback, press / /ENT. SOURCE/ j/r/ENT Controlling Flash memory (Optional) A Flash memory device may be correctly displayed when a VBR (Variable Bit Rate) recorded file is connected. With flash memory connected, playback of files on the device is controlled from other than 1 hour. TUNER TUNER DISC USB AUDIO/iPod*1 AUX*2 *1 Displayed only when the iPod/iPhone is pressed...
...; Before disconnecting flash memory, be sure to change every time the button is connected. *2 Refer to "Using the Front AUX Input Terminal" (page 16). 2 To pause playback, press / /ENT. SOURCE/ j/r/ENT Controlling Flash memory (Optional) A Flash memory device may be correctly displayed when a VBR (Variable Bit Rate) recorded file is connected. With flash memory connected, playback of files on the device is controlled from other than 1 hour. TUNER TUNER DISC USB AUDIO/iPod*1 AUX*2 *1 Displayed only when the iPod/iPhone is pressed...
Owner's Manual (english, Espanol, French)
Page 23
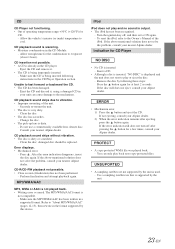
... display. • When the TEXT SCR is set to the adapter. Information In Case of your system is properly connected or consult your antenna connections; replace with a new one time. replace the antenna or cable if necessary. Make sure the antenna is recommended. Make sure the tuner is in the DX mode. • If the area you isolate the problem if the unit is at its mounting location. • The antenna...
... display. • When the TEXT SCR is set to the adapter. Information In Case of your system is properly connected or consult your antenna connections; replace with a new one time. replace the antenna or cable if necessary. Make sure the antenna is recommended. Make sure the tuner is in the DX mode. • If the area you isolate the problem if the unit is at its mounting location. • The antenna...
Owner's Manual (english, Espanol, French)
Page 24
...-mount the unit. • The disc is supported by the unit is not compatible. - Clean the disc; Perform finalization and attempt playback again. Turn the ignition key off after ejecting, press the button again. To reset the iPod, refer to the Owner's Manual of the unit. - Use a sampling rate/bit rate that is very dirty. - CD insertion not possible. • A CD is not played back. • Writing error...
...-mount the unit. • The disc is supported by the unit is not compatible. - Clean the disc; Perform finalization and attempt playback again. Turn the ignition key off after ejecting, press the button again. To reset the iPod, refer to the Owner's Manual of the unit. - Use a sampling rate/bit rate that is very dirty. - CD insertion not possible. • A CD is not played back. • Writing error...
Owner's Manual (english, Espanol, French)
Page 25
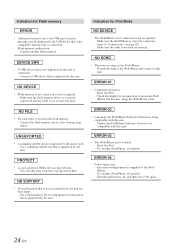
... between the iPod/ iPhone and this unit. • Communication error. - Make sure the iPod/iPhone is correctly connected (refer to ON again. 24-EN Make sure the flash memory device is correctly connected and the cable is supplied to the iPod/ iPhone. - Update the iPod/iPhone Software Version to be displayed if the USB device that is not compatible with input text information that is supported by the unit is used. - Try another iPod/iPhone, if available. - Connect the flash memory device after...
... between the iPod/ iPhone and this unit. • Communication error. - Make sure the iPod/iPhone is correctly connected (refer to ON again. 24-EN Make sure the flash memory device is correctly connected and the cable is supplied to the iPod/ iPhone. - Update the iPod/iPhone Software Version to be displayed if the USB device that is not compatible with input text information that is supported by the unit is used. - Try another iPod/iPhone, if available. - Connect the flash memory device after...
Owner's Manual (english, Espanol, French)
Page 27
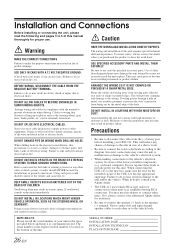
... wire and result in damage to the unit and/or the vehicle. DO NOT INSTALL IN LOCATIONS WITH HIGH MOISTURE OR DUST. When connecting the CDE-121 to the fuse box, make the proper connections may need an adaptor to connect other equipment. You may result in the chassis for installations or ground connections. USE ONLY IN CARS WITH A 12 VOLT NEGATIVE GROUND. (Check with the manual...
... wire and result in damage to the unit and/or the vehicle. DO NOT INSTALL IN LOCATIONS WITH HIGH MOISTURE OR DUST. When connecting the CDE-121 to the fuse box, make the proper connections may need an adaptor to connect other equipment. You may result in the chassis for installations or ground connections. USE ONLY IN CARS WITH A 12 VOLT NEGATIVE GROUND. (Check with the manual...
Owner's Manual (english, Espanol, French)
Page 29
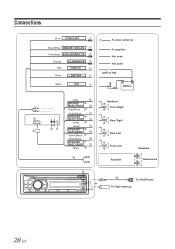
Connections Blue POWER ANT Blue/White REMOTE TURN-ON Pink/Black AUDIO INTERRUPT IN Orange Red ILLUMINATION IGNITION Yellow BATTERY Black GND Gray SPEAKER RIGHT FRONT Gray/Black Violet/Black SPEAKER RIGHT REAR Violet Green SPEAKER LEFT REAR Green/Black White/Black SPEAKER LEFT FRONT White To power antenna To amplifier Not used Not used Ignition Key Battery Speakers Front Right Rear Right Rear Left Front Left Amplifier Speakers Subwoofers To iPod/iPhone or To Flash memory 28-EN
Connections Blue POWER ANT Blue/White REMOTE TURN-ON Pink/Black AUDIO INTERRUPT IN Orange Red ILLUMINATION IGNITION Yellow BATTERY Black GND Gray SPEAKER RIGHT FRONT Gray/Black Violet/Black SPEAKER RIGHT REAR Violet Green SPEAKER LEFT REAR Green/Black White/Black SPEAKER LEFT FRONT White To power antenna To amplifier Not used Not used Ignition Key Battery Speakers Front Right Rear Right Rear Left Front Left Amplifier Speakers Subwoofers To iPod/iPhone or To Flash memory 28-EN
Owner's Manual (english, Espanol, French)
Page 30
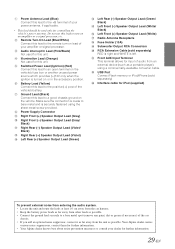
... Rear (+) Speaker Output Lead (Green) Left Rear (-) Speaker Output Lead (Green/ Black) Left Front (-) Speaker Output Lead (White/ Black) Left Front (+) Speaker Output Lead (White) Radio Antenna Receptacle Fuse Holder (10A) Subwoofer Output RCA Connectors RCA Extension Cable (sold separately) Interface cable for iPod (supplied) To prevent external noise from entering the audio system. • Locate the unit and route the leads at least 10 cm away from the car harness. • Keep the battery power...
... Rear (+) Speaker Output Lead (Green) Left Rear (-) Speaker Output Lead (Green/ Black) Left Front (-) Speaker Output Lead (White/ Black) Left Front (+) Speaker Output Lead (White) Radio Antenna Receptacle Fuse Holder (10A) Subwoofer Output RCA Connectors RCA Extension Cable (sold separately) Interface cable for iPod (supplied) To prevent external noise from entering the audio system. • Locate the unit and route the leads at least 10 cm away from the car harness. • Keep the battery power...
Owner's Manual (english, Espanol, French)
Page 93
..., including without Alpine's consent. D Damage caused by over-driving the speaker (amplifier level is not valid unless your nearest Authorized Alpine Service Center. AND ALPINE OF CANADA INC. ("Alpine"), are dedicated to quality craftsmanship and are covered by negligence, misuse, improper operation or failure to use a carrier that you . LENGTH OF WARRANTY: This Warranty is recommended to follow instructions contained in the...
..., including without Alpine's consent. D Damage caused by over-driving the speaker (amplifier level is not valid unless your nearest Authorized Alpine Service Center. AND ALPINE OF CANADA INC. ("Alpine"), are dedicated to quality craftsmanship and are covered by negligence, misuse, improper operation or failure to use a carrier that you . LENGTH OF WARRANTY: This Warranty is recommended to follow instructions contained in the...


