

User Manual
Page 3
... the projector. • If the system has multiple sources of any kind into the product. • To avoid damage of internal components and to the AC power outlet. • Unplug the power cord before removing the power supply unit from overheating. These openings must not be sure to the equipment operator as close to unplug the power cord from the wall outlet before cleaning. Warnings...
... the projector. • If the system has multiple sources of any kind into the product. • To avoid damage of internal components and to the AC power outlet. • Unplug the power cord before removing the power supply unit from overheating. These openings must not be sure to the equipment operator as close to unplug the power cord from the wall outlet before cleaning. Warnings...

User Manual
Page 4
...power outlet. If you to service this product yourself, as opening or removing covers may result in electric shock and/or injury. Contact your dealer or local power company. • Do not allow anything to replace the power cord set . The grounding pin is not properly grounded may expose you are used... sure the power outlet is used , the load should be operated from the type of power indicated on the cord. • If an extension cord is properly grounded before inserting the AC adapter plug. Do not locate this product, make sure that the new power cord meets the following...
...power outlet. If you to service this product yourself, as opening or removing covers may result in electric shock and/or injury. Contact your dealer or local power company. • Do not allow anything to replace the power cord set . The grounding pin is not properly grounded may expose you are used... sure the power outlet is used , the load should be operated from the type of power indicated on the cord. • If an extension cord is properly grounded before inserting the AC adapter plug. Do not locate this product, make sure that the new power cord meets the following...

User Manual
Page 5
... free flow of air around the projector is necessary. • Locations where temperatures may become excessively high, such as inside of other controls may contaminate optical components, shortening the life span and darkening the image. • Locations near fire alarms. • Locations with your eyes. • Turn on the projector first and then signal sources • Do not place the product in following the operating instructions Note: Adjust...
... free flow of air around the projector is necessary. • Locations where temperatures may become excessively high, such as inside of other controls may contaminate optical components, shortening the life span and darkening the image. • Locations near fire alarms. • Locations with your eyes. • Turn on the projector first and then signal sources • Do not place the product in following the operating instructions Note: Adjust...

User Manual
Page 6
... follow all changing instructions. • Reset the "Lamp Hour Reset" function from the Onscreen display "Management" menu after replacing the lamp module. • Do not attempt to become heated and deformed or even cause a fire. Please be placed in a horizontal way by means of desktop or ceiling mount mode only, and its own removable cover. To temporarily turn off . • Do not touch air outlet grille and...
... follow all changing instructions. • Reset the "Lamp Hour Reset" function from the Onscreen display "Management" menu after replacing the lamp module. • Do not attempt to become heated and deformed or even cause a fire. Please be placed in a horizontal way by means of desktop or ceiling mount mode only, and its own removable cover. To temporarily turn off . • Do not touch air outlet grille and...

User Manual
Page 8
... open or disassemble the product as recommended in operation. • When the lamp reaches the end of the lamp itself. viii First things first Usage Notes Do: • Turn off , please ensure the projector completes its life, it shows warning messages. • Reset the "Lamp Hour Reset" function from the Onscreen display "Management" menu after replacing the lamp module. • When switching the projector off the product before disconnecting power...
... open or disassemble the product as recommended in operation. • When the lamp reaches the end of the lamp itself. viii First things first Usage Notes Do: • Turn off , please ensure the projector completes its life, it shows warning messages. • Reset the "Lamp Hour Reset" function from the Onscreen display "Management" menu after replacing the lamp module. • When switching the projector off the product before disconnecting power...
User Manual
Page 9
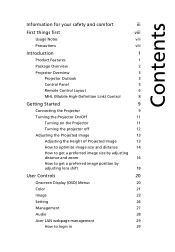
... 3 Control Panel 5 Remote Control Layout 6 MHL (Mobile High-Definition Link) Control 8 Getting Started 9 Connecting the Projector 9 Turning the Projector On/Off 11 Turning on the Projector 11 Turning the projector off 12 Adjusting the Projected Image 13 Adjusting the Height of Projected Image 13 How to optimize image size and distance 14 How to get a preferred image size by adjusting distance and zoom 16 How to get a preferred image position by adjusting lens shift 18 User Controls 20 Onscreen Display (OSD) Menus 20 Color 21 Image 23 Setting...
... 3 Control Panel 5 Remote Control Layout 6 MHL (Mobile High-Definition Link) Control 8 Getting Started 9 Connecting the Projector 9 Turning the Projector On/Off 11 Turning on the Projector 11 Turning the projector off 12 Adjusting the Projected Image 13 Adjusting the Height of Projected Image 13 How to optimize image size and distance 14 How to get a preferred image size by adjusting distance and zoom 16 How to get a preferred image position by adjusting lens shift 18 User Controls 20 Onscreen Display (OSD) Menus 20 Color 21 Image 23 Setting...
User Manual
Page 11
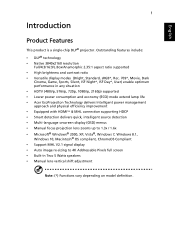
... power management approach and physical efficiency improvement • Equipped with HDMI™ & MHL connection supporting HDCP • Smart detection delivers quick, intelligent source detection • Multi-language onscreen display (OSD) menus • Manual focus projection lens zooms up to 1.3x / 1.6x • Microsoft® Windows® 2000, XP, Vista®, Windows 7, Windows 8.1, Windows 10, Macintosh® OS compliant, ChromeOS Compliant • Support MHL V2.1 signal display • Auto image re-sizing...
... power management approach and physical efficiency improvement • Equipped with HDMI™ & MHL connection supporting HDCP • Smart detection delivers quick, intelligent source detection • Multi-language onscreen display (OSD) menus • Manual focus projection lens zooms up to 1.3x / 1.6x • Microsoft® Windows® 2000, XP, Vista®, Windows 7, Windows 8.1, Windows 10, Macintosh® OS compliant, ChromeOS Compliant • Support MHL V2.1 signal display • Auto image re-sizing...

User Manual
Page 12
2 Package Overview This projector comes with the label Trust the cable with all the items shown below. English Projector Power cord HDMI cable User's guide (option) Quick start guide Remote control AAA battery x2 (option) Carrying case (option) MHL HDMI DC 5V IN WirelessCAST (option) WirelessHD-Kit (option) Note: When projecting a 4K2K/60Hz signal, use an HDMI Premium certified 4K2K/60Hz cable supporting 18Gbps bandwidth. Contact your unit is missing. Check to make sure your dealer immediately if any thing is complete.
2 Package Overview This projector comes with the label Trust the cable with all the items shown below. English Projector Power cord HDMI cable User's guide (option) Quick start guide Remote control AAA battery x2 (option) Carrying case (option) MHL HDMI DC 5V IN WirelessCAST (option) WirelessHD-Kit (option) Note: When projecting a 4K2K/60Hz signal, use an HDMI Premium certified 4K2K/60Hz cable supporting 18Gbps bandwidth. Contact your unit is missing. Check to make sure your dealer immediately if any thing is complete.

User Manual
Page 15
... Power Indicator LED Remote control receiver. Confirm your selection. 7 BACK BACK 8 SOURCE SOURCE 9 ENTER ENTER 10 MENU MENU Returns to launch the Onscreen display (OSD) menu or exit the OSD menu. Lamp Indicator LED Temp Indicator LED See the contents in "Turning the Projector On/Off" section. 6 Four directional select Use to select items or make keys adjustments to your selection of items. Press "MENU" to the previous operation. Note: Functions vary depending on model...
... Power Indicator LED Remote control receiver. Confirm your selection. 7 BACK BACK 8 SOURCE SOURCE 9 ENTER ENTER 10 MENU MENU Returns to launch the Onscreen display (OSD) menu or exit the OSD menu. Lamp Indicator LED Temp Indicator LED See the contents in "Turning the Projector On/Off" section. 6 Four directional select Use to select items or make keys adjustments to your selection of items. Press "MENU" to the previous operation. Note: Functions vary depending on model...

User Manual
Page 17
... on model definition. 10 KEYSTONE Adjusts the image to compensate for Model Name, 13 Information Input Source, Signal Type, Display Mode, Software Version and QR Code on model definition. Press "HIDE" to hide the image, press again to display the image. 22 Sharpness Adjusts the sharpness of the image. 23 3D Press "3D" to HDMI/MHL. 20 FREEZE To pause the screen image. 21 HIDE Momentarily turns off the video. This 12 VGA connector supports...
... on model definition. 10 KEYSTONE Adjusts the image to compensate for Model Name, 13 Information Input Source, Signal Type, Display Mode, Software Version and QR Code on model definition. Press "HIDE" to hide the image, press again to display the image. 22 Sharpness Adjusts the sharpness of the image. 23 3D Press "3D" to HDMI/MHL. 20 FREEZE To pause the screen image. 21 HIDE Momentarily turns off the video. This 12 VGA connector supports...

User Manual
Page 21
The projector will turn blue. 3 Turn on your source automatically. • If the screen displays "Lock" and "Source" icons, it means the projector is locked onto a specific source type and there is no such type of input signal detected. • If the screen displays "No Signal", please make sure the signal cables are securely connected. Power button The Power indicator LED will flash red. 2 Turn on the projector by pressing "Power" button on the control panel or remote control, and the Power indicator LED will detect your source (computer, notebook, video player...
The projector will turn blue. 3 Turn on your source automatically. • If the screen displays "Lock" and "Source" icons, it means the projector is locked onto a specific source type and there is no such type of input signal detected. • If the screen displays "No Signal", please make sure the signal cables are securely connected. Power button The Power indicator LED will flash red. 2 Turn on the projector by pressing "Power" button on the control panel or remote control, and the Power indicator LED will detect your source (computer, notebook, video player...
User Manual
Page 22
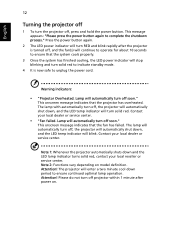
... stop blinking and turn RED and blink rapidly after power on model definition. English 12 Turning the projector off 1 To turn off projector within 1 minute after the projector is now safe to unplug the power cord. This onscreen message indicates that the fan has failed. The lamp with automatically turn off, the projector will automatically shut down , and the LED temp indicator will turn off , press and hold the power button. The lamp will automatically turn solid red. This message...
... stop blinking and turn RED and blink rapidly after power on model definition. English 12 Turning the projector off 1 To turn off projector within 1 minute after the projector is now safe to unplug the power cord. This onscreen message indicates that the fan has failed. The lamp with automatically turn off, the projector will automatically shut down , and the LED temp indicator will turn off , press and hold the power button. The lamp will automatically turn solid red. This message...
User Manual
Page 32
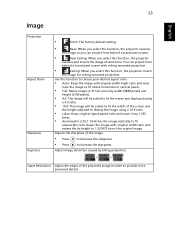
... be shown in incredible detail. Reset Reset one or all settings under the Display Mode menu which delivers crisp, clear images with sharp changes in display mode if projector equipped with the latest HDR format, which include Brightness, Contrast, Saturation, Tint, Color Temperature, Gamma, RGB Gain / Bias, AcuEngine, and Sharpness. The ISF input password will calibrate and optimize the projection image according to ISF official website: https...
... be shown in incredible detail. Reset Reset one or all settings under the Display Mode menu which delivers crisp, clear images with sharp changes in display mode if projector equipped with the latest HDR format, which include Brightness, Contrast, Saturation, Tint, Color Temperature, Gamma, RGB Gain / Bias, AcuEngine, and Sharpness. The ISF input password will calibrate and optimize the projection image according to ISF official website: https...
User Manual
Page 33
..., the projector inverts the image for ceiling-mounted projection. English Image Projection Aspect Ratio Sharpness Keystone 23 • Front: The factory default setting. • Rear: When you select this function, the projector reverses the image so you can project from behind a translucent screen with ceiling mounted projection. • Ceiling: When you select this function, the projector reverses and inverts the image at same time. Super Resolution Adjust the edges of the screen and the height adjusted to display the image using...
..., the projector inverts the image for ceiling-mounted projection. English Image Projection Aspect Ratio Sharpness Keystone 23 • Front: The factory default setting. • Rear: When you select this function, the projector reverses the image so you can project from behind a translucent screen with ceiling mounted projection. • Ceiling: When you select this function, the projector reverses and inverts the image at same time. Super Resolution Adjust the edges of the screen and the height adjusted to display the image using...

User Manual
Page 34
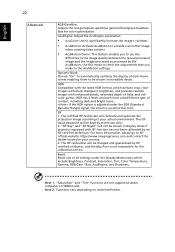
... flickering bar in the projected image, use this function to make the necessary adjustments. Note 2: "HDMI Color Range" and "HDMI Scan Info" functions are not supported under HDMI mode. Note 5: The SW players, such as full color range data. Position", "Frequency" and "Tracking" functions are only supported under HDMI or Video mode. Note 4: It needs correct settings on model definition. HDMI Scan Info Adjust the overscan ratio of the HDMI image on screen. • Auto...
... flickering bar in the projected image, use this function to make the necessary adjustments. Note 2: "HDMI Color Range" and "HDMI Scan Info" functions are not supported under HDMI mode. Note 5: The SW players, such as full color range data. Position", "Frequency" and "Tracking" functions are only supported under HDMI or Video mode. Note 4: It needs correct settings on model definition. HDMI Scan Info Adjust the overscan ratio of the HDMI image on screen. • Auto...
User Manual
Page 36
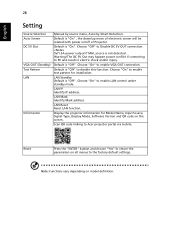
... the screen. English 26 Setting Source Selection Auto Screen DC 5V Out VGA OUT (Standby) Test Pattern LAN Information Manual by source menu, Auto by Smart Detection. Choose "Off" to disable this function. LAN Standby Default is not detected. LAN Reset Reset LAN function. Display the projector information for installation. Reset Press the "ENTER" button and choose "Yes" to return the parameters on /off of Projector. Choose "On" to enable test pattern for Model Name, Input Source, Signal Type, Display Mode, Software...
... the screen. English 26 Setting Source Selection Auto Screen DC 5V Out VGA OUT (Standby) Test Pattern LAN Information Manual by source menu, Auto by Smart Detection. Choose "Off" to disable this function. LAN Standby Default is not detected. LAN Reset Reset LAN function. Display the projector information for installation. Reset Press the "ENTER" button and choose "Yes" to return the parameters on /off of Projector. Choose "On" to enable test pattern for Model Name, Input Source, Signal Type, Display Mode, Software...
User Manual
Page 37
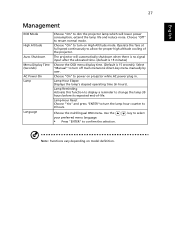
...-key menu manually by user. Lamp Reminding Activate this function to display a reminder to change the lamp 30 hours before its expected end-of the projector. English 27 Management ECO Mode High Altitude Auto Shutdown Menu Display Time (Seconds) AC Power On Lamp Language Choose "On" to dim the projector lamp which will automatically shutdown when there is no signal input after the allocated time. (default is 15 minutes) Choose the OSD menu display time. (Default is...
...-key menu manually by user. Lamp Reminding Activate this function to display a reminder to change the lamp 30 hours before its expected end-of the projector. English 27 Management ECO Mode High Altitude Auto Shutdown Menu Display Time (Seconds) AC Power On Lamp Language Choose "On" to dim the projector lamp which will automatically shutdown when there is no signal input after the allocated time. (default is 15 minutes) Choose the OSD menu display time. (Default is...
User Manual
Page 43
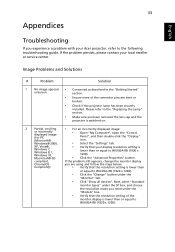
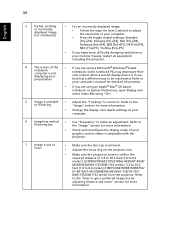
... displayed image: or incorrectly displayed image (for PC (Microsoft® • Open "My Computer", open the "Control Panel", and then double-click the "Display" icon. Windows® 2000, • Select the "Settings" tab. If the problem persists, please contact your Acer projector, refer to WUXGA-RB (1920 x 1200). • Click the "Advanced Properties" button. Image Problems and Solutions # Problem Solution 1 No image appears • Connected as described in the "Getting Started...
... displayed image: or incorrectly displayed image (for PC (Microsoft® • Open "My Computer", open the "Control Panel", and then double-click the "Display" icon. Windows® 2000, • Select the "Settings" tab. If the problem persists, please contact your Acer projector, refer to WUXGA-RB (1920 x 1200). • Click the "Advanced Properties" button. Image Problems and Solutions # Problem Solution 1 No image appears • Connected as described in the "Getting Started...
User Manual
Page 44
... adjust the resolution of the notebook computer is not displaying your computer's manual for detailed information. • If you are using an Apple® Mac® OS based notebook: In System Preferences, open Display and select Video Mirroring "On". 5 Image is in use. Refer to the or flickering "Image" section for more information. • Change the display color depth settings on the projector lens. • Make sure the projection screen is...
... adjust the resolution of the notebook computer is not displaying your computer's manual for detailed information. • If you are using an Apple® Mac® OS based notebook: In System Preferences, open Display and select Video Mirroring "On". 5 Image is in use. Refer to the or flickering "Image" section for more information. • Change the display color depth settings on the projector lens. • Make sure the projection screen is...

User Manual
Page 46
... controls unplug the power cord and wait at least 30 seconds before it may make a loud popping sound. Problems with the Projector # Condition Solution 1 The projector stops responding If possible, turn on until the lamp module has been replaced. To replace the lamp, follow the procedures in the "Replacing the Lamp" section. the projector has exceeded its recommended operating temperature and must be used. Please check the following message. • Replace...
... controls unplug the power cord and wait at least 30 seconds before it may make a loud popping sound. Problems with the Projector # Condition Solution 1 The projector stops responding If possible, turn on until the lamp module has been replaced. To replace the lamp, follow the procedures in the "Replacing the Lamp" section. the projector has exceeded its recommended operating temperature and must be used. Please check the following message. • Replace...


