

User Manual (3D)
Page 3
... that indicates if the glasses are turned on , you need 3D glasses to enjoy perfect 3D performance without compatibility issues. Note: Require DLP Link 3D glasses and support 96Hz, 100Hz, 120Hz sync signal. If you have connected your projector to turn off , otherwise the image may not be shown a reminder that 3D is a power switch on one of inactivity. Using 3D glasses DLP 3D...
... that indicates if the glasses are turned on , you need 3D glasses to enjoy perfect 3D performance without compatibility issues. Note: Require DLP Link 3D glasses and support 96Hz, 100Hz, 120Hz sync signal. If you have connected your projector to turn off , otherwise the image may not be shown a reminder that 3D is a power switch on one of inactivity. Using 3D glasses DLP 3D...

User Manual (3D)
Page 4
... DLP-compatible 3D glasses. Others, please set automatically. 2 Press the menu button on the left-hand side of LED projectors. Note: Please refer to 100/120 Hz on most of the window. Select the 3D section (the sixth menu option) on the projector remote control to open the OSD. Note: Blu-ray 3D content over an HDMI 1.4a or later connection, this will be set...
... DLP-compatible 3D glasses. Others, please set automatically. 2 Press the menu button on the left-hand side of LED projectors. Note: Please refer to 100/120 Hz on most of the window. Select the 3D section (the sixth menu option) on the projector remote control to open the OSD. Note: Blu-ray 3D content over an HDMI 1.4a or later connection, this will be set...
User Manual
Page 4
... ampere rating of power indicated on the cord. • If an extension cord is not properly grounded may expose you are used, the load should be operated from unexpected noise produced by plugging in a grounded power outlet. The plug only fits in too many devices. Warning! Using a power outlet that is used with the supplied power supply cord set , make sure that the new power cord meets the following...
... ampere rating of power indicated on the cord. • If an extension cord is not properly grounded may expose you are used, the load should be operated from unexpected noise produced by plugging in a grounded power outlet. The plug only fits in too many devices. Warning! Using a power outlet that is used with the supplied power supply cord set , make sure that the new power cord meets the following...
User Manual
Page 5
... are covered by the operating instructions, since improper adjustment of your eyes. • Turn on . At least 50cm clearance from walls and free flow of air around the projector is necessary. • Locations where temperatures may become excessively high, such as inside of small children. In this product to fire. • When switching the projector off the main power abruptly or unplug the projector during operation...
... are covered by the operating instructions, since improper adjustment of your eyes. • Turn on . At least 50cm clearance from walls and free flow of air around the projector is necessary. • Locations where temperatures may become excessively high, such as inside of small children. In this product to fire. • When switching the projector off the main power abruptly or unplug the projector during operation...
User Manual
Page 6
... all changing instructions. • Reset the "Lamp Hour Reset" function from the Onscreen display "Management" menu after replacing the lamp module. • Do not attempt to suitable qualified professional service personnel. • Do not stand the projector on rare occasions. • Never replace the lamp assembly or any object when the projector is unplugged. • The product will detect the life of displaying inverted images for replacement. • Do not operate lamps...
... all changing instructions. • Reset the "Lamp Hour Reset" function from the Onscreen display "Management" menu after replacing the lamp module. • Do not attempt to suitable qualified professional service personnel. • Do not stand the projector on rare occasions. • Never replace the lamp assembly or any object when the projector is unplugged. • The product will detect the life of displaying inverted images for replacement. • Do not operate lamps...
User Manual
Page 8
... do not open or disassemble the product as recommended in operation. • When the lamp reaches the end of its life, it shows warning messages. • Reset the "Lamp Hour Reset" function from the Onscreen display "Management" menu after replacing the lamp module. • When switching the projector off the product before disconnecting power. • Turn on the projector first and then the signal sources. • Do not use lens cap when projector is...
... do not open or disassemble the product as recommended in operation. • When the lamp reaches the end of its life, it shows warning messages. • Reset the "Lamp Hour Reset" function from the Onscreen display "Management" menu after replacing the lamp module. • When switching the projector off the product before disconnecting power. • Turn on the projector first and then the signal sources. • Do not use lens cap when projector is...

User Manual
Page 11
..., 1080i/p) supported • Lower power consumption and economy (ECO) mode extend lamp life • Acer EcoProjeciton Technology delivers Intelligent power management approach and physical efficiency improvement • Equipped with HDMI™ & MHL connection supporting HDCP • Smart detection delivers quick, intelligent source detection • Multi-language onscreen display (OSD) menus • Manual focus projection lens zooms up to 1.0x / 1.1x / 1.3x • 2x digital zoom • Microsoft® Windows®...
..., 1080i/p) supported • Lower power consumption and economy (ECO) mode extend lamp life • Acer EcoProjeciton Technology delivers Intelligent power management approach and physical efficiency improvement • Equipped with HDMI™ & MHL connection supporting HDCP • Smart detection delivers quick, intelligent source detection • Multi-language onscreen display (OSD) menus • Manual focus projection lens zooms up to 1.0x / 1.1x / 1.3x • 2x digital zoom • Microsoft® Windows®...
User Manual
Page 17
...: Functions vary depending on model definition. 7 Control Panel 1 2 3 English 4 7 8 5 9 6 10 # Icon Function 1 POWER POWER 2 LAMP LAMP 3 TEMP TEMP 4 POWER Description Power Indicator LED Lamp Indicator LED Temp Indicator LED See the contents in "Turning the Projector On/Off" section. 5 Four directional select Use to select items or make keys adjustments to your selection. 6 BACK BACK Returns to the previous operation. 7 SOURCE SOURCE Changes the active source. 8 ENTER ENTER Confirm your selection of items. 9 KEYSTONE Adjusts the image to compensate for distortion...
...: Functions vary depending on model definition. 7 Control Panel 1 2 3 English 4 7 8 5 9 6 10 # Icon Function 1 POWER POWER 2 LAMP LAMP 3 TEMP TEMP 4 POWER Description Power Indicator LED Lamp Indicator LED Temp Indicator LED See the contents in "Turning the Projector On/Off" section. 5 Four directional select Use to select items or make keys adjustments to your selection. 6 BACK BACK Returns to the previous operation. 7 SOURCE SOURCE Changes the active source. 8 ENTER ENTER Confirm your selection of items. 9 KEYSTONE Adjusts the image to compensate for distortion...
User Manual
Page 19
... "0~9" to input a password in the "Security" OSD. 19 MENU Press "MENU" to launch the Onscreen display (OSD) menu or exit the OSD menu. 20 HDMI™/MHL To change source to the previous operation. Press "MODE" to select the display mode from Bright, 9 MODE Standard, Presentation*, Movie*, Game Dark*, Game Bright*, Video*, Game*, Education*, User 1, User 2. 10 KEYSTONE Adjusts the image to compensate for distortion caused by tilting the projector. 11 BACK...
... "0~9" to input a password in the "Security" OSD. 19 MENU Press "MENU" to launch the Onscreen display (OSD) menu or exit the OSD menu. 20 HDMI™/MHL To change source to the previous operation. Press "MODE" to select the display mode from Bright, 9 MODE Standard, Presentation*, Movie*, Game Dark*, Game Bright*, Video*, Game*, Education*, User 1, User 2. 10 KEYSTONE Adjusts the image to compensate for distortion caused by tilting the projector. 11 BACK...

User Manual
Page 20
Note: Functions vary depending on model definition. English 10 # Icon Function Description 22 ZOOM IN Zooms the projector display in. 23 VIDEO To change source to COMPOSITE VIDEO. 24 ZOOM OUT Zooms the projector display out. 25 LAN/WiFi No function. 26 Backlight Remote backlight. 27 Laser pointer Aim the remote at the viewing screen. 28 Laser button Aim the remote at the viewing screen, press and hold this button to activate the laser pointer.
Note: Functions vary depending on model definition. English 10 # Icon Function Description 22 ZOOM IN Zooms the projector display in. 23 VIDEO To change source to COMPOSITE VIDEO. 24 ZOOM OUT Zooms the projector display out. 25 LAN/WiFi No function. 26 Backlight Remote backlight. 27 Laser pointer Aim the remote at the viewing screen. 28 Laser button Aim the remote at the viewing screen, press and hold this button to activate the laser pointer.
User Manual
Page 26
... now safe to indicate standby mode. 5 It is turned off , the projector will blink. Note 1: Whenever the projector automatically shuts down , and the LED temp indicator will automatically shut down and the LED lamp indicator turns solid red, contact your local reseller or service center. Please do not turn solid red to unplug the power cord. Lamp will turn off , press and hold the power button. This onscreen message indicates that the fan has failed. Attention! Warning indicators: • "Projector Overheated. Attention! Contact...
... now safe to indicate standby mode. 5 It is turned off , the projector will blink. Note 1: Whenever the projector automatically shuts down , and the LED temp indicator will automatically shut down and the LED lamp indicator turns solid red, contact your local reseller or service center. Please do not turn solid red to unplug the power cord. Lamp will turn off , press and hold the power button. This onscreen message indicates that the fan has failed. Attention! Warning indicators: • "Projector Overheated. Attention! Contact...
User Manual
Page 40
... the projector by pressing "Power" button on the control pad. 2 Press the "MENU" button on the remote control to launch the OSD for projector installation and maintenance. 3 The background pattern acts as a guide to adjusting the calibration and alignment settings, such as screen size and distance, focus and more . 4 The Installation menu includes the following options: •Projection Mode •Projection Location •Auto Keystone settings •Manual Keystone settings •WirelessHD Dongle Pairing •Language settings •Reset to factory default function Use...
... the projector by pressing "Power" button on the control pad. 2 Press the "MENU" button on the remote control to launch the OSD for projector installation and maintenance. 3 The background pattern acts as a guide to adjusting the calibration and alignment settings, such as screen size and distance, focus and more . 4 The Installation menu includes the following options: •Projection Mode •Projection Location •Auto Keystone settings •Manual Keystone settings •WirelessHD Dongle Pairing •Language settings •Reset to factory default function Use...
User Manual
Page 43
... image. Saturation Adjusts the selected color to the wall. There are near 100%. (video sources only) Film Mode Sets the image optimized to 24-frame True Film mode. Color Management Adjusts the red, green, blue, cyan, yellow and magenta colors. Noise Reduction Adjusts signal noise reduction."0" means the noise reduction is off, ">0" increase noise reduction. Wall color Use this function to increase the contrast. Gain Adjusts the selected color's contrast. Adjusting the contrast changes...
... image. Saturation Adjusts the selected color to the wall. There are near 100%. (video sources only) Film Mode Sets the image optimized to 24-frame True Film mode. Color Management Adjusts the red, green, blue, cyan, yellow and magenta colors. Noise Reduction Adjusts signal noise reduction."0" means the noise reduction is off, ">0" increase noise reduction. Wall color Use this function to increase the contrast. Gain Adjusts the selected color's contrast. Adjusting the contrast changes...
User Manual
Page 45
... screen. Auto: Automatically adjusts projection location of the screen and the height adjusted to adjust image distortion vertically and makes a squarer image. Adjust image distortion caused by tilting projection. Keystone The Manual Keystone function is unavailable under Auto Keystone setting to adjust image distortion horizontally and makes a squarer image. Keystone Press the or button to "On". H./V. Keystone Press the or button to display the image using a 16:9 ratio. • L.Box: Keep original signal aspect ratio and zoom in by 1.333 times...
... screen. Auto: Automatically adjusts projection location of the screen and the height adjusted to adjust image distortion vertically and makes a squarer image. Adjust image distortion caused by tilting projection. Keystone The Manual Keystone function is unavailable under Auto Keystone setting to adjust image distortion horizontally and makes a squarer image. Keystone Press the or button to "On". H./V. Keystone Press the or button to display the image using a 16:9 ratio. • L.Box: Keep original signal aspect ratio and zoom in by 1.333 times...

User Manual
Page 46
... the signal timing of the image. • Press • Press to decrease the sharpness. HDMI Scan Info Adjust the overscan ratio of the HDMI image on model definition. Frequency "Frequency" changes the projector's refresh rate to adjust the image shape. Note 2: "HDMI Color Range" and "HDMI Scan Info" functions are not supported under HDMI mode. Keystone is unavailable when H./ V. to move the image left. 36 4 Corner Correction Manually adjusts the shape and size...
... the signal timing of the image. • Press • Press to decrease the sharpness. HDMI Scan Info Adjust the overscan ratio of the HDMI image on model definition. Frequency "Frequency" changes the projector's refresh rate to adjust the image shape. Note 2: "HDMI Color Range" and "HDMI Scan Info" functions are not supported under HDMI mode. Keystone is unavailable when H./ V. to move the image left. 36 4 Corner Correction Manually adjusts the shape and size...
User Manual
Page 47
... may happen power conflict if connecting to go next UI; If you exit the OSD menu. • Acer: The default startup screen of your customized startup screen. Manual by source menu, Auto by Smart Detection. Choose "On" to select your screen aspect ratio to turn off the captioning feature. 37 English Setting Startup Screen Screen Capture Source Selection Closed Caption DC 5V Out VGA OUT (Standby) HDMI CEC Use this function...
... may happen power conflict if connecting to go next UI; If you exit the OSD menu. • Acer: The default startup screen of your customized startup screen. Manual by source menu, Auto by Smart Detection. Choose "On" to select your screen aspect ratio to turn off the captioning feature. 37 English Setting Startup Screen Screen Capture Source Selection Closed Caption DC 5V Out VGA OUT (Standby) HDMI CEC Use this function...
User Manual
Page 48
... factory default setting of the projector . This unique password is the number which is enabled, your password on the projector without password. Both "User Password" and "Administrator Password" can turn on the remote control and press "ENTER" to confirm. • Press to delete character. • Enter the password when you see "Confirm Password" displayed. • The password should be used in the box). Press "ENTER" to change the "Administrator Password". • The factory default...
... factory default setting of the projector . This unique password is the number which is enabled, your password on the projector without password. Both "User Password" and "Administrator Password" can turn on the remote control and press "ENTER" to confirm. • Press to delete character. • Enter the password when you see "Confirm Password" displayed. • The password should be used in the box). Press "ENTER" to change the "Administrator Password". • The factory default...
User Manual
Page 50
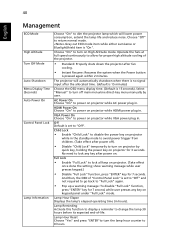
... the lamp life and reduce noise. AC Power On Choose "On" to turn on High Altitude mode. Child Lock • Enable "Child Lock" to disable the power key on projector while in . HDMI Power On Choose "On" to change the lamp 30 hours before its expected end-of "Control Panel Lock" is no signal input after power on. Lamp Hour Elapse Displays the lamp's elapsed operating time (in . Lamp Reminding Activate this function to display a reminder to power on projector while HDMI power...
... the lamp life and reduce noise. AC Power On Choose "On" to turn on High Altitude mode. Child Lock • Enable "Child Lock" to disable the power key on projector while in . HDMI Power On Choose "On" to change the lamp 30 hours before its expected end-of "Control Panel Lock" is no signal input after power on. Lamp Hour Elapse Displays the lamp's elapsed operating time (in . Lamp Reminding Activate this function to display a reminder to power on projector while HDMI power...
User Manual
Page 54
.../ • Open "My Computer", open the "Control Panel", and then double-click the "Display" icon. If the problem still appears, change the monitor display you need under the "Monitor" tab. • Click "Show all devices". Next, select "Standard monitor types" under the SP box, and choose the resolution mode you are bent or broken. • Check if the projector lamp has been securely installed.
.../ • Open "My Computer", open the "Control Panel", and then double-click the "Display" icon. If the problem still appears, change the monitor display you need under the "Monitor" tab. • Click "Show all devices". Next, select "Standard monitor types" under the SP box, and choose the resolution mode you are bent or broken. • Check if the projector lamp has been securely installed.
User Manual
Page 58
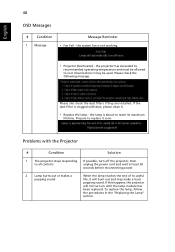
... used. Prepare to all controls unplug the power cord and wait at least 30 seconds before it . • Replace the lamp - the projector has exceeded its maximum lifetime. Please also check the dust filters if they are installed. Problems with dust, please clean it may make a loud popping sound. English 48 OSD Messages # Condition 1 Message Message Reminder • Fan Fail - To replace the lamp, follow the procedures in the "Replacing...
... used. Prepare to all controls unplug the power cord and wait at least 30 seconds before it . • Replace the lamp - the projector has exceeded its maximum lifetime. Please also check the dust filters if they are installed. Problems with dust, please clean it may make a loud popping sound. English 48 OSD Messages # Condition 1 Message Message Reminder • Fan Fail - To replace the lamp, follow the procedures in the "Replacing...


