
Quick Start Guide
Page 3
It covers basic topics such as system utilities, data recovery, expansion options and troubleshooting. The Quick Guide introduces you to the ...for meeting your mobile computing needs. For instructions on your notebook. It is not installed on such subjects as Acer eRecovery Management, using the keyboard, audio, etc. This guide contains detailed information on your new computer. Please ... certain models of your computer, clicking on how your computer. The Aspire Generic User Guide contains useful information applying to functions or features which are only contained in the...
It covers basic topics such as system utilities, data recovery, expansion options and troubleshooting. The Quick Guide introduces you to the ...for meeting your mobile computing needs. For instructions on your notebook. It is not installed on such subjects as Acer eRecovery Management, using the keyboard, audio, etc. This guide contains detailed information on your new computer. Please ... certain models of your computer, clicking on how your computer. The Aspire Generic User Guide contains useful information applying to functions or features which are only contained in the...
Service Guide
Page 9
...148 LS-4854P Lid Board 148 Clearing Password Check and BIOS Recovery 149 Clearing Password Check 149 Clear CMOS Jumper 149 BIOS Recovery by Crisis Disk 150 FRU (Field Replaceable Unit) List 151 Aspire 7715Z/7315 Exploded Diagrams 152 Main Assembly 152 Base Assembly 153 Rear... Assembly 154 Aspire 7715Z/7315 FRU List 155 Screw List 163 Model Definition and Configuration 164 Aspire 7315 165 Aspire 7715Z 167 Test ...
...148 LS-4854P Lid Board 148 Clearing Password Check and BIOS Recovery 149 Clearing Password Check 149 Clear CMOS Jumper 149 BIOS Recovery by Crisis Disk 150 FRU (Field Replaceable Unit) List 151 Aspire 7715Z/7315 Exploded Diagrams 152 Main Assembly 152 Base Assembly 153 Rear... Assembly 154 Aspire 7715Z/7315 FRU List 155 Screw List 163 Model Definition and Configuration 164 Aspire 7315 165 Aspire 7715Z 167 Test ...

Service Guide
Page 33
...in this screen. Valid range is the help for your reference only. Sets the system date. Displays the total memory available. Enables, disables D2D Recovery function. Format/Option Format: HH:MM:SS (hour:minute:second) Format MM/DD/YYYY (month/day/year) N/A N/A Option: Enabled or Disabled ...: AHCI or IDE Chapter 2 23 Parameter System Time System Date Total Memory Video Memory Quick Boot Network Boot F12 Boot Menu D2D Recovery SATA Mode Description Sets the system time. Displays the available memory for Video. Enables, disables Boot Menu during POST. Allows startup to...
...in this screen. Valid range is the help for your reference only. Sets the system date. Displays the total memory available. Enables, disables D2D Recovery function. Format/Option Format: HH:MM:SS (hour:minute:second) Format MM/DD/YYYY (month/day/year) N/A N/A Option: Enabled or Disabled ...: AHCI or IDE Chapter 2 23 Parameter System Time System Date Total Memory Video Memory Quick Boot Network Boot F12 Boot Menu D2D Recovery SATA Mode Description Sets the system time. Displays the available memory for Video. Enables, disables Boot Menu during POST. Allows startup to...
Service Guide
Page 43
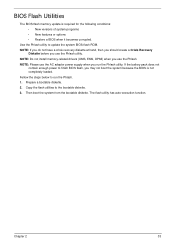
... bootable diskette. 3. Fellow the steps below to finish BIOS flash, you use the Phlash. NOTE: If you do not have a crisis recovery diskette at hand, then you should create a Crisis Recovery Diskette before you may not boot the system because the BIOS is required for the following conditions: • New versions of...
... bootable diskette. 3. Fellow the steps below to finish BIOS flash, you use the Phlash. NOTE: If you do not have a crisis recovery diskette at hand, then you should create a Crisis Recovery Diskette before you may not boot the system because the BIOS is required for the following conditions: • New versions of...

Service Guide
Page 140
... System Restore. Select Repair your computer. h. Check the BIOS settings are required. Ensure all external devices. 2. Run the Windows Vista Startup Repair Utility: a. The System Recovery Options screen displays. Click Next. i. If the issue is not fixed, repeat the preceding steps and select an earlier time and date. 11.
... System Restore. Select Repair your computer. h. Check the BIOS settings are required. Ensure all external devices. 2. Run the Windows Vista Startup Repair Utility: a. The System Recovery Options screen displays. Click Next. i. If the issue is not fixed, repeat the preceding steps and select an earlier time and date. 11.

Service Guide
Page 159
...provides you with the standard operating procedures of the HW Gap. 4. However, once it is cleared. NOTE: These steps are only for enabling BIOS Recovery. Then remove the tool from the machine. 2. Press F2 key to BIOS Setup menu. Clear CMOS Jumper Item J1 Description Clear CMOS Jumper Chapter 5... Password is necessary to bypass the password check, users need to short the HW Gap to short the two points of clearing password and BIOS recovery for a security reason, BIOS will ask the password during systems POST or when systems enter to enter BIOS Setup menu. 6. Power Off the...
...provides you with the standard operating procedures of the HW Gap. 4. However, once it is cleared. NOTE: These steps are only for enabling BIOS Recovery. Then remove the tool from the machine. 2. Press F2 key to BIOS Setup menu. Clear CMOS Jumper Item J1 Description Clear CMOS Jumper Chapter 5... Password is necessary to bypass the password check, users need to short the HW Gap to short the two points of clearing password and BIOS recovery for a security reason, BIOS will ask the password during systems POST or when systems enter to enter BIOS Setup menu. 6. Power Off the...
Service Guide
Page 160
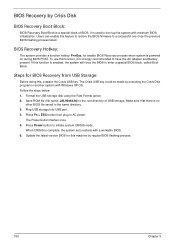
...disk using the Fast Format option. 2. The Power button flashes once. 5. The Crisis USB key could be made by Crisis Disk BIOS Recovery Boot Block: BIOS Recovery Boot Block is a special block of USB storage. Save ROM file (file name: JAL90x64.fd) to initiate system CRISIS mode. Plug ...have the AC adapter and Battery present. When CRISIS is strongly recommended to a successful one once the previous BIOS flashing process failed. BIOS Recovery by executing the Crisis Disk program in another system with Windows XP OS. Users can enable this function, it is complete, the system ...
...disk using the Fast Format option. 2. The Power button flashes once. 5. The Crisis USB key could be made by Crisis Disk BIOS Recovery Boot Block: BIOS Recovery Boot Block is a special block of USB storage. Save ROM file (file name: JAL90x64.fd) to initiate system CRISIS mode. Plug ...have the AC adapter and Battery present. When CRISIS is strongly recommended to a successful one once the previous BIOS flashing process failed. BIOS Recovery by executing the Crisis Disk program in another system with Windows XP OS. Users can enable this function, it is complete, the system ...


