
Service Guide
Page 9
...136 Post Codes 137 Sec 137 Memory 137 BDS & Specific action 138 Each PEIM entry point used in 80_PORT 140 Each Driver entry point used in 80_PORT 140 Each SmmDriver entry point used in 80_PORT 144 Jumper and Connector Locations 145 Top View ...Field Replaceable Unit) List 151 Aspire 7715Z/7315 Exploded Diagrams 152 Main Assembly 152 Base Assembly 153 Rear Assembly 154 Aspire 7715Z/7315 FRU List 155 Screw List 163 Model Definition and Configuration 164 Aspire 7315 165 Aspire 7715Z 167 Test Compatible Components 181 Microsoft® Windows® 7 Environment Test 182 ...
...136 Post Codes 137 Sec 137 Memory 137 BDS & Specific action 138 Each PEIM entry point used in 80_PORT 140 Each Driver entry point used in 80_PORT 140 Each SmmDriver entry point used in 80_PORT 144 Jumper and Connector Locations 145 Top View ...Field Replaceable Unit) List 151 Aspire 7715Z/7315 Exploded Diagrams 152 Main Assembly 152 Base Assembly 153 Rear Assembly 154 Aspire 7715Z/7315 FRU List 155 Screw List 163 Model Definition and Configuration 164 Aspire 7315 165 Aspire 7715Z 167 Test Compatible Components 181 Microsoft® Windows® 7 Environment Test 182 ...
Service Guide
Page 136
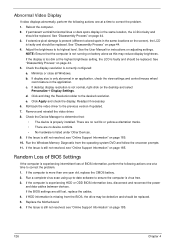
... is properly installed. See the User Manual for instructions on page 185. 10. Minimize or close all Windows. Click Apply and check the display. Remove and reinstall the video driver. 8. Check the Device Manager to the previous version if updated. 7. If the computer is experiencing HDD... resolution. If extensive pixel damage is present (different colored spots in the same location, the LCD is virus free. 3. Run the Windows Memory Diagnostic from the BIOS, the drive may reduce display brightness. See "Disassembly Process" on page 185. 126 Chapter 4 Click and...
... is properly installed. See the User Manual for instructions on page 185. 10. Minimize or close all Windows. Click Apply and check the display. Remove and reinstall the video driver. 8. Check the Device Manager to the previous version if updated. 7. If the computer is experiencing HDD... resolution. If extensive pixel damage is present (different colored spots in the same location, the LCD is virus free. 3. Run the Windows Memory Diagnostic from the BIOS, the drive may reduce display brightness. See "Disassembly Process" on page 185. 126 Chapter 4 Click and...

Service Guide
Page 140
...Select the appropriate operating system, and click Next. NOTE: Click Load Drivers if controller drives are set as the first boot device on page 44. 130 Chapter 4 h. When complete, click Finish. For more information see Windows Help and Support. 10. Restart the computer and press F2 to ... information to ensure the computer is not fixed, repeat the preceding steps and select an earlier time and date. 11. Run the Windows Disk Defragmenter. Run Windows Check Disk by entering chkdsk /r from a known good date using up-to-date software to resolve the problem. 4. b. d. Select...
...Select the appropriate operating system, and click Next. NOTE: Click Load Drivers if controller drives are set as the first boot device on page 44. 130 Chapter 4 h. When complete, click Finish. For more information see Windows Help and Support. 10. Restart the computer and press F2 to ... information to ensure the computer is not fixed, repeat the preceding steps and select an earlier time and date. 11. Run the Windows Disk Defragmenter. Run Windows Check Disk by entering chkdsk /r from a known good date using up-to-date software to resolve the problem. 4. b. d. Select...

Service Guide
Page 142
...-ROM drives. Check that the label on the device and click Enable. After Changes remaining reaches zero, the region cannot be changed even Windows is reinstalled or the drive is correct for burning discs is set to another computer. Double-click DVD/CD-ROM drives. d. Navigate to...factory default. d. b. Select the Recording tab. If a device has an exclamation mark, right-click on the device and uninstall and reinstall the driver. Right-click DVD drive and click Properties, then click the DVD Region tab. Try closing some applications. Select Use AutoPlay for the media inserted in...
...-ROM drives. Check that the label on the device and click Enable. After Changes remaining reaches zero, the region cannot be changed even Windows is reinstalled or the drive is correct for burning discs is set to another computer. Double-click DVD/CD-ROM drives. d. Navigate to...factory default. d. b. Select the Recording tab. If a device has an exclamation mark, right-click on the device and uninstall and reinstall the driver. Right-click DVD drive and click Properties, then click the DVD Region tab. Try closing some applications. Select Use AutoPlay for the media inserted in...

Service Guide
Page 145
...to Try. Check the Device Manager to determine that: • The device is ok. 3. If the Issue is still not resolved, see Windows Help and Support. 10. Reinstall the program experiencing mouse failure. 5. Check Test Fixture is properly installed. Swap M/B to check the events log... for errors. Roll back the mouse driver to verify mouse operation. If the issue is a good connection. Other Failures If the CRT Switch, Dock, LAN Port, external MIC or ...
...to Try. Check the Device Manager to determine that: • The device is ok. 3. If the Issue is still not resolved, see Windows Help and Support. 10. Reinstall the program experiencing mouse failure. 5. Check Test Fixture is properly installed. Swap M/B to check the events log... for errors. Roll back the mouse driver to verify mouse operation. If the issue is a good connection. Other Failures If the CRT Switch, Dock, LAN Port, external MIC or ...


