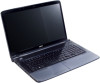
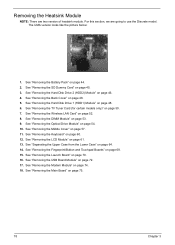
Acer Aspire 7535 Notebook Service Guide
Page 7
... Key (only for certain models 15 Windows Mobility Center 16 Using the System Utilities 17 Acer Bio-Protection (only for certain models 17 Acer GridVista (dual-display compatible 18 Hardware Specifications and Configurations 19 System Utilities 27 BIOS Setup ...Removing the Battery Pack 44 Removing the SD Dummy Card 45 Removing the Hard Disk Drive 2 (HDD2) Module 46 Removing the Back Cover 48 Removing the Hard Disk Drive 1 (HDD1) Module 48 Removing the TV Tuner Card (for certain models only 50 Removing the Wireless LAN Card 52 Removing the DIMM Module 53 Removing the Optical Drive...
Acer Aspire 7535 Notebook Service Guide
Page 51
EXTERNAL MODULE DISASSEMBLY TURN OFF POWER AND PERIPHERALS UNPLUG POWER CABLES REMOVE BATTERY PACK SD DUMMY CARD OPTICAL DISK DRIVE Bx1 ODD MODULE Cx1 OPTICAL LOCKER BRACKET Cx1 HDD 1 MODULE Captive Screwx6 BACK COVER DIMM MODULES Fx1 TV TUNER BOARD Dx2 HARD DISK BRACKET HARD DISK DRIVE Captive Screwx2 HDD 2 COVER HDD 2 MODULE Fx1 WLAN BOARD...
Acer Aspire 7535 Notebook Service Guide
Page 54
If your model does not have an HDD2, please skip to the next section and disregard the steps for removing the HDD2 module below. 46 Chapter 3 Release the two captive screws on page 44. 2. NOTE: The HDD2 module is available in certain models only. Lift and remove the HDD2 bay cover. See "Removing the Battery Pack" on the hard disk 2 module cover. 4. Removing the Hard Disk Drive 2 (HDD2) Module 1. See "Removing the SD Dummy Card" on page 45. 3.
Acer Aspire 7535 Notebook Service Guide
Page 56
Removing the Back Cover 1. See "Removing the Hard Disk Drive 2 (HDD2) Module" on page 45. 3. Release the six captive screws securing the back cover. 5. See "Removing the SD Dummy Card" on page 46. 4. See "Removing the Back Cover" on page 46. 4. See "Removing the Hard Disk Drive 2 (HDD2) Module" on page 48. 48 Chapter 3 See "Removing the Battery Pack" on page 44. 2. See "Removing the Battery Pack" on page 44. 2. Carefully lift and remove the back cover. See "Removing the SD Dummy Card" on page 45. 3. Removing the Hard Disk Drive 1 (HDD1) Module 1.
Acer Aspire 7535 Notebook Service Guide
Page 57
Lift the HDD1 module and remove it . Size (Quantity) M2 x L3 (1) Silver Color Torque 1.6 kgf-cm 6. Part No. 86.00F80.723 NOTE: To prevent damage to the system. Chapter 3 49 Remove the one screw (C) securing the hard disk drive 1 (HDD1) module to device, avoid pressing down on it or placing heavy objects on top of it from the hard disk drive bay. 5.
Acer Aspire 7535 Notebook Service Guide
Page 58
Remove the two screws (D) securing the hard disk to the bracket and remove the hard disk from the bracket. See "Removing the Hard Disk Drive 2 (HDD2) Module" on page 48. 50 Chapter 3 See "Removing the Hard Disk Drive 1 (HDD1) Module" on page 46. 4. See "Removing the SD Dummy Card" on page 48. 5. 7. Size (Quantity) M3 x L4 (2) Color Silver Torque 3.0 kgf-cm Part No. 86.9A554.4R0 Removing the TV Tuner Card (for certain models only) 1. See "Removing the Back Cover" on page 45. 3. See "Removing the Battery Pack" on page 44. 2.
Acer Aspire 7535 Notebook Service Guide
Page 60
... the black cable from connector 1, the white cable from connector 2 and the gray cable from connector 2 on the WLAN card. 8. See "Removing the Hard Disk Drive 2 (HDD2) Module" on page 48. 5. For 2-antenna WLAN card, detach the black cable from connector 1 and the white cable from connector... x L4 (1) Color Silver Torque 1.6 kgf-cm Part No. 86.9A552.4R0 52 Chapter 3 See "Removing the Hard Disk Drive 1 (HDD1) Module" on page 44. 2. See "Removing the Battery Pack" on page 48. 6. See "Removing the TV Tuner Card (for certain models only)" on the WLAN card and detach the card...
Acer Aspire 7535 Notebook Service Guide
Page 61
See "Removing the Hard Disk Drive 1 (HDD1) Module" on page 52. 8. See "Removing the Wireless LAN Card" on page 48. 6. See "Removing the Hard Disk Drive 2 (HDD2) Module" on page 45. 3. Chapter 3 53 See "Removing the SD Dummy Card" on page 46. 4. Remove the DIMM module(s). See "Removing the Battery Pack" on both sides of the DIMM socket to release the...
Acer Aspire 7535 Notebook Service Guide
Page 62
... (Quantity) M2.5 x L7 (1) Black Color Torque 3.0 kgf-cm 10. See "Removing the SD Dummy Card" on page 48. 5. See "Removing the TV Tuner Card (for certain models only)" on page 46. 4. See "Removing the Hard Disk Drive 2 (HDD2) Module" on page 50. 7. See "Removing the Hard Disk Drive 1 (HDD1) Module" on page 53. 9. Part No. 86.00E72.637...
Acer Aspire 7535 Notebook Service Guide
Page 65
....9A552.4R0 Chapter 3 57 See "Removing the Hard Disk Drive 2 (HDD2) Module" on page 52. 8. See "Removing the Wireless LAN Card" on page 46. 4. See "Removing the Back Cover" on page 54. 10. See "Removing the Optical Drive Module" on page 48. 5. See "Removing the Hard Disk Drive 1 (HDD1) Module" on the back cover. Remove the fifteen screws (B) on page 48...
Acer Aspire 7535 Notebook Service Guide
Page 68
... two screws (F) securing the power button board to the middle cover. See "Removing the DIMM Module" on page 57. 60 Chapter 3 See "Removing the Battery Pack" on page 46. 4. See "Removing the Hard Disk Drive 2 (HDD2) Module" on page 44. 2. See "Removing the TV Tuner Card (for certain models only)" on page 48. 6. Torque 1.6 kgf-cm...
Acer Aspire 7535 Notebook Service Guide
Page 69
... the main board and detach the keyboard. See "Removing the Hard Disk Drive 2 (HDD2) Module" on page 54. 10. See "Removing the Optical Drive Module" on page 46. 4. See "Removing the Keyboard" on page 44. 2. See "Removing the Battery Pack" on page 60. Chapter 3 61 Removing the LCD Module 1. See "Removing the SD Dummy Card" on page 50. 7. See...
Acer Aspire 7535 Notebook Service Guide
Page 72
... LCD module from its connector on the main board. 64 Chapter 3 See "Removing the SD Dummy Card" on page 48. 6. See "Removing the Hard Disk Drive 1 (HDD1) Module" on page 45. 3. See "Removing the Optical Drive Module" on page 48. 5. Release the latch (a) and disconnect the launch cable (b) from the base unit. 17. Separating the Upper...
Acer Aspire 7535 Notebook Service Guide
Page 76
... Color Silver Torque 1.6 kgf-cm Part No. 86.9A552.4R0 Chapter 3 See "Removing the Hard Disk Drive 2 (HDD2) Module" on page 52. 8. See "Removing the Wireless LAN Card" on page 46. 4. See "Removing the Battery Pack" on page 54. 10. See "Removing the Optical Drive Module" on page 44. 2. See "Separating the Upper Case from the lower...
Acer Aspire 7535 Notebook Service Guide
Page 78
... Fingerprint/Button and Touchpad Boards" on page 61. 13. See "Removing the Hard Disk Drive 2 (HDD2) Module" on page 48. 6. See "Removing the Hard Disk Drive 1 (HDD1) Module" on page 46. 4. See "Removing the Optical Drive Module" on page 44. 2. 18. See "Removing the Battery Pack" on page 54. 10. See "Removing the SD Dummy Card" on page 48. 5. See...
Acer Aspire 7535 Notebook Service Guide
Page 80
... 68. 15. See "Removing the Fingerprint/Button and Touchpad Boards" on page 64. 14. See "Removing the Hard Disk Drive 1 (HDD1) Module" on page 52. 8. See "Removing the Wireless LAN Card" on page 48. 6. See "Removing the Launch Board" on page 53. 9. See "Removing the DIMM Module" on page... 70. 16. See "Removing the Keyboard" on page 44. 2. See "Removing the Battery Pack"...
Acer Aspire 7535 Notebook Service Guide
Page 82
... Pack" on page 57. 11. See "Removing the Middle Cover" on page 44. 2. See "Removing the LCD Module" on page 46. 4. See "Removing the Hard Disk Drive 2 (HDD2) Module" on page 61. 13. See "Removing the DIMM Module" on page 54. 10. See "Removing the Optical Drive Module" on page 53. 9. See "Removing the Back Cover" on page 70...
Acer Aspire 7535 Notebook Service Guide
Page 83
... page 54. 10. See "Removing the Optical Drive Module" on page 45. 3. 18. See "Removing the TV Tuner Card (for certain models only)" on page 46. 4. See "Removing the Hard Disk Drive 2 (HDD2) Module" on page 50. 7. See "Removing the Keyboard" on page 52. 8. Part No. 86.9A552.4R0 Removing the Main Board 1. See "Removing the Wireless LAN Card...
Acer Aspire 7535 Notebook Service Guide
Page 86
... like the picture below: 1. See "Removing the SD Dummy Card" on page 46. 4. See "Removing the Hard Disk Drive 2 (HDD2) Module" on page 45. 3. See "Removing the Wireless LAN Card" on page 48. 6. See "Removing the Hard Disk Drive 1 (HDD1) Module" on page 52. 8. See "Removing the Optical Drive Module" on page 57. 11. See "Removing the Middle Cover" on page...
Acer Aspire 7535 Notebook Service Guide
Page 90
... on page 72. 17. See "Removing the USB Board Module" on page 68. 15. See "Removing the Battery Pack" on page 48. 6. See "Removing the Hard Disk Drive 1 (HDD1) Module" on page 44. 2. See "Removing the Launch Board" on page 57. 11. See "Removing the Middle Cover" on page 70.... page 50. 7. See "Removing the TV Tuner Card (for all the models. 1. Removing the CPU NOTE: Aspire 7738/7738G and Aspire 7735/7735G/7735Z/7735ZG Series uses the Intel® processor, while Aspire 7535/7535G/7235 Series uses the AMD® processor. See "Removing the Optical Drive Module" on page 64. 14...