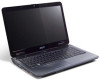
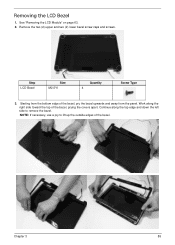
Acer Aspire 5332 / 5732Z Series Service Guide
Page 8
...Replacing the Right Speaker Module 107 Replacing the Left Speaker Module 108 Replacing the Power Board 109 Replacing the Upper Cover 109 Replacing the LCD Module 113 Replacing the Keyboard 118 Replacing the Switch Cover 119 Replacing the Hard Disk Drive Module 119 Replacing the WLAN Module 121 ... the Battery 124 Troubleshooting 125 Common Problems 125 Power On Issue 126 No Display Issue 127 Random Loss of BIOS Settings 128 LCD Failure 129 Built-In Keyboard Failure 129 TouchPad Failure 130 Internal Speaker Failure 130 HDD Not Operating Correctly 132 ODD Failure 133 VIII
Acer Aspire 5332 / 5732Z Series Service Guide
Page 15
...output. Touch-sensitive pointing device which functions like a computer mouse. 5 Front View No. 1 2 3 4 5 6 Chapter 1 Icon Item Acer Crystal Eye webcam Display screen Touchpad toggle Description Web camera for video communication (for selected models). Turns the internal touchpad on and off . Also... called Liquid-Crystal Display (LCD), displays computer output. Indicates the status of wireless LAN communication. Power button Turns the computer on and off . Your Acer Notebook tour After knowing your computer features, let us show you ...
Acer Aspire 5332 / 5732Z Series Service Guide
Page 17
... 2.0 ports Microphone-in jack Headphones/ speaker/line-out jack Description Connects to an Ethernet 10/100-based network. Connects to an AC adapter. external monitor, LCD projector). Connect to a display device (e.g. USB mouse, USB camera). speakers, headphones). Accepts input from external microphones. Connects to USB 2.0 devices (e.g. Connects to stay cool, even...
Acer Aspire 5332 / 5732Z Series Service Guide
Page 32
... Item Vendor & model name Battery Type Pack capacity Normal Voltage Package configuration Specification 6 Cell SANYO/SONY/PANASONIC/SIMPLO AS2009A Li-ion 4400 mAh 2.2 Ah 3S2P LCD 15.6" Item Vendor/model name Screen Diagonal (mm) Display Area (mm) Display resolution (pixels) Pixel Pitch Display Mode Typical White Luminance (cd/m2) (also called...
Acer Aspire 5332 / 5732Z Series Service Guide
Page 39
...-Device2, Function1 • IGD-Pre-allocat Memory • IGD-DVMT Size • Clock Chip Initialize • Enabled CK SSC • IGD-Boot Type • IGD-LCD Panel Type • IGD-TV • IGD-PAVP Mode • USB Legacy • EHCI 1, 2 • UHCI 1 ~ 5 • Per-Port Control • USB Port 0~7 • Port...
Acer Aspire 5332 / 5732Z Series Service Guide
Page 58
... the following stages: • External module disassembly • Main unit disassembly • LCD module disassembly The flowcharts provided in that you must be disassembled outside of the LCD Module is divided into the following : 1. Remove the battery pack. Disassembly Process IMPORTANT:...3.2L K 6D NI + 17 86.N2802.006 48 Chapter 3 The disassembly process is faulty, such as the camera, antenna or LCD panel, the whole module must first remove the keyboard, then disassemble the inside assembly frame in the succeeding disassembly sections illustrate the entire ...
Acer Aspire 5332 / 5732Z Series Service Guide
Page 70
Main Unit Disassembly Process Main Unit Disassembly Flowchart Remove External Modules before proceeding Rem ove Switch Cover Rem ove Keyboard Rem ove LCD Module Upper Cover Rem ove Upper Cover Rem ove Power Board Rem ove Left Speaker Module Rem ove Right Speaker Module Rem ove TouchPad... Bracket Lower Cover Rem ove Mainboard Rem ove RTC Battery Rem ove Thermal Module Rem ove CPU Fan Rem ove CPU Screw List Step LCD Module LCD Module Upper Cover Upper Cover Power Board Left Speaker Module Right Speaker Module TouchPad Bracket Mainboard Thermal Module CPU Fan Screw M2.5*8 M2.5*8 ...
Acer Aspire 5332 / 5732Z Series Service Guide
Page 73
Removing the LCD Module 1. Ensure that the cables are free from the bottom of the chassis. Remove the two (2) securing screws from all cable clips. Step LCD Module Size M2.5*8 Quantity 2 Screw Type 3. Chapter 3 63 Remove the Antenna Cables from the cable channel as shown. Turn the computer over. See "Removing the Keyboard" on page 62. 2.
Acer Aspire 5332 / 5732Z Series Service Guide
Page 74
Stand the computer on the LCD Panel and pull the Antenna cables completely through the chassis. 5. 4. Ensure that the cable is completely free of the retaining clips all the way to the hinge well. 64 Chapter 3 Disconnect the LCD cable from the Mainboard and remove the cable from the cable channel. Remove the white Antenna cable from the cable channel. 6.
Acer Aspire 5332 / 5732Z Series Service Guide
Page 75
Ensure that the cable is completely free of the retaining clips all the way to expose the Hinge Covers. 10. Open the LCD Panel to the full extent to the hinge well. 9. Press the left side Hinge Cover inward, as shown. Remove the black Antenna cable from the chassis. 11. Chapter 3 65 Repeat the process for the right side Hinge Cover. Remove the adhesive tape securing the Antenna cable to remove the cover from the cable channel as shown, and lift to the Upper Cover. 8. 7.
Acer Aspire 5332 / 5732Z Series Service Guide
Page 76
12. Lift the LCD Module clear of the hinges Screw Type 14. Remove the four (4) securing screws (two each side) from on top of the Upper Cover. 66 Chapter 3 Remove the left and right screw covers from the LCD module. Step LCD Module Size M2.5*8 Quantity 4 13.
Acer Aspire 5332 / 5732Z Series Service Guide
Page 77
Turn the computer over . Chapter 3 67 Turn the computer over . Remove the eleven (11) screws on page 63. 2. See "Removing the LCD Module" on the bottom panel. Remove the three screw caps at the rear of the Upper Cover as shown. Step Upper Cover Size M2.5*8 Quantity 11 Screw Type 3. Removing the Upper Cover 1.
Acer Aspire 5332 / 5732Z Series Service Guide
Page 95
Work along the top edge and down the left side to lift up the outside edges of the bezel. Remove the two (2) upper and two (2) lower bezel screw caps and screws. Step LCD Bezel Size M2.5*6 Quantity 4 Screw Type 3. Continue along the right side toward the top of the bezel, pry the bezel upwards and away from the panel. Removing the LCD Bezel 1. Starting from the bottom edge of the bezel, prying the covers apart. Chapter 3 85 NOTE: If necessary, use a pry to remove the bezel. See "Removing the LCD Module" on page 63. 2.
Acer Aspire 5332 / 5732Z Series Service Guide
Page 96
Locate the Camera Module at the top of the LCD Module and disconnect the camera cable. 3. Remove the Camera from the module. 86 Chapter 3 See "Removing the LCD Bezel" on page 85. 2. Removing the Camera Module 1.
Acer Aspire 5332 / 5732Z Series Service Guide
Page 97
Remove the two (2) securing screws from the LCD Module as shown. Screw Type 4. Remove the Camera cable cluster from the LCD Panel. Step LCD Panel Size M2.5*6 Quantity 2 3. Remove the adhesive strip holding the cables in place. Chapter 3 87 See "Removing the Camera Module" on page 86. 2. Removing the LCD Panel 1.
Acer Aspire 5332 / 5732Z Series Service Guide
Page 98
5. Lift the LCD Panel clear of the module. 88 Chapter 3
Acer Aspire 5332 / 5732Z Series Service Guide
Page 99
Remove the six (6) securing screws (three on page 87. 2. See "Removing the LCD Panel" on each side) from the LCD Panel. Remove the LCD brackets by pulling away from the LCD Panel brackets. Step LCD Brackets Size M2*3 Quantity 6 3. Screw Type Chapter 3 89 Removing the LCD Brackets and FPC Cable 1.
Acer Aspire 5332 / 5732Z Series Service Guide
Page 100
Lift the adhesive protector and disconnect the cable from the panel. 90 Chapter 3 4. Lift the cable as shown to expose the rear. Place the LCD panel face down on a soft clean surface.Turn the LCD panel over to pull free the adhesive strip securing it in place. 6. Lift the FPC cable to disengage the remaining adhesive and remove the cable from the LCD Panel. 5.
Acer Aspire 5332 / 5732Z Series Service Guide
Page 101
Remove the adhesive tape securing the left antenna cable in place. Remove the cable from all cable clips and adhesive strips. 4. Chapter 3 91 Remove the adhesive strips holding the left Antenna to the LCD Module. Ensure that the cable is free from obstructions. 3. Removing the Antennas 1. Ensure the cable is free from the cable channel. See "Removing the LCD Panel" on page 87. 2.
Acer Aspire 5332 / 5732Z Series Service Guide
Page 103
Lift the right Antenna clear of the cover. Chapter 3 93 8. Remove the adhesive tape securing the right Antenna to the LCD Module. 9.