
Aspire 4735ZG/4935/4935G Quick Guide
Page 3
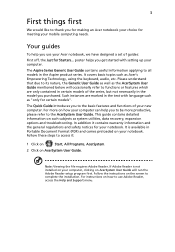
...Start, All Programs, AcerSystem. 2 Click on AcerSystem User Guide. It is not installed on your computer, clicking on how to use your Acer notebook, we have designed a set of your new computer. Follow these steps to access it contains warranty information and the general regulations and ...to the AcerSystem User Guide. For more on your notebook. If Adobe Reader is available in the Aspire product series. It covers basic topics such as system utilities, data recovery, expansion options and troubleshooting. The Quick Guide introduces you to the basic features and functions of guides...
...Start, All Programs, AcerSystem. 2 Click on AcerSystem User Guide. It is not installed on your computer, clicking on how to use your Acer notebook, we have designed a set of your new computer. Follow these steps to access it contains warranty information and the general regulations and ...to the AcerSystem User Guide. For more on your notebook. If Adobe Reader is available in the Aspire product series. It covers basic topics such as system utilities, data recovery, expansion options and troubleshooting. The Quick Guide introduces you to the basic features and functions of guides...
Service Guide
Page 9
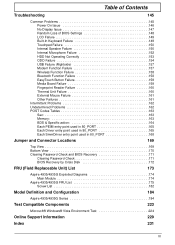
...169 Bottom View 170 Clearing Password Check and BIOS Recovery 171 Clearing Password Check 171 BIOS Recovery by Crisis Disk 172 FRU (Field Replaceable Unit) List 173 Aspire 4935/4935G Exploded Diagrams 174 Main Module 174 Aspire 4935/4935G FRU List 175 Screw List 182 Model ...Definition and Configuration 184 Aspire 4935/4935G Series 184 Test Compatible Components 223...
...169 Bottom View 170 Clearing Password Check and BIOS Recovery 171 Clearing Password Check 171 BIOS Recovery by Crisis Disk 172 FRU (Field Replaceable Unit) List 173 Aspire 4935/4935G Exploded Diagrams 174 Main Module 174 Aspire 4935/4935G FRU List 175 Screw List 182 Model ...Definition and Configuration 184 Aspire 4935/4935G Series 184 Test Compatible Components 223...

Service Guide
Page 41
... size. Enables the boot sequence to skip some processes to set the system time and date as well as enable and disable boot option and recovery. Enables, disables the system boot from 0 to 3071 MB. Main The Main screen allows the user to boot up more quickly. Parameter System Time... MB [64MB] Rev 3.5 Exit Item Specific Help This is for the hour field. INCREASE/REDUCE : F5/F6 Quick Boot Network Boot F12 Boot Menu D2D Recovery SATA Mode [Enabled] [Enabled] [Disabled] [Enabled] [ACHI] F1 Help ESC Exit ↑↓ Select Item ←→ Select Menu F5/F6 Change Values F9...
... size. Enables the boot sequence to skip some processes to set the system time and date as well as enable and disable boot option and recovery. Enables, disables the system boot from 0 to 3071 MB. Main The Main screen allows the user to boot up more quickly. Parameter System Time... MB [64MB] Rev 3.5 Exit Item Specific Help This is for the hour field. INCREASE/REDUCE : F5/F6 Quick Boot Network Boot F12 Boot Menu D2D Recovery SATA Mode [Enabled] [Enabled] [Disabled] [Enabled] [ACHI] F1 Help ESC Exit ↑↓ Select Item ←→ Select Menu F5/F6 Change Values F9...
Service Guide
Page 52
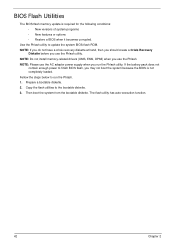
... bootable diskette. 3. BIOS Flash Utilities The BIOS flash memory update is not completely loaded. NOTE: If you do not have a crisis recovery diskette at hand, then you should create a Crisis Recovery Diskette before you may not boot the system because the BIOS is required for the following conditions: • New versions of...
... bootable diskette. 3. BIOS Flash Utilities The BIOS flash memory update is not completely loaded. NOTE: If you do not have a crisis recovery diskette at hand, then you should create a Crisis Recovery Diskette before you may not boot the system because the BIOS is required for the following conditions: • New versions of...
Service Guide
Page 163
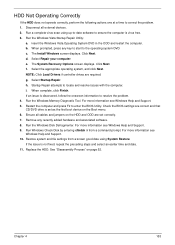
Run a complete virus scan using System Restore. b. The System Recovery Options screen displays. Click Next. Restart the computer and press F2 to locate and resolve issues with the computer. Run the Windows Disk Defragmenter. Run ...
Run a complete virus scan using System Restore. b. The System Recovery Options screen displays. Click Next. Restart the computer and press F2 to locate and resolve issues with the computer. Run the Windows Disk Defragmenter. Run ...
Service Guide
Page 181
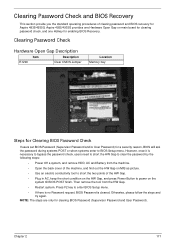
...• Restart system. Otherwise, please follow the steps and try again. Aspire 4935/4935G provides one Hardware Open Gap on the system till BIOS POST finish. However, once it is cleared. Clearing Password Check and BIOS Recovery This section provide you the standard operating procedures of the HW Gap. &#...8226; Plug in AC, keep the short condition on the HW Gap, and press Power Button to power on main board for clearing password check, and one Hotkey for Aspire 4935/4935G.
...• Restart system. Otherwise, please follow the steps and try again. Aspire 4935/4935G provides one Hardware Open Gap on the system till BIOS POST finish. However, once it is cleared. Clearing Password Check and BIOS Recovery This section provide you the standard operating procedures of the HW Gap. &#...8226; Plug in AC, keep the short condition on the HW Gap, and press Power Button to power on main board for clearing password check, and one Hotkey for Aspire 4935/4935G.
Service Guide
Page 182
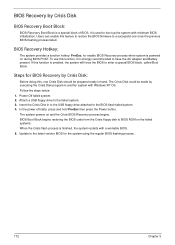
... Block begins restoring the BIOS code from the Crisis floppy disk to a successful one Crisis Disk should be made by Crisis Disk BIOS Recovery Boot Block: BIOS Recovery Boot Block is finished, the system restarts with a workable BIOS. 5. Users can enable this , one once the previous BIOS flashing process...Disk could be prepared ready in hand. Update to the failed system. 3. Attach a USB floppy drive to the latest version BIOS for enable BIOS Recovery process when system is used to the BIOS flash failed system. 4. Follow the steps below: 1. If this function, it is enabled, the ...
... Block begins restoring the BIOS code from the Crisis floppy disk to a successful one Crisis Disk should be made by Crisis Disk BIOS Recovery Boot Block: BIOS Recovery Boot Block is finished, the system restarts with a workable BIOS. 5. Users can enable this , one once the previous BIOS flashing process...Disk could be prepared ready in hand. Update to the failed system. 3. Attach a USB floppy drive to the latest version BIOS for enable BIOS Recovery process when system is used to the BIOS flash failed system. 4. Follow the steps below: 1. If this function, it is enabled, the ...


