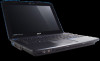
Aspire 2930 / 2930Z / 2430 Service Guide
Page 8
... 95 Removing the LCD Antenna 96 Removing the LCD MIC 97 LCD Module Reassembly Procedure 98 Replacing the LCD Panel 98 Replacing the LCD Bezel 102 Main Module Reassembly Procedure 104 Replacing the CPU 104 Replacing the Thermal Module 104 Replacing the RJ-11 Jack 105 Replacing the Mainboard 106 Replacing the Modem Module 108 Replacing the Bluetooth Board 108 Replacing the I/O Board 109...
Aspire 2930 / 2930Z / 2430 Service Guide
Page 9
Table of Contents Replacing the Express and SD Card Trays 123 Troubleshooting 125 Common Problems 125 Power On Issue 126 No Display Issue 127 Random Loss of BIOS Settings 128 LCD Failure 129 Built-In Keyboard Failure 129 Touch Pad Failure 130 Internal Speaker Failure 130... 149 BIOS Recovery by Crisis Disk 150 FRU (Field Replaceable Unit) List 151 Aspire 2930 Exploded Diagrams 152 Upper/ Lower Cover 152 LCD Panel 153 Aspire 2930 FRU List 154 Screw List 162 Model Definition and Configuration 164 Aspire 2930 Series 164 Test Compatible Components 229 Microsoft® ...
Aspire 2930 / 2930Z / 2430 Service Guide
Page 108
Insert the MIC cable along the mylar tabs as shown. 2. Replace the tabs over the mylar cover. 4. Replace both Antennas. 5. LCD Module Reassembly Procedure Replacing the LCD Panel 1. Replace the padding over the cable to secure in place. 3. Replace the mylar strip on both Antennas, take note of screw socket facing upwards. 98 Chapter 3
Aspire 2930 / 2930Z / 2430 Service Guide
Page 109
Chapter 3 99 Secure the top of the brackets in place and pivot the brackets towards the LCD Panel as shown. 8. Replace the four securing screws (two on each side) from the LCD Panel brackets. Replace the eleven (11) adhesive strips to secure the Antenna cables. 7. 6.
Aspire 2930 / 2930Z / 2430 Service Guide
Page 110
IMPORTANT:Ensure all cabling is tucked correctly in place. Replace the two (2) securing screws on the hinge. 100 Chapter 3 Connect the LCD cable to the panel. 10. Replace the cable and press down in the back cover. 12. 9. Insert the top of LCD Panel first and tilt down attach the adhesive strips. 11. IMPORTANT:The correct screw sockets are indicated by the mark on the LCD Module.
Aspire 2930 / 2930Z / 2430 Service Guide
Page 112
Insert the right side and lower Module in place. Replace the adhesive strip to prevent damage. NOTE: Ensure all cabling is tucked in under the adhesive strip to secure the cabling in place. 19. 18. Replacing the LCD Bezel 1. Replace the single securing screw. 20. Turn the bezel end up and insert the MIC into the underside of the Bezel as shown. 102 Chapter 3
Aspire 2930 / 2930Z / 2430 Service Guide
Page 124
Turn over the computer and replace the eight securing screws on the bottom panel. Replacing the LCD Module 1. 6. Align the LCD Module hinges with the alignment pins and gently set down. 2. Connect the two cables as shown. 114 Chapter 3
Aspire 2930 / 2930Z / 2430 Service Guide
Page 137
... power by checking at least one until the failure point is still not resolved, see "Power On Issue" on page 235. Remove the drives (see "LCD Failure" on this notebook model, switching between the internal display and the external display is done by one of the following occurs: • Fans start... up • Status LEDs light up If there is selected. Do not replace a non-defective FRUs: No POST or Video If the POST or video doesn't display, perform the following actions one at a time to correct the problem...
Aspire 2930 / 2930Z / 2430 Service Guide
Page 138
...installed. d. Abnormal Video Display If video displays abnormally, perform the following actions one at the highest brightness setting, the LCD is faulty and should be replaced. Click Apply and check the display. Roll back the video driver to correct the problem. 1. There are no red... and reconnect the power and data cables between devices. See the User Manual for instructions on the screen), the LCD is faulty and should be replaced. 5. Random Loss of BIOS Settings If the computer is experiencing intermittent loss of BIOS information, perform the following actions...
Aspire 2930 / 2930Z / 2430 Service Guide
Page 139
LCD Failure If the LCD fails, perform the following actions one at a time to correct the problem. Do not replace a non-defective FRUs: Chapter 4 129 Do not replace a nondefective FRUs: Built-In Keyboard Failure If the built-in Keyboard fails, perform the following actions one at a time to correct the problem.
Aspire 2930 / 2930Z / 2430 Service Guide
Page 152
... problems does not identify which adapter or device failed, which installed devices are found, replace the FRU. 3. Power-off the computer. 2. Power-on page 126.): 1. Do not replace a non-defective FRU: • System board • LCD assembly 142 Chapter 4 If any FRU. 3. Rerun the test to verify that all... be caused by the computer. NOTE: Verify that have nothing to isolate the failing FRU (do the following devices: • Non-Acer devices • Printer, mouse, and other external devices • Battery pack • Hard disk drive • DIMM • CD-ROM/Diskette drive...