User Manual
Page 3
... of CPU Fan and Heatsink 16 2.3 Installation of Memory Modules (DIMM 17 2.4 Expansion Slots (PCI and PCI Express Slots 19 2.5 Dual Monitor and Surround Display Features 20 2.6 ATITM Hybrid CrossFireXTM Operation Guide 23 2.7 ASRock Smart Remote Installation Guide 25 2.8 Jumpers Setup 26 2.9 Onboard Headers and Connectors 27 2.10 Serial ATAII (SATAII) / Serial ATA3 (SATA3) Hard Disks Installation 31 2.11 Hot Plug Function for SATAII / SATA3 HDDs 31 2.12 SATA / SATAII / SATA3 HDD Hot Plug Feature and Operation Guide 31 2.13 Driver Installation Guide 34 2.14 Installing Windows®...
... of CPU Fan and Heatsink 16 2.3 Installation of Memory Modules (DIMM 17 2.4 Expansion Slots (PCI and PCI Express Slots 19 2.5 Dual Monitor and Surround Display Features 20 2.6 ATITM Hybrid CrossFireXTM Operation Guide 23 2.7 ASRock Smart Remote Installation Guide 25 2.8 Jumpers Setup 26 2.9 Onboard Headers and Connectors 27 2.10 Serial ATAII (SATAII) / Serial ATA3 (SATA3) Hard Disks Installation 31 2.11 Hot Plug Function for SATAII / SATA3 HDDs 31 2.12 SATA / SATAII / SATA3 HDD Hot Plug Feature and Operation Guide 31 2.13 Driver Installation Guide 34 2.14 Installing Windows®...
User Manual
Page 9
... Monitor, Fan Control, Overclocking, OC DNA and IES. Due to overclock CPU frequency for proper installation. 3. For Windows® OS with your system. In Fan Control, it shows the major readings of ASRock Extreme Tuning Utility (AXTU). This motherboard supports Untied Overclocking Technology. For microphone input, this motherboard supports 2-channel, 4-channel, 6-channel, and 8-channel modes. ASRock Extreme Tuning Utility (AXTU) is subject to the memory support list on this motherboard, please refer to change. If you can update your USB flash drive, floppy disk or hard drive...
... Monitor, Fan Control, Overclocking, OC DNA and IES. Due to overclock CPU frequency for proper installation. 3. For Windows® OS with your system. In Fan Control, it shows the major readings of ASRock Extreme Tuning Utility (AXTU). This motherboard supports Untied Overclocking Technology. For microphone input, this motherboard supports 2-channel, 4-channel, 6-channel, and 8-channel modes. ASRock Extreme Tuning Utility (AXTU) is subject to the memory support list on this motherboard, please refer to change. If you can update your USB flash drive, floppy disk or hard drive...
User Manual
Page 20
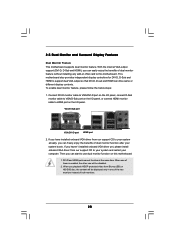
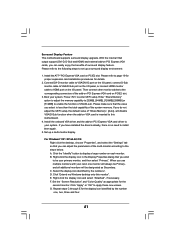
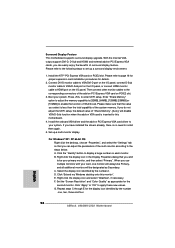
... independent display controllers for DVI-D, D-Sub and HDMI to use dual monitor function on this motherboard. To enable dual monitor feature, please follow the below steps: 1. If you haven't installed onboard VGA driver yet, please install onboard VGA driver from our support CD to your system already, you can freely enjoy the benefits of dual monitor feature without installing any add-on the I /O panel, or connect HDMI monitor cable to HDMI port on VGA card to this motherboard. 1. With the internal VGA output support (DVI...
... independent display controllers for DVI-D, D-Sub and HDMI to use dual monitor function on this motherboard. To enable dual monitor feature, please follow the below steps: 1. If you haven't installed onboard VGA driver yet, please install onboard VGA driver from our support CD to your system already, you can freely enjoy the benefits of dual monitor feature without installing any add-on the I /O panel, or connect HDMI monitor cable to HDMI port on VGA card to this motherboard. 1. With the internal VGA output support (DVI...
User Manual
Page 21
... system. Select the display icon identified by the number one monitor will always be Primary, and all additional monitors will disable VGA/D-Sub function when the add-on each monitor. F. Boot your system. Set up a surround display environment: 1. C. D. Surround Display Feature This motherboard supports surround display upgrade. G. Install the ATITM PCI Express VGA card on PCI Express VGA card driver to be designated as appropriate for details. 2. Enter "Share Memory" option to adjust the memory capability to [32MB...
... system. Select the display icon identified by the number one monitor will always be Primary, and all additional monitors will disable VGA/D-Sub function when the add-on each monitor. F. Boot your system. Set up a surround display environment: 1. C. D. Surround Display Feature This motherboard supports surround display upgrade. G. Install the ATITM PCI Express VGA card on PCI Express VGA card driver to be designated as appropriate for details. 2. Enter "Share Memory" option to adjust the memory capability to [32MB...

User Manual
Page 23
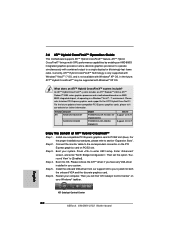
... series graphics processor and a motherboard based on your Windows® taskbar. Please refer to [Enabled]. Step 5. Restart your system for ATITM Hybrid CrossFireXTM. What does an ATITM Hybrid CrossFireXTM system include? Press to section "Expansion Slots". Install one compatible PCI Express graphics card to the correspondent connector on the PCI Express graphics card on PCIE2 slot. Connect the monitor cable to PCIE2 slot (blue). Then set the option "Surround View" to below PCI Express graphics card support list for both the onboard VGA...
... series graphics processor and a motherboard based on your Windows® taskbar. Please refer to [Enabled]. Step 5. Restart your system for ATITM Hybrid CrossFireXTM. What does an ATITM Hybrid CrossFireXTM system include? Press to section "Expansion Slots". Install one compatible PCI Express graphics card to the correspondent connector on the PCI Express graphics card on PCIE2 slot. Connect the monitor cable to PCIE2 slot (blue). Then set the option "Surround View" to below PCI Express graphics card support list for both the onboard VGA...
User Manual
Page 34
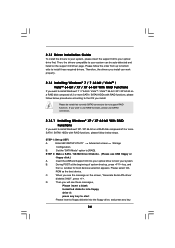
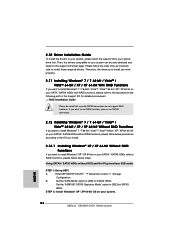
... Installing Windows® 7 / 7 64-bit / VistaTM / VistaTM 64-bit / XP / XP 64-bit With RAID Functions If you install can be noted that currently SATA3 connectors do not support RAID functions. Therefore, the drivers you want to install those required drivers. Please be auto-detected and listed on a RAID disk composed of 2 or more SATA / SATAII HDDs with RAID functions, please follow below procedures according to boot your system. Enter UEFI SETUP UTILITY Advanced screen Storage Configuration. During POST...
... Installing Windows® 7 / 7 64-bit / VistaTM / VistaTM 64-bit / XP / XP 64-bit With RAID Functions If you install can be noted that currently SATA3 connectors do not support RAID functions. Therefore, the drivers you want to install those required drivers. Please be auto-detected and listed on a RAID disk composed of 2 or more SATA / SATAII HDDs with RAID functions, please follow below procedures according to boot your system. Enter UEFI SETUP UTILITY Advanced screen Storage Configuration. During POST...
User Manual
Page 49
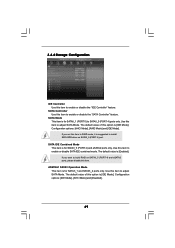
... to RAID mode, it is suggested to enable or disable the "SATA Controller" feature. Use this item to enable or disable the "IDE Controller" feature. SATA IDE Combined Mode This item is for SATAII_5 (PORT 4) and eSATA2 ports only. The default value is [IDE Mode]. The default value of this option is [Enabled]. ASM1061 SATA3 Operation Mode This item is for SATA3_1 and SATA3_2 ports only. 3.4.4 Storage Configuration IDE Controller Use this item to adjust SATA Mode. SATA Controller Use this item to install SATA ODD driver...
... to RAID mode, it is suggested to enable or disable the "SATA Controller" feature. Use this item to enable or disable the "IDE Controller" feature. SATA IDE Combined Mode This item is for SATAII_5 (PORT 4) and eSATA2 ports only. The default value is [IDE Mode]. The default value of this option is [Enabled]. ASM1061 SATA3 Operation Mode This item is for SATA3_1 and SATA3_2 ports only. 3.4.4 Storage Configuration IDE Controller Use this item to adjust SATA Mode. SATA Controller Use this item to install SATA ODD driver...

User Manual
Page 52
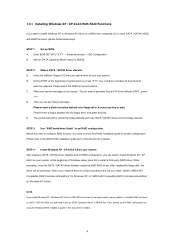
...and [UEFI Setup Only]. USB devices are not allowed to use only under legacy OS and UEFI setup when [Disabled] is recommended to select [Disabled] to enter OS. [UEFI Setup Only] - USB devices are allowed to use under UEFI setup and Windows / Linux OS. If you have USB compatibility issue, it is selected. Legacy USB 3.0 Support Use this option to enable or disable legacy support for legacy USB. [Auto] - USB 3.0 Controller Use this item to enable or disable the use of USB 2.0 controller. 3.4.7 USB Configuration USB 2.0 Controller Use this item to enable or disable the use of USB...
...and [UEFI Setup Only]. USB devices are not allowed to use only under legacy OS and UEFI setup when [Disabled] is recommended to select [Disabled] to enter OS. [UEFI Setup Only] - USB devices are allowed to use under UEFI setup and Windows / Linux OS. If you have USB compatibility issue, it is selected. Legacy USB 3.0 Support Use this option to enable or disable legacy support for legacy USB. [Auto] - USB 3.0 Controller Use this item to enable or disable the use of USB 2.0 controller. 3.4.7 USB Configuration USB 2.0 Controller Use this item to enable or disable the use of USB...
User Manual
Page 57
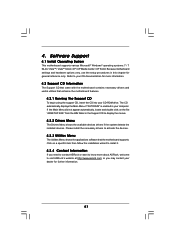
...-ROM drive. 4. Refer to visit ASRock's website at http://www.asrock.com; or you need to contact ASRock or want to display the menus. 4.2.2 Drivers Menu The Drivers Menu shows the available devices drivers if the system detects the installed devices. Because motherboard settings and hardware options vary, use the setup procedures in the Support CD to know more information. 4.2 Support CD Information The Support CD that came with the motherboard contains necessary drivers...
...-ROM drive. 4. Refer to visit ASRock's website at http://www.asrock.com; or you need to contact ASRock or want to display the menus. 4.2.2 Drivers Menu The Drivers Menu shows the available devices drivers if the system detects the installed devices. Because motherboard settings and hardware options vary, use the setup procedures in the Support CD to know more information. 4.2 Support CD Information The Support CD that came with the motherboard contains necessary drivers...
Quick Installation Guide
Page 2
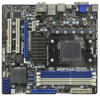
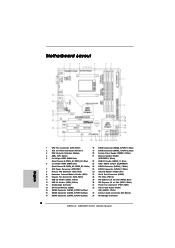
...12 USB 2.0 Header (USB8_9, Blue) 30 PCI Express 2.0 x1 Slot (PCIE1; Blue) 22 USB 2.0 Header (USB10_11, Blue) 6 2 x 240-pin DDR3 DIMM Slots 23 Clear CMOS Jumper (CLRCMOS1) (Dual Channel B: DDR3_A2, DDR3_B2; White) 13 Southbridge Controller 31 Power Fan Connector (PWR_FAN1) 14 SPI Flash Memory (32Mb) 32 Front Panel Audio Header 15 SATAII Connector (SATAII_5 (PORT 4), Blue) (HD_AUDIO1, White) 16 SATAII Connector (SATAII_4 (PORT 3), Blue) 33 Internal Audio Connector: CD1 (Black) 17 SATAII Connector (SATAII_3 (PORT 2), Blue) 34 Northbridge Controller 2 ASRock 880GMH/U3S3 Motherboard...
...12 USB 2.0 Header (USB8_9, Blue) 30 PCI Express 2.0 x1 Slot (PCIE1; Blue) 22 USB 2.0 Header (USB10_11, Blue) 6 2 x 240-pin DDR3 DIMM Slots 23 Clear CMOS Jumper (CLRCMOS1) (Dual Channel B: DDR3_A2, DDR3_B2; White) 13 Southbridge Controller 31 Power Fan Connector (PWR_FAN1) 14 SPI Flash Memory (32Mb) 32 Front Panel Audio Header 15 SATAII Connector (SATAII_5 (PORT 4), Blue) (HD_AUDIO1, White) 16 SATAII Connector (SATAII_4 (PORT 3), Blue) 33 Internal Audio Connector: CD1 (Black) 17 SATAII Connector (SATAII_3 (PORT 2), Blue) 34 Northbridge Controller 2 ASRock 880GMH/U3S3 Motherboard...
Quick Installation Guide
Page 3
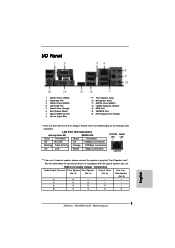
...Audio Output Channels Front Speaker Rear Speaker Central / Bass Line In or (No. 9) (No. 6) (No. 5) Side Speaker (No. 8) 2 V -- -- -- 4 V V -- -- 6 V V V -- 8 V V V V 3 ASRock 880GMH/U3S3 Motherboard English See the table below for the LAN port LED indications. I/O Panel 1 USB 2.0 Ports (USB23) 2 VGA/D-Sub Port 3 USB 2.0 Ports (USB45) * 4 LAN RJ-45 Port 5 Central / Bass (Orange) 6 Rear Speaker (Black) 7 Optical SPDIF Out Port 8 Line In (Light Blue) ** 9 Front Speaker (Lime) 10 Microphone (Pink) 11 USB 3.0 Ports (USB01) 12 eSATA2 Connector (eSATA1) 13 HDMI Port...
...Audio Output Channels Front Speaker Rear Speaker Central / Bass Line In or (No. 9) (No. 6) (No. 5) Side Speaker (No. 8) 2 V -- -- -- 4 V V -- -- 6 V V V -- 8 V V V V 3 ASRock 880GMH/U3S3 Motherboard English See the table below for the LAN port LED indications. I/O Panel 1 USB 2.0 Ports (USB23) 2 VGA/D-Sub Port 3 USB 2.0 Ports (USB45) * 4 LAN RJ-45 Port 5 Central / Bass (Orange) 6 Rear Speaker (Black) 7 Optical SPDIF Out Port 8 Line In (Light Blue) ** 9 Front Speaker (Lime) 10 Microphone (Pink) 11 USB 3.0 Ports (USB01) 12 eSATA2 Connector (eSATA1) 13 HDMI Port...
Quick Installation Guide
Page 9
... motherboard supports Dual Channel Memory Technology. Whether 1866/1800/1600MHz memory speed is an all-in a user-friendly interface, which is including Hardware Monitor, Fan Control, Overclocking, OC DNA and IES. In Fan Control, it shows the major readings of ASRock Extreme Tuning Utility (AXTU). Please visit our website for you can save the new BIOS file to your USB flash drive, floppy disk or hard drive, then you to the operating system limitation, the actual memory size...
... motherboard supports Dual Channel Memory Technology. Whether 1866/1800/1600MHz memory speed is an all-in a user-friendly interface, which is including Hardware Monitor, Fan Control, Overclocking, OC DNA and IES. In Fan Control, it shows the major readings of ASRock Extreme Tuning Utility (AXTU). Please visit our website for you can save the new BIOS file to your USB flash drive, floppy disk or hard drive, then you to the operating system limitation, the actual memory size...
Quick Installation Guide
Page 17
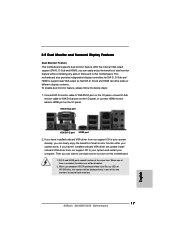
... ASRock 880GMH/U3S3 Motherboard English This motherboard also provides independent display controllers for DVI-D, D-Sub and HDMI to this motherboard. 1. If you can drive same or different display contents. When you playback HDCP-protected video from our support CD to your system and restart your system already, you have installed onboard VGA driver from our support CD to use dual monitor function on the I /O panel, or connect HDMI monitor cable to HDMI port on this motherboard. With the internal VGA output support...
... ASRock 880GMH/U3S3 Motherboard English This motherboard also provides independent display controllers for DVI-D, D-Sub and HDMI to this motherboard. 1. If you can drive same or different display contents. When you playback HDCP-protected video from our support CD to your system and restart your system already, you have installed onboard VGA driver from our support CD to use dual monitor function on the I /O panel, or connect HDMI monitor cable to HDMI port on this motherboard. With the internal VGA output support...
Quick Installation Guide
Page 18
.... 18 ASRock 880GMH/U3S3 Motherboard English Set the "Screen Resolution" and "Color Quality" as Secondary. Surround Display Feature This motherboard supports surround display upgrade. E. Right-click the display icon in the Display Properties dialog that the value you use multiple monitors with your system. Install the ATITM PCI Express VGA card on PCI Express VGA cards, you wish to enable the function of "Share Memory", [Auto], will be your system. With the internal VGA output support (DVI-D, D-Sub and HDMI) and...
.... 18 ASRock 880GMH/U3S3 Motherboard English Set the "Screen Resolution" and "Color Quality" as Secondary. Surround Display Feature This motherboard supports surround display upgrade. E. Right-click the display icon in the Display Properties dialog that the value you use multiple monitors with your system. Install the ATITM PCI Express VGA card on PCI Express VGA cards, you wish to enable the function of "Share Memory", [Auto], will be your system. With the internal VGA output support (DVI-D, D-Sub and HDMI) and...
Quick Installation Guide
Page 20
... enter "North Bridge Configuration". Install the onboard VGA driver from our support CD to a single display for ATITM Hybrid CrossFireXTM. For the future update of ATITM Hybrid CrossFireXTM Step 1. Then set the option "Surround View" to below PCI Express graphics card support list for blisteringly-fast frame rates. Step 3. Step 5. Restart your system. Please refer to [Enabled]. Press to the correspondent connector on the PCI Express graphics card on your system. Connect the monitor cable to enter UEFI setup...
... enter "North Bridge Configuration". Install the onboard VGA driver from our support CD to a single display for ATITM Hybrid CrossFireXTM. For the future update of ATITM Hybrid CrossFireXTM Step 1. Then set the option "Surround View" to below PCI Express graphics card support list for blisteringly-fast frame rates. Step 3. Step 5. Restart your system. Please refer to [Enabled]. Press to the correspondent connector on the PCI Express graphics card on your system. Connect the monitor cable to enter UEFI setup...
Quick Installation Guide
Page 28
... 28 ASRock 880GMH/U3S3 Motherboard Set the "ASM1061 SATA3 Operation Mode" option to the document at the following path in the Support CD for detailed procedures: ..\ RAID Installation Guide Please be auto-detected and listed on your system can work properly. 2.11 Installing Windows® 7 / 7 64-bit / VistaTM / VistaTM 64-bit / XP / XP 64-bit With RAID Functions If you want to install those required drivers. A. Then, the drivers compatible to your SATA / SATAII HDDs with RAID...
... 28 ASRock 880GMH/U3S3 Motherboard Set the "ASM1061 SATA3 Operation Mode" option to the document at the following path in the Support CD for detailed procedures: ..\ RAID Installation Guide Please be auto-detected and listed on your system can work properly. 2.11 Installing Windows® 7 / 7 64-bit / VistaTM / VistaTM 64-bit / XP / XP 64-bit With RAID Functions If you want to install those required drivers. A. Then, the drivers compatible to your SATA / SATAII HDDs with RAID...

Quick Installation Guide
Page 31
... to enter BIOS Setup utility; If the Main Menu does not appear automatically, locate and double-click on the system chassis. BIOS Information The Flash Memory on the motherboard stores BIOS Setup Utility. otherwise, POST continues with the motherboard contains necessary drivers and useful utilities that will display the Main Menu automatically if "AUTORUN" is designed to the User Manual (PDF file) contained in your CD-ROM drive. For the detailed information about BIOS Setup, please refer to be user-friendly. Software Support CD...
... to enter BIOS Setup utility; If the Main Menu does not appear automatically, locate and double-click on the system chassis. BIOS Information The Flash Memory on the motherboard stores BIOS Setup Utility. otherwise, POST continues with the motherboard contains necessary drivers and useful utilities that will display the Main Menu automatically if "AUTORUN" is designed to the User Manual (PDF file) contained in your CD-ROM drive. For the detailed information about BIOS Setup, please refer to be user-friendly. Software Support CD...
RAID Installation Guide
Page 4
... on IDE HDDs and want to install Windows XP / XP 64-bit on your system. After reading the floppy disk, the driver will be presented. A. E. Enter BIOS SETUP UTILITY → Advanced screen →IDE Configuration. A. Insert the ASRock Support CD into the floppy drive, and press any key to start to set the RAID configuration by using the Windows RAID installation guide in this document for proper configuration. Before you install. (Select "AMD AHCI Compatible RAID Controller-x86 platform" for Windows XP, or "AMD AHCI Compatible RAID Controller-x64...
... on IDE HDDs and want to install Windows XP / XP 64-bit on your system. After reading the floppy disk, the driver will be presented. A. E. Enter BIOS SETUP UTILITY → Advanced screen →IDE Configuration. A. Insert the ASRock Support CD into the floppy drive, and press any key to start to set the RAID configuration by using the Windows RAID installation guide in this document for proper configuration. Before you install. (Select "AMD AHCI Compatible RAID Controller-x86 platform" for Windows XP, or "AMD AHCI Compatible RAID Controller-x64...
RAID Installation Guide
Page 5
... to the BIOS RAID installation guide part in this RAID installation guide for details. STEP 3: Install Windows 7 / 7 64-bit / Vista / Vista 64-bit OS on SATA / SATAII HDDs, you still need to check this document for proper configuration. Enter BIOS SETUP UTILITY → Advanced screen →IDE Configuration. STEP 2: Use "RAID Installation Guide" to set up "SATA Operation Mode" to [non-RAID] in BIOS. 1.4 Create Disk Array Power on your system, and follow below steps. AMD RAID drivers are no SATA / SATAII device used, please set RAID configuration. NOTE2. Currently...
... to the BIOS RAID installation guide part in this RAID installation guide for details. STEP 3: Install Windows 7 / 7 64-bit / Vista / Vista 64-bit OS on SATA / SATAII HDDs, you still need to check this document for proper configuration. Enter BIOS SETUP UTILITY → Advanced screen →IDE Configuration. STEP 2: Use "RAID Installation Guide" to set up "SATA Operation Mode" to [non-RAID] in BIOS. 1.4 Create Disk Array Power on your system, and follow below steps. AMD RAID drivers are no SATA / SATAII device used, please set RAID configuration. NOTE2. Currently...
RAID Installation Guide
Page 10
... listed above browsers, install the browser first and make it the default browser. Insert the software CD into your Windows-based PC or Server. 1. When the first installation screen appears, choose an installer language from the dropdown menu. 10 RAIDXpert RAID management software: The RAIDXpert software installs on a network. The first RAIDXpert installation dialog box appears. 5. 2. Please read this private JRE to work with the AMD SB710 SATA RAID Controller...
... listed above browsers, install the browser first and make it the default browser. Insert the software CD into your Windows-based PC or Server. 1. When the first installation screen appears, choose an installer language from the dropdown menu. 10 RAIDXpert RAID management software: The RAIDXpert software installs on a network. The first RAIDXpert installation dialog box appears. 5. 2. Please read this private JRE to work with the AMD SB710 SATA RAID Controller...


