Vivitar DVR 790HD Support Question
Vivitar DVR 790HD Support Question
Find answers below for this question about Vivitar DVR 790HD.Need a Vivitar DVR 790HD manual? We have 2 online manuals for this item!
Question posted by kidney4rent on December 6th, 2013
Power
every time i plug the camcorder in to charge the screen comes on and wont turn off. also, the charge light doesn't come on
Current Answers
Answer #1: Posted by cursed on December 6th, 2013 8:38 PM
cursed

Member since:
November 27th, 2013 Points: 320,075

Member since:
November 27th, 2013 Points: 320,075
Hi,
Please refer to the manual mentioned beloW:
http://www.vivitar.com/files_products/595/DVR_790HD_Camera_Manual.pdf
Take Care
bye
Related Vivitar DVR 790HD Manual Pages
Camera Manual - Page 1

Windows and the Windows logo are the property of Microsoft Corporation.
All other trademarks are registered trademarks of their respective companies. DVR 790HD 3D Digital Camcorder
User Manual
© 2009-2011 Sakar International, Inc. All rights reserved.
Camera Manual - Page 2

Table of Contents
Introduction ...2 What‟s Included...2 Parts of the Camera ...3 Initial Camera Setup...4 Main Camera Modes ...8 Camera Technical Specifications 9 Computer System Requirements 10 Powering the Camera On/Off ...11 Changing Camcorder Mode ...12 Navigating the Menus...13 Video Capture Mode ...14 Video Playback Mode...28 Photo Capture Mode ...33 Photo Playback Mode ...49 ...
Camera Manual - Page 7

... control buttons. Turning On the Camera
Using the Camera
When powering the camera on the camera. Setting the Camera Language 1) You will first be prompted to select a language for the FIRST time the camera will appear. The Language selection
menu will take you through the INITIAL CAMERA SETUP.
Powering the Camera ON
1) Battery Make sure the battery is fully charged.
2) SD Card...
Camera Manual - Page 8

... to choose the default ViviLink social network for photos and videos taken with the accompanying software application. 1) First you to quickly and easily upload your camera.
The ViviLink technology allows you will be adjusted at any time manually through the menus in the initial camera setup is now ready to choose the default ViviLink...
Camera Manual - Page 9

....
To stop the record, press the Shutter button again. After turning on the LCD screen while record is powered ON. This is the default mode when the camera is in progress. The video will appear on your camera, press the MODE button twice to your digital camcorder. To access the various menus for the Photo Capture mode...
Camera Manual - Page 10

Camera Technical Specifications
Image Sensor
Image Resolution
Video Resolution File Format Internal Memory External Memory LCD Display Lens Zoom Exposure White Balance ISO
Scene
LED Flash Self-Timer Anti-Shake Face Detect Microphone Speaker Auto Power Off
Languages
Interface
System Requirements
Battery Working Temperature
CMOS Sensor 2592 x1944 (5M) / 2048 x 1536 (3.1M) / 1920 x 1080...
Camera Manual - Page 12

... camcorder. The Auto Power Off settings can press the Power button again at any time to turn your camera OFF. A "Goodbye" screen appears and then the camera will automatically turn your camera ON. After powering on, the camera emits a sound and the LED light turns on briefly. The LCD screen turns on , you can be set from the Auto Power Off settings menu (in Video...
Camera Manual - Page 13

... the top-left corner of the LCD display
12 Use this mode to capture photos with your camera. When the camera is powered ON and press the MODE button.
Changing Camcorder Mode
Your camcorder has three main modes: 1) Video Capture Mode - Use this icon will display on the top-left corner of the LCD display...
Camera Manual - Page 15

... the LCD screen. Put on the top left side of the camera to START the video capture.
4) You will appear on your video.
14 Note: The actual shape of the LCD indicating that the 3D Video Capture Mode is in 3D as you capture your videos in Video Capture Mode. You can magnify your digital camcorder. The 3D...
Camera Manual - Page 16

... Menus, use the UP/DOWN/LEFT/RIGHT direction control buttons. Toggles between 3D and 2D image capture
Delete - Turns the LED light on the screen.
15 Video Capture Mode Quick Function Buttons Your digital camcorder has a four-directional joystick button that functions as previously captured images ViviLink - Up Down Right
3D Option - Toggles between...
Camera Manual - Page 20

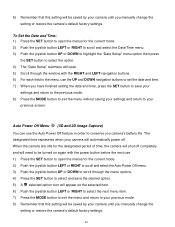
...Image Capture only) The White Balance feature allows your camera to adjust the coloring of light source in the images that are taken with your camera. 1) Press the SET button to open the ...selection will display on the LCD screen. 9) Remember that this setting will be saved by your camera until you manually change the
setting or restore the camera‟s default factory settings.
19 ...
Camera Manual - Page 25
... mode. 8) Press the MODE button to exit the menu without saving your settings and return to your
previous screen. The designated time represents when your camera will automatically power off completely and will need to be turned on again with the RIGHT and LEFT navigation buttons. 6) For each field in order to conserve you have...
Camera Manual - Page 28

... SET button to proceed with the digital camcorder settings set to the Factory Default Settings.
Note: After RESETTING to the default settings, it is powered on, you do not, the next time your camera is recommended to select your system Language, Date/Time and ViviLink for Photos and Videos. You will then automatically exit the menu...
Camera Manual - Page 30

.../AVI in the Thumbnail View: press the SET button Opens the menu options for Video Playback Mode Saves your selected menu option
Note: To navigate through the Menus, use the... UP/DOWN/LEFT/RIGHT direction control buttons.
29 Video Playback Mode Quick Function Buttons Your digital camcorder has a four-directional pad that functions as Quick Function buttons. wish ...
Camera Manual - Page 32

... ViviLink destination will only
be assigned to a photo or video if you to quickly and easily upload your camera‟s photos and videos to the social networks of your choice with the ViviLink Quick...the ViviLink menu in Capture mode). 9) Changing the ViviLink destination site will be selected at any time through the menu options. 4) Press the SET button to select and save the desired option....
Camera Manual - Page 34

... appears on the LCD screen in 3 dimension, push the joystick control button UP.
This indicates that the 3D Photo Capture Mode is first powered ON, the camera will automatically be in /out if desired.
Photo Capture Mode
When the digital camcorder is ready. Press the Mode button once to zoom in Video Capture Mode by...
Camera Manual - Page 41

...only) The White Balance feature allows your camera to adjust the coloring of the captured images depending on the type of light source in the images that are taken with your camera. 1) Press the SET button to open...option. 5) A selected option icon will appear on the LCD screen 9) Remember that this setting will be saved by your camera until you manually change the
setting or restore the...
Camera Manual - Page 47

Auto Power Off Menu (3D and 2D Image Capture) You can use . 1) Press the SET button to open the menus for the designated period of the electrical current in fluorescent lighting sources... power off completely and will need to be powered on again with the power button before the next use the Auto Power Off feature in your camera. 50Hz -
The designated time represents when your camera will...
Camera Manual - Page 49

...) Use this menu to view the Firmware version on your camera or to reset your camera settings to the Factory Default Settings. 1) Press the SET button to open the menus for Photos and Videos. If you do not, the next time your system Language, Date/Time and ViviLink for the current mode. 2) Push the joystick...
Camera Manual - Page 59

.... 13) On Macintosh: Click the "Quit" button when the installation is complete. Connecting the Camcorder to the Computer
1) Use the USB cable that came with your camcorder to connect your camcorder to your computer.
2) Power the camera ON. 3) The first time you connect the device to the computer you can run the Vivitar Experience Image Manager...
Similar Questions

The Vivitar Dvr 990hd Batterry Life After Charge
the Vivitar DVR 990HD batterry life after charge
the Vivitar DVR 990HD batterry life after charge
(Posted by centralpraise647 6 years ago)

Vivitar Dvr787-pnk-kit-wm Action Digital Video Recorder, Pink Video Camera With
Vivitar's DVR 787 HD comes on when plugged in and says it has full power but cuts off when you unplu...
Vivitar's DVR 787 HD comes on when plugged in and says it has full power but cuts off when you unplu...
(Posted by jjknott82 8 years ago)

785hd Vivitar Action Camera: Charge Light Flashes, But Not Charging
I've tried charging this through the usb cable and it doesnt accept a charge. When I hit the power b...
I've tried charging this through the usb cable and it doesnt accept a charge. When I hit the power b...
(Posted by andrewdavies 9 years ago)
Not Powering Up
I have the vivitar 810 HD and we changed batteries and when trying to power up it shows red light bu...
I have the vivitar 810 HD and we changed batteries and when trying to power up it shows red light bu...
(Posted by shericoons 9 years ago)

What Would Cause It To Not Power On If Only Used A Few Times
i have a vivitar dvr 925hd i have only used it a couple of times and its been in its box for about a...
i have a vivitar dvr 925hd i have only used it a couple of times and its been in its box for about a...
(Posted by danniegeorge 11 years ago)