Vivitar DVR 925HD Support Question
Vivitar DVR 925HD Support Question
Find answers below for this question about Vivitar DVR 925HD.Need a Vivitar DVR 925HD manual? We have 2 online manuals for this item!
Question posted by danniegeorge on March 25th, 2013
What Would Cause It To Not Power On If Only Used A Few Times
i have a vivitar dvr 925hd i have only used it a couple of times and its been in its box for about a year but now it isnt powering on when charged
Current Answers
Related Vivitar DVR 925HD Manual Pages
Warranty - Page 1
...purchase, use or inability to use this...time period of this product which result from other extraneous causes such as unauthorised disassembly, repair or modification. Limited One Year Warranty
Vivitar warrants this product even if Vivitar has been advised of such damages. This warranty shall not extend to you.
-1- During the period, Vivitar will repair or replace the product at no charge...
Camera Manual - Page 1

All rights reserved. Windows and the Windows logo are the property of Microsoft Corporation. All other trademarks are registered trademarks of their respective companies. DVR 925HD Digital Video Camera
User Manual
© 2010 Sakar International, Inc.
Camera Manual - Page 2

... Specifications 7 Computer System Requirements - Windows 8 Computer System Requirements - Macintosh 8 Charging the Lithium Battery ...9 Using Your Digital Camera ...9 Changing Camera Mode ...10 Navigating the Menus...11 Photo Capture Mode ...12 Photo Playback Mode ...26 Video Capture Mode ...32 Video Playback Mode...44 Connecting the Camera to the TV and HDTV 46 Installing the Software ...48...
Camera Manual - Page 3

... take quality digital photos and videos is included with your digital camera. TV Cable 5. What Your Camera Includes
1. Note: Your camera needs an SD Memory card (up to get the most out of your camera. Digital Camera 2. Everything you for purchasing this manual carefully first in order to 32GB) for normal use. Vivitar makes capturing those special moments...
Camera Manual - Page 4

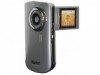
... Screen 14. Speaker 19. Power button 2. MODE button 8. USB Slot 9. Memory Card Slot 16. Zoom Out/ Zoom In /OK/MENU Button 3. TV-Out Slot 10. Battery Compartment 17. Photo Shutter Button 4. Digital Lens 13. Parts of the Camera
1. Right /ViviLink Button 6. Left/LED Light Button 7. Microphone 18. Tripod Socket
3 Video Shutter Button 5. LED...
Camera Manual - Page 6
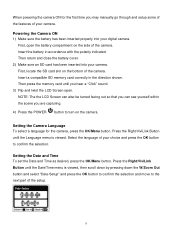
... features of your choice and press the OK button to confirm the selection. Setting the Date and Time To set the Date and Time as desired, press the OK/Menu button.
When powering the camera ON for the camera, press the OK/Menu button. Then press the memory card until the Language menu is viewed...
Camera Manual - Page 7

... Mode Use this mode to capture videos with your camera, press the MODE button once to view, edit or delete them as desired and press the Photo Shutter button.
A red record indicator will be automatically saved to view and manage the photos and videos on your camera. After turning on your camera after the camera has been powered...
Camera Manual - Page 8

Camera Technical Specifications
Image Sensor
Image Resolution
Video Resolution
File Format Internal Memory External Memory LCD ...pixels, (2M HD) 1920x1080 pixels and (VGA) 640x480 pixels 1280x720 (25fps), 640X480pixels (30fps), 320X240pixels (30 fps) JPEG/AVI 1 Test Photo Use Only SD Card (up to 32GB) 2.4 Inch TFT f=7.23mm F2.8, Fix Focus 4X Digital Zoom -3.0EV ~ +3.0EV Auto, Daylight, Cloudy...
Camera Manual - Page 10

... Lithium Battery that is fully charged before the first use. If your camera ON.
Powering the camera ON
Press the Power button to the USB port of
your digital camera. The camera will turn your camera comes with a rechargeable lithium battery, make sure it is included in the packaging. To charge the Lithium Battery insert the battery into your computer...
Camera Manual - Page 11

...-left corner of time that you have already taken with your camera. Powering the camera OFF
While the camera is on, you can press the Power button
again at any point to capture and enjoy clear quality videos and photos. The Auto Power Off settings
can begin to turn off
completely.
Use this icon will power off your
camera after a specific...
Camera Manual - Page 12

Navigating the Menus
Each camera mode has a set of the selected menu option. Changes made to these options will remain as is until you decide to change them again at a later time. 6) Some menu options are single-use functions that mode. 1) Press the OK button to open the menus for the current mode. 2) Press...
Camera Manual - Page 17

... be no further than 8 to 9 feet (3.5
meters) from the camera -
Face Detect Menu The Face Detect feature when set to use the Face Detect option please ensure the following: Anti-Shake ...by
default when you start using your camera and assists you in the camera‟s display.
Anti-Shake Menu The Anti-Shake feature reduces image distortion that can be caused by movement of your ...
Camera Manual - Page 24

...use the UP and DOWN navigation buttons to set the time and date. 8) Press the MODE button to exit the menu and return to set your camera, the image will include a time stamp with the date and time... menus for future images that the image was taken.
Date/Time Menu When you manually change the
setting or restore the camera‟s default factory settings. You can also disable the timestamp...
Camera Manual - Page 25

...;s default factory settings.
24 Silent Mode Menu You have the option of activating the camera‟s silent mode to disable all of time, the camera will shut off . Auto Power Off Menu You can use .
1) Press the OK button to open the menus for the current mode. 2) Press the LEFT or RIGHT direction control buttons...
Camera Manual - Page 26

...the selected option will be saved by your camera.
1) Press the OK button to open ... your camera's memory card.
Format Memory Card Menu You can use the delete menu in the camera‟...flourescent lighting sources in your camera‟s memory card.
If your camera is currently on the ... waves on your camera until you would like to delete individual images, use the Format Memory ...
Camera Manual - Page 27

... begin the format. 7) The camera will be reset. 8) A message will appear confirming that you camera. Viewing Photos on your camera or to reset your camera settings to the factory default settings.
1) Press the OK button to view the Firmware version on Your Camera Once in Video Capture mode by default. Firmware Menu Use this menu to open...
Camera Manual - Page 33

...
32 Note: The actual shape of the LCD indicating that the record is first powered ON, the camera will see a red icon at the scene you to capture videos with your digital camera. Taking a Video 1) While in Video Capture Mode. Video Capture Mode
The Video Capture Mode allows you
would like to capture.
2)
Click the T/Zoom In and...
Camera Manual - Page 36

... that can be caused by movement of the images taken by your camera.
Image Quality Menu The Image Quality menu allows you manually change the
setting or restore the camera‟s default factory...LCD screen. 9) Remember that this setting will be saved by your camera until you to select the desired quality level of the camera while capturing the image.
1) Press the OK button to open ...
Camera Manual - Page 42

... use the Auto Power Off feature in addition to the video record.
1) Press the OK button to open . 4) Scroll through the window with the power button before the next use the UP and DOWN navigation buttons to set the time and date. 5) Press the MODE button to exit the menu and return to your camera will automatically power...
Camera Manual - Page 50

...videos from my camera to open the application. 14) If you close the application you can run the Vivitar Experience Image Manager from the Programs (PC) or Applications (Mac) menu on your computer. Click the "Launch Vivitar...Connecting the Camera to the Computer
1) Use the USB cable that came with your camera to connect your camera to your computer. 2) Power the camera ON. 3) The first time you ...
Similar Questions

Camera Battery
what are some comparable batteries for the dvr 925 HD vivitar camera?
what are some comparable batteries for the dvr 925 HD vivitar camera?
(Posted by claudehenderson 3 years ago)

How Do I Delete Everything On 503 Hd To Start Over...........
(Posted by ijd6213 8 years ago)

Vivitar Dvr787-pnk-kit-wm Action Digital Video Recorder, Pink Video Camera With
Vivitar's DVR 787 HD comes on when plugged in and says it has full power but cuts off when you unplu...
Vivitar's DVR 787 HD comes on when plugged in and says it has full power but cuts off when you unplu...
(Posted by jjknott82 8 years ago)

Not Powering Up
I have the vivitar 810 HD and we changed batteries and when trying to power up it shows red light bu...
I have the vivitar 810 HD and we changed batteries and when trying to power up it shows red light bu...
(Posted by shericoons 9 years ago)

I Lost The Image Manager Disc For My Vivitar 925hd, How Can I Set Up?
(Posted by headforthemountains69 9 years ago)