Get support for Sanyo VPC-T700T

Sanyo VPC-T700T Support Question

Sanyo VPC-T700T Support Question

Find answers below for this question about Sanyo VPC-T700T.
Need a Sanyo VPC-T700T manual? We have 1 online manual for this item!
Question posted by skey6 on April 24th, 2022

How Do You Remove The Battery In The Camera

How do I remove the chargeable battery in the camera

Current Answers

Answer #1: Posted by Sibshah on April 24th, 2022 3:16 PM
This answer was accepted by the poster of the original question.
Sibshah

Member since:
April 10th, 2022

Points: 10,450
1,100
points


Sibtain
Answer #2: Posted by SonuKumar on April 24th, 2022 8:19 PM
SonuKumar

Member since:
May 9th, 2021

Points: 16,622,290
100
points
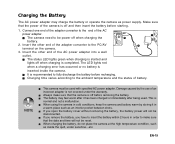
Charging the Battery

The AC power adapter may charge the battery or operate the camera as power supply. Make sure

that the power of the camera is off and then insert the battery before starting.

1. Connect one end of the adapter converter to the end of the AC

power adapter.

The camera need to be power off when charging the

battery.

2. Insert the other end of the adapter converter to the PC/AV

terminal on the camera.

3. Insert the other end of the AC power adapter into a wall

outlet.

The status LED lights green when charging is started and

lights off when charging is completed. The LED lights red

when a charging error has occurred or no battery is

inserted inside the camera.

It is recommended to fully discharge the battery before recharging.

Charging time varies according to the ambient temperature and the status of battery


This camera must be used with specified AC power adapter. Damage caused by the use of an

incorrect adapter is not covered under the warranty.

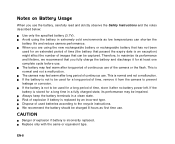
Always make sure that the camera is off before removing the battery.

The battery may feel warm after it has been charged or immediately after being used. This is

normal and not a malfunction.

When using the camera in cold conditions, keep the camera and battery warm by storing it in

a warm place such as an interior pocket between shots.

If you open the battery cover without removing the battery, the battery power will not be

disconnected.

If you remove the battery, you have to insert the battery within 2 hours in order to make sure

that the date and time will not be reset.

When charging the battery, do not place the camera at the high temperature condition, such

as inside the quilt, under sunshine...etc


Please respond to my effort to provide you with the best possible solution by using the "Acceptable Solution" and/or the "Helpful" buttons when the answer has proven to be helpful.

Regards,
Sonu
Your search handyman for all e-support needs!!

Related Sanyo VPC-T700T Manual Pages

Owners Manual - Page 2

registered trademarks of your camera may be different from those described in this manual are for precise product definition and included accessories. This includes primary product specifications, software, software drivers, and user's manual. This is due to the fact that come with accessories such as batteries, chargers, AC adapters, memory cards, cables, pouches...
Owners Manual - Page 3

... objects or water have entered the camera, turn the power OFF and remove the battery and the AC power adapter. If the camera has fallen or its case has been damaged, turn the power OFF and remove the battery and the AC power adapter. Do not disassemble, change or repair the camera. For repair or internal inspection...
Owners Manual - Page 4

... internal fluid has entered your body or clothes, rinse with fresh water. This might cause damage to the camera. Do not remove the battery immediately after long period of the terminals. Do not leave the camera in places where the temperature may rise significantly, such as inside , resulting in fire. This might cause fire...
Owners Manual - Page 7

Canadian ICES-003 information This class B digital apparatus complies with Part 15 of Conformity Model number: VPC-T700 Trade Name: SANYO Responsible party: SANYO FISHER COMPANY ... USE Declaration of the FCC Rules. You many find the answers to questions or problems concerning camera operation in this manual Points giving some extended instructions or special points to pay attention to the...
Owners Manual - Page 8

... for at least one complete cycle before use . J Dispose of time, remove it for a long period of images that you fully charge the battery and discharge it from the camera to the recycle instructions. EN-8 J Avoid using the new rechargeable battery or rechargeable battery that has not been used for a long time in a fully charged...
Owners Manual - Page 9

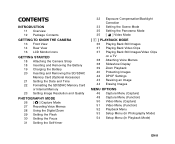
... Front View 14 Rear View 16 LCD Monitor Icons GETTING STARTED 18 Attaching the Camera Strap 18 Inserting and Removing the Battery 19 Charging the Battery 20 Inserting and Removing the SD/SDHC Memory Card (Optional Accessory) 21 Setting the Date and Time 22 Formatting the SD/SDHC Memory Card or Internal Memory 23 Setting...
Owners Manual - Page 11

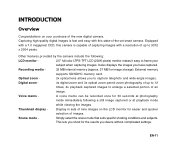
INTRODUCTION Overview Congratulations on the LCD monitor for easier and quicker selection of an image. Capturing high-quality digital images is capable of capturing images with this state-of the new digital camera. Recording media - 32 MB internal memory (approx. 27 MB for 30 seconds at playback mode while viewing the images. Optical zoom...
Owners Manual - Page 12

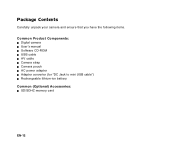
Package Contents Carefully unpack your camera and ensure that you have the following items. Common Product Components: J Digital camera J User's manual J Software CD-ROM J USB cable J AV cable J Camera strap J Camera pouch J AC power adapter J Adapter converter (for "DC Jack to mini USB cable") J Rechargeable lithium-ion battery Common (Optional) Accessories: J SD/SDHC memory card EN-12
Owners Manual - Page 18

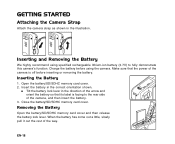
... then insert the battery. 3. Inserting and Removing the Battery We highly recommend using the camera. Insert the battery in the illustration. Tilt the battery lock lever in the direction of the arrow and orient the battery so that the power of the camera is facing to fully demonstrate this camera's function. Charge the battery before inserting or removing the battery. Make sure...
Owners Manual - Page 19

Make sure that the power of the camera is off and then insert the battery before recharging. J The battery may charge the battery or operate the camera as inside the camera. J Always make sure that the camera is off before removing the battery. Damage caused by storing it has been charged or immediately after being used with specified AC power...
Owners Manual - Page 20

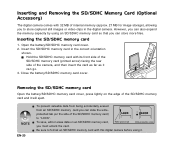
... store captured still images or video clips in the correct orientation shown. Insert the SD/SDHC memory card in the digital camera. However, you can go. 3. Removing the SD/SDHC memory card Open the battery/SD/SDHC memory card cover, press lightly on the side of the SD/SDHC memory card and it can...
Owners Manual - Page 21

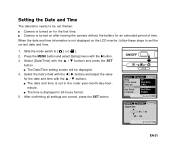
...]. 2. Select [Date/Time] with the Xbutton. 3. The Date/Time setting screen will be set if/when: Camera is set the correct date and time. 1. The time is turned on for the first time. SET:Adj. ... is turned on after leaving the camera without the battery for an extended period of time. Capture Date/Time 2006 / 01 / 01 20 : 00 SET:Enter EN-21 Camera is displayed in the order year-...
Owners Manual - Page 28

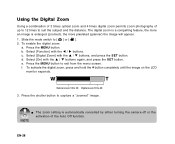
...zoom setting is enlarged (zoomed), the more an image is automatically cancelled by either turning the camera off or the activation of up to 12 times to suit the subject and the distance. Press the MENU ... to [ ] or [ ]. 2. The digital zoom is a compelling feature, the more pixelated (grainier) the image will appear. 1. To activate the digital zoom, press and hold the button completely until...
Owners Manual - Page 41

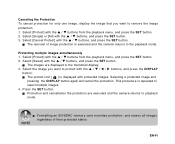
...from the playback menu, and press the SET button. 2. This procedure is repeated to remove the image protection. 1. EN-41 Canceling the Protection To cancel protection for only one ...with the S / T buttons, and press the SET button. J The protect icon [ ] is executed and the camera returns to protect with the S / T / W / X buttons, and press the DISPLAY button. J Protection and ...
Owners Manual - Page 42

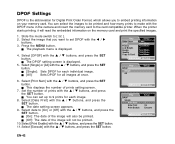
...You can select the images to be printed and how many prints to make with the DPOF menu in the camera and insert the memory card to embed printing information on the memory card and print the specified images. 1. ... MENU:Exit SET:Enter Play MENU:Exit SET:Enter EN-42 You can set up to 9 prints for Digital Print Order Format, which allows you want to set DPOF with the S / T buttons, and press ...
Owners Manual - Page 52

Of course, you can only do this manual titled "Protecting Images" for further details. J The playback menu is available. To exit from the digital still camera's internal memory to an SD/SDHC memory card. Slide Show Refer to section in this if you to copy your files from the menu, press ...
Owners Manual - Page 53

...Reset This returns all basic settings to section in which language menus and messages are recorded to the camera is displayed. 3. The time setting will not be displayed on the LCD monitor. Beep This sets ...Execute Auto Off If no operation is useful to reduce battery wear. * 1 Min. / 2 Min. / 3 Min. / Off Date/Time Refer to the camera's default settings. The captured images are to be reset....
Owners Manual - Page 63

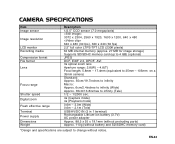
EN-63 CAMERA SPECIFICATIONS Item Image sensor Image resolution LCD monitor Recording media Compression format File format Lens Focus range Shutter speed Digital zoom Flash effective range ...IN (3 in 1 terminal) Rechargeable Lithium-ion battery (3.7V) AC power adapter Approx. 88.5 x 55 x 19.1mm (without protruding parts) Approx. 110g (without battery and SD/SDHC memory card) *Design and ...
Owners Manual - Page 65

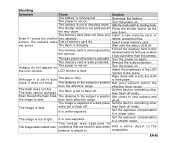
... End of the LCD monitor in this camera. Wait until the status LED off mode. The auto power off mode. Images do not appear on . It is not on The power is under-exposed. It is running low. Shooting Symptom Cause Solution The battery is over-exposed. The The flash flash does...
Owners Manual - Page 66

... and stored on your computer/software Symptom Cause Solution Check whether the hard disk has a Cannot images. Remove the write-protection. Other Problems Symptom Cause Solution Even when the camera's buttons are pressed, it The battery is too dark. The correct date and time in be insufficient. still on . You played back a memory...

Similar Questions

I Have A Sanyo Vpc S750 Camera And Need A Software Program To Download My Photos
The disc for the Sanyo camera is for older model PC & as I am now running windows 7, I need the ...
(Posted by gwatkuns 7 years ago)
Drivers For Sanyo Vpc-s880p Digital Camera
Are there any drivers for the Sanyo VPC-S880P didital camera?
(Posted by poorjim 9 years ago)
Looking For A Usb Cable Vpc-t700 7mp Sanyo Digital Camera. (not Xacti)
I bought a Sanyo Digital Camera VPT-T700 camera in 2007 and have since misplaced the USB cord that g...
(Posted by krayner 10 years ago)
Sanyo Vpc-e870 Digital Camera Vertical White Lines Across Uploaded Pics
My camera is a few years old but the housing etc still looks brand new, never been dropped or anythi...
(Posted by cilenefarrell 12 years ago)
Battery Drains Quickly In Digital Camera
How do I fix this problem for my Sanyo VPC-E870 digital camera. The battery drains quickly, like in ...
(Posted by ctwaley 12 years ago)
Ask a New Question
Use the box below to post a new question about this Sanyo product .
Points & Prizes
  • You can earn points for nearly everything you do on HelpOwl.com
  • You can trade in those points for gift cards at leading retailers such as Amazon.com and Walmart
  • It's that simple!
See How it Works
Create a Free Account

Sanyo Manuals

Find free Sanyo VPC-T700T manuals and user guides available at ManualOwl.com. Try out our unique manual viewer allowing you to interact with manuals from directly within your browser!

Sanyo Reviews

View thousands of Sanyo user reviews and customer ratings available at ReviewOwl.com.

Contact Information

Complete Sanyo customer service contact information including steps to reach representatives, hours of operation, customer support links and more from ContactHelp.com.

Scoreboard Ratings

See detailed Sanyo customer service rankings, employee comments and much more from our sister site.

Sanyo Recalls

Find comprehensive Sanyo recall information updated hourly on RecallOwl.com.