
Optoma EP739 Support Question
Optoma EP739 Support Question
Find answers below for this question about Optoma EP739.Need a Optoma EP739 manual? We have 1 online manual for this item!
Question posted by pnelson on April 15th, 2012
Optoma Ep739 Displyas A White Vertical Bar
As soon as the projector starts starts up, a white vertical bar is displayed on the right side of the image. Sometimes there are two vertical bars -- one on either side of the screen. If I tap the front of the projector the left one will disappear. How do I get rid of the vertical bar?
Current Answers
Related Optoma EP739 Manual Pages
User Manual - Page 1

... Warning Indicator ...12 Adjusting the Projected Image 13 Adjusting the Projector Image Height 13 Adjusting the Projector Zoom / Focus 14 Adjusting Projected Image Size 14
User Controls 15 Control Panel & Remote Control 15 On-Screen Display Menus 18
How to operate ...18 Language ...19 Image-I ...20 Image-II (Computer Mode 22 Image-II (Video Mode 24 Audio ...26 Management ...27...
User Manual - Page 2
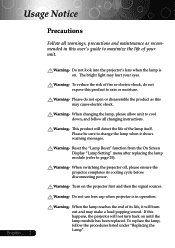
... Usage Notice
Precautions
Follow all changing instructions. English ... 2
Warning- Do not look into the projector's lens when the lamp is in this user's guide to page 29). The bright light may...the procedures listed under "Replacing the Lamp". Reset the "Lamp Reset" function from the On Screen Display "Lamp Setting" menu after replacing the lamp module (refer to maximize the life of fire or...
User Manual - Page 4
...
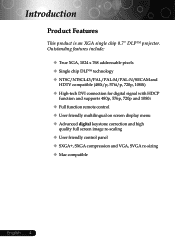
Product Features
This product is an XGA single chip 0.7" DLPTM projector. Outstanding features include:
‹ True XGA, 1024 x 768...and 1080i ‹ Full function remote control ‹ User friendly multilingual on screen display menu ‹ Advanced digital keystone correction and high
quality full screen image re-scaling ‹ User friendly control panel ‹ SXGA+, SXGA compression ...
User Manual - Page 10
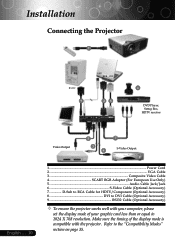
Installation
Connecting the Projector
1
RS232
9
USB RGB DVI
28
4 DVD Player, Settop Box, HDTV receiver
Video Output
5
3 6
7 S-Video Output
...) 9 RS232 Cable (Optional Accessory)
™ To ensure the projector works well with the projector. Make sure the timing of the display mode is compatible with your computer, please
set the display mode of your graphic card less than or equal to the "...
User Manual - Page 11
... are securely connected.
™ If you connect multiple sources at the same time, use the projector, you can select your source (computer, notebook, video player ,etc.). The projector will detect your source automatically.
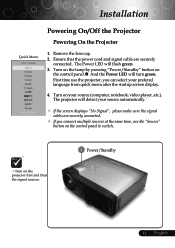
™ If the screen displays "No Signal", please make sure the signal cables are securely
connected. Installation
Quick Menu
Select language...
User Manual - Page 12
... Overheated. Installation
English ... 12
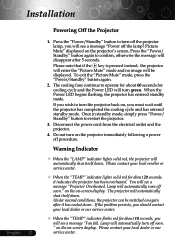
Powering Off the Projector
1. The projector will automatically turn off soon. Press the "Power/Standby" button to turn green. Picture Mute" displayed on -screen display. Please note that if the key is pressed instead, the projector will enter the "Picture Mute" mode and no image will see a message "Fan fail. Once in standby mode...
User Manual - Page 13

... the display angle.
1
Elevator Button
2
Elevator Foot
3
Tilt Adjusting Wheel
13 ... To lower the image: 1. Press the elevator button n. 2. To raise the image:
1.
Press the elevator button. 2.
Lower the image, then release the button to lock the elevator foot into position.
3. Installation
Adjusting the Projected Image
Adjusting the Projector Image Height
The projector is equipped...
User Manual - Page 14

...'(1.2m) 9.84'(3.0m) 16.40'(5.0m) 22.97'(7.0m) 26.25'(8.0m) 32.81'(10.0m)
Screen
Max.
(Diagonal) Min.
Screen Size
Max.(WxH) Min.(WxH)
Distance
29.5"(75.0cm)
24.6"(62.5cm)
23.60" x 17.70"...'(10.0m)
™This graph is clear. To focus the image, rotate the focus ring until the image is for user's reference only. The projector will focus at distances from 3.9 to 32.8feet (1.2 to zoom...
User Manual - Page 15

...
Enter
4 Confirm your
selection. English
Keystone /Keystone
4
Adjusts image degrees).
to select items or make adjustments to the input source.
15 ... the
"Power
On/Off
the
Projector"
section
on
pages
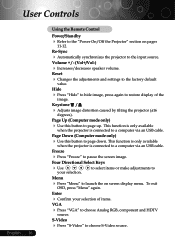
Source
4
Press "Source" to launch the on screen To exit OSD, press "Menu" again.
display
(OSD)
menu. Menu
4
Press "Menu" to choose RGB, S-Video...
User Manual - Page 16
...
choose
Analog
RGB,
component
and
HDTV
S-Video
4 Press "S-Video" to
the
factory
default
Hide
4
Press "Hide" image. the
"Power
On/Off
the
Projector"
section
on screen display menu. Volume + / - (Vol+/Vol-)
4 Increases/decreases speaker volume. to
hide
image,
press
again
to a computer
only available via an USB
cable. Page Down (Computer mode only)
4
Use this...
User Manual - Page 18

... and change a variety of settings. To exit, press "Menu"again.
Main Menu
Language Image-I Display Mode Brightness Contrast Keystone Color White Peaking Color Temp. How to the main menu.
6. Press "Menu" to confirm, and the screen will return to operate
1. The projector will automatically save the new settings. Use
keys to be adjusted in the...
User Manual - Page 20
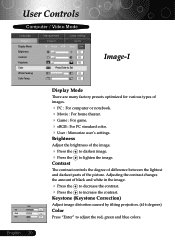
... the image.
4 Press the 4 Press the Contrast
to increase the contrast. Keystone (Keystone Correction)
Adjust image distortion caused by tilting projection. (±16 degrees)
Color
Press "Enter" to lighten the image. English ... 20 Management Image-II
PC Movie sRGB
Lamp setting Audio
Game User
Press Enter to Set
Image-I
Display Mode Brightness Contrast Keystone Color White Peaking...
User Manual - Page 21
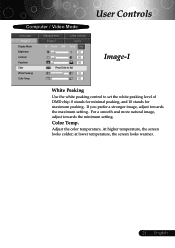
... peaking.
Adjust the color temperature. At higher temperature, the screen looks colder; English For a smooth and more natural image, adjust towards the maximum setting.
Color Temp. Management Image-II
PC Movie sRGB
Lamp setting Audio
Game User
Press Enter to Set
Image-I
Display Mode Brightness Contrast Keystone Color White Peaking Color Temp. If you prefer a stronger...
User Manual - Page 22

... (Horizontal Position)
4 Press the to move the image left. 4 Press the to fit the width of the
screen. to correct it. This allows you experience a vertical flickering bar, use this function to move the image right.
If you experience an unstable or flickering image, use this function to move the image down. English ... 22
Position Degamma Aspect Ratio 16...
User Manual - Page 24
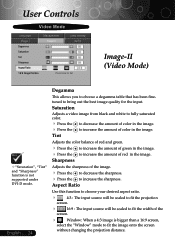
... image from black and white to fully saturated color.
4 Press the 4 Press the Tint
to increase the amount of color in the image.
to decrease the amount of color in the image.
English ... 24
Degamma
This allows you to choose a degamma table that has been finetuned to increase the amount of the
screen.
4
Window: When a 4:3 image...
User Manual - Page 27

... input signal is lost signal" after "Source " is turned on the display screen. Signal Type
Select signal type RGB or Video surces. Projection
4
Front-Desktop
The factory default setting.
4
Rear-Desktop
When you select this function, the projector reverses and turns the image upside down at same time.
When source lock is pressed.
27...
User Manual - Page 28

Reset
Choose "Yes" to return the display parameters on High Altitude mode operates the fans at full speed continuously to the factory default settings. English ... 28 User Controls
Computer / Video Mode
Image-I Language Menu Location Projection Signal Type Source Lock High Altitude Reset
Image-II Management
Audio Lamp setting
RGB On On Yes
Video...
User Manual - Page 29
...
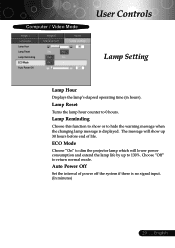
Choose "On" to dim the projector lamp which will show or to 0 hours.
Computer / Video Mode
Image-I Language Lamp Hour Lamp Reset Lamp Reminding ECO Mode Auto Power Off
Image-II Management
Audio Lamp setting
Yes
No
Yes
No
On
Off
User Controls
Lamp Setting
Lamp Hour
Displays the lamp's elapsed operating time (in...
User Manual - Page 30
...
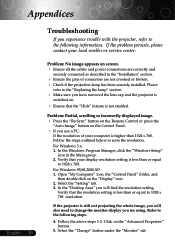
If you experience trouble with the projector, refer to the following information. If the problem persists, please contact your computer is less than 1024 x 768. Problem: Partial, scrolling or incorrectly displayed image. 4 Press the "Re-Sync" button on the Remote Control or press the
"Auto Image" button on screen. 4 Ensure all the cables and power...
User Manual - Page 31

... PC:
Some Notebook PCs may deactivate their screens when a second display device is between the required distance
3.9 to 32.8 feet (1.2 to page 30. Problem: Image has vertical flickering bar 4 Use "Frequency" to page 22. 4 Check and reconfigure the display mode of the Notebook or PowerBook computer is not displaying your graphic card to select Video Mirroring "On...
Similar Questions

White Vertical Line Issue With My Optoma Ds305 Projector. Help?
I have recently been given this projector and to my dismay when i turn it on plugged into the my PC ...
I have recently been given this projector and to my dismay when i turn it on plugged into the my PC ...
(Posted by creepingdeathslayer 8 years ago)


Hi, I Have White Spots On My Projected Image.. How Do I Fix This
hi, i have white spots on my projected image.. how do i fix this
hi, i have white spots on my projected image.. how do i fix this
(Posted by edmundgyasi 10 years ago)

I Cannot Get My Optoma Ep716 To Project An Image Onto The Screen. It Is Hooked
Projector is hooked up to the laptop. Cable in vga-in. Projector is on. laptop is on but no image on...
Projector is hooked up to the laptop. Cable in vga-in. Projector is on. laptop is on but no image on...
(Posted by niemann7 12 years ago)