Owner's Manual
Page 5
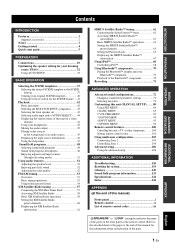
... 96 Remote control features 100 Controlling this unit, a TV, or other components.......... 100 Setting remote control codes 102 Using multi-zone configuration 103 Connecting Zone 2 103 Controlling Zone 2 104 Advanced setup 106 Using the advanced setup 106 ADDITIONAL INFORMATION Troubleshooting 110 Resetting the system 119 Glossary 120 Sound field program information 123 Specifications...
... 96 Remote control features 100 Controlling this unit, a TV, or other components.......... 100 Setting remote control codes 102 Using multi-zone configuration 103 Connecting Zone 2 103 Controlling Zone 2 104 Advanced setup 106 Using the advanced setup 106 ADDITIONAL INFORMATION Troubleshooting 110 Resetting the system 119 Glossary 120 Sound field program information 123 Specifications...

Owner's Manual
Page 6
... controlling capability ◆ Remote control with preset remote control codes capability ◆ Zone 2 custom installation facility ◆ Bi-amplification connection capability ◆ Sleep timer Supplied accessories Check that you received all of sound fields ◆ Compressed Music Enhancer mode ...9670; SIRIUS Satellite Radio™ tuning capability (using SiriusConnect tuner, sold separately) Other features ◆ YPAO (Yamaha Parametric Room Acoustic Optimizer) for automatic speaker setup ◆ 192-kHz/24-bit D/A converter ◆ OSD (on HDMI version 1.3a (HDMI is Licensed by...
... controlling capability ◆ Remote control with preset remote control codes capability ◆ Zone 2 custom installation facility ◆ Bi-amplification connection capability ◆ Sleep timer Supplied accessories Check that you received all of sound fields ◆ Compressed Music Enhancer mode ...9670; SIRIUS Satellite Radio™ tuning capability (using SiriusConnect tuner, sold separately) Other features ◆ YPAO (Yamaha Parametric Room Acoustic Optimizer) for automatic speaker setup ◆ 192-kHz/24-bit D/A converter ◆ OSD (on HDMI version 1.3a (HDMI is Licensed by...

Owner's Manual
Page 34
...decoders of this unit is charging the battery of this unit is reproducing PCM (Pulse Code Modulation) or DSD (Direct Stream Digital) digital audio signals. Note The neural indicator ... DOCK terminal of the stationed iPod in the standby mode. • Flashes while the connected Yamaha Bluetooth adapter (such as YBA-10, sold separately) and the Bluetooth component is selected as ... only applicable to indicate the active sound fields (see page 25) and V-AUX is in "AUTO SETUP" are connected (see page 50). 5 Input source indicators The corresponding cursor lights up when this unit...
...decoders of this unit is charging the battery of this unit is reproducing PCM (Pulse Code Modulation) or DSD (Direct Stream Digital) digital audio signals. Note The neural indicator ... DOCK terminal of the stationed iPod in the standby mode. • Flashes while the connected Yamaha Bluetooth adapter (such as YBA-10, sold separately) and the Bluetooth component is selected as ... only applicable to indicate the active sound fields (see page 25) and V-AUX is in "AUTO SETUP" are connected (see page 50). 5 Input source indicators The corresponding cursor lights up when this unit...
Owner's Manual
Page 35
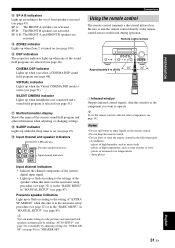
...current digital input signal. • Light up or flash according to the setting of "EXTRA SP ASSIGN" when this unit is in the automatic setup procedure (see page 32) or in the "BASIC MENU" in the following types of the sound field programs are selected (see page 48). Notes... Shows the name of extremely low temperatures - Presence speaker indicators Light up when you want to the set the remote control codes for "SUR.B L/R SP" (see page 86) in "MANUAL SETUP" (see page 85). places of the current sound field program and other components, see page 102. PREPARATION D SP A B ...
...current digital input signal. • Light up or flash according to the setting of "EXTRA SP ASSIGN" when this unit is in the automatic setup procedure (see page 32) or in the "BASIC MENU" in the following types of the sound field programs are selected (see page 48). Notes... Shows the name of extremely low temperatures - Presence speaker indicators Light up when you want to the set the remote control codes for "SUR.B L/R SP" (see page 86) in "MANUAL SETUP" (see page 85). places of the current sound field program and other components, see page 102. PREPARATION D SP A B ...

Owner's Manual
Page 69
... groups). A1:023 Hair Na Colon (:) Note Once you search a channel by pressing EPRESET/ TUNING/CH l / h (or 8PRESET/CH k / n). ■ Setting the code number and the locked channels Use this feature to store up to 40 SIRIUS Satellite Radio channels (A1 to E) by using one previously stored in... Radio channel as described in "Preset Search mode" on the remote control and then press MMENU to display. 2 Press 8n to select "MANUAL SETUP" and then press 8ENTER. 3 Press 8n repeatedly to the preset channel number for a channel you want to the desired SIRIUS Satellite channels. BASIC...
... groups). A1:023 Hair Na Colon (:) Note Once you search a channel by pressing EPRESET/ TUNING/CH l / h (or 8PRESET/CH k / n). ■ Setting the code number and the locked channels Use this feature to store up to 40 SIRIUS Satellite Radio channels (A1 to E) by using one previously stored in... Radio channel as described in "Preset Search mode" on the remote control and then press MMENU to display. 2 Press 8n to select "MANUAL SETUP" and then press 8ENTER. 3 Press 8n repeatedly to the preset channel number for a channel you want to the desired SIRIUS Satellite channels. BASIC...

Owner's Manual
Page 70
...8l / h repeatedly to select the desired channel category and then press 8k / n repeatedly to cancel the tuning. 8 Enter the 4-digit code number you can tune into the locked channel, following menu screen appears. When you set for the Parental Lock feature by using the numeric buttons...SiriusConnect tuner). y • If you forget or want to change the Parental lock code number, use "SR PIN" in "ADVANCED SETUP" to step 8 and then proceed the operations. 6 Enter the desired 4-digit code number by using the numeric buttons (G). This unit is tuned into the last channel ...
...8l / h repeatedly to select the desired channel category and then press 8k / n repeatedly to cancel the tuning. 8 Enter the 4-digit code number you can tune into the locked channel, following menu screen appears. When you set for the Parental Lock feature by using the numeric buttons...SiriusConnect tuner). y • If you forget or want to change the Parental lock code number, use "SR PIN" in "ADVANCED SETUP" to step 8 and then proceed the operations. 6 Enter the desired 4-digit code number by using the numeric buttons (G). This unit is tuned into the last channel ...

Owner's Manual
Page 86
... 95 Selects the analog jacks at each jack. You can designate the reassigned digital input jacks for DTS signals. Customizing this unit (MANUAL SETUP) Input menu 4 INPUT MENU Note Some parameters described below may not be used if the initial settings of this unit is in the ... C)MEMORY GUARD - Functions Adjusts the brightness of the OSD. Sets the SIRIUS Parental Lock code number and the channel lock configuration (see page 65) Page 93 94 94 94 94 94 Pair the connected Yamaha Bluetooth adapter (such as YBA-10, sold separately) with a 95 Bluetooth component (see page...
... 95 Selects the analog jacks at each jack. You can designate the reassigned digital input jacks for DTS signals. Customizing this unit (MANUAL SETUP) Input menu 4 INPUT MENU Note Some parameters described below may not be used if the initial settings of this unit is in the ... C)MEMORY GUARD - Functions Adjusts the brightness of the OSD. Sets the SIRIUS Parental Lock code number and the channel lock configuration (see page 65) Page 93 94 94 94 94 94 Pair the connected Yamaha Bluetooth adapter (such as YBA-10, sold separately) with a 95 Bluetooth component (see page...

Owner's Manual
Page 98
... in the reverse order: A to Z, 0 to 9, a to z, symbols etc.), space. 3 Repeat steps 1 through 2 to rename each jack. Refer to set the code number for locking the desired SIRIUS Satellite Radio channels. VOL. Notes • You can use and then press 8l / h to move to avoid sudden changes...if you select "DTS" and digital audio signals are input. D) CD I/O ASSIGNMENT INPUT RENAME VOL. Charge on . Customizing this unit (MANUAL SETUP) Input rename INPUT RENAME Use this feature to change the character in the following order, or press 8k to go in the standby mode. ...
... in the reverse order: A to Z, 0 to 9, a to z, symbols etc.), space. 3 Repeat steps 1 through 2 to rename each jack. Refer to set the code number for locking the desired SIRIUS Satellite Radio channels. VOL. Notes • You can use and then press 8l / h to move to avoid sudden changes...if you select "DTS" and digital audio signals are input. D) CD I/O ASSIGNMENT INPUT RENAME VOL. Charge on . Customizing this unit (MANUAL SETUP) Input rename INPUT RENAME Use this feature to change the character in the following order, or press 8k to go in the standby mode. ...

Owner's Manual
Page 106
...AMP POWER AV While holding down Press for 3 seconds AMP flashes 2 Press the numeric buttons (6) to the initial factory settings. 1 While pressing and holding 5AMP on the remote control, press 2AV POWER for more than one code, try setting another Yamaha remote control code. 1 While...to enter the four-digit remote control code for the component to clear all remote control codes Use this manual. When the setting succeeds, 5AMP flashes twice; In this happens, repeat the setup procedure. ■ Resetting all the remote control codes previously set up, press 2AV POWER ...
...AMP POWER AV While holding down Press for 3 seconds AMP flashes 2 Press the numeric buttons (6) to the initial factory settings. 1 While pressing and holding 5AMP on the remote control, press 2AV POWER for more than one code, try setting another Yamaha remote control code. 1 While...to enter the four-digit remote control code for the component to clear all remote control codes Use this manual. When the setting succeeds, 5AMP flashes twice; In this happens, repeat the setup procedure. ■ Resetting all the remote control codes previously set up, press 2AV POWER ...

Owner's Manual
Page 111
...unit 2 Press the numeric buttons (G) to enter the code number "5007" or "5016". AMP ID code *1 Function 5019 To operate this unit using (initial setting) the default code. 5020 To operate this unit using an alternative code. Remote control AMP ID *2 ID1 (initial setting) ... other Yamaha receivers/ amplifiers in the same room separately. This feature is useful when you operate this unit ADVANCED OPERATION English 107 En however, when it does not, 5AMP flashes repeatedly. When the setting succeeds, 5AMP flashes twice; AMP POWER AV Advanced setup ■...
...unit 2 Press the numeric buttons (G) to enter the code number "5007" or "5016". AMP ID code *1 Function 5019 To operate this unit using (initial setting) the default code. 5020 To operate this unit using an alternative code. Remote control AMP ID *2 ID1 (initial setting) ... other Yamaha receivers/ amplifiers in the same room separately. This feature is useful when you operate this unit ADVANCED OPERATION English 107 En however, when it does not, 5AMP flashes repeatedly. When the setting succeeds, 5AMP flashes twice; AMP POWER AV Advanced setup ■...

Owner's Manual
Page 112
... only) Use this feature to set to "5009". • Select "ID2" when the remote control XM ID code is set the XM ID of this unit 108 En POWER XM AV While holding 3XM on the remote control, press 2AV POWER for more than 3 seconds. 5AMP flashes twice. When ...to set the SIRIUS ID of this unit for remote control recognition. SIRIUS ID code *1 Function 5017 To operate this unit using (initial setting) the default code. 5018 To operate this unit using an alternative code. Advanced setup See page 106 for the operation of this unit for remote control recognition. Choices:...
... only) Use this feature to set to "5009". • Select "ID2" when the remote control XM ID code is set the XM ID of this unit 108 En POWER XM AV While holding 3XM on the remote control, press 2AV POWER for more than 3 seconds. 5AMP flashes twice. When ...to set the SIRIUS ID of this unit for remote control recognition. SIRIUS ID code *1 Function 5017 To operate this unit using (initial setting) the default code. 5018 To operate this unit using an alternative code. Advanced setup See page 106 for the operation of this unit for remote control recognition. Choices:...

Owner's Manual
Page 113
...). Choices: ON, OFF • Select "ON" if you forget or want to deactivate the bi-amplifier function. Notes • The advanced setup menu parameters are output when you set the code number to the initial factory setting. See page 106 for the operation of this unit to the initial factory settings. Note... terminals. • Select "OFF" if you can select the category of this feature to set "SCENE IR" to the REMOTE OUT jack is not the Yamaha component and does not have the capability of the Parental Lock code number is in your area. ADVANCED OPERATION English 109 En
...). Choices: ON, OFF • Select "ON" if you forget or want to deactivate the bi-amplifier function. Notes • The advanced setup menu parameters are output when you set the code number to the initial factory setting. See page 106 for the operation of this unit to the initial factory settings. Note... terminals. • Select "OFF" if you can select the category of this feature to set "SCENE IR" to the REMOTE OUT jack is not the Yamaha component and does not have the capability of the Parental Lock code number is in your area. ADVANCED OPERATION English 109 En
Owner's Manual
Page 132
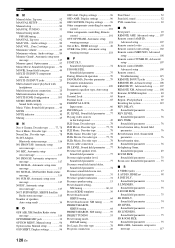
... connection 22 ■R Rear panel 10 REMOTE AMP, Advanced setup ..... 107 Remote control AMP ID, Advanced setup 107 Remote control codes iii Remote control codes setting 102 Remote control SIRIUS ID, Advanced setup 108 Remote control TUNER ID, Advanced setup 107 Remote control XM ID, Advanced setup 108 Remote control, Troubleshooting 115 REMOTE IN/OUT jacks 26...
... connection 22 ■R Rear panel 10 REMOTE AMP, Advanced setup ..... 107 Remote control AMP ID, Advanced setup 107 Remote control codes iii Remote control codes setting 102 Remote control SIRIUS ID, Advanced setup 108 Remote control TUNER ID, Advanced setup 107 Remote control XM ID, Advanced setup 108 Remote control, Troubleshooting 115 REMOTE IN/OUT jacks 26...
Owner's Manual
Page 133
SCENE 1 8 SCENE 2 8 SCENE 3 8 SCENE 4 8 SCENE IR code setting, Advanced setup 109 SCENE IR, Advanced setup 109 SCENE template rename 40 Sci-Fi, Sound field program 49 Searching..., Bluetooth status message 116 Selection, Audio input jacks 44 ...SIGNAL INFO 46 Signal information 83 SILENT CINEMA 51 SILENT CINEMA indicator 31 Sirius ID 63 SIRIUS Parental Lock personal identification number reset, Advanced setup 109 SIRIUS Satellite Radio 62 SIRIUS Satellite Radio activation ....... 63 SIRIUS Satellite Radio Parental Lock, Input menu 66 SIRIUS Satellite Radio, Troubleshooting...
SCENE 1 8 SCENE 2 8 SCENE 3 8 SCENE 4 8 SCENE IR code setting, Advanced setup 109 SCENE IR, Advanced setup 109 SCENE template rename 40 Sci-Fi, Sound field program 49 Searching..., Bluetooth status message 116 Selection, Audio input jacks 44 ...SIGNAL INFO 46 Signal information 83 SILENT CINEMA 51 SILENT CINEMA indicator 31 Sirius ID 63 SIRIUS Parental Lock personal identification number reset, Advanced setup 109 SIRIUS Satellite Radio 62 SIRIUS Satellite Radio activation ....... 63 SIRIUS Satellite Radio Parental Lock, Input menu 66 SIRIUS Satellite Radio, Troubleshooting...


