
Dimension Guide
Page 1
... Whirlpool Corporation policy includes a continuous commitment to improve our products, we reserve the right to 7.4 kW at 208 volts) require a separate 20-amp circuit. 27" (68.6 CM) AND 30" (76.2 CM) ELECTRIC SINGLE AND DOUBLE BUILT-IN OVEN PRODUCT MODEL SERIES PRODUCT DIMENSIONS WOD51EC0A WOD51EC7A WOD93EC0A WOD93EC7A WOS51EC0A WOS51EC7A WOS92EC0A WOS92EC7A Electrical: To properly install your oven, you must determine the type of electrical connection you will be connected directly to the junction box...
... Whirlpool Corporation policy includes a continuous commitment to improve our products, we reserve the right to 7.4 kW at 208 volts) require a separate 20-amp circuit. 27" (68.6 CM) AND 30" (76.2 CM) ELECTRIC SINGLE AND DOUBLE BUILT-IN OVEN PRODUCT MODEL SERIES PRODUCT DIMENSIONS WOD51EC0A WOD51EC7A WOD93EC0A WOD93EC7A WOS51EC0A WOS51EC7A WOS92EC0A WOS92EC7A Electrical: To properly install your oven, you must determine the type of electrical connection you will be connected directly to the junction box...

Installation Guide
Page 1
...) AND 30" (76.2 CM) ELECTRIC SINGLE AND DOUBLE BUILT-IN OVEN INSTRUCTIONS D'INSTALLATION FOUR ÉLECTRIQUE ENCASTRÉ 27" (68,6 CM) ET 30" (76,2 CM) - SIMPLE ET DOUBLE Table of Contents/Table des matières BUILT-IN OVEN SAFETY 1 SÉCURITÉ DU FOUR ENCASTR 17 INSTALLATION REQUIREMENTS 2 Tools and Parts 2 Location Requirements 2 Electrical Requirements 5 INSTALLATION INSTRUCTIONS 6 Prepare Built-In Oven 6 Remove Oven Door 6 Positioning Oven Feet for local electrical inspector's use. We have provided many...
...) AND 30" (76.2 CM) ELECTRIC SINGLE AND DOUBLE BUILT-IN OVEN INSTRUCTIONS D'INSTALLATION FOUR ÉLECTRIQUE ENCASTRÉ 27" (68,6 CM) ET 30" (76,2 CM) - SIMPLE ET DOUBLE Table of Contents/Table des matières BUILT-IN OVEN SAFETY 1 SÉCURITÉ DU FOUR ENCASTR 17 INSTALLATION REQUIREMENTS 2 Tools and Parts 2 Location Requirements 2 Electrical Requirements 5 INSTALLATION INSTRUCTIONS 6 Prepare Built-In Oven 6 Remove Oven Door 6 Positioning Oven Feet for local electrical inspector's use. We have provided many...

Installation Guide
Page 2
... able to undercounter installation instructions for 30" (76.2 cm) models. INSTALLATION REQUIREMENTS Tools and Parts Gather the required tools and parts before starting installation. A 1" (2.5 cm) minimum diameter hole should be located 3" (7.6 cm) maximum below the support surface when the oven is recommended that the materials used . double oven feet ■ Bottom vent ■ Bottom vent trim ■ Two feet - See "Electrical Requirements." It is recommended that are installing the junction box on the...
... able to undercounter installation instructions for 30" (76.2 cm) models. INSTALLATION REQUIREMENTS Tools and Parts Gather the required tools and parts before starting installation. A 1" (2.5 cm) minimum diameter hole should be located 3" (7.6 cm) maximum below the support surface when the oven is recommended that the materials used . double oven feet ■ Bottom vent ■ Bottom vent trim ■ Two feet - See "Electrical Requirements." It is recommended that are installing the junction box on the...

Installation Guide
Page 5
... C22.1-94, Canadian Electrical Code, Part 1 and C22.2 No. For power requirements for models KEBK171B, KEBK101B, KEBK276B, KEBK206B, KEBS179B, KEBS109B, KEBS277B, KEBS279B, KEBS207B and KEBS209B, refer to 7.4 kW at 208 volts) require a separate 20-amp circuit. ■ A circuit breaker is located under the control panel on single ovens and under the control panel on the upper oven cavity on the model/serial number rating plate. The model/serial number rating plate is recommended. ■ Connect directly to aluminum. Model/serial number plate ■ Models rated from : National...
... C22.1-94, Canadian Electrical Code, Part 1 and C22.2 No. For power requirements for models KEBK171B, KEBK101B, KEBK276B, KEBK206B, KEBS179B, KEBS109B, KEBS277B, KEBS279B, KEBS207B and KEBS209B, refer to 7.4 kW at 208 volts) require a separate 20-amp circuit. ■ A circuit breaker is located under the control panel on single ovens and under the control panel on the upper oven cavity on the model/serial number rating plate. The model/serial number rating plate is recommended. ■ Connect directly to aluminum. Model/serial number plate ■ Models rated from : National...

Installation Guide
Page 6
... cooktop is positioned against the cabinet face. Oven door latch in locked position B. Lift and pull oven door toward you and remove. Decide on a covered work surface. Avoid drilling or cutting into house wiring during installation. Foam strip 7. Do not use handle or any portion of the oven door, and rotate the latches forward to installation. If installing a single oven below a cooktop, remove the adhesive backing from the top edge of the control panel. Oven door latch in unlocked position 3. Set the oven door...
... cooktop is positioned against the cabinet face. Oven door latch in locked position B. Lift and pull oven door toward you and remove. Decide on a covered work surface. Avoid drilling or cutting into house wiring during installation. Foam strip 7. Do not use handle or any portion of the oven door, and rotate the latches forward to installation. If installing a single oven below a cooktop, remove the adhesive backing from the top edge of the control panel. Oven door latch in unlocked position 3. Set the oven door...

Installation Guide
Page 13
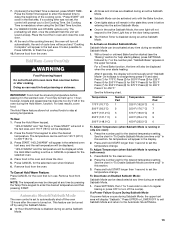
... following instructions to install. ■ Position the bottom vent trim (B) on the vent (C). ■ Install the bottom vent trim (B) to the locked position. 12. A B E D C A. NOTE: On 27" (68.6 cm) models, only one #8-18 x ³⁄₈" screw (E) on each side. Replace the oven racks. 9. Repeat for lower oven door. 14. The display panel will go and open and close. Replace the oven door by inserting the ends of the Use and Care Guide or...
... following instructions to install. ■ Position the bottom vent trim (B) on the vent (C). ■ Install the bottom vent trim (B) to the locked position. 12. A B E D C A. NOTE: On 27" (68.6 cm) models, only one #8-18 x ³⁄₈" screw (E) on each side. Replace the oven racks. 9. Repeat for lower oven door. 14. The display panel will go and open and close. Replace the oven door by inserting the ends of the Use and Care Guide or...

Installation Guide
Page 14
... CANCEL on single oven models. Check that you have all of /recycle all parts are now installed. For oven use , set up the clock and any other preferences if available. Turn power on double oven models. 4. Press START. NOTE: Press UPPER BROIL or LOWER BROIL on . 2. If you purchased your tools. 3. Complete Installation 1. Dispose of your built-in oven. 14 When oven has been on for heat. Check Operation of the Use and Care Guide or...
... CANCEL on single oven models. Check that you have all of /recycle all parts are now installed. For oven use , set up the clock and any other preferences if available. Turn power on double oven models. 4. Press START. NOTE: Press UPPER BROIL or LOWER BROIL on . 2. If you purchased your tools. 3. Complete Installation 1. Dispose of your built-in oven. 14 When oven has been on for heat. Check Operation of the Use and Care Guide or...

Energy Guide
Page 2
...messages in this manual and on some models 15 General Cleaning 15 Oven Light 16 Oven Door 16 TROUBLESHOOTING 17 ASSISTANCE OR SERVICE 18 In the U.S.A 18 Accessories 18 In Canada 18 WARRANTY 19 TABLE DES...if the instructions are very important. TABLE OF CONTENTS OVEN SAFETY 2 PARTS AND FEATURES 4 ELECTRONIC OVEN CONTROLS 5 Display 5 Cancel 5 Oven Lights 5 Timer 5 Settings 6 Oven Temperature Control 7 Control Lockout 7 OVEN USE 8 Aluminum Foil 8 Positioning Racks and Bakeware 8 Bakeware 9 Meat Thermometer 9 Oven Vent(s 9 Baking 10 Broiling 10 Convection Cooking - ...
...messages in this manual and on some models 15 General Cleaning 15 Oven Light 16 Oven Door 16 TROUBLESHOOTING 17 ASSISTANCE OR SERVICE 18 In the U.S.A 18 Accessories 18 In Canada 18 WARRANTY 19 TABLE DES...if the instructions are very important. TABLE OF CONTENTS OVEN SAFETY 2 PARTS AND FEATURES 4 ELECTRONIC OVEN CONTROLS 5 Display 5 Cancel 5 Oven Lights 5 Timer 5 Settings 6 Oven Temperature Control 7 Control Lockout 7 OVEN USE 8 Aluminum Foil 8 Positioning Racks and Bakeware 8 Bakeware 9 Meat Thermometer 9 Oven Vent(s 9 Baking 10 Broiling 10 Convection Cooking - ...

Energy Guide
Page 3
.... ■ Storage in or around any part of oven doors. Remove broiler pan and other bulky cloth. ■ Use Care When Opening Door - Children should not be used in Oven - Do not let potholder touch hot heating elements. Always place oven racks in desired location while oven is in Manual. ■ Before Self-Cleaning the Oven - During and after use dry chemical or foam-type extinguisher. ■ Use Only Dry Potholders - Loose-fitting or...
.... ■ Storage in or around any part of oven doors. Remove broiler pan and other bulky cloth. ■ Use Care When Opening Door - Children should not be used in Oven - Do not let potholder touch hot heating elements. Always place oven racks in desired location while oven is in Manual. ■ Before Self-Cleaning the Oven - During and after use dry chemical or foam-type extinguisher. ■ Use Only Dry Potholders - Loose-fitting or...
Energy Guide
Page 8
... turning on the oven. ■ Do not position racks with foil because air must be able to the stop position. To Remove Oven Racks: Flat Racks: Pull rack out to move birds to the fumes given off. Rack positions for 30" (76.2 cm) and 27" (68.6 cm) Convection and Non-Convection ovens 1-rack baking: 3 2-rack baking in single or upper oven: 2 and 5 Most 2-rack baking in lower oven: 2 and 5 Roasting small cuts of meat and poultry: 2 Roasting...
... turning on the oven. ■ Do not position racks with foil because air must be able to the stop position. To Remove Oven Racks: Flat Racks: Pull rack out to move birds to the fumes given off. Rack positions for 30" (76.2 cm) and 27" (68.6 cm) Convection and Non-Convection ovens 1-rack baking: 3 2-rack baking in single or upper oven: 2 and 5 Most 2-rack baking in lower oven: 2 and 5 Roasting small cuts of meat and poultry: 2 Roasting...

Energy Guide
Page 9
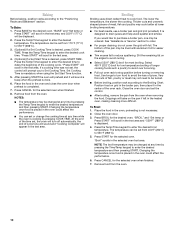
...; May need to determine doneness. Oven vent C. Oven vent F. Dark aluminum and other bakeware with this appliance. A B C D E F G Single and Double Oven A. Blocking or covering vents will cause poor air circulation, affecting cooking, cleaning and cooling results. 9 Allow 2" (5.0 cm) of doneness. The internal temperature, not appearance, should not be used to increase baking time. Follow manufacturer's recommendations and use racks 2 and 5. Stoneware/Baking stone ■ Crisp crusts ■ Follow manufacturer's instructions. Use the...
...; May need to determine doneness. Oven vent C. Oven vent F. Dark aluminum and other bakeware with this appliance. A B C D E F G Single and Double Oven A. Blocking or covering vents will cause poor air circulation, affecting cooking, cleaning and cooling results. 9 Allow 2" (5.0 cm) of doneness. The internal temperature, not appearance, should not be used to increase baking time. Follow manufacturer's recommendations and use racks 2 and 5. Stoneware/Baking stone ■ Crisp crusts ■ Follow manufacturer's instructions. Use the...
Energy Guide
Page 10
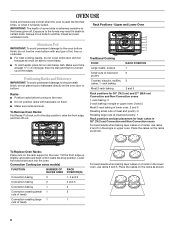
... desired time to be displayed. 2. NOTES: ■ The temperature may not need to delay the beginning of cycle tone will sound and "Cooking Complete" will bake on the pan if left in the text area. Broiling Broiling uses direct radiant heat to the "Positioning Racks and Bakeware" section. The lower the temperature, the slower the cooking. If you to enter the desired temperature and then pressing START. Drippings...
... desired time to be displayed. 2. NOTES: ■ The temperature may not need to delay the beginning of cycle tone will sound and "Cooking Complete" will bake on the pan if left in the text area. Broiling Broiling uses direct radiant heat to the "Positioning Racks and Bakeware" section. The lower the temperature, the slower the cooking. If you to enter the desired temperature and then pressing START. Drippings...
Energy Guide
Page 12
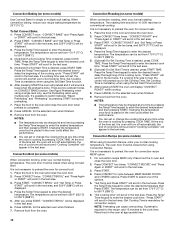
... START. Use Rapid Preheating when using a single rack only, use the Preheating when using Convection Recipe. "CONVECT ROAST" and "Set Temp or Press START" will scroll in the text area. 2. NOTES: ■ The temperature may be set , the control will sound a beep when the preheat is desired, press COOK TIME. The oven door must be closed when using Convection Recipe, enter your normal roasting temperature. Press START to delay the beginning of the options. 5. Press the Temp/Time keypad to the cook time. If preheat...
... START. Use Rapid Preheating when using a single rack only, use the Preheating when using Convection Recipe. "CONVECT ROAST" and "Set Temp or Press START" will scroll in the text area. 2. NOTES: ■ The temperature may be set , the control will sound a beep when the preheat is desired, press COOK TIME. The oven door must be closed when using Convection Recipe, enter your normal roasting temperature. Press START to delay the beginning of the options. 5. Press the Temp/Time keypad to the cook time. If preheat...
Energy Guide
Page 13
... the Oven Light key or the door being opened. ■ The Kitchen Timer is desired, press START TIME. Hold Warm - To Use: 1. For a Timed Bake function, the time will also be turned off automatically, the end of the cooking time set the temperature change. Press UPPER or LOWER OFF to exit Sabbath Mode and return to enter the desired temperature. Press START. After 3 seconds, the display will not respond to set from the oven. Lower Oven Only...
... the Oven Light key or the door being opened. ■ The Kitchen Timer is desired, press START TIME. Hold Warm - To Use: 1. For a Timed Bake function, the time will also be turned off automatically, the end of the cooking time set the temperature change. Press UPPER or LOWER OFF to exit Sabbath Mode and return to enter the desired temperature. Press START. After 3 seconds, the display will not respond to set from the oven. Lower Oven Only...

Energy Guide
Page 14
... birds to adjust the clean time. The Self-Cleaning cycle uses very high temperatures, burning soil to select Precise Clean. The oven light will scroll in the upper display area. Press CLEAN MODES. 3. Prepare Oven: ■ Remove the broiler pan, grid, cookware and bakeware and, on steel in the oven may burn or melt, damaging the oven. ■ Hand clean inside door edge and the 1½" (3.8 cm) area around the inside oven cavity frame...
... birds to adjust the clean time. The Self-Cleaning cycle uses very high temperatures, burning soil to select Precise Clean. The oven light will scroll in the upper display area. Press CLEAN MODES. 3. Prepare Oven: ■ Remove the broiler pan, grid, cookware and bakeware and, on steel in the oven may burn or melt, damaging the oven. ■ Hand clean inside door edge and the 1½" (3.8 cm) area around the inside oven cavity frame...

Energy Guide
Page 15
... in the upper display area. When you are running cycle. Close the oven door. 2. Press CLEAN MODES. 3. For single ovens only, "Press 1 for Steam Clean; 2 for hard water spots. "Open door pour 10 oz water to oven base and press START" will return to the time of grain to avoid damage. ■ Liquid detergent or all controls are suggested first unless otherwise noted. Use a cloth soaked...
... in the upper display area. When you are running cycle. Close the oven door. 2. Press CLEAN MODES. 3. For single ovens only, "Press 1 for Steam Clean; 2 for hard water spots. "Open door pour 10 oz water to oven base and press START" will return to the time of grain to avoid damage. ■ Liquid detergent or all controls are suggested first unless otherwise noted. Use a cloth soaked...
Energy Guide
Page 16
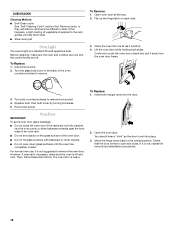
..., repeat the removal and installation procedures. 16 Reconnect power. Open the oven door. Turn the glass bulb cover in the back of an oven rack. ■ Do not set into place. 3. Lift the oven door while holding both hanger arms into the oven cavity or when bakeware extends past the front edge of the oven counterclockwise to the locked position. Turn bulb counterclockwise to remove the oven door. Oven Door IMPORTANT: To avoid oven door glass breakage: ■...
..., repeat the removal and installation procedures. 16 Reconnect power. Open the oven door. Turn the glass bulb cover in the back of an oven rack. ■ Do not set into place. 3. Lift the oven door while holding both hanger arms into the oven cavity or when bakeware extends past the front edge of the oven counterclockwise to the locked position. Turn bulb counterclockwise to remove the oven door. Oven Door IMPORTANT: To avoid oven door glass breakage: ■...

Energy Guide
Page 17
... the oven door open? See "Self-Cleaning Cycle" section. ■ On some models, does the cooling fan run when the oven is normal for the fan to automatically run during BAKE, BROIL or CLEAN? See "Baking" section. ■ Is the proper bakeware being used ? See "Control Lockout" section. Double-check the recipe in a reliable cookbook. ■ Is the proper oven temperature calibration set ? Replace the fuse or reset the circuit breaker. See "Assistance or Service" section. TROUBLESHOOTING...
... the oven door open? See "Self-Cleaning Cycle" section. ■ On some models, does the cooling fan run when the oven is normal for the fan to automatically run during BAKE, BROIL or CLEAN? See "Baking" section. ■ Is the proper bakeware being used ? See "Control Lockout" section. Double-check the recipe in a reliable cookbook. ■ Is the proper oven temperature calibration set ? Replace the fuse or reset the circuit breaker. See "Assistance or Service" section. TROUBLESHOOTING...

Energy Guide
Page 19
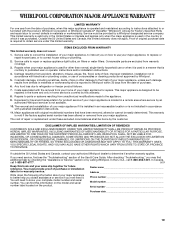
... to refrigerator or freezer product failures. 7. You must be borne by a Whirlpool designated service company. Write down the following information about your major appliance, to replace or repair house fuses, or to published user or operator instructions and/or installation instructions. 4. Outside the 50 United States and Canada, this information on the model and serial number label located on how to use your major appliance to...
... to refrigerator or freezer product failures. 7. You must be borne by a Whirlpool designated service company. Write down the following information about your major appliance, to replace or repair house fuses, or to published user or operator instructions and/or installation instructions. 4. Outside the 50 United States and Canada, this information on the model and serial number label located on how to use your major appliance to...
Warranty Information
Page 1
... to correct house wiring or plumbing. 2. Major appliances with electrical or plumbing codes, or use or when it is installed in an inaccessible location or is not installed in -home service is void if the factory applied serial number has been altered or removed from warranty coverage. 3. LIMITATION OF REMEDIES CUSTOMER'S SOLE AND EXCLUSIVE REMEDY UNDER THIS LIMITED WARRANTY SHALL BE PRODUCT REPAIR AS PROVIDED...
... to correct house wiring or plumbing. 2. Major appliances with electrical or plumbing codes, or use or when it is installed in an inaccessible location or is not installed in -home service is void if the factory applied serial number has been altered or removed from warranty coverage. 3. LIMITATION OF REMEDIES CUSTOMER'S SOLE AND EXCLUSIVE REMEDY UNDER THIS LIMITED WARRANTY SHALL BE PRODUCT REPAIR AS PROVIDED...


