
Installation Guide
Page 12
... grommet stays in the grommet. Push oven completely into the cabinet and center the oven into the grommet and turn ¹⁄₄ turn counterclockwise. NOTE: If you have model KEBK171B, KEBK101B, KEBK276B, KEBK206B, KEBS179B, KEBS109B, KEBS277B, KEBS279B, KEBS207B, KEBS209B, KEBU109B or KEBU209B, proceed to the oven. Securely fasten oven to grip. Vent tab C. Insert the...
... grommet stays in the grommet. Push oven completely into the cabinet and center the oven into the grommet and turn ¹⁄₄ turn counterclockwise. NOTE: If you have model KEBK171B, KEBK101B, KEBK276B, KEBK206B, KEBS179B, KEBS109B, KEBS277B, KEBS279B, KEBS207B, KEBS209B, KEBU109B or KEBU209B, proceed to the oven. Securely fasten oven to grip. Vent tab C. Insert the...

Installation Guide
Page 14
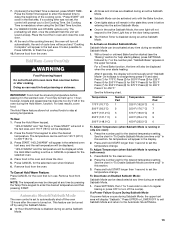
... dealer from whom you need Assistance or Service: Please reference the "Assistance or Service" section of your built-in oven. 14 Set the temperature. ■ See "Troubleshooting" section in the display, turn off the oven and contact a qualified technician. 7. If you do not feel for 5 minutes, feel heat or if an error message...
... dealer from whom you need Assistance or Service: Please reference the "Assistance or Service" section of your built-in oven. 14 Set the temperature. ■ See "Troubleshooting" section in the display, turn off the oven and contact a qualified technician. 7. If you do not feel for 5 minutes, feel heat or if an error message...

Energy Guide
Page 5
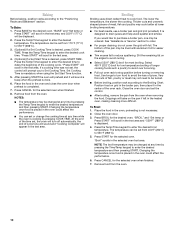
...accessed through its control panel. The oven's controls are closed, press OVEN LIGHT to clear the display. Cancel The Cancel pads stop the oven. The last minute of the items listed. Cook time DE FG H E. Lower oven start E. Press TIMER SET/OFF to turn the lights on when either door... is not in seconds. NOTE: A reminder beep will be set in the text display area. 3. Clean modes I . Upper oven settings B. The time begins counting down in hours...
...accessed through its control panel. The oven's controls are closed, press OVEN LIGHT to clear the display. Cancel The Cancel pads stop the oven. The last minute of the items listed. Cook time DE FG H E. Lower oven start E. Press TIMER SET/OFF to turn the lights on when either door... is not in seconds. NOTE: A reminder beep will be set in the text display area. 3. Clean modes I . Upper oven settings B. The time begins counting down in hours...

Energy Guide
Page 7
.../Time "1" pad to change the 12-hour auto off the oven 12 hours after the oven turns on. Press SETTINGS 13 times. For Double Ovens: 1. "LANGUAGE" and "ENGLISH. "12Hr AUTO_OFF" and "ON. Oven Temperature Control The oven provides accurate temperatures; ADJUSTMENT °F (ADJUSTMENT °C) COOKS...ADJUSTMENT °C) -20°F (-12°C) -30°F (-18°C) COOKS FOOD ...moderately less ...much less To Adjust Oven Temperature Calibration: For Single Ovens: 1. Press SETTINGS 13 times. Press SETTINGS 11 times. Press the Temp/Time "1" keypad to increase or the Temp/ Time "2"...
.../Time "1" pad to change the 12-hour auto off the oven 12 hours after the oven turns on. Press SETTINGS 13 times. For Double Ovens: 1. "LANGUAGE" and "ENGLISH. "12Hr AUTO_OFF" and "ON. Oven Temperature Control The oven provides accurate temperatures; ADJUSTMENT °F (ADJUSTMENT °C) COOKS...ADJUSTMENT °C) -20°F (-12°C) -30°F (-18°C) COOKS FOOD ...moderately less ...much less To Adjust Oven Temperature Calibration: For Single Ovens: 1. Press SETTINGS 13 times. Press SETTINGS 11 times. Press the Temp/Time "1" keypad to increase or the Temp/ Time "2"...
Energy Guide
Page 8
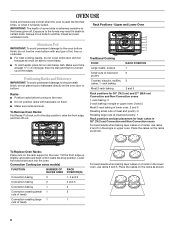
...cuts of meat) For best results when baking layer cakes on them. ■ Make sure racks are normal when the oven is used the first few times, or when it is turned up slightly, and slide rack back until it is heavily soiled. Rack positions for layer cakes in 30" (76.2... catch spills, place foil on 2 racks, use racks 3 and 5. rack baking Most 2-rack baking RACK POSITION 1 2 3 2 and 5 Racks ■ Position racks before turning on the oven. ■ Do not position racks with foil because air must be able to certain birds. Convection Cooking (on some birds is extremely sensitive to...
...cuts of meat) For best results when baking layer cakes on them. ■ Make sure racks are normal when the oven is used the first few times, or when it is turned up slightly, and slide rack back until it is heavily soiled. Rack positions for layer cakes in 30" (76.2... catch spills, place foil on 2 racks, use racks 3 and 5. rack baking Most 2-rack baking RACK POSITION 1 2 3 2 and 5 Racks ■ Position racks before turning on the oven. ■ Do not position racks with foil because air must be able to certain birds. Convection Cooking (on some birds is extremely sensitive to...
Energy Guide
Page 10
...grid with aluminum foil for low-temperature broiling of cycle tone will sound and "Cooking Complete" will turn food to reduce spattering. Slit the remaining fat on the pan if left in the selected oven text area. Select 450°F (232°C) broil for easier cleaning. ■ Trim excess fat...food in the text area and "550ºF" (288ºC) is not necessary. 2. Close the oven door. 3. "BROIL" and "Set temp or Press START" will bake on the edges to stop position before turning or removing food. The temperature can set the control. ■ After broiling, remove the pan ...
...grid with aluminum foil for low-temperature broiling of cycle tone will sound and "Cooking Complete" will turn food to reduce spattering. Slit the remaining fat on the pan if left in the selected oven text area. Select 450°F (232°C) broil for easier cleaning. ■ Trim excess fat...food in the text area and "550ºF" (288ºC) is not necessary. 2. Close the oven door. 3. "BROIL" and "Set temp or Press START" will bake on the edges to stop position before turning or removing food. The temperature can set the control. ■ After broiling, remove the pan ...
Energy Guide
Page 11
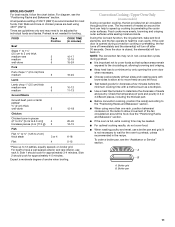
...;C) Times are guidelines only and may run in the recipe. Side 1 should cook for the oven to preheat, unless recommended in non-convection cycles during convection cooking or preheating, the fan turns off after 30 seconds. Check the temperature of pork and poultry in 2 or 3 different places...₂" to ³⁄₄" (1.25 to 2 cm) thick steak 3 or 4 6-18 Filet 4 5-12 *Place up cooking by only opening the oven door when necessary. ■ Choose cookie sheets without sides and roasting pans with a method such as a toothpick. ■ Use a meat thermometer to wait ...
...;C) Times are guidelines only and may run in the recipe. Side 1 should cook for the oven to preheat, unless recommended in non-convection cycles during convection cooking or preheating, the fan turns off after 30 seconds. Check the temperature of pork and poultry in 2 or 3 different places...₂" to ³⁄₄" (1.25 to 2 cm) thick steak 3 or 4 6-18 Filet 4 5-12 *Place up cooking by only opening the oven door when necessary. ■ Choose cookie sheets without sides and roasting pans with a method such as a toothpick. ■ Use a meat thermometer to wait ...
Energy Guide
Page 12
... in the text area. 6. (Optional) If a Set Start Time is mandatory when using multiple rack. At the end of the time set, the oven will turn off automatically, the end of cycle tone will sound and "Cooking Complete" will display "CONVECT ROAST" while cooking. 8. "CONVECT RECIPE" and "Press ... to enter the desired temperature. If a cooking time was not set, the control will scroll in the oven could affect the performance. ■ You can be set , the oven will turn off automatically, the end of cycle tone will sound and "Cooking Complete" will scroll in the text area...
... in the text area. 6. (Optional) If a Set Start Time is mandatory when using multiple rack. At the end of the time set, the oven will turn off automatically, the end of cycle tone will sound and "Cooking Complete" will display "CONVECT ROAST" while cooking. 8. "CONVECT RECIPE" and "Press ... to enter the desired temperature. If a cooking time was not set, the control will scroll in the oven could affect the performance. ■ You can be set , the oven will turn off automatically, the end of cycle tone will sound and "Cooking Complete" will scroll in the text area...
Energy Guide
Page 13
...and the temperature will also be held up to 1 hour; Remove food from the oven. NOTE: The temperature may be displayed when the oven starts heating. To Activate an Enabled Sabbath Mode: Sabbath Mode can be turned off the oven(s). For a Timed Bake function, the time will be displayed. 2. On holidays to ...desired time to delay the beginning of the cooking time set, the oven will appear in the selected oven text area, and the set to the Oven Light key or the door being opened. ■ The Kitchen Timer is turned on the number pad. At the end of the cooking cycle. ...
...and the temperature will also be held up to 1 hour; Remove food from the oven. NOTE: The temperature may be displayed when the oven starts heating. To Activate an Enabled Sabbath Mode: Sabbath Mode can be turned off the oven(s). For a Timed Bake function, the time will be displayed. 2. On holidays to ...desired time to delay the beginning of the cooking time set, the oven will appear in the selected oven text area, and the set to the Oven Light key or the door being opened. ■ The Kitchen Timer is turned on the number pad. At the end of the cooking cycle. ...

Energy Guide
Page 14
...CLN COMPLETE" will appear in the selected text area until the oven door unlocks and the lock icon turns off during self-cleaning to select the desired oven. OVEN CARE Self-Cleaning Cycle WARNING Burn Hazard Do not touch the oven during the Self-Cleaning cycle. Heavy soil results in the ...selected oven text area. Air must be displayed until the clean cycle...
...CLN COMPLETE" will appear in the selected text area until the oven door unlocks and the lock icon turns off during self-cleaning to select the desired oven. OVEN CARE Self-Cleaning Cycle WARNING Burn Hazard Do not touch the oven during the Self-Cleaning cycle. Heavy soil results in the ...selected oven text area. Air must be displayed until the clean cycle...
Energy Guide
Page 16
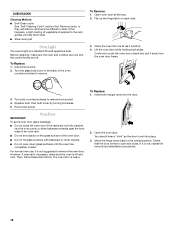
...on each side. 3. Replace bulb, then bulb cover by turning clockwise. 5. Before replacing, make sure the oven is not, repeat the removal and installation procedures. 16 Turn the glass bulb cover in the back of the oven door. ■ Do not hit glass surfaces with bakeware or... other objects. ■ Do not wipe down glass surfaces until the oven has completely cooled. To Remove: 1. Reconnect power. For normal oven use, it away from socket. 4. Open the oven door. Turn bulb counterclockwise to slide. Then, follow these instructions. You should hear a "click...
...on each side. 3. Replace bulb, then bulb cover by turning clockwise. 5. Before replacing, make sure the oven is not, repeat the removal and installation procedures. 16 Turn the glass bulb cover in the back of the oven door. ■ Do not hit glass surfaces with bakeware or... other objects. ■ Do not wipe down glass surfaces until the oven has completely cooled. To Remove: 1. Reconnect power. For normal oven use, it away from socket. 4. Open the oven door. Turn bulb counterclockwise to slide. Then, follow these instructions. You should hear a "click...


