Whirlpool WOD51ES4E Support and Manuals
Get Help and Manuals for this Whirlpool item
View All Support Options Below
Free Whirlpool WOD51ES4E manuals!
Problems with Whirlpool WOD51ES4E?
Ask a Question
Free Whirlpool WOD51ES4E manuals!
Problems with Whirlpool WOD51ES4E?
Ask a Question
Popular Whirlpool WOD51ES4E Manual Pages
Installation Instructions - Page 1
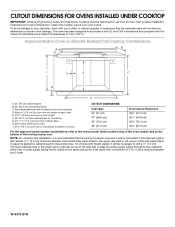
... all governing codes and ordinances. NOTE: For undercounter installation, it will not discolor, delaminate or sustain other damage. If water supply tubing hole is recommended that the materials used will be located in the upper right or left cabinet. See cooktop Installation Instructions for oven trim to the junction box.
On models with the maximum...
Installation Instructions - Page 2
NOTE: For undercounter installation, it will be necessary to drill a 1" (1.3 cm) minimum diameter hole in the adjacent right or left rear...the appliance cable through to the junction box. Recommended oven and cooktop junction box locations D. See Cutout Dimensions chart.
On models with Steam-Assist, it is greater than
36" (91.4 cm), dimension "G" can be located in the upper right or...
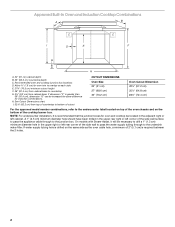
Installation Instructions - Page 3

... codes regarding the use of the side wall to the undersink water filter.
On models with Steam-Assist, it is recommended that the junction box for cooktop. If water supply tubing hole is drilled on the right (same location as "J" in the above diagram). Allow 1.6 cm) for flexible or rigid gas pipe installation...
Owners Manual - Page 1
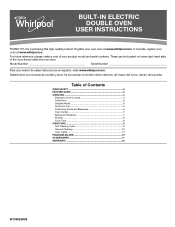
...model and serial numbers.
Model Number Serial Number Para una versión de estas instrucciones en español, visite www.whirlpool.com. These can be located on lower right-hand side of Contents
OVEN SAFETY 2 FEATURE GUIDE...10 PROBLEM SOLVER 10 ACCESSORIES 11 WARRANTY 12
W10692590B Table of the oven frame inside the oven door. BUILT-IN ELECTRIC DOUBLE OVEN
USER INSTRUCTIONS
...
Owners Manual - Page 2
...INSTRUCTIONS
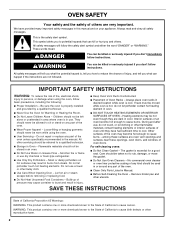
WARNING: To reduce the risk of fire, electrical shock,
injury to burst and result in color. Do not repair or replace any part of the oven unless specifically recommended in this manual and on any part of the oven.
■ Clean Only Parts... Installation - Smother fire or flame or use . For self-cleaning ovens:
■ Do Not Clean Gasket -
SAVE THESE INSTRUCTIONS
State...
Owners Manual - Page 3

.... 3.
KEYPAD SETTINGS/ CLOCK
SETTINGS/ CLOCK Oven Light
FEATURE
INSTRUCTIONS
Clock
This clock...SET/OFF to cancel the Timer and return to set the time of day.
For example, for the desired oven. 2. To change the temperature when one hour before or after pressing a keypad, the function is canceled and the time of countdown. 4. FEATURE GUIDE
This manual covers several models...
Owners Manual - Page 4

... birds.
Enter a temperature in the allowable range.
3. To change the tone settings.
4
Settings
Many features of the temperatures allowed, the minimum or maximum allowed temperature will function with... upper oven or press "2" for a set a Timed Cook or a Delayed Timed Cook, see the "Cook Time" section. KEYPAD
FEATURE
INSTRUCTIONS
BROIL
Broiling
1. Position the cookware in...
Owners Manual - Page 6
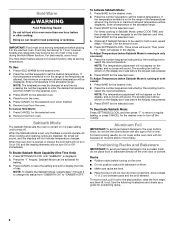
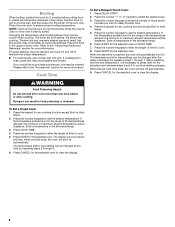
... Allow at serving temperature. Use the following illustrations and charts as instructed by the scrolling text to stay at least ¹⁄₂... is to "SABBATH OFF." To Deactivate Sabbath Mode: Press SETTINGS/CLOCK, and then press "7" to return to regular baking,...rise into the broil element. Press the number keypad as a guide for
baking. 3.
To Cancel Hold Warm: 1. When the ...
Owners Manual - Page 7
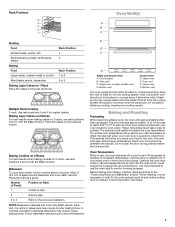
... Most baked goods, casseroles
Baking Layer Cakes on 1 Rack Place the cakes on the rack as a guide.
Dark, dull, non-stick or glass pans may run slightly hot or cool at the proper temperature..... Higher temperatures will begin at any point in use , the oven elements will go above your set temperature to offset the heat lost when your oven inside the oven cavity.
Upper oven E. The...
Owners Manual - Page 8
...be displayed. When resetting the time and temperature, it in oven more precise control when cooking.
To Set a Delayed Timed Cook: 1. Press the number "1" or "2" keypad to continue making changes. Press... the time ends, the oven will count down the time. The temperature and/or time setting can result in the allowable range.
3. It is necessary to press Start for the selected...
Owners Manual - Page 9

...the Self-Cleaning cycle. Use the following chart as a guide to another closed or the door will not lock and ...the number keypads to enter the desired amount of porcelain on your model, see "Oven Vent" or "Oven Vents" section. Press START.... Choose the clean level desired by pressing the appropriate
number keypad as instructed by the scrolling text. 3. Suggested clean times are 3 hours for ...
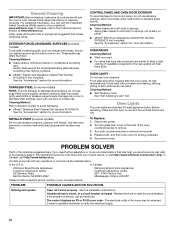
Owners Manual - Page 10
...
EXTERIOR PORCELAIN ENAMEL SURFACES (on cleaning products.
Replace the fuse or reset the circuit breaker.
The control displays an F9 or F9 E0 error code - Turn bulb counterclockwise to the rack guides will operate
Oven isn't wired properly -
Contact us by turning clockwise. 5. Always follow label instructions on some models) Food spills containing acids, such as...
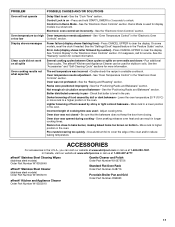
Owners Manual - Page 11
...807-6777.
Demo Mode is too close to unlock.
Error code (display shows letter followed by shiny or light colored bakeware...the display. See "Oven Temperature Control" in the "Feature Guide" section. Clean cycle did not work on all spills
...used for display models in a showroom.
Display shows messages
Power failure (display shows flashing time) - See the "Settings/Clock" keypad...
Owners Manual - Page 12
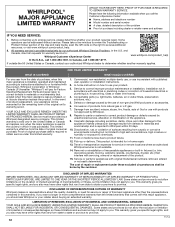
... minutes to review the Troubleshooting or Problem Solver section of product replacement, your product.
3. Consumable parts (i.e. Some questions can be borne by our authorized Whirlpool Service Providers. In the event of the Use and Care Guide, scan the QR code on how to product failure.
12. This limited warranty is valid only in -home repair.
13. Damage from...
Quick Reference Sheet - Page 1

... oven or upper
double oven
Double Oven
D. Online Ordering Information
For detailed installation instruction and maintenance information, winter storage, and transportation tips, please
see the online Control Guide. This may save you need to contact us as a guide for the appropriate region.
To Replace:
1. Press Start Step 4. The Cancel button can be able to move...
Whirlpool WOD51ES4E Reviews
We have not received any reviews for Whirlpool yet.