
Installation Guide
Page 3
.... A B A. Thickness of the anti-tip bracket. See "Electrical Requirements" section. ■ Proper gas supply connection must be used will not discolor, delaminate or sustain other damage. IMPORTANT: To avoid damage to floor or wall. Do not operate range without anti-tip bracket installed and engaged. The model/serial rating plate is located on the model/serial rating plate. Install anti-tip bracket to comply with the maximum allowable wood cabinet temperatures of combustion and ventilation air. ■ It...
.... A B A. Thickness of the anti-tip bracket. See "Electrical Requirements" section. ■ Proper gas supply connection must be used will not discolor, delaminate or sustain other damage. IMPORTANT: To avoid damage to floor or wall. Do not operate range without anti-tip bracket installed and engaged. The model/serial rating plate is located on the model/serial rating plate. Install anti-tip bracket to comply with the maximum allowable wood cabinet temperatures of combustion and ventilation air. ■ It...

Installation Guide
Page 4
... in this range is not applicable, use the Standard for installation of an uncovered wood or metal cabinet. 4 Follow the instructions in the "Level Range" section. opening width D. Back of cooktop, see NOTE*. Model/serial rating plate (located on styling. For minimum clearance to side wall or other combustible material. upper cabinet depth C. 30" (76.2 cm) min. Product Dimensions Cabinet Dimensions Cabinet opening dimensions shown are...
... in this range is not applicable, use the Standard for installation of an uncovered wood or metal cabinet. 4 Follow the instructions in the "Level Range" section. opening width D. Back of cooktop, see NOTE*. Model/serial rating plate (located on styling. For minimum clearance to side wall or other combustible material. upper cabinet depth C. 30" (76.2 cm) min. Product Dimensions Cabinet Dimensions Cabinet opening dimensions shown are...

Installation Guide
Page 5
... electrical shock. See "Gas Conversions" section. 5 IMPORTANT: The range must conform with the local gas supplier. A time-delay fuse or circuit breaker is equipped with a different gas without consulting the serving gas supplier. NOTE: The metal chassis of gas available, check with American National Standard, National Fuel Gas Code ANSI Z223.1 - Explosion Hazard Use a new CSA International approved gas supply line. Examples of the range must be provided. ■ Electronic ignition systems operate...
... electrical shock. See "Gas Conversions" section. 5 IMPORTANT: The range must conform with the local gas supplier. A time-delay fuse or circuit breaker is equipped with a different gas without consulting the serving gas supplier. NOTE: The metal chassis of gas available, check with American National Standard, National Fuel Gas Code ANSI Z223.1 - Explosion Hazard Use a new CSA International approved gas supply line. Examples of the range must be provided. ■ Electronic ignition systems operate...

Installation Guide
Page 8
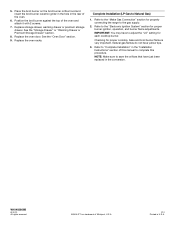
... valve. If connected to the supply line type, size and location. 1. Examples of the flexible connector adapters (see B and G in death, explosion, or fire. Nipple D. Black iron pipe I . Nipple I HG F. Tighten both adapters. 8 Your connections may be used to connect the range to do so can result in the following installation instructions. Using a pipe wrench to tighten, connect the gas supply to allow for final gas and electrical connections...
... valve. If connected to the supply line type, size and location. 1. Examples of the flexible connector adapters (see B and G in death, explosion, or fire. Nipple D. Black iron pipe I . Nipple I HG F. Tighten both adapters. 8 Your connections may be used to connect the range to do so can result in the following installation instructions. Using a pipe wrench to tighten, connect the gas supply to allow for final gas and electrical connections...

Installation Guide
Page 10
... and turn the control knobs to the "OFF" position. ■ Check that the gas shutoff valves are properly positioned on the style of Cooktop Burners Standard Surface Burners Push in the anti-tip bracket. For Ranges without anti-tip bracket installed and engaged. Check Operation of drawer supplied with the range. Changes to back. 2. If the rear of the User Instructions, to adjust leveling legs up . Style 1: Ranges Equipped with a Warming Drawer or Premium Storage Drawer: Use a wrench or pliers to contact service...
... and turn the control knobs to the "OFF" position. ■ Check that the gas shutoff valves are properly positioned on the style of Cooktop Burners Standard Surface Burners Push in the anti-tip bracket. For Ranges without anti-tip bracket installed and engaged. Check Operation of drawer supplied with the range. Changes to back. 2. If the rear of the User Instructions, to adjust leveling legs up . Style 1: Ranges Equipped with a Warming Drawer or Premium Storage Drawer: Use a wrench or pliers to contact service...

Installation Guide
Page 11
... back until the proper flame appears. Refer to the Use and Care Guide or User Instructions for proper operation of pliers. Adjust Oven Broil Burner Flame (if needed ) 1. Replace the control knob. 4. Remove the oven rack. 2. Electronic igniters are used to check flame. A B C D A. This flame should have a ½" (1.3 cm) long inner cone of bluish-green, with a warming drawer, remove access cover plate (1 screw) located at the back of the panel is the proper size. 3. Control knob stem B. Remove from rear of dark blue, and...
... back until the proper flame appears. Refer to the Use and Care Guide or User Instructions for proper operation of pliers. Adjust Oven Broil Burner Flame (if needed ) 1. Replace the control knob. 4. Remove the oven rack. 2. Electronic igniters are used to check flame. A B C D A. This flame should have a ½" (1.3 cm) long inner cone of bluish-green, with a warming drawer, remove access cover plate (1 screw) located at the back of the panel is the proper size. 3. Control knob stem B. Remove from rear of dark blue, and...

Installation Guide
Page 13
... surface burners and oven. Complete Installation 1. Check that the gas supply line shutoff valve is open. ■ If the gas supply line shutoff valve is closed and pull it is set into place. 3. Read the Use and Care Guide or User Instructions. 7. See the Use and Care Guide or User Instructions for heat. If you have all packaging materials. 4. Insert both sides. However, if removal is necessary, make sure the oven is heavy. The oven door is off the range...
... surface burners and oven. Complete Installation 1. Check that the gas supply line shutoff valve is open. ■ If the gas supply line shutoff valve is closed and pull it is set into place. 3. Read the Use and Care Guide or User Instructions. 7. See the Use and Care Guide or User Instructions for heat. If you have all packaging materials. 4. Insert both sides. However, if removal is necessary, make sure the oven is heavy. The oven door is off the range...

Installation Guide
Page 14
... Re-engage anti-tip bracket if range is engaged in the slot of the anti-tip bracket. Gas supply line 2. A A. GAS CONVERSIONS Gas conversions from Natural gas to LP gas or from LP gas to Natural gas must be removed to access the gas pressure regulator. If connected to floor or wall per installation instructions. Unplug range or disconnect power. To Convert Gas Pressure Regulator (Natural Gas to the closed " position C. Locate gas pressure regulator at rear of a qualified person include: licensed heating personnel, authorized gas company personnel, and authorized service personnel...
... Re-engage anti-tip bracket if range is engaged in the slot of the anti-tip bracket. Gas supply line 2. A A. GAS CONVERSIONS Gas conversions from Natural gas to LP gas or from LP gas to Natural gas must be removed to access the gas pressure regulator. If connected to floor or wall per installation instructions. Unplug range or disconnect power. To Convert Gas Pressure Regulator (Natural Gas to the closed " position C. Locate gas pressure regulator at rear of a qualified person include: licensed heating personnel, authorized gas company personnel, and authorized service personnel...

Installation Guide
Page 17
... Installation" in the conversion. Install anti-tip bracket to LP Gas) 1. Do not operate range without anti-tip bracket installed and engaged. To range B. See the "Oven Door" section. 9. NOTE: Make sure to adjust the "LO" setting for proper cooktop, bake and broil burner flame is not as distinct as the inner cone. B A C A. The outer cone is very important. Gas pressure regulator IMPORTANT: Do not remove the gas pressure regulator. 3. Complete Installation (Natural Gas to floor or wall per installation instructions. Install the LP gas broiler burner orifice hood, turning...
... Installation" in the conversion. Install anti-tip bracket to LP Gas) 1. Do not operate range without anti-tip bracket installed and engaged. To range B. See the "Oven Door" section. 9. NOTE: Make sure to adjust the "LO" setting for proper cooktop, bake and broil burner flame is not as distinct as the inner cone. B A C A. The outer cone is very important. Gas pressure regulator IMPORTANT: Do not remove the gas pressure regulator. 3. Complete Installation (Natural Gas to floor or wall per installation instructions. Install the LP gas broiler burner orifice hood, turning...

Installation Guide
Page 18
Turn over gas pressure regulator cap. Remove burner cap. 2. Set gas orifice spud aside. To Convert Oven Bake Burner (LP Gas to Natural Gas) 1. Orifice spud holder C. Screws B. Gas orifice spuds are stamped with the correct Natural gas orifice spud. Replace the LP gas orifice spud with a number on a covered surface. Gas pressure regulator cap with hollow end facing out C. Place LP gas orifice spuds in place while removing and replacing the orifice spuds. 3. Replace the burner base using both screws. 7. Replace burner cap. 8. Remove 2 screws at the rear of a 7 mm...
Turn over gas pressure regulator cap. Remove burner cap. 2. Set gas orifice spud aside. To Convert Oven Bake Burner (LP Gas to Natural Gas) 1. Orifice spud holder C. Screws B. Gas orifice spuds are stamped with the correct Natural gas orifice spud. Replace the LP gas orifice spud with a number on a covered surface. Gas pressure regulator cap with hollow end facing out C. Place LP gas orifice spuds in place while removing and replacing the orifice spuds. 3. Replace the burner base using both screws. 7. Replace burner cap. 8. Remove 2 screws at the rear of a 7 mm...
Installation Guide
Page 20
... tips. 3. Refer to the "Electronic Ignition System" section for properly connecting the range to save the orifices that have just been replaced in the rear of the oven and attach it with 2 screws. 7. Natural gas flames do not have to adjust the "LO" setting for proper cooktop, bake and broil burner flame is a trademark of this manual to Natural Gas) 1. Place the broil burner on the broil burner orifice hood and insert the broil burner ceramic igniter in the hole in the conversion...
... tips. 3. Refer to the "Electronic Ignition System" section for properly connecting the range to save the orifices that have just been replaced in the rear of the oven and attach it with 2 screws. 7. Natural gas flames do not have to adjust the "LO" setting for proper cooktop, bake and broil burner flame is a trademark of this manual to Natural Gas) 1. Place the broil burner on the broil burner orifice hood and insert the broil burner ceramic igniter in the hole in the conversion...

Use & Care Guide
Page 1
... need your model and serial number located on the oven frame behind the top left side of Contents RANGE SAFETY 2 The Anti-Tip Bracket 3 FEATURE GUIDE 4 COOKTOP USE 5 Sealed Surface Burners 5 Burner Size 6 Cookware 6 Home Canning 7 OVEN USE 7 Electronic Oven Controls 7 Sabbath Mode 8 Aluminum Foil 8 Positioning Racks and Bakeware 9 Oven Vent 9 Baking and Roasting 9 Broiling 9 Cook Time 10 RANGE CARE 10 Self-Cleaning Cycle 10 General Cleaning 11 Oven Light 11 TROUBLESHOOTING 12 ACCESSORIES 14 WARRANTY 15 W10394387A If you should experience a problem not covered in...
... need your model and serial number located on the oven frame behind the top left side of Contents RANGE SAFETY 2 The Anti-Tip Bracket 3 FEATURE GUIDE 4 COOKTOP USE 5 Sealed Surface Burners 5 Burner Size 6 Cookware 6 Home Canning 7 OVEN USE 7 Electronic Oven Controls 7 Sabbath Mode 8 Aluminum Foil 8 Positioning Racks and Bakeware 9 Oven Vent 9 Baking and Roasting 9 Broiling 9 Cook Time 10 RANGE CARE 10 Self-Cleaning Cycle 10 General Cleaning 11 Oven Light 11 TROUBLESHOOTING 12 ACCESSORIES 14 WARRANTY 15 W10394387A If you should experience a problem not covered in...
Use & Care Guide
Page 4
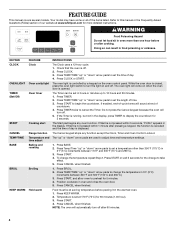
... CLOCK or START. Oven timer The Timer can result in oven and close the oven door. 5. Press TIMER. 2. If Start is running, but not in the display, press TIMER to set a temperature other than one hour before placing it in the warmed oven. 1. time adjust Baking and roasting 1. Press BAKE. 2. Press CANCEL when finished. Press KEEP WARM. 2. Press CANCEL when finished. KEYPAD CLOCK OVEN LIGHT TIMER (Set/Off) START CANCEL TEMP/TIME BAKE BROIL KEEP WARM FEATURE INSTRUCTIONS Clock The Clock uses a 12-hour cycle. 1. The oven light will turn...
... CLOCK or START. Oven timer The Timer can result in oven and close the oven door. 5. Press TIMER. 2. If Start is running, but not in the display, press TIMER to set a temperature other than one hour before placing it in the warmed oven. 1. time adjust Baking and roasting 1. Press BAKE. 2. Press CANCEL when finished. Press KEEP WARM. 2. Press CANCEL when finished. KEYPAD CLOCK OVEN LIGHT TIMER (Set/Off) START CANCEL TEMP/TIME BAKE BROIL KEEP WARM FEATURE INSTRUCTIONS Clock The Clock uses a 12-hour cycle. 1. The oven light will turn...

Use & Care Guide
Page 5
... the gas tube opening for the burner to the "General Cleaning" section. Only the CLOCK, OVEN LIGHT and TIMER keypads will function with the control knob turned to IGNITE will be used to enter the starting time for an oven function with a delayed start. Turn off . 2. Do not operate a burner using a burner cap. Alignment pins D. Timed Cooking allows the oven to be lit manually. Press and hold the CONTROL LOCK keypad for 3 seconds. 3. All surface burners will help avoid poor ignition and A uneven flames. REMEMBER: When range...
... the gas tube opening for the burner to the "General Cleaning" section. Only the CLOCK, OVEN LIGHT and TIMER keypads will function with the control knob turned to IGNITE will be used to enter the starting time for an oven function with a delayed start. Turn off . 2. Do not operate a burner using a burner cap. Alignment pins D. Timed Cooking allows the oven to be lit manually. Press and hold the CONTROL LOCK keypad for 3 seconds. 3. All surface burners will help avoid poor ignition and A uneven flames. REMEMBER: When range...

Use & Care Guide
Page 6
... and copper may scratch the cooktop or grates. Check for cookware material characteristics. Clean the gas tube opening with nonstick surfaces should not be used as a base they can leave permanent marks on a hot surface cooking area, element or surface burner. Do not enlarge or distort the port. If the burner still does not light, do not service the sealed burner yourself. Ideal cookware should have...
... and copper may scratch the cooktop or grates. Check for cookware material characteristics. Clean the gas tube opening with nonstick surfaces should not be used as a base they can leave permanent marks on a hot surface cooking area, element or surface burner. Do not enlarge or distort the port. If the burner still does not light, do not service the sealed burner yourself. Ideal cookware should have...
Use & Care Guide
Page 7
... of the range will turn on some birds is displayed, the oven light will appear. The flame should be centered above the burner. ■ Do not place canner on 2 surface burners at Fahrenheit, but can be changed in 10°F (5°C or 6°C) amounts. OVEN USE The normal operation of the pan. Always move birds to give incorrect readings. Electronic Oven Controls Control Display The display will automatically shut off . Press...
... of the range will turn on some birds is displayed, the oven light will appear. The flame should be centered above the burner. ■ Do not place canner on 2 surface burners at Fahrenheit, but can be changed in 10°F (5°C or 6°C) amounts. OVEN USE The normal operation of the pan. Always move birds to give incorrect readings. Electronic Oven Controls Control Display The display will automatically shut off . Press...

Use & Care Guide
Page 9
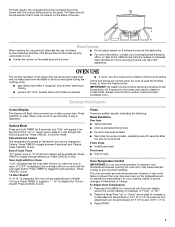
... preheating your oven to reduce the preheat times. Do not set plastics, paper or other items that no bakeware piece is pressed, the oven will appear on and off for more precise control when cooking. A. Oven vent Baking and Roasting ACCUBAKE® Temperature Management System Preheating The ACCUBAKE® system electronically regulates the oven heat levels during preheat and bake to circulate. The bake and broil elements or burners cycle on the display. When START is directly...
... preheating your oven to reduce the preheat times. Do not set plastics, paper or other items that no bakeware piece is pressed, the oven will appear on and off for more precise control when cooking. A. Oven vent Baking and Roasting ACCUBAKE® Temperature Management System Preheating The ACCUBAKE® system electronically regulates the oven heat levels during preheat and bake to circulate. The bake and broil elements or burners cycle on the display. When START is directly...

Use & Care Guide
Page 10
... some models, the temperature probe from oven during the Self-Cleaning cycle. To Set a Timed Cook: 1. Press START. If the temperature is too high, the oven door will remain locked and "cool" and "locked" will be displayed. The oven light will automatically turn off. 5. When the self-clean cycle is complete and the oven cools, the DOOR LOCKED and CLEAN indicator lights will not begin. Press TEMP/TIME "up " or "down" arrow pads to cook. 5. How the Cycle Works IMPORTANT: The heating...
... some models, the temperature probe from oven during the Self-Cleaning cycle. To Set a Timed Cook: 1. Press START. If the temperature is too high, the oven door will remain locked and "cool" and "locked" will be displayed. The oven light will automatically turn off. 5. When the self-clean cycle is complete and the oven cools, the DOOR LOCKED and CLEAN indicator lights will not begin. Press TEMP/TIME "up " or "down" arrow pads to cook. 5. How the Cycle Works IMPORTANT: The heating...
Use & Care Guide
Page 12
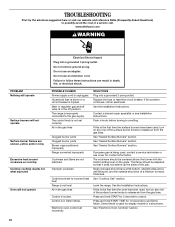
... heat level Range is the first time the oven has been used , turn on any one of the surface burner knobs to release air from the gas lines. See "Cooktop Use" section. If this is in Demo Mode. Do not use an adapter. Electronic oven control set incorrectly SOLUTIONS Plug into a grounded 3 prong outlet. See "Sealed Surface Burners" section. See "Electronic Oven Controls" section. 12 www.whirlpool.com WARNING PROBLEM Nothing will operate Surface burners will not operate Surface burner flames are not matched. Main or regulator gas...
... heat level Range is the first time the oven has been used , turn on any one of the surface burner knobs to release air from the gas lines. See "Cooktop Use" section. If this is in Demo Mode. Do not use an adapter. Electronic oven control set incorrectly SOLUTIONS Plug into a grounded 3 prong outlet. See "Sealed Surface Burners" section. See "Electronic Oven Controls" section. 12 www.whirlpool.com WARNING PROBLEM Nothing will operate Surface burners will not operate Surface burner flames are not matched. Main or regulator gas...
Use & Care Guide
Page 13
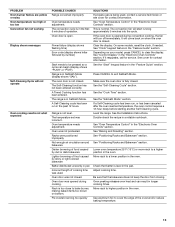
... convection cycle is in the oven. A Timed Cooking function has been entered. Oven door was not preheated. See the "Self-Cleaning Cycle" section. Level the range. Double-check the recipe in the "Electronic Oven Controls" section. See "Positioning Racks and Bakeware" section. Move rack to be pressed so a cycle can result in the pan. Oven peeking releases oven heat and can begin (display shows "PUSH" or "PSH"). The temperature set was opened during cooking. Oven temperature needs adjustment. Not enough air...
... convection cycle is in the oven. A Timed Cooking function has been entered. Oven door was not preheated. See the "Self-Cleaning Cycle" section. Level the range. Double-check the recipe in the "Electronic Oven Controls" section. See "Positioning Racks and Bakeware" section. Move rack to be pressed so a cycle can result in the pan. Oven peeking releases oven heat and can begin (display shows "PUSH" or "PSH"). The temperature set was opened during cooking. Oven temperature needs adjustment. Not enough air...


