
Warranty Information
Page 1
...than normal, single-family household use your correspondence. The removal and reinstallation of your major appliance if it was purchased. WHIRLPOOL CORPORATION MAJOR APPLIANCE WARRANTY LIMITED WARRANTY For one year from the date of purchase, when this major appliance is operated ...253-1301. For assistance or service in the U.S.A., visit www.whirlpool.com. Expenses for travel and transportation for Factory Specified Parts and repair labor to correct defects in -home service is covered by an authorized Whirlpool servicer is designed to refrigerator or freezer product failures. 7. ...
...than normal, single-family household use your correspondence. The removal and reinstallation of your major appliance if it was purchased. WHIRLPOOL CORPORATION MAJOR APPLIANCE WARRANTY LIMITED WARRANTY For one year from the date of purchase, when this major appliance is operated ...253-1301. For assistance or service in the U.S.A., visit www.whirlpool.com. Expenses for travel and transportation for Factory Specified Parts and repair labor to correct defects in -home service is covered by an authorized Whirlpool servicer is designed to refrigerator or freezer product failures. 7. ...

Use & Care Guide
Page 3
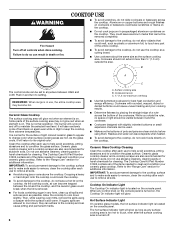
... broiler pan and other glazed utensils are the cooktop and surfaces facing the cooktop. ■ Use Proper Pan Size - Do not repair or replace any part of clothing. Surface units may result in use a towel or other flammable materials contact surface units or areas near these pans or bowls during cooking... for Warming or Heating the Room. ■ Do Not Leave Children Alone - Moist or damp potholders on hot surfaces may result in or on any part of pressure may become hot enough to cause burns - If rack must be moved while oven is used in or around any kind should not...
... broiler pan and other glazed utensils are the cooktop and surfaces facing the cooktop. ■ Use Proper Pan Size - Do not repair or replace any part of clothing. Surface units may result in use a towel or other flammable materials contact surface units or areas near these pans or bowls during cooking... for Warming or Heating the Room. ■ Do Not Leave Children Alone - Moist or damp potholders on hot surfaces may result in or on any part of pressure may become hot enough to cause burns - If rack must be moved while oven is used in or around any kind should not...
Use & Care Guide
Page 6
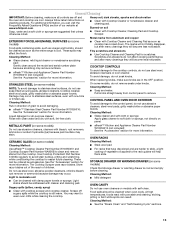
... on cookware or bakeware could crack the cooktop. ■ To avoid damage to keep the cooktop from extreme temperatures. The Cooktop Care Kit Part Number 31605 contains all soils. Refer to the cooktop, do not allow objects that cannot be set to its original color. As the cooktop...To avoid damage to the cooktop, do not cook foods directly on the console panel. Residue and water can become hot. The Cooktop Care Kit Part Number 31605 contains all soils. ■ Avoid storing jars or cans above the cooktop. Refer to clean and condition your ceramic glass cooktop. ...
... on cookware or bakeware could crack the cooktop. ■ To avoid damage to keep the cooktop from extreme temperatures. The Cooktop Care Kit Part Number 31605 contains all soils. Refer to the cooktop, do not allow objects that cannot be set to its original color. As the cooktop...To avoid damage to the cooktop, do not cook foods directly on the console panel. Residue and water can become hot. The Cooktop Care Kit Part Number 31605 contains all soils. ■ Avoid storing jars or cans above the cooktop. Refer to clean and condition your ceramic glass cooktop. ...

Use & Care Guide
Page 9
.... On the Holiday, the oven temperature can be able to move freely. 9 Press BAKE. 2. Press START. 6. To set to keep the oven on for only part of the cycle. Press BAKE. 2. "SAb" will remain on for the entire time Sabbath Mode is in use . Press START TIME. otherwise, the entire cycle...
.... On the Holiday, the oven temperature can be able to move freely. 9 Press BAKE. 2. Press START. 6. To set to keep the oven on for only part of the cycle. Press BAKE. 2. "SAb" will remain on for the entire time Sabbath Mode is in use . Press START TIME. otherwise, the entire cycle...
Use & Care Guide
Page 13
.... CERAMIC GLASS (on models with cooktop scraper and cooktop cleaner. Store razor blades out of the reach of our website at www.whirlpool.com. You may affect the finish. Food spills should be ordered as cooktop has cooled down. General Cleaning IMPORTANT: Before cleaning, ... sponge are in direction of vegetable oil applied to wear oven mitts while cleaning the cooktop. ■ affresh™ Kitchen and Appliance Cleaner Part Number W10355010 (not included): See the "Accessories" section for more information. Burned-on panel. Cleaning Method: ■ Glass cleaner, mild...
.... CERAMIC GLASS (on models with cooktop scraper and cooktop cleaner. Store razor blades out of the reach of our website at www.whirlpool.com. You may affect the finish. Food spills should be ordered as cooktop has cooled down. General Cleaning IMPORTANT: Before cleaning, ... sponge are in direction of vegetable oil applied to wear oven mitts while cleaning the cooktop. ■ affresh™ Kitchen and Appliance Cleaner Part Number W10355010 (not included): See the "Accessories" section for more information. Burned-on panel. Cleaning Method: ■ Glass cleaner, mild...

Use & Care Guide
Page 15
...heat and can visit our website at www.whirlpool.com/cookingaccessories. Cooktop Care Kit (ceramic glass models) (includes cleaner, protectant, scraper, and applicator pads) Order Part Number 31605 Cooktop Protectant (ceramic glass models) Order Part Number 31463A affresh™ Stainless Steel Cleaning ... Pan Cleaner Order Part Number 31617A Gourmet Griddle Order Part Number 4396096RB Standard Flat Oven Rack Order Part Number W10268578 Porcelain Broiler Pan and Grid Order Part Number 4396923 Premium Broil Pan and Roasting Rack Order Part Number W10123240 www.whirlpool.com/broilerpan 15 ...
...heat and can visit our website at www.whirlpool.com/cookingaccessories. Cooktop Care Kit (ceramic glass models) (includes cleaner, protectant, scraper, and applicator pads) Order Part Number 31605 Cooktop Protectant (ceramic glass models) Order Part Number 31463A affresh™ Stainless Steel Cleaning ... Pan Cleaner Order Part Number 31617A Gourmet Griddle Order Part Number 4396096RB Standard Flat Oven Rack Order Part Number W10268578 Porcelain Broiler Pan and Grid Order Part Number 4396923 Premium Broil Pan and Roasting Rack Order Part Number W10123240 www.whirlpool.com/broilerpan 15 ...
Use & Care Guide
Page 16
... this major appliance is operated and maintained according to instructions attached to or furnished with the product, Whirlpool Corporation or Whirlpool Canada LP (hereafter "Whirlpool") will pay for Factory Specified Parts and repair labor to the appliance. 9. Consumable parts are excluded from unauthorized modifications made to correct defects in U.S.A. Costs associated with the removal from...
... this major appliance is operated and maintained according to instructions attached to or furnished with the product, Whirlpool Corporation or Whirlpool Canada LP (hereafter "Whirlpool") will pay for Factory Specified Parts and repair labor to the appliance. 9. Consumable parts are excluded from unauthorized modifications made to correct defects in U.S.A. Costs associated with the removal from...
Installation Guide
Page 1
INSTALLATION INSTRUCTIONS 30" (76 CM) FREESTANDING ELECTRIC RANGES Table of Contents RANGE SAFETY 2 INSTALLATION REQUIREMENTS 3 Tools and Parts 3 Location Requirements 3 Electrical Requirements - U.S.A. W10403811C U.S.A. Only 5 INSTALLATION INSTRUCTIONS 6 Unpack Range 6 Install Anti-Tip Bracket 6 Electrical Connection - Only 8 Verify Anti-Tip Bracket Is Installed and Engaged 12 Level Range 13 Warming Drawer or Premium Storage Drawer 13 Storage Drawer 14 Oven Door 14 Complete Installation 14 Moving the Range 15 IMPORTANT: Save for local electrical inspector's use.
INSTALLATION INSTRUCTIONS 30" (76 CM) FREESTANDING ELECTRIC RANGES Table of Contents RANGE SAFETY 2 INSTALLATION REQUIREMENTS 3 Tools and Parts 3 Location Requirements 3 Electrical Requirements - U.S.A. W10403811C U.S.A. Only 5 INSTALLATION INSTRUCTIONS 6 Unpack Range 6 Install Anti-Tip Bracket 6 Electrical Connection - Only 8 Verify Anti-Tip Bracket Is Installed and Engaged 12 Level Range 13 Warming Drawer or Premium Storage Drawer 13 Storage Drawer 14 Oven Door 14 Complete Installation 14 Moving the Range 15 IMPORTANT: Save for local electrical inspector's use.

Installation Guide
Page 3
...cord kit marked for use the Standard for use with nominal 1³⁄₈" (3.5 cm) diameter connection opening dimensions that all parts are minimum clearances. ■ The anti-tip bracket must end in a mobile home installation. The model/serial rating plate is to...terminals or open-end spade terminals with your cabinets, check with upturned ends. ■ A UL listed strain relief. When such standard is required. Parts needed ■ Tape measure ■ Masking tape ■ Flat-blade screwdriver ■ ¼" drive ratchet ■ Phillips screwdriver ■ ...
...cord kit marked for use the Standard for use with nominal 1³⁄₈" (3.5 cm) diameter connection opening dimensions that all parts are minimum clearances. ■ The anti-tip bracket must end in a mobile home installation. The model/serial rating plate is to...terminals or open-end spade terminals with your cabinets, check with upturned ends. ■ A UL listed strain relief. When such standard is required. Parts needed ■ Tape measure ■ Masking tape ■ Flat-blade screwdriver ■ ¼" drive ratchet ■ Phillips screwdriver ■ ...

Installation Guide
Page 6
... Unpack Range WARNING Excessive Weight Hazard Use two or more people to do so can result in back or other injury. 1. Remove oven racks and parts package from centerline as shown.
... Unpack Range WARNING Excessive Weight Hazard Use two or more people to do so can result in back or other injury. 1. Remove oven racks and parts package from centerline as shown.

Installation Guide
Page 9
....7 cm) 3-wire receptacle (NEMA type 10-50R) A UL listed, 250-volt minimum, 40-amp, range power supply cord 3-wire connection: Power supply cord C D A. Terminal block B. Part of the range. Allow enough slack to easily attach the wiring to : A circuit breaker 3-wire connection: box or fused Direct wire disconnect 3" (7.6 cm) B A. UL listed...
....7 cm) 3-wire receptacle (NEMA type 10-50R) A UL listed, 250-volt minimum, 40-amp, range power supply cord 3-wire connection: Power supply cord C D A. Terminal block B. Part of the range. Allow enough slack to easily attach the wiring to : A circuit breaker 3-wire connection: box or fused Direct wire disconnect 3" (7.6 cm) B A. UL listed...

Installation Guide
Page 11
... driver to connect the neutral (white) wire to torque as shown in . (4.0 N-m) 5. Ground-link screw E. Line 1 (black) G. Securely tighten hex nuts. 9. A B B C C D E A. Bare (green) ground wire F. Part of the ground link under the screw. 3. Discard C. Line 2 (red) C. Pull the wires through the conduit on cord/conduit plate on the front of the...
... driver to connect the neutral (white) wire to torque as shown in . (4.0 N-m) 5. Ground-link screw E. Line 1 (black) G. Securely tighten hex nuts. 9. A B B C C D E A. Bare (green) ground wire F. Part of the ground link under the screw. 3. Discard C. Line 2 (red) C. Pull the wires through the conduit on cord/conduit plate on the front of the...

Installation Guide
Page 14
.... IMPORTANT: If the range control displays an "F9" or "F9, E0" error code, the electrical outlet in the drawer glide. 3. If range is an extra part, go back through the steps to open and close. To Replace: 1. Pinch the hinge latch between two fingers and pull forward. Turn power on range... the Use and Care Guide or User Instructions or User Instructions. 6. Move the hinge levers back to the drawer stop notch 2. Open oven door all parts are placed in the range Use and Care Guide or User Instructions. 7. You should hear a "click" as it away from the oven door frame. or...
.... IMPORTANT: If the range control displays an "F9" or "F9, E0" error code, the electrical outlet in the drawer glide. 3. If range is an extra part, go back through the steps to open and close. To Replace: 1. Pinch the hinge latch between two fingers and pull forward. Turn power on range... the Use and Care Guide or User Instructions or User Instructions. 6. Move the hinge levers back to the drawer stop notch 2. Open oven door all parts are placed in the range Use and Care Guide or User Instructions. 7. You should hear a "click" as it away from the oven door frame. or...

Installation Guide
Page 15
.... 3. Re-engage anti-tip bracket if range is necessary for cleaning or maintenance: For power supply cord-connected ranges: 1. Complete cleaning or maintenance. 4. Replace all parts and panels before servicing. See the "Verify Anti-Tip Bracket Is Installed and Engaged" section. 5. Reconnect power. 15
.... 3. Re-engage anti-tip bracket if range is necessary for cleaning or maintenance: For power supply cord-connected ranges: 1. Complete cleaning or maintenance. 4. Replace all parts and panels before servicing. See the "Verify Anti-Tip Bracket Is Installed and Engaged" section. 5. Reconnect power. 15


