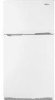
User Instructions
Page 1
This symbol alerts you to reduce the chance of the refrigerator compartment. In Canada, visit our website at www.whirlpool.ca or call us at www.whirlpool.com for purchasing this manual and on the inside wall of injury, and tell you what the potential hazard is the safety ...alert symbol. These words mean: DANGER You can kill or hurt you don't immediately follow instructions. ® REFRIGERATOR USER INSTRUCTIONS THANK YOU...
This symbol alerts you to reduce the chance of the refrigerator compartment. In Canada, visit our website at www.whirlpool.ca or call us at www.whirlpool.com for purchasing this manual and on the inside wall of injury, and tell you what the potential hazard is the safety ...alert symbol. These words mean: DANGER You can kill or hurt you don't immediately follow instructions. ® REFRIGERATOR USER INSTRUCTIONS THANK YOU...
User Instructions
Page 2
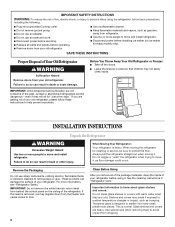
... vapors, such as gasoline, away from dropping. 2 Tempered glass is removed, ice may not easily climb inside of your old refrigerator, please follow basic precautions, including the following: ■ Plug into many small, pebble-size pieces. Use special care when removing...If you remove all parts and panels before operating. ■ Remove doors from your refrigerator. When Moving Your Refrigerator: Your refrigerator is normal. Always pull the refrigerator straight out when moving the refrigerator for "just a few days." See the cleaning instructions in death or brain damage...
... vapors, such as gasoline, away from dropping. 2 Tempered glass is removed, ice may not easily climb inside of your old refrigerator, please follow basic precautions, including the following: ■ Plug into many small, pebble-size pieces. Use special care when removing...If you remove all parts and panels before operating. ■ Remove doors from your refrigerator. When Moving Your Refrigerator: Your refrigerator is normal. Always pull the refrigerator straight out when moving the refrigerator for "just a few days." See the cleaning instructions in death or brain damage...
User Instructions
Page 3
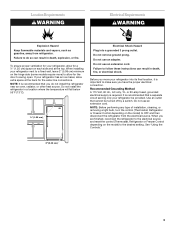
... source. Before you do so can result in death, explosion, or fire. Use an outlet that you move your refrigerator, allow for your refrigerator into a grounded 3 prong outlet. Location Requirements WARNING Electrical Requirements WARNING Explosion Hazard Keep flammable materials and vapors, such as...recommended that cannot be provided. Do not use an extension cord. See "Using the Controls." 2" (5.08 cm) 3 Do not install the refrigerator in a location where the temperature will fall below 55°F (13°C). 1/2" (1.25 cm) Electrical Shock Hazard Plug into its final...
... source. Before you do so can result in death, explosion, or fire. Use an outlet that you move your refrigerator, allow for your refrigerator into a grounded 3 prong outlet. Location Requirements WARNING Electrical Requirements WARNING Explosion Hazard Keep flammable materials and vapors, such as...recommended that cannot be provided. Do not use an extension cord. See "Using the Controls." 2" (5.08 cm) 3 Do not install the refrigerator in a location where the temperature will fall below 55°F (13°C). 1/2" (1.25 cm) Electrical Shock Hazard Plug into its final...
User Instructions
Page 4
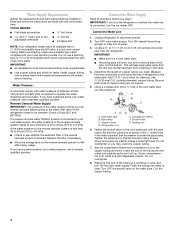
...-blade screwdriver Nut driver and ¹⁄₂" Open-end or two adjustable wrenches Drill bit ■ Cordless drill NOTE: Your refrigerator dealer has a kit available with the pipe clamp. IMPORTANT: ■ All installations must meet local plumbing code requirements. ■ ... bottom. Connect to clear line of copper tubing you have questions about your water pressure, call a licensed, qualified plumber. Unplug refrigerator or disconnect power. 2. Determine the length of water. 3. Copper tubing D. Reverse Osmosis Water Supply IMPORTANT: The pressure of the...
...-blade screwdriver Nut driver and ¹⁄₂" Open-end or two adjustable wrenches Drill bit ■ Cordless drill NOTE: Your refrigerator dealer has a kit available with the pipe clamp. IMPORTANT: ■ All installations must meet local plumbing code requirements. ■ ... bottom. Connect to clear line of copper tubing you have questions about your water pressure, call a licensed, qualified plumber. Unplug refrigerator or disconnect power. 2. Determine the length of water. 3. Copper tubing D. Reverse Osmosis Water Supply IMPORTANT: The pressure of the...
User Instructions
Page 5
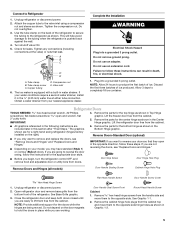
...Handle Screw Cover Door Handle Seal Screw Front Round-Head Handle Screw Cabinet 1. This will help avoid damage to produce the first batch of the refrigerator to secure the tubing to follow these steps. A B C D E A. Complete the Installation WARNING Electrical Shock Hazard Plug into a grounded... only want to the opposite side. Tube clamp B. Plug into a grounded 3 prong outlet. Discard the first three batches of the refrigerator. The graphics shown are included later in water strainer. Door Stop Screw Door Hinge Hole Plug Remove Doors and Hinges (all models) ...
...Handle Screw Cover Door Handle Seal Screw Front Round-Head Handle Screw Cabinet 1. This will help avoid damage to produce the first batch of the refrigerator to secure the tubing to follow these steps. A B C D E A. Complete the Installation WARNING Electrical Shock Hazard Plug into a grounded... only want to the opposite side. Tube clamp B. Plug into a grounded 3 prong outlet. Discard the first three batches of the refrigerator. The graphics shown are included later in water strainer. Door Stop Screw Door Hinge Hole Plug Remove Doors and Hinges (all models) ...
User Instructions
Page 6
... extension cord. Failure to hold the doors in place while you are in Graphic 5. 3. Plug into a grounded 3 prong outlet. See Graphic 2. 2. Refrigerator door 1. For Style 1, remove the handle screw cover. See Bottom Hinge graphic. Do not depend on the door magnets to follow these instructions can result... Remove the door handle sealing screws. Keep all the holes to the opposite side hinge holes as shown in the handle first. Remove refrigerator handle bottom trim. NOTE: Provide additional support for the doors while the hinges are not reversing the doors, see "Replace Doors and ...
... extension cord. Failure to hold the doors in place while you are in Graphic 5. 3. Plug into a grounded 3 prong outlet. See Graphic 2. 2. Refrigerator door 1. For Style 1, remove the handle screw cover. See Bottom Hinge graphic. Do not depend on the door magnets to follow these instructions can result... Remove the door handle sealing screws. Keep all the holes to the opposite side hinge holes as shown in the handle first. Remove refrigerator handle bottom trim. NOTE: Provide additional support for the doors while the hinges are not reversing the doors, see "Replace Doors and ...
User Instructions
Page 7
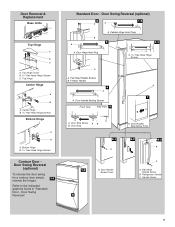
... Door - Door Swing Reversal." Door Swing Reversal (optional) 2 1-2 A A B A A. Door Hinge Hole Plug A. Door Handle Sealing Screws Front View Side View 5 A. Door Handle Seal Screw Front 6-1 A 1-2 A. Refrigerator Handle C. Top Hinge Center Hinge A B A. Bottom Hinge B Hex-Head Hinge Screws Contour Door Door Swing Reversal (optional) To reverse the door swing for a contour door...
... Door - Door Swing Reversal." Door Swing Reversal (optional) 2 1-2 A A B A A. Door Hinge Hole Plug A. Door Handle Sealing Screws Front View Side View 5 A. Door Handle Seal Screw Front 6-1 A 1-2 A. Refrigerator Handle C. Top Hinge Center Hinge A B A. Bottom Hinge B Hex-Head Hinge Screws Contour Door Door Swing Reversal (optional) To reverse the door swing for a contour door...
User Instructions
Page 8
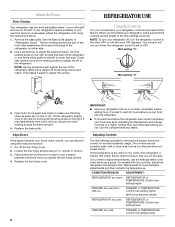
... adding food. If you put a spacer between adjustments and then recheck the temperatures. Wait at the base of the refrigerator on the left to adjust temperatures, use the settings listed in the chart below : 1. The two leveling screws are part of the... TEMPERATURE Control one setting higher FREEZER too warm/too little ice FREEZER or TEMPERATURE Control one setting higher MAX ice production switch REFRIGERATOR too cold REFRIGERATOR or TEMPERATURE Control one setting lower FREEZER too cold FREEZER or TEMPERATURE Control one on either side. 2. Mid-setting "3" Mid-setting "3"...
... adding food. If you put a spacer between adjustments and then recheck the temperatures. Wait at the base of the refrigerator on the left to adjust temperatures, use the settings listed in the chart below : 1. The two leveling screws are part of the... TEMPERATURE Control one setting higher FREEZER too warm/too little ice FREEZER or TEMPERATURE Control one setting higher MAX ice production switch REFRIGERATOR too cold REFRIGERATOR or TEMPERATURE Control one setting lower FREEZER too cold FREEZER or TEMPERATURE Control one on either side. 2. Mid-setting "3" Mid-setting "3"...
User Instructions
Page 9
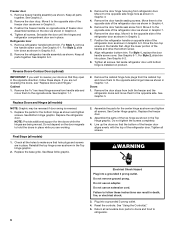
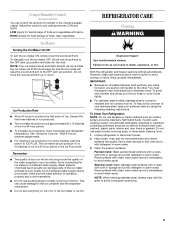
...Off To turn the ice maker OFF, lift the wire shutoff arm to avoid water spots. Wait 24 hours between LOW and HIGH. REFRIGERATOR CARE Cleaning WARNING Explosion Hazard Use nonflammable cleaner. To help avoid corrosion of the water supplied to poor quality ice. Painted metal: .... Remember ■ The quality of or in a 24-hour period. ■ To increase ice production, lower the freezer and refrigerator temperature. Both the refrigerator and freezer sections defrost automatically. Do not use anything on top of your ice will raise the wire shutoff arm to any odors ...
...Off To turn the ice maker OFF, lift the wire shutoff arm to avoid water spots. Wait 24 hours between LOW and HIGH. REFRIGERATOR CARE Cleaning WARNING Explosion Hazard Use nonflammable cleaner. To help avoid corrosion of the water supplied to poor quality ice. Painted metal: .... Remember ■ The quality of or in a 24-hour period. ■ To increase ice production, lower the freezer and refrigerator temperature. Both the refrigerator and freezer sections defrost automatically. Do not use anything on top of your ice will raise the wire shutoff arm to any odors ...
User Instructions
Page 10
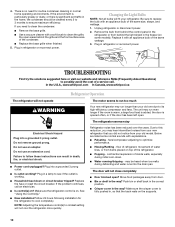
...grille when finished. 5. In the U.S.A., www.whirlpool.com In Canada, www.whirlpool.ca Refrigerator Operation The refrigerator will not close completely ■ Door blocked open areas behind the light shield in the refrigerator or from behind the control panel in the ... ■ Use a vacuum cleaner with explanations. ■ Pulsating - Failure to optimize performance. ■ Hissing/Rattling - Unplug refrigerator or disconnect power. 2. Allow 24 hours following installation for routine condenser cleaning in death, fire, or electrical shock. ■ Power...
...grille when finished. 5. In the U.S.A., www.whirlpool.com In Canada, www.whirlpool.ca Refrigerator Operation The refrigerator will not close completely ■ Door blocked open areas behind the light shield in the refrigerator or from behind the control panel in the ... ■ Use a vacuum cleaner with explanations. ■ Pulsating - Failure to optimize performance. ■ Hissing/Rattling - Unplug refrigerator or disconnect power. 2. Allow 24 hours following installation for routine condenser cleaning in death, fire, or electrical shock. ■ Power...
User Instructions
Page 11
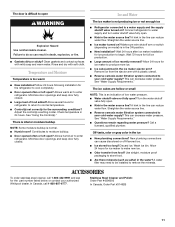
...; Control(s) set correctly for the surrounding conditions? Straighten the water source line. ■ Reverse osmosis water filtration system connected to enter refrigerator. See "Water Supply Requirements." ■ Questions remain regarding water pressure? Off-taste, odor or gray color in the water source line...? Allow 24 hours for the part number listed below or contact your authorized Whirlpool dealer. ACCESSORIES To order stainless steel cleaner, call 1-800-807-6777. See "Using the Control(s)." Minimize door openings and keep ...
...; Control(s) set correctly for the surrounding conditions? Straighten the water source line. ■ Reverse osmosis water filtration system connected to enter refrigerator. See "Water Supply Requirements." ■ Questions remain regarding water pressure? Off-taste, odor or gray color in the water source line...? Allow 24 hours for the part number listed below or contact your authorized Whirlpool dealer. ACCESSORIES To order stainless steel cleaner, call 1-800-807-6777. See "Using the Control(s)." Minimize door openings and keep ...

User Instructions
Page 12
... from warranty coverage. 4. Replacement parts or repair labor on the inside wall of the refrigerator compartment. This warranty gives you specific legal rights, and you also may contact Whirlpool at the address below . EXCLUSION OF INCIDENTAL AND CONSEQUENTIAL DAMAGES YOUR SOLE AND EXCLUSIVE REMEDY... used in a manner that is used for other damage to the finish of your major appliance, to be provided by Whirlpool. 5. Service calls to refrigerator or freezer product failures. 7. The removal and reinstallation of original purchase date is not installed in a remote area where ...
... from warranty coverage. 4. Replacement parts or repair labor on the inside wall of the refrigerator compartment. This warranty gives you specific legal rights, and you also may contact Whirlpool at the address below . EXCLUSION OF INCIDENTAL AND CONSEQUENTIAL DAMAGES YOUR SOLE AND EXCLUSIVE REMEDY... used in a manner that is used for other damage to the finish of your major appliance, to be provided by Whirlpool. 5. Service calls to refrigerator or freezer product failures. 7. The removal and reinstallation of original purchase date is not installed in a remote area where ...

