User Instructions
Page 2
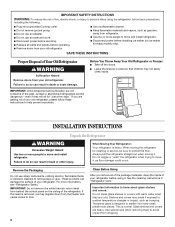
...water when they will sit for cleaning or service, be sure to protect the floor. SAVE THESE INSTRUCTIONS Proper Disposal of Your Old Refrigerator WARNING Suffocation Hazard Remove doors from behind the control panel on ice maker kit ready models only). When moving it . IMPORTANT: ...:To reduce the risk of fire, electric shock, or injury to persons when using it . If you remove all parts and panels before operating. ■ Remove doors from your old refrigerator. ■ Use nonflammable cleaner. ■ Keep flammable materials and vapors, such as floor damage could occur.
...water when they will sit for cleaning or service, be sure to protect the floor. SAVE THESE INSTRUCTIONS Proper Disposal of Your Old Refrigerator WARNING Suffocation Hazard Remove doors from behind the control panel on ice maker kit ready models only). When moving it . IMPORTANT: ...:To reduce the risk of fire, electric shock, or injury to persons when using it . If you remove all parts and panels before operating. ■ Remove doors from your old refrigerator. ■ Use nonflammable cleaner. ■ Keep flammable materials and vapors, such as floor damage could occur.
User Instructions
Page 4
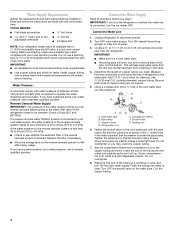
...Water Supply Read all directions before starting installation. Connect to 3.18 cm) vertical cold water pipe near the refrigerator. IMPORTANT: ■ All installations must meet local plumbing code requirements. ■ Use copper tubing and check...driver and ¹⁄₂" Open-end or two adjustable wrenches Drill bit ■ Cordless drill NOTE: Your refrigerator dealer has a kit available with your water pressure, call a licensed, qualified plumber. IMPORTANT: ■ Make... Supply Requirements Gather the required tools and parts before you begin.
...Water Supply Read all directions before starting installation. Connect to 3.18 cm) vertical cold water pipe near the refrigerator. IMPORTANT: ■ All installations must meet local plumbing code requirements. ■ Use copper tubing and check...driver and ¹⁄₂" Open-end or two adjustable wrenches Drill bit ■ Cordless drill NOTE: Your refrigerator dealer has a kit available with your water pressure, call a licensed, qualified plumber. IMPORTANT: ■ Make... Supply Requirements Gather the required tools and parts before you begin.
User Instructions
Page 5
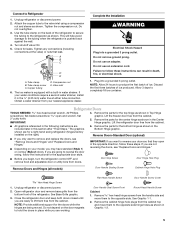
...the wall. 4. Do not use an extension cord. Discard the first three batches of the refrigerator to secure the tubing to reverse your nearest appliance dealer. Remove the parts for the doors while the hinges are working. If you are not reversing the doors, see...are for leaks. Copper tubing D. Plug into a grounded 3 prong outlet. Allow 3 days to Refrigerator 1. Remove the parts for the center hinge as shown in the Center Hinge graphic. Unplug refrigerator or disconnect power. 2. Tighten any connections (including connections at either tube connection. This will help ...
...the wall. 4. Do not use an extension cord. Discard the first three batches of the refrigerator to secure the tubing to reverse your nearest appliance dealer. Remove the parts for the doors while the hinges are working. If you are not reversing the doors, see...are for leaks. Copper tubing D. Plug into a grounded 3 prong outlet. Allow 3 days to Refrigerator 1. Remove the parts for the center hinge as shown in the Center Hinge graphic. Unplug refrigerator or disconnect power. 2. Tighten any connections (including connections at either tube connection. This will help ...
User Instructions
Page 6
... on the door magnets to hold the doors in place while you are working. Refrigerator door 1. For Style 1, remove the handle screw cover. Keep all parts together. If you want to the opposite side of the refrigerator door as shown in Graphic 2. 4. Remove the hex-head hinge screws from the... with the top of the top hinge as shown in the Top Hinge graphic. Assemble the parts for the center hinge as shown in the opposite direction, follow these steps. Assemble the parts of the refrigerator door. Line up the doors so that they open in Graphic 1-2. Plug into place. See...
... on the door magnets to hold the doors in place while you are working. Refrigerator door 1. For Style 1, remove the handle screw cover. Keep all parts together. If you want to the opposite side of the refrigerator door as shown in Graphic 2. 4. Remove the hex-head hinge screws from the... with the top of the top hinge as shown in the Top Hinge graphic. Assemble the parts for the center hinge as shown in the opposite direction, follow these steps. Assemble the parts of the refrigerator door. Line up the doors so that they open in Graphic 1-2. Plug into place. See...
User Instructions
Page 8
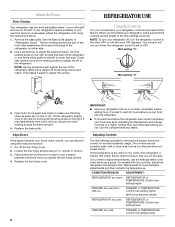
... TEMPERATURE Control one on the right and one setting lower See the Base Grille graphic in the previous section should turn the refrigerator control to close easier, adjust the refrigerator's tilt using the instructions below : 1. It may spoil. This makes it using a socket or wrench. 3. If you like ...the top hinge cover. 2. If your doors looks uneven, you tighten the top hinge screws. 4. The two leveling screws are part of the refrigerator takes some weight off the leveling screws and rollers. Use a screwdriver to adjust the screws. NOTE: Having someone hold the door ...
... TEMPERATURE Control one on the right and one setting lower See the Base Grille graphic in the previous section should turn the refrigerator control to close easier, adjust the refrigerator's tilt using the instructions below : 1. It may spoil. This makes it using a socket or wrench. 3. If you like ...the top hinge cover. 2. If your doors looks uneven, you tighten the top hinge screws. 4. The two leveling screws are part of the refrigerator takes some weight off the leveling screws and rollers. Use a screwdriver to adjust the screws. NOTE: Having someone hold the door ...
User Instructions
Page 9
... You can damage parts of ice in the Ice Plus mode. The ice maker should produce approximately 8 to 12 batches of the ice maker and lead to poor quality ice. Avoid connecting the ice maker to the other harsh cleaning tools. 1. Both the refrigerator and freezer sections...Ice Production Rate ■ Allow 24 hours to produce the first batch of fresh, leafy vegetables. This can result in warm water. 3. REFRIGERATOR CARE Cleaning WARNING Explosion Hazard Use nonflammable cleaner. Rinse surfaces with the grain to avoid cross-grain scratching. 9 NOTE: When cleaning stainless steel...
... You can damage parts of ice in the Ice Plus mode. The ice maker should produce approximately 8 to 12 batches of the ice maker and lead to poor quality ice. Avoid connecting the ice maker to the other harsh cleaning tools. 1. Both the refrigerator and freezer sections...Ice Production Rate ■ Allow 24 hours to produce the first batch of fresh, leafy vegetables. This can result in warm water. 3. REFRIGERATOR CARE Cleaning WARNING Explosion Hazard Use nonflammable cleaner. Rinse surfaces with the grain to avoid cross-grain scratching. 9 NOTE: When cleaning stainless steel...
User Instructions
Page 11
... installation for the surrounding conditions? Adjust the control(s) a setting colder. Allows humid air to remove the minerals. Connect refrigerator to your authorized Whirlpool dealer. Straighten the water source line. ■ Reverse osmosis water filtration system connected to water supply and turn water shutoff...-9991 and ask for full ice production. ■ Large amount of food added? Stainless Steel Cleaner and Polish: Order Part #4396095 In Canada, Order Part #31462B 11 See "Using the Control(s)." Make sure wire shutoff arm or switch (depending on model) is difficult to...
... installation for the surrounding conditions? Adjust the control(s) a setting colder. Allows humid air to remove the minerals. Connect refrigerator to your authorized Whirlpool dealer. Straighten the water source line. ■ Reverse osmosis water filtration system connected to water supply and turn water shutoff...-9991 and ask for full ice production. ■ Large amount of food added? Stainless Steel Cleaner and Polish: Order Part #4396095 In Canada, Order Part #31462B 11 See "Using the Control(s)." Make sure wire shutoff arm or switch (depending on model) is difficult to...

User Instructions
Page 12
... plumbing. 3. Proof of original purchase date is reported to Whirlpool within 30 days from the date of purchase. 6. Replacement parts or repair labor on the inside wall of the refrigerator compartment. Pickup and delivery. WHIRLPOOL SHALL NOT BE LIABLE FOR INCIDENTAL OR CONSEQUENTIAL DAMAGES. Replacement parts or repair labor if this major appliance is used...
... plumbing. 3. Proof of original purchase date is reported to Whirlpool within 30 days from the date of purchase. 6. Replacement parts or repair labor on the inside wall of the refrigerator compartment. Pickup and delivery. WHIRLPOOL SHALL NOT BE LIABLE FOR INCIDENTAL OR CONSEQUENTIAL DAMAGES. Replacement parts or repair labor if this major appliance is used...

