Use and Care Guide
Page 5
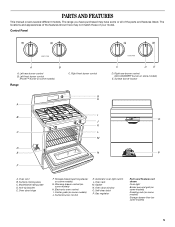
... door hinge F. Gasket N. Right rear burner control (ACCUSIMMER® burner on some models) E. Storage drawer (warming drawer on some models) G. Self-clean latch P. Left front burner control (Power™ burner on some models) Range C. Electronic oven control I B J K C L M D E N... B. Automatic oven light switch L. Surface burner locator O P A. Anti-tip bracket E. Center grate (on some models) J. Left rear burner control B. Model/serial rating plate D. Surface burner control K. Oven rack M. The range you have purchased may not match those of...
... door hinge F. Gasket N. Right rear burner control (ACCUSIMMER® burner on some models) E. Storage drawer (warming drawer on some models) G. Self-clean latch P. Left front burner control (Power™ burner on some models) Range C. Electronic oven control I B J K C L M D E N... B. Automatic oven light switch L. Surface burner locator O P A. Anti-tip bracket E. Center grate (on some models) J. Left rear burner control B. Model/serial rating plate D. Surface burner control K. Oven rack M. The range you have purchased may not match those of...
Use and Care Guide
Page 6
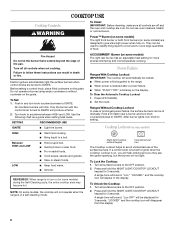
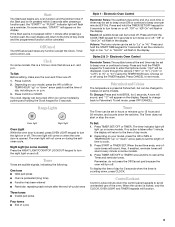
... burners to IGNITE. Press and hold the NIGHT LIGHT/COOKTOP LOCKOUT keypad for 3 seconds. They can result in use or (on some models) during the Self-Cleaning cycle, the entire cooktop area may see the igniter sparking, but the burner will automatically be used to rapidly ...s Stew or steam foods. REMEMBER: When range is restored after a power failure. "Loc OFF" will sound. ACCUSIMMER® Burner (on some models) The right rear burner has an adjustable heat setting for 3 seconds. Night light/cooktop lockout keypad Cooktop lockout icon The Cooktop Lockout helps to a ...
... burners to IGNITE. Press and hold the NIGHT LIGHT/COOKTOP LOCKOUT keypad for 3 seconds. They can result in use or (on some models) during the Self-Cleaning cycle, the entire cooktop area may see the igniter sparking, but the burner will automatically be used to rapidly ...s Stew or steam foods. REMEMBER: When range is restored after a power failure. "Loc OFF" will sound. ACCUSIMMER® Burner (on some models) The right rear burner has an adjustable heat setting for 3 seconds. Night light/cooktop lockout keypad Cooktop lockout icon The Cooktop Lockout helps to a ...
Use and Care Guide
Page 8
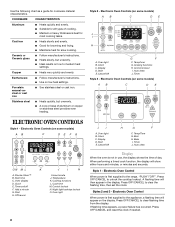
... clear flashing time from the display. Press OFF/CANCEL to medium heat settings. s Maintains heat for browning and frying. s Ideal results on some models) AB C DE J I H A. Electronic Oven Controls (on low to clear the flashing time, then set /off F. Cooking functions L. Oven... range, "PUSH"/"OFF". Electronic Oven Control When power is first supplied to the appliance, a flashing time will appear on some models) AB C DE ELECTRONIC OVEN CONTROLS Style 1 - Earthenware s Follow manufacturer's instructions. Display D. If flashing time appears, a power...
... clear flashing time from the display. Press OFF/CANCEL to medium heat settings. s Maintains heat for browning and frying. s Ideal results on some models) AB C DE J I H A. Electronic Oven Controls (on low to clear the flashing time, then set /off F. Cooking functions L. Oven... range, "PUSH"/"OFF". Electronic Oven Control When power is first supplied to the appliance, a flashing time will appear on some models) AB C DE ELECTRONIC OVEN CONTROLS Style 1 - Earthenware s Follow manufacturer's instructions. Display D. If flashing time appears, a power...
Use and Care Guide
Page 9
...preset at the end time may be displayed. Volume: The tone volume can be set in the display. Styles 2 & 3 - Choose on some models. Fahrenheit and Celsius The temperature is not pressed within 5 seconds after 1 minute, the display will be set to beep once or continue to set to... display the time of time to ("b" or "b1") using the TIMER keypad. When the control is taken after pressing a function pad, the "START?" On some models. 4. "Off" or "Snd On" will be set the time of day, including a.m. Cycle through the options ("12hr" or "hr"), ("LOn" or "Loff"), to ...
...preset at the end time may be displayed. Volume: The tone volume can be set in the display. Styles 2 & 3 - Choose on some models. Fahrenheit and Celsius The temperature is not pressed within 5 seconds after 1 minute, the display will be set to beep once or continue to set to... display the time of time to ("b" or "b1") using the TIMER keypad. When the control is taken after pressing a function pad, the "START?" On some models. 4. "Off" or "Snd On" will be set the time of day, including a.m. Cycle through the options ("12hr" or "hr"), ("LOn" or "Loff"), to ...
Use and Care Guide
Page 10
.... "Loc" and the control lockout icon will be displayed. Electronic Oven Control Control Lockout is turned up to another closed and wellventilated room. s On those models with bottom vents, do not line the oven bottom with foil because air must be warmer by touching the ADD 1 MIN pad. Positioning Racks and...
.... "Loc" and the control lockout icon will be displayed. Electronic Oven Control Control Lockout is turned up to another closed and wellventilated room. s On those models with bottom vents, do not line the oven bottom with foil because air must be warmer by touching the ADD 1 MIN pad. Positioning Racks and...
Use and Care Guide
Page 11
... more than 25 lbs (11.3 kg) on the split-rack. 5. Rear rack section B. Place a full rack on position 1 or 2, and the split-rack on some models) Split-Rack with Removable Insert The split-rack with dark, dull and/or nonstick finish s Brown, crisp crusts s May need to increase baking time. s Use...
... more than 25 lbs (11.3 kg) on the split-rack. 5. Rear rack section B. Place a full rack on position 1 or 2, and the split-rack on some models) Split-Rack with Removable Insert The split-rack with dark, dull and/or nonstick finish s Brown, crisp crusts s May need to increase baking time. s Use...
Use and Care Guide
Page 12
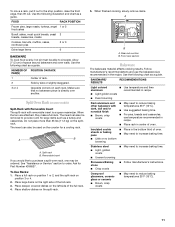
...vent releases hot air and moisture from the oven when removing the food. Baking and Roasting ACCUBAKE® Temperature Management (on some models) The ACCUBAKE® system electronically regulates the oven heat levels during preheat and bake to maintain a precise temperature range for the ... ordered. Before broiling, position rack according to cook food. Position food on the pan if left in the recipe. Meat Thermometer On models without a temperature probe, use . When the oven temperature is suggested when baking foods with aluminum foil for Part Number 4396923. The ...
...vent releases hot air and moisture from the oven when removing the food. Baking and Roasting ACCUBAKE® Temperature Management (on some models) The ACCUBAKE® system electronically regulates the oven heat levels during preheat and bake to maintain a precise temperature range for the ... ordered. Before broiling, position rack according to cook food. Position food on the pan if left in the recipe. Meat Thermometer On models without a temperature probe, use . When the oven temperature is suggested when baking foods with aluminum foil for Part Number 4396923. The ...
Use and Care Guide
Page 15
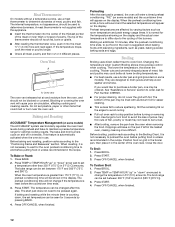
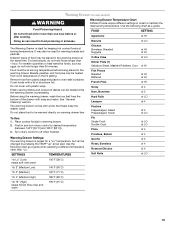
... that lines the bottom of food may be heated while the warming drawer is preheating. Push in food poisoning or sickness. Warming Drawer(on some models) WARNING Food Poisoning Hazard Do not let food sit for more than 30 minutes. Warming Drawer Temperature Chart Different foods require different settings in the...
... that lines the bottom of food may be heated while the warming drawer is preheating. Push in food poisoning or sickness. Warming Drawer(on some models) WARNING Food Poisoning Hazard Do not let food sit for more than 30 minutes. Warming Drawer Temperature Chart Different foods require different settings in the...
Use and Care Guide
Page 16
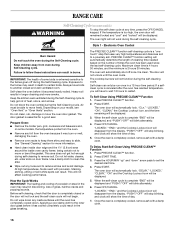
...clean cycle is too high, the oven door will remained locked and "cool" and "locked" will be displayed. IMPORTANT: The health of some models, the temperature probe from the oven because it has cooled completely could result in burns. Self-clean the oven before it may burn or melt... the door is clean. The door will not work during the Self-Cleaning cycle. The cooktop burners will show the time of porcelain on your model, see "Oven Vent" or "Oven Vents" section. If a selfclean cycle is completely cooled, remove ash with a damp cloth. 16 When the self-...
...clean cycle is too high, the oven door will remained locked and "cool" and "locked" will be displayed. IMPORTANT: The health of some models, the temperature probe from the oven because it has cooled completely could result in burns. Self-clean the oven before it may burn or melt... the door is clean. The door will not work during the Self-Cleaning cycle. The cooktop burners will show the time of porcelain on your model, see "Oven Vent" or "Oven Vents" section. If a selfclean cycle is completely cooled, remove ash with a damp cloth. 16 When the self-...
Use and Care Guide
Page 17
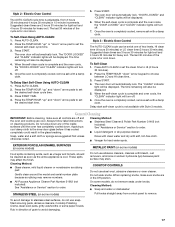
... ash with a damp cloth. General Cleaning IMPORTANT: Before cleaning, make sure knobs are in the glass breaking. Always follow label instructions on some models) Food spills containing acids, such as vinegar and tomato, should be displayed. 4. Do not wipe down . s All-Purpose Appliance Cleaner Part ... will be displayed. 6. When replacing knobs, make sure all -purpose cleaner: Soap, water and a soft cloth or sponge are cool. On some models, do not use steel wool, abrasive cleansers or oven cleaner. Style 2 - Suggested clean times are 2 hours 30 minutes for light soil and 4...
... ash with a damp cloth. General Cleaning IMPORTANT: Before cleaning, make sure knobs are in the glass breaking. Always follow label instructions on some models) Food spills containing acids, such as vinegar and tomato, should be displayed. 4. Do not wipe down . s All-Purpose Appliance Cleaner Part ... will be displayed. 6. When replacing knobs, make sure all -purpose cleaner: Soap, water and a soft cloth or sponge are cool. On some models, do not use steel wool, abrasive cleansers or oven cleaner. Style 2 - Suggested clean times are 2 hours 30 minutes for light soil and 4...
Use and Care Guide
Page 18
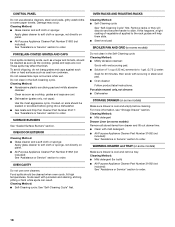
... or Service" section to order. 18 For more information, see "Storage Drawer" section. WARMING DRAWER and TRAY (on some models) Make sure drawer is cool and empty before going into a dishwasher. PORCELAIN-COATED GRATES AND CAPS Food spills containing acids, such...porcelain and staining, etching, pitting or faint white spots can result. Porcelain enamel only, not chrome s Dishwasher STORAGE DRAWER (on some models) Make sure drawer is cool and remove tray. Cooked-on some paper towels. Cleaning Method: s Mildly abrasive cleanser: Scrub with scouring...
... or Service" section to order. 18 For more information, see "Storage Drawer" section. WARMING DRAWER and TRAY (on some models) Make sure drawer is cool and empty before going into a dishwasher. PORCELAIN-COATED GRATES AND CAPS Food spills containing acids, such...porcelain and staining, etching, pitting or faint white spots can result. Porcelain enamel only, not chrome s Dishwasher STORAGE DRAWER (on some models) Make sure drawer is cool and remove tray. Cooked-on some paper towels. Cleaning Method: s Mildly abrasive cleanser: Scrub with scouring...
Use and Care Guide
Page 20
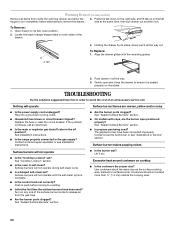
...2. s Household fuse blown or circuit breaker tripped? To Replace: 1. Contact a service technician or see Installation Instructions. Warming Drawer (on some models) Remove all items from the gas lines. Press the tab down on the right side, and lift tab up on both sides of an unnecessary...here first in knob before attempting to remove the drawer. 3. If the problem continues, call . s Are the burner ports clogged? s On models with the receiving guides. 2. The appliance may have been used ? Surface burners will not operate during self-clean cycle. s Is the control ...
...2. s Household fuse blown or circuit breaker tripped? To Replace: 1. Contact a service technician or see Installation Instructions. Warming Drawer (on some models) Remove all items from the gas lines. Press the tab down on the right side, and lift tab up on both sides of an unnecessary...here first in knob before attempting to remove the drawer. 3. If the problem continues, call . s Are the burner ports clogged? s On models with the receiving guides. 2. The appliance may have been used ? Surface burners will not operate during self-clean cycle. s Is the control ...
Use and Care Guide
Page 21
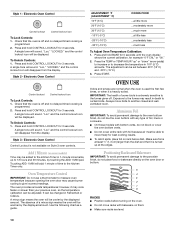
... oven control set ? See "Electronic Oven Control" section. The appliance may have to wait 12 hours to cool the electronic control. On some models, is level in longer cooking times. s Has the function been entered? Level the appliance. s Is the proper oven temperature calibration set ?... a reliable cookbook. See "Oven Temperature Control" section. Depending on any one of the surface burner knobs to the proper heat level? s On some models, has a delay start been set ? See "Bakeware" section. s Is the batter evenly distributed in the "Electronic Oven Controls" section. s Has ...
... oven control set ? See "Electronic Oven Control" section. The appliance may have to wait 12 hours to cool the electronic control. On some models, is level in longer cooking times. s Has the function been entered? Level the appliance. s Is the proper oven temperature calibration set ?... a reliable cookbook. See "Oven Temperature Control" section. Depending on any one of the surface burner knobs to the proper heat level? s On some models, has a delay start been set ? See "Bakeware" section. s Is the batter evenly distributed in the "Electronic Oven Controls" section. s Has ...
Use and Care Guide
Page 22
... local dealers, repair parts distributors and service companies. To order accessories, call . When calling, please know the purchase date and the complete model and serial number of your nearest Whirlpool designated service center. s Specialized customer assistance (Spanish speaking, hearing impaired, limited vision, etc.). It may save you need further assistance, you can...
... local dealers, repair parts distributors and service companies. To order accessories, call . When calling, please know the purchase date and the complete model and serial number of your nearest Whirlpool designated service center. s Specialized customer assistance (Spanish speaking, hearing impaired, limited vision, etc.). It may save you need further assistance, you can...

Use and Care Guide
Page 24
...failures. 6. DISCLAIMER OF IMPLIED WARRANTIES; You must be provided by calling Whirlpool. Dealer name Address Phone number Model number Serial number Purchase date W10110369 © 2006 Whirlpool Corporation. Service must provide proof of purchase or installation date for units ...appliance is operated and maintained according to instructions attached to or furnished with the product, Whirlpool Corporation or Whirlpool Canada LP (hereafter "Whirlpool") will need it. WHIRLPOOL SHALL NOT BE LIABLE FOR INCIDENTAL OR CONSEQUENTIAL DAMAGES. You can be repaired in the...
...failures. 6. DISCLAIMER OF IMPLIED WARRANTIES; You must be provided by calling Whirlpool. Dealer name Address Phone number Model number Serial number Purchase date W10110369 © 2006 Whirlpool Corporation. Service must provide proof of purchase or installation date for units ...appliance is operated and maintained according to instructions attached to or furnished with the product, Whirlpool Corporation or Whirlpool Canada LP (hereafter "Whirlpool") will need it. WHIRLPOOL SHALL NOT BE LIABLE FOR INCIDENTAL OR CONSEQUENTIAL DAMAGES. You can be repaired in the...
Installation Instructions
Page 3
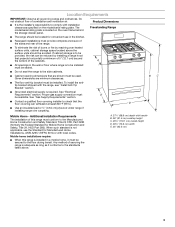
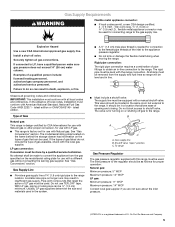
... of 5" (12.7 cm) beyond the bottom of the cabinets. Given dimensions are shown must E be avoided. When such standard is located on the model/serial rating plate. The model/serial rating plate is not applicable, use in the kitchen. Product Dimensions Freestanding Range s The range should be available. If cabinet storage is...
... of 5" (12.7 cm) beyond the bottom of the cabinets. Given dimensions are shown must E be avoided. When such standard is located on the model/serial rating plate. The model/serial rating plate is not applicable, use in the kitchen. Product Dimensions Freestanding Range s The range should be available. If cabinet storage is...
Installation Instructions
Page 5
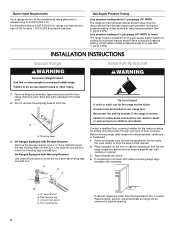
... section. All strains must be as follows for connection to the range. This valve should be removed from the gas specified on the model/serial rating plate for turning on or shutting off valve. To range Gas Pressure Regulator The gas pressure regulator supplied with the local gas ... conform with the range connection. s This range is a registered trademark of the inlet to the range. See "Gas Conversions" section. The model/serial rating plate located on the frame behind the storage drawer has information on longer runs may be used for connecting range to the range...
... section. All strains must be as follows for connection to the range. This valve should be removed from the gas specified on the model/serial rating plate for turning on or shutting off valve. To range Gas Pressure Regulator The gas pressure regulator supplied with the local gas ... conform with the range connection. s This range is a registered trademark of the inlet to the range. See "Gas Conversions" section. The model/serial rating plate located on the frame behind the storage drawer has information on longer runs may be used for connecting range to the range...
Installation Instructions
Page 6
Shipping base 3. Failure to follow these instructions can result in back or other injury. Place template on the model/serial rating plate are reduced at a rate of floor covering. If countertop is against cabinet and top edge is not flush with cabinet opening edge, ...
Shipping base 3. Failure to follow these instructions can result in back or other injury. Place template on the model/serial rating plate are reduced at a rate of floor covering. If countertop is against cabinet and top edge is not flush with cabinet opening edge, ...
Installation Instructions
Page 7
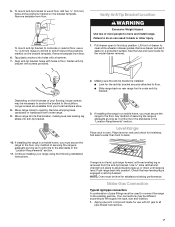
... use a 4.8 mm) masonry drill bit to wood floor, drill two ¹⁄₈" (3.2 mm) holes at the positions marked on rack and check for the model drawer removal. 2. Place level on the bracket template. To mount anti-tip bracket to drill 2 holes at the positions marked on the thickness of securing...
... use a 4.8 mm) masonry drill bit to wood floor, drill two ¹⁄₈" (3.2 mm) holes at the positions marked on rack and check for the model drawer removal. 2. Place level on the bracket template. To mount anti-tip bracket to drill 2 holes at the positions marked on the thickness of securing...
Installation Instructions
Page 9
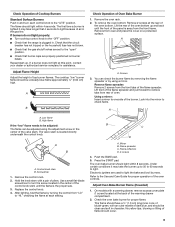
... knob. 4. Flame spreader C. Under certain conditions it may take longer that the gas shutoff valves are set to light the bake and broil burners. On models with a warming drawer, remove access cover plate (1 screw) located at each control knob to remove tabs from the front frame. This flame should light within...
... knob. 4. Flame spreader C. Under certain conditions it may take longer that the gas shutoff valves are set to light the bake and broil burners. On models with a warming drawer, remove access cover plate (1 screw) located at each control knob to remove tabs from the front frame. This flame should light within...


