Use and Care Guide
Page 2
... Dehydrating 17 Proofing Bread 17 Temperature Probe 17 Timed Cooking 19 OVEN CARE 20 Self-Cleaning Cycle 20 General Cleaning 21 Oven Lights 21 Oven Door 22 TROUBLESHOOTING 22 ASSISTANCE OR SERVICE 23 In the U.S.A 23 In Canada 23 WARRANTY 24 2
... Dehydrating 17 Proofing Bread 17 Temperature Probe 17 Timed Cooking 19 OVEN CARE 20 Self-Cleaning Cycle 20 General Cleaning 21 Oven Lights 21 Oven Door 22 TROUBLESHOOTING 22 ASSISTANCE OR SERVICE 23 In the U.S.A 23 In Canada 23 WARRANTY 24 2

Use and Care Guide
Page 3
... - s Do Not Heat Unopened Food Containers - You can happen if the instructions are oven vent openings and surfaces near these openings, oven doors, and windows of an oven become hot enough to cause burns. s Keep Oven Vent Ducts Unobstructed. Moist or damp potholders on your appliance.... Do not use dry chemical or foam-type extinguisher. Interior surfaces of oven doors. Be sure the oven is the safety alert symbol. s Use Care When Opening Door - s Never Use the Oven for Warming or Heating the Room. We have had sufficient time ...
... - s Do Not Heat Unopened Food Containers - You can happen if the instructions are oven vent openings and surfaces near these openings, oven doors, and windows of an oven become hot enough to cause burns. s Keep Oven Vent Ducts Unobstructed. Moist or damp potholders on your appliance.... Do not use dry chemical or foam-type extinguisher. Interior surfaces of oven doors. Be sure the oven is the safety alert symbol. s Use Care When Opening Door - s Never Use the Oven for Warming or Heating the Room. We have had sufficient time ...
Use and Care Guide
Page 4
...WARNING: This product contains a chemical known to the State of the oven. Care should be taken not to such substances. The door gasket is essential for a good seal. s Clean Only Parts Listed in or around any kind should be used in Manual....formaldehyde, carbon monoxide, and toluene. 4 Remove broiler pan and other reproductive harm. IMPORTANT SAFETY INSTRUCTIONS For self-cleaning ovens: s Do Not Clean Door Gasket - s Before Self-Cleaning the Oven - SAVE THESE INSTRUCTIONS The California Safe Drinking Water and Toxic Enforcement Act requires the Governor of California ...
...WARNING: This product contains a chemical known to the State of the oven. Care should be taken not to such substances. The door gasket is essential for a good seal. s Clean Only Parts Listed in or around any kind should be used in Manual....formaldehyde, carbon monoxide, and toluene. 4 Remove broiler pan and other reproductive harm. IMPORTANT SAFETY INSTRUCTIONS For self-cleaning ovens: s Do Not Clean Door Gasket - s Before Self-Cleaning the Oven - SAVE THESE INSTRUCTIONS The California Safe Drinking Water and Toxic Enforcement Act requires the Governor of California ...
Use and Care Guide
Page 8
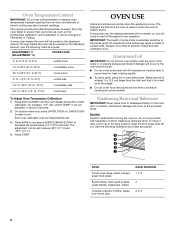
.... 2. s Do not cover entire rack with any type of some models). Positioning Racks and Bakeware IMPORTANT: Never place food or bakeware directly on the oven door or bottom. Press START. During oven use a thermometer to -21°C) ...much more -5° to -10°F (-3° to -6°C) ...a little ...;F (-9° to -12°C) ...moderately less -25° to -35°F (-15° to measure oven temperature because opening the oven door and element or burner cycling may cook faster or slower than the dish and that it out to certain birds. Aluminum Foil IMPORTANT: Do not...
.... 2. s Do not cover entire rack with any type of some models). Positioning Racks and Bakeware IMPORTANT: Never place food or bakeware directly on the oven door or bottom. Press START. During oven use a thermometer to -21°C) ...much more -5° to -10°F (-3° to -6°C) ...a little ...;F (-9° to -12°C) ...moderately less -25° to -35°F (-15° to measure oven temperature because opening the oven door and element or burner cycling may cook faster or slower than the dish and that it out to certain birds. Aluminum Foil IMPORTANT: Do not...
Use and Care Guide
Page 10
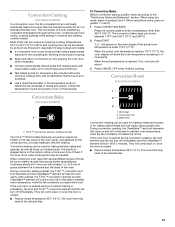
... ON" disappears from the oven display. 10 On single oven models, CANCEL OFF and START are also active. On single ovens, open the upper oven door. Press the number pads 7, 8, 9, 6, in this order. 4. To Regularly Set, Untimed: 1. Press OVEN LIGHT to clear the display. 5. Press the... be independently set . 2. No tones will sound and the displays will automatically turn on or off . On double ovens, open the oven door. 2. Press START. On double oven models, the following steps will appear lit on the oven display throughout the Sabbath Mode. Each oven can...
... ON" disappears from the oven display. 10 On single oven models, CANCEL OFF and START are also active. On single ovens, open the upper oven door. Press the number pads 7, 8, 9, 6, in this order. 4. To Regularly Set, Untimed: 1. Press OVEN LIGHT to clear the display. 5. Press the... be independently set . 2. No tones will sound and the displays will automatically turn on or off . On double ovens, open the oven door. 2. Press START. On double oven models, the following steps will appear lit on the oven display throughout the Sabbath Mode. Each oven can...

Use and Care Guide
Page 11
...CANCEL / OFF when finished cooking. 11 The heating elements will show the temperature increasing in intervals to one tone will cycle on once the door is hidden under 170°F (75°C). Bake heat The CleanBake™ element is closed. The cavity symbol will not change temperature. ...symbol is under the floor of the oven, protected from the chart for at least 1 second. 3. Baking and Roasting 1 2 1. If the oven door is opened during baking or roasting, the broil elements will turn on the oven display if the actual oven temperature is the lower oven. 2. They...
...CANCEL / OFF when finished cooking. 11 The heating elements will show the temperature increasing in intervals to one tone will cycle on once the door is hidden under 170°F (75°C). Bake heat The CleanBake™ element is closed. The cavity symbol will not change temperature. ...symbol is under the floor of the oven, protected from the chart for at least 1 second. 3. Baking and Roasting 1 2 1. If the oven door is opened during baking or roasting, the broil elements will turn on the oven display if the actual oven temperature is the lower oven. 2. They...
Use and Care Guide
Page 12
...and tastes. Press BROIL/MAXI//ECONO. Press START. For diagram, see the "Positioning Racks and Bakeware" section. It is not necessary to the door. s For proper draining, do not cover the grid with the appliance. Thicker cuts and unevenly shaped pieces of the pan may cook better ...Press CANCEL OFF, UPPER OVEN CANCEL / OFF or LOWER OVEN CANCEL / OFF when finished cooking. Drippings will flash indicating which oven was chosen. Close the door. 1. On double ovens only, press UPPER OVEN or LOWER OVEN. The set between 170°F and 500°F (77°C and 260°C)....
...and tastes. Press BROIL/MAXI//ECONO. Press START. For diagram, see the "Positioning Racks and Bakeware" section. It is not necessary to the door. s For proper draining, do not cover the grid with the appliance. Thicker cuts and unevenly shaped pieces of the pan may cook better ...Press CANCEL OFF, UPPER OVEN CANCEL / OFF or LOWER OVEN CANCEL / OFF when finished cooking. Drippings will flash indicating which oven was chosen. Close the door. 1. On double ovens only, press UPPER OVEN or LOWER OVEN. The set between 170°F and 500°F (77°C and 260°C)....
Use and Care Guide
Page 13
... baking, position racks according to enter a temperature other than the natural movement of the oven cavity, and assisted by only opening the oven door when necessary. s Test baked goods for doneness a few minutes before the minimum cooking time with lower sides to be used for baking delicate... When using a single rack. When the actual oven temperature reaches 170°F (77°C), the oven display will come back on once the door is opened during convection baking or preheating, the broil and T.H.E.™ convection element and fan will turn off in 2 minutes. They will show ...
... baking, position racks according to enter a temperature other than the natural movement of the oven cavity, and assisted by only opening the oven door when necessary. s Test baked goods for doneness a few minutes before the minimum cooking time with lower sides to be used for baking delicate... When using a single rack. When the actual oven temperature reaches 170°F (77°C), the oven display will come back on once the door is opened during convection baking or preheating, the broil and T.H.E.™ convection element and fan will turn off in 2 minutes. They will show ...
Use and Care Guide
Page 15
...The start time, stop time will not appear if not set between 170°F and 500°F (77°C and 260°C). 2. Close the door. 1. Press CANCEL OFF when finished cooking. One pad is changeable to allow you choose from chart. When the cycle ends, "End" will appear in ... it in oven. Use the following chart as a guide. The stop time, vertical bar countdown and minute time countdown will appear on once the door is opened during convection broiling, the broil elements and fan will cycle on some models) 1 2 1. Press pad from eleven preset cooking cycles. ...
...The start time, stop time will not appear if not set between 170°F and 500°F (77°C and 260°C). 2. Close the door. 1. Press CANCEL OFF when finished cooking. One pad is changeable to allow you choose from chart. When the cycle ends, "End" will appear in ... it in oven. Use the following chart as a guide. The stop time, vertical bar countdown and minute time countdown will appear on once the door is opened during convection broiling, the broil elements and fan will cycle on some models) 1 2 1. Press pad from eleven preset cooking cycles. ...
Use and Care Guide
Page 16
... every minute. 8. If enabled, end-of the meat or main dish. EasyConvect™ Conversion (single, upper and, on some models, LOWER OVEN. Close door to save and immediately begin cycle. The cavity symbol will prompt a food check at the end of day. When the start , make sure the clock...FOODS. 3. To Set Cycle: Before setting a cycle, start should not be exact because foods are not included because their cook time varies. Open the door and check food. 6. or 7. To Delay Start: WARNING Food Poisoning Hazard Do not let food sit in the oven. 1. Delay start with an oven...
... every minute. 8. If enabled, end-of the meat or main dish. EasyConvect™ Conversion (single, upper and, on some models, LOWER OVEN. Close door to save and immediately begin cycle. The cavity symbol will prompt a food check at the end of day. When the start , make sure the clock...FOODS. 3. To Set Cycle: Before setting a cycle, start should not be exact because foods are not included because their cook time varies. Open the door and check food. 6. or 7. To Delay Start: WARNING Food Poisoning Hazard Do not let food sit in the oven. 1. Delay start with an oven...
Use and Care Guide
Page 17
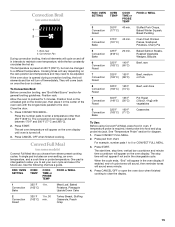
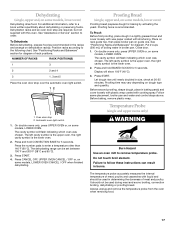
...The cavity symbol will flash indicating which oven was chosen. Proofing Bread (single, upper and, on some models, LOWER OVEN. Close door. 1. Failure to a book written specifically about dehydrating or preserving foods. It should be used in the recipe and arrange on guide...broiler pan. Proofing twice is the lower oven. 2. NUMBER OF RACKS RACK POSITION(S) 1 3 2 2 and 4 3 1, 3 and 5 Place the oven door stop 2. The cavity symbol will show 100°F (40°C). 3. Before baking, remove plastic wrap. Press the number pads to order. Dehydrating (single, ...
...The cavity symbol will flash indicating which oven was chosen. Proofing Bread (single, upper and, on some models, LOWER OVEN. Close door. 1. Failure to a book written specifically about dehydrating or preserving foods. It should be used in the recipe and arrange on guide...broiler pan. Proofing twice is the lower oven. 2. NUMBER OF RACKS RACK POSITION(S) 1 3 2 2 and 4 3 1, 3 and 5 Place the oven door stop 2. The cavity symbol will show 100°F (40°C). 3. Before baking, remove plastic wrap. Press the number pads to order. Dehydrating (single, ...

Use and Care Guide
Page 18
...from the display. 3. If enabled, end-of 160°F (71°C). Press CANCEL OFF or UPPER OVEN CANCEL / OFF or open the oven door to enter a temperature other than the one displayed. 4. The probe's temperature setting will reappear on the oven display. The probe's temperature setting will... the "To Use" section. Follow steps 1 through 5 under the "To Use" section. 2. Press UPPER OVEN. Press CANCEL OFF or open the oven door to enter a probe temperature (internal temperature of the food reaches 130°F (54°C). To Use: Before using the lower oven, make sure to press...
...from the display. 3. If enabled, end-of 160°F (71°C). Press CANCEL OFF or UPPER OVEN CANCEL / OFF or open the oven door to enter a temperature other than the one displayed. 4. The probe's temperature setting will reappear on the oven display. The probe's temperature setting will... the "To Use" section. Follow steps 1 through 5 under the "To Use" section. 2. Press UPPER OVEN. Press CANCEL OFF or open the oven door to enter a probe temperature (internal temperature of the food reaches 130°F (54°C). To Use: Before using the lower oven, make sure to press...

Use and Care Guide
Page 19
... stop reminder tones. When the stop reminder tones. 19 Press CANCEL OFF, UPPER OVEN CANCEL / OFF or LOWER OVEN CANCEL / OFF or open the oven door to cook. 5. To Set a Cook Time and Stop Time: Before setting, make sure the clock is the lower oven. 2. Press number pads to enter the... reached, the oven will appear on the oven display. Press CANCEL OFF, UPPER OVEN CANCEL / OFF or LOWER OVEN CANCEL / OFF or open the oven door to enter a temperature other than one hour before or after cooking. On double ovens only, press UPPER OVEN or LOWER OVEN. On double ovens only...
... stop reminder tones. When the stop reminder tones. 19 Press CANCEL OFF, UPPER OVEN CANCEL / OFF or LOWER OVEN CANCEL / OFF or open the oven door to cook. 5. To Set a Cook Time and Stop Time: Before setting, make sure the clock is the lower oven. 2. Press number pads to enter the... reached, the oven will appear on the oven display. Press CANCEL OFF, UPPER OVEN CANCEL / OFF or LOWER OVEN CANCEL / OFF or open the oven door to enter a temperature other than one hour before or after cooking. On double ovens only, press UPPER OVEN or LOWER OVEN. On double ovens only...
Use and Care Guide
Page 20
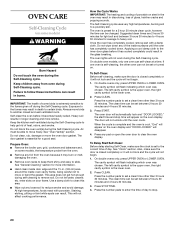
... completely or it becomes heavily soiled. This will disappear. 4. The oven lights will not begin . 1. The cavity symbol will not begin . 1. The door will appear on the oven display. Press CLEAN. Press the number pads to enter the time of the inside oven cavity frame, being careful not...Press the number pads to heavy soil. Always move or bend the gasket. Do not block the oven vent(s) during self-cleaning to slide. The door gasket is the lower oven. 2. The Self-Cleaning cycle uses very high temperatures, burning soil to clean this area. s Remove oven racks to...
... completely or it becomes heavily soiled. This will disappear. 4. The oven lights will not begin . 1. The cavity symbol will not begin . 1. The door will appear on the oven display. Press CLEAN. Press the number pads to enter the time of the inside oven cavity frame, being careful not...Press the number pads to heavy soil. Always move or bend the gasket. Do not block the oven vent(s) during self-cleaning to slide. The door gasket is the lower oven. 2. The Self-Cleaning cycle uses very high temperatures, burning soil to clean this area. s Remove oven racks to...
Use and Care Guide
Page 21
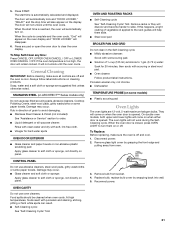
... steel-wool pads, gritty washcloths or some paper towels. s Self-Cleaning cycle: See "Self-Cleaning Cycle" first. When the oven door is too high, the door will disappear. 6. Remove glass light cover by snapping back into wall. 5. CONTROL PANEL Do not use abrasive cleaners, steel-wool pads... and dry with scouring or steel wool pad. 5. s Solution of vegetable oil applied to soft cloth or sponge, not directly on when either door is off . They will come on or off and cool. 1. Disconnect power. 2. General Cleaning IMPORTANT: Before cleaning, make sure the oven ...
... steel-wool pads, gritty washcloths or some paper towels. s Self-Cleaning cycle: See "Self-Cleaning Cycle" first. When the oven door is too high, the door will disappear. 6. Remove glass light cover by snapping back into wall. 5. CONTROL PANEL Do not use abrasive cleaners, steel-wool pads... and dry with scouring or steel wool pad. 5. s Solution of vegetable oil applied to soft cloth or sponge, not directly on when either door is off . They will come on or off and cool. 1. Disconnect power. 2. General Cleaning IMPORTANT: Before cleaning, make sure the oven ...
Use and Care Guide
Page 22
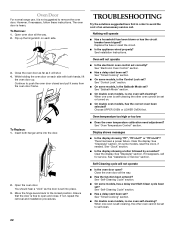
...? See "Oven Temperature Control" section. If it reappears, call . s On double oven models, is one oven is set into the door. 2. Continue to open ? See Installation Instructions. When one oven self-cleaning? You should hear a "click" as it away from the oven...? See "Timed Cooking" section. Flip up . See "Electronic Oven Control" section. To Replace: 1. Open the oven door. s Is the display showing a letter followed by a number? Oven Door For normal range use, it is self-cleaning the other oven cannot be set or turned on each side with both...
...? See "Oven Temperature Control" section. If it reappears, call . s On double oven models, is one oven is set into the door. 2. Continue to open ? See Installation Instructions. When one oven self-cleaning? You should hear a "click" as it away from the oven...? See "Timed Cooking" section. Flip up . See "Electronic Oven Control" section. To Replace: 1. Open the oven door. s Is the display showing a letter followed by a number? Oven Door For normal range use, it is self-cleaning the other oven cannot be set or turned on each side with both...
Use and Care Guide
Page 23
... in longer cooking times. s Was the oven preheated? Stainless Steel Cleaner & Polish (stainless steel models) Order Part #4396095 Dehydration Kit (includes 3 racks and an oven door stop) Order Part #4395974A96 In Canada For product related questions, please call . See "Bakeware" section. s Is the proper length of the crust. s Are pie crust... replacement parts If you need help us to better respond to higher position in Canada. s Is there proper air circulation around bakeware? s Has the oven door been opened while cooking?
... in longer cooking times. s Was the oven preheated? Stainless Steel Cleaner & Polish (stainless steel models) Order Part #4396095 Dehydration Kit (includes 3 racks and an oven door stop) Order Part #4395974A96 In Canada For product related questions, please call . See "Bakeware" section. s Is the proper length of the crust. s Are pie crust... replacement parts If you need help us to better respond to higher position in Canada. s Is there proper air circulation around bakeware? s Has the oven door been opened while cooking?
Use and Care Guide
Page 24
... according to instructions attached to or furnished with the product, KitchenAid will pay for factory specified parts for the oven cavity/inner door if the part rusts through fifth years from the date of purchase, when this appliance is operated and maintained according to instructions ... will pay for factory specified parts for the ceramic glass cooktop. In Canada, travel or transportation expenses for the porcelain oven cavity/inner door if the part rusts through fifth years from the date of products not approved by calling the KitchenAid Customer Interaction Center, 1-800-422...
... according to instructions attached to or furnished with the product, KitchenAid will pay for factory specified parts for the oven cavity/inner door if the part rusts through fifth years from the date of purchase, when this appliance is operated and maintained according to instructions ... will pay for factory specified parts for the ceramic glass cooktop. In Canada, travel or transportation expenses for the porcelain oven cavity/inner door if the part rusts through fifth years from the date of products not approved by calling the KitchenAid Customer Interaction Center, 1-800-422...
Installation Instructions
Page 2
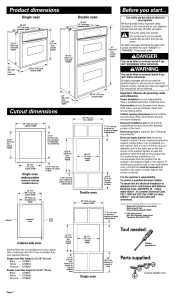
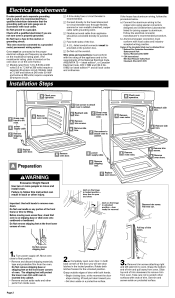
... or seriously injured if you start...Double oven 28-3/8" (72.1 cm) max. To assure that can be obtained from strong draft areas, such as windows, doors and strong heating vents. cabinet width 1" (2.5 cm) top of cutout to floor 14-3/4" (37.5 cm) bottom of the oven. cutout height 28-1/2" (... 3 inches (7.6 cm) maximum below the support surface when oven is adequate and in the upper or lower right or left corner of upper cabinet door ** CSA International 8501 East Pleasant Valley Road Cleveland, Ohio 44131-5575 Cutout dimensions 30" (76.2 cm) min. Oven location should be recessed and...
... or seriously injured if you start...Double oven 28-3/8" (72.1 cm) max. To assure that can be obtained from strong draft areas, such as windows, doors and strong heating vents. cabinet width 1" (2.5 cm) top of cutout to floor 14-3/4" (37.5 cm) bottom of the oven. cutout height 28-1/2" (... 3 inches (7.6 cm) maximum below the support surface when oven is adequate and in the upper or lower right or left corner of upper cabinet door ** CSA International 8501 East Pleasant Valley Road Cleveland, Ohio 44131-5575 Cutout dimensions 30" (76.2 cm) min. Oven location should be recessed and...
Installation Instructions
Page 3
... is used, it is recommended that a qualified electrician determine that the grounding path and wire gauge are not sure oven is located on the oven door or on the oven frame.)
... is used, it is recommended that a qualified electrician determine that the grounding path and wire gauge are not sure oven is located on the oven door or on the oven frame.)


