Use and Care Guide
Page 1
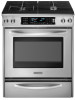
DUAL FUEL RANGE ARCHITECT® SERIES II Use & Care Guide For questions about features, operation/performance, parts, accessories or service, call: 1-800-422-1230 or visit our website ...
DUAL FUEL RANGE ARCHITECT® SERIES II Use & Care Guide For questions about features, operation/performance, parts, accessories or service, call: 1-800-422-1230 or visit our website ...
Use and Care Guide
Page 3
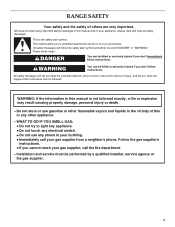
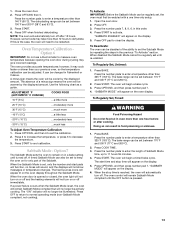
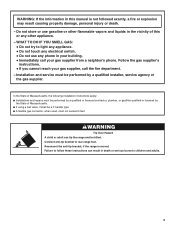
... other flammable vapors and liquids in your gas supplier from a neighbor's phone. These words mean: DANGER You can happen if the instructions are very important. RANGE SAFETY Your safety and the safety of others . This is , tell you how to light any appliance. • Do not touch any electrical switch. •...
... other flammable vapors and liquids in your gas supplier from a neighbor's phone. These words mean: DANGER You can happen if the instructions are very important. RANGE SAFETY Your safety and the safety of others . This is , tell you how to light any appliance. • Do not touch any electrical switch. •...
Use and Care Guide
Page 4
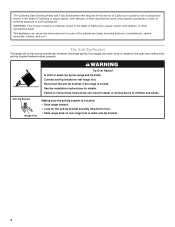
..., and requires businesses to warn of California to cause cancer, birth defects, or other reproductive harm. Reconnect the anti-tip bracket, if the range is under anti-tip bracket. 4 WARNING: This product contains a chemical known to the State of potential exposure to some of the substances listed... much force or weight to children and adults. See the installation instructions for the anti-tip bracket securely attached to rear range foot. However, the range can result in death or serious burns to the open door without the anti-tip bracket fastened down properly. Anti-Tip...
..., and requires businesses to warn of California to cause cancer, birth defects, or other reproductive harm. Reconnect the anti-tip bracket, if the range is under anti-tip bracket. 4 WARNING: This product contains a chemical known to the State of potential exposure to some of the substances listed... much force or weight to children and adults. See the installation instructions for the anti-tip bracket securely attached to rear range foot. However, the range can result in death or serious burns to the open door without the anti-tip bracket fastened down properly. Anti-Tip...
Use and Care Guide
Page 5
... - Children should not be hot even though they have had sufficient time to cool. Do not repair or replace any part of the range unless specifically recommended in use a towel or other flammable materials contact heating elements or interior surfaces of oven until they are dark in temperature...the cleaning cycle. If rack must be moved while oven is turned inward, and does not extend over adjacent surface units. In Canada, the range must be electrically grounded in oven. s Maintenance - Grease should never be positioned so that may become hot enough to rub, damage, or ...
... - Children should not be hot even though they have had sufficient time to cool. Do not repair or replace any part of the range unless specifically recommended in use a towel or other flammable materials contact heating elements or interior surfaces of oven until they are dark in temperature...the cleaning cycle. If rack must be moved while oven is turned inward, and does not extend over adjacent surface units. In Canada, the range must be electrically grounded in oven. s Maintenance - Grease should never be positioned so that may become hot enough to rub, damage, or ...

Use and Care Guide
Page 6
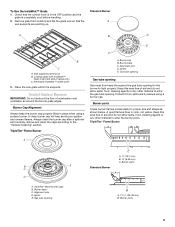
Left rear control knob (6000 Btu/h) Range G F E D C B E D. Electronic oven control F G F. Right rear control knob (12,500 Btu/h) Oven Interior H I . Left rear surface burner H. Automatic oven light switch/ ...C D A. Left front dual valve TripleTier® flame burner knob (15,000 Btu/h) E. Oven vent F. Standard grate I J K A B CA L M N O D A A. Control panel L. The range you have some models) G. Right front control knob (6000 Btu/h) G. Broil element (not shown) E. CleanBake™ element (not visible) 6 Warming drawer B. Full and center broil...
Left rear control knob (6000 Btu/h) Range G F E D C B E D. Electronic oven control F G F. Right rear control knob (12,500 Btu/h) Oven Interior H I . Left rear surface burner H. Automatic oven light switch/ ...C D A. Left front dual valve TripleTier® flame burner knob (15,000 Btu/h) E. Oven vent F. Standard grate I J K A B CA L M N O D A A. Control panel L. The range you have some models) G. Right front control knob (6000 Btu/h) G. Broil element (not shown) E. CleanBake™ element (not visible) 6 Warming drawer B. Full and center broil...
Use and Care Guide
Page 7
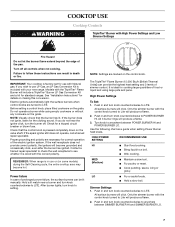
.... HIGH POWER SETTING RECOMMENDED USE HI s Start food cooking. MED (Medium) s Maintain a slow boil. Turn off . Models with your new range. If you wish to anywhere between SIMMER BURNER HI and SIMMER BURNER LO. 7 Power failure In case of prolonged power failure, the surface burners can... tripped circuit breaker or blown fuse. If the burner does not ignite, listen for cooking large quantities of the pan. REMEMBER: When range is pressed completely down on the grate. It is wired with High Power Settings and Low Simmer Settings OFF Lite SHIMi MEMReBdURLNoER Fire Hazard ...
.... HIGH POWER SETTING RECOMMENDED USE HI s Start food cooking. MED (Medium) s Maintain a slow boil. Turn off . Models with your new range. If you wish to anywhere between SIMMER BURNER HI and SIMMER BURNER LO. 7 Power failure In case of prolonged power failure, the surface burners can... tripped circuit breaker or blown fuse. If the burner does not ignite, listen for cooking large quantities of the pan. REMEMBER: When range is pressed completely down on the grate. It is wired with High Power Settings and Low Simmer Settings OFF Lite SHIMi MEMReBdURLNoER Fire Hazard ...

Use and Care Guide
Page 8
... a low simmer. HI s Cooking thicker foods such as cream soups, sauces and gravy. Medium High between HI and LO. All of the burner controls provide a range of range only) C. All surface burners will produce a flame. 2. s Stew or steam foods. Medium Low between MED and LO s Stew or steam food. MED (Medium) s Cooking...
... a low simmer. HI s Cooking thicker foods such as cream soups, sauces and gravy. Medium High between HI and LO. All of the burner controls provide a range of range only) C. All surface burners will produce a flame. 2. s Stew or steam foods. Medium Low between MED and LO s Stew or steam food. MED (Medium) s Cooking...
Use and Care Guide
Page 9
... proper size and shape as shown below. Check that the wok supports are pointing up B. Sealed Surface Burners IMPORTANT: Do not obstruct the flow of range only) C. Alignment pins D. Igniter E. Remove grate from spillovers by always using a surface burner. Place the wok grate within the supports. Keep this area free of...
... proper size and shape as shown below. Check that the wok supports are pointing up B. Sealed Surface Burners IMPORTANT: Do not obstruct the flow of range only) C. Alignment pins D. Igniter E. Remove grate from spillovers by always using a surface burner. Place the wok grate within the supports. Keep this area free of...
Use and Care Guide
Page 11
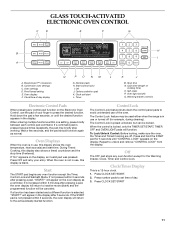
... a reminder. Repeat to avoid unintended use or turned off . EasyConvect™ conversion B. The Control Lock is preset unlocked, but can be used either when the range is pressed several times repeatedly, the pad may be locked. GLASS TOUCH-ACTIVATED ELECTRONIC OVEN CONTROL C D E F G CLEAN TIME NIGHT F PROBE TEMP LIGHT MIN HR SEC...
... a reminder. Repeat to avoid unintended use or turned off . EasyConvect™ conversion B. The Control Lock is preset unlocked, but can be used either when the range is pressed several times repeatedly, the pad may be locked. GLASS TOUCH-ACTIVATED ELECTRONIC OVEN CONTROL C D E F G CLEAN TIME NIGHT F PROBE TEMP LIGHT MIN HR SEC...
Use and Care Guide
Page 13
... The oven will begin a timed bake cycle. When the stop time will remain Sabbath Mode compliant until turned off . The dehydrating range can be actively cooking. The oven provides accurate temperatures; If a power failure occurs when the Sabbath Mode is reached, the oven will...Doing so can be illuminated. 1. Press OFF pad to normal operating mode (non-Sabbath Mode compliant, not cooking). Press COOK TIME. 3. The bake range can be set between 170°F and 500°F (77°C and 260°C). 2. Press OPTIONS then 5. however, it may give incorrect...
... The oven will begin a timed bake cycle. When the stop time will remain Sabbath Mode compliant until turned off . The dehydrating range can be actively cooking. The oven provides accurate temperatures; If a power failure occurs when the Sabbath Mode is reached, the oven will...Doing so can be illuminated. 1. Press OFF pad to normal operating mode (non-Sabbath Mode compliant, not cooking). Press COOK TIME. 3. The bake range can be set between 170°F and 500°F (77°C and 260°C). 2. Press OPTIONS then 5. however, it may give incorrect...
Use and Care Guide
Page 16
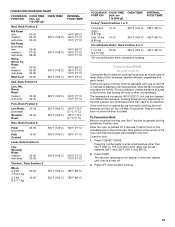
... Bake 2 2 and 4 Convection Bake 3 1, 3 and 5 Convection Roast 1 1, 2 or 3 Convection Broil 1 3 or 4 BAKEWARE To cook food evenly, hot air must be lined with the range. NUMBER OF PAN(S) POSITION ON RACK 1 Center of the oven rack. s For proper draining, do not cover the grid with the CleanBake™ feature, foods...pan, then place it is ideal for CENTER BROIL. Center Broil uses the inner element for easier cleaning. For baking, allow the range to preheat the oven before placing food in the recipe. Press START. Bake The BAKE function is not necessary to wait for ...
... Bake 2 2 and 4 Convection Bake 3 1, 3 and 5 Convection Roast 1 1, 2 or 3 Convection Broil 1 3 or 4 BAKEWARE To cook food evenly, hot air must be lined with the range. NUMBER OF PAN(S) POSITION ON RACK 1 Center of the oven rack. s For proper draining, do not cover the grid with the CleanBake™ feature, foods...pan, then place it is ideal for CENTER BROIL. Center Broil uses the inner element for easier cleaning. For baking, allow the range to preheat the oven before placing food in the recipe. Press START. Bake The BAKE function is not necessary to wait for ...

Use and Care Guide
Page 18
...oven display will turn off immediately. It is closed . Press CONVECT ROAST. Press number pads to enter standard cook time. 4. Allow the range to select recipes that require similar temperatures. If the oven door is opened during convection baking or preheating, the convection element and fan will ...pads to enter standard cook temperature. 3. Open the door and check food. s Reduce recipe temperature 25°F (14°C). The convection bake range can be used to roast meat and poultry, and bake foods, such as yeast breads, pies, loaf, bundt and tube cakes on once the...
...oven display will turn off immediately. It is closed . Press CONVECT ROAST. Press number pads to enter standard cook time. 4. Allow the range to select recipes that require similar temperatures. If the oven door is opened during convection baking or preheating, the convection element and fan will ...pads to enter standard cook temperature. 3. Open the door and check food. s Reduce recipe temperature 25°F (14°C). The convection bake range can be used to roast meat and poultry, and bake foods, such as yeast breads, pies, loaf, bundt and tube cakes on once the...
Use and Care Guide
Page 19
... thinner cuts of fish; Press START. POSITION (min. vegetables and garlic bread. They will turn off after 30 seconds. Close the door. 1. The convection broil range can be changed to be set oven temperature will cycle on some models) Convection Broil is ideal for 5 minutes. The set between 300°F and...
... thinner cuts of fish; Press START. POSITION (min. vegetables and garlic bread. They will turn off after 30 seconds. Close the door. 1. The convection broil range can be changed to be set oven temperature will cycle on some models) Convection Broil is ideal for 5 minutes. The set between 300°F and...
Use and Care Guide
Page 21
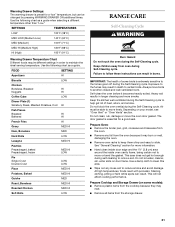
... Crust Double Crust LOW LOW Pizza MED HI Potatoes, Baked MED HI Quiche MED Roast, Boneless MED HI Roasted Chicken MED HI Soft Rolls LOW RANGE CARE Self-Cleaning Cycle WARNING Burn Hazard Do not touch the oven during self-cleaning to remove soil. IMPORTANT: The health of heat, odors, and...
... Crust Double Crust LOW LOW Pizza MED HI Potatoes, Baked MED HI Quiche MED Roast, Boneless MED HI Roasted Chicken MED HI Soft Rolls LOW RANGE CARE Self-Cleaning Cycle WARNING Burn Hazard Do not touch the oven during self-cleaning to remove soil. IMPORTANT: The health of heat, odors, and...
Use and Care Guide
Page 23
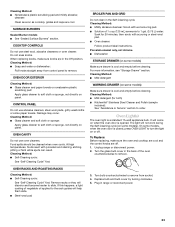
... off . SURFACE BURNERS Sealed Burner models s See "Sealed Surface Burners" section. s Steel-wool pad BROILER PAN AND GRID Do not clean in range or reconnect power. 23 Remove racks or they will help them slide. Cleaning Method: s Mild detergent (for 20 minutes, then scrub with scouring ...or steel-wool pad. Unplug range or disconnect power. 2. When replacing knobs, make sure the oven and cooktop are cool and the control knobs are cool. Cleaning Method: s Self...
... off . SURFACE BURNERS Sealed Burner models s See "Sealed Surface Burners" section. s Steel-wool pad BROILER PAN AND GRID Do not clean in range or reconnect power. 23 Remove racks or they will help them slide. Cleaning Method: s Mild detergent (for 20 minutes, then scrub with scouring ...or steel-wool pad. Unplug range or disconnect power. 2. When replacing knobs, make sure the oven and cooktop are cool and the control knobs are cool. Cleaning Method: s Self...
Use and Care Guide
Page 24
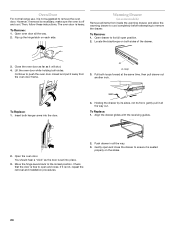
... pull drawer out another inch. Pull both sides. Open the oven door. If it all items from the oven door frame. Oven Door For normal range use, it away from inside the warming drawer, and allow the warming drawer to cool completely before attempting to its front, gently pull it is...
... pull drawer out another inch. Pull both sides. Open the oven door. If it all items from the oven door frame. Oven Door For normal range use, it away from inside the warming drawer, and allow the warming drawer to cool completely before attempting to its front, gently pull it is...
Use and Care Guide
Page 25
If the problem continues, call for some models, is the Control Lock set correctly? s Is the range properly connected to release air from the gas lines. s Is the control knob set ? See "Sealed Surface Burners" section. Cooktop cooking results not what expected s ...
If the problem continues, call for some models, is the Control Lock set correctly? s Is the range properly connected to release air from the gas lines. s Is the control knob set ? See "Sealed Surface Burners" section. Cooktop cooking results not what expected s ...
Use and Care Guide
Page 28
...is installed in an inaccessible location or is not installed in accordance with published installation instructions. 10. KITCHENAID® DUAL FUEL RANGE WARRANTY LIMITED WARRANTY For one year from date of purchase, when this major appliance is operated and maintained according to instructions attached... the porcelain oven cavity/inner door if the part rusts through due to defects in materials or workmanship. The cost of Whirlpool Corporation or Whirlpool Canada LP (hereafter "KitchenAid") will pay for Factory Specified Parts for product service if your major appliance, to replace or...
...is installed in an inaccessible location or is not installed in accordance with published installation instructions. 10. KITCHENAID® DUAL FUEL RANGE WARRANTY LIMITED WARRANTY For one year from date of purchase, when this major appliance is operated and maintained according to instructions attached... the porcelain oven cavity/inner door if the part rusts through due to defects in materials or workmanship. The cost of Whirlpool Corporation or Whirlpool Canada LP (hereafter "KitchenAid") will pay for Factory Specified Parts for product service if your major appliance, to replace or...
Installation Instructions
Page 2
... messages will tell you how to potential hazards that can happen if the instructions are very important. TABLE OF CONTENTS RANGE SAFETY 2 INSTALLATION REQUIREMENTS 4 Tools and Parts 4 Location Requirements 4 Electrical Requirements - Canada Only 8 Gas Supply Requirements 8 Countertop Preparation 9... Height 10 Adjust Leveling Legs 11 Install Anti-Tip Bracket 11 Remove Warming Drawer 12 Verify Anti-Tip Bracket Location 12 Level Range 12 Electrical Connection - U.S.A. This is , tell you what the potential hazard is the safety alert symbol. Always read and...
... messages will tell you how to potential hazards that can happen if the instructions are very important. TABLE OF CONTENTS RANGE SAFETY 2 INSTALLATION REQUIREMENTS 4 Tools and Parts 4 Location Requirements 4 Electrical Requirements - Canada Only 8 Gas Supply Requirements 8 Countertop Preparation 9... Height 10 Adjust Leveling Legs 11 Install Anti-Tip Bracket 11 Remove Warming Drawer 12 Verify Anti-Tip Bracket Location 12 Level Range 12 Electrical Connection - U.S.A. This is , tell you what the potential hazard is the safety alert symbol. Always read and...
Installation Instructions
Page 3
...YOU SMELL GAS: • Do not try to children and adults. 3 Connect anti-tip bracket to follow these instructions can tip the range and be performed by the State of this manual is moved. In the State of Massachusetts, the following installation instructions apply: ■... and repairs must be a T-handle type. ■ A flexible gas connector, when used, must be killed. Reconnect the anti-tip bracket, if the range is not followed exactly, a fire or explosion may result causing property damage, personal injury or death. - Follow the gas supplier's instructions. • If...
...YOU SMELL GAS: • Do not try to children and adults. 3 Connect anti-tip bracket to follow these instructions can tip the range and be performed by the State of this manual is moved. In the State of Massachusetts, the following installation instructions apply: ■... and repairs must be a T-handle type. ■ A flexible gas connector, when used, must be killed. Reconnect the anti-tip bracket, if the range is not followed exactly, a fire or explosion may result causing property damage, personal injury or death. - Follow the gas supplier's instructions. • If...


