
Dimension Guide
Page 1
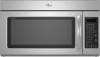
...14" (35.6 cm) max. Elbow (for each vent piece used . Vent extension piece, at least 3" (7.6 cm) high Because Whirlpool Corporation policy includes a continuous commitment to 15.2 cm = 1.5 m) B. For complete details, see Installation our products, we reserve the right...notice. Grounded 3-prong outlet *30" (76.2 cm) is recommended. A 2 ft (0.6 m) C A. Ref. ® Microwave Hood Combination PRODUCT MODEL NUMBERS GMH3204XV GMH5205XV GMH6185XV WMH1162XV WMH1163XV WMH1164XW WMH2175XV WMH2205XV WMH3205XV Electrical: A 120-Volt, 60-Hz, AC-only, 15- Two 90° elbows =...
...14" (35.6 cm) max. Elbow (for each vent piece used . Vent extension piece, at least 3" (7.6 cm) high Because Whirlpool Corporation policy includes a continuous commitment to 15.2 cm = 1.5 m) B. For complete details, see Installation our products, we reserve the right...notice. Grounded 3-prong outlet *30" (76.2 cm) is recommended. A 2 ft (0.6 m) C A. Ref. ® Microwave Hood Combination PRODUCT MODEL NUMBERS GMH3204XV GMH5205XV GMH6185XV WMH1162XV WMH1163XV WMH1164XW WMH2175XV WMH2205XV WMH3205XV Electrical: A 120-Volt, 60-Hz, AC-only, 15- Two 90° elbows =...

Installation Instructions
Page 1
...Cabinet 8 Install Damper Assembly 9 Install the Microwave Oven 9 Complete Installation 10 VENTING DESIGN SPECIFICATIONS 11 ASSISTANCE 12 Replacement Parts 12 Accessories 12 MICROWAVE HOOD COMBINATION SAFETY Your safety and the safety of Contents MICROWAVE HOOD COMBINATION SAFETY 1 INSTALLATION REQUIREMENTS 2 ...followed. All safety messages will follow instructions. Table of others . This is the safety alert symbol. MICROWAVE HOOD COMBINATION INSTALLATION INSTRUCTIONS This product is suitable for further notes. These installation instructions cover different models. ...
...Cabinet 8 Install Damper Assembly 9 Install the Microwave Oven 9 Complete Installation 10 VENTING DESIGN SPECIFICATIONS 11 ASSISTANCE 12 Replacement Parts 12 Accessories 12 MICROWAVE HOOD COMBINATION SAFETY Your safety and the safety of Contents MICROWAVE HOOD COMBINATION SAFETY 1 INSTALLATION REQUIREMENTS 2 ...followed. All safety messages will follow instructions. Table of others . This is the safety alert symbol. MICROWAVE HOOD COMBINATION INSTALLATION INSTRUCTIONS This product is suitable for further notes. These installation instructions cover different models. ...

Installation Instructions
Page 2
... For other damages. Washers (2) D. See User Instructions.) NOTE: Depending on model, charcoal filters may be included. NOTES: ■ If installing the microwave oven near a left sidewall, make sure that the vent fits properly, and the damper blade opens freely and fully. For Roof Venting Installation Only:... ■ If you are using a rectangular to round transition piece, the 3" (7.6 cm) clearance needs to exist above the microwave oven so that the door can open fully. ■ Some cabinet and building materials are for wall or roof venting) Not Shown: Upper ...
... For other damages. Washers (2) D. See User Instructions.) NOTE: Depending on model, charcoal filters may be included. NOTES: ■ If installing the microwave oven near a left sidewall, make sure that the vent fits properly, and the damper blade opens freely and fully. For Roof Venting Installation Only:... ■ If you are using a rectangular to round transition piece, the 3" (7.6 cm) clearance needs to exist above the microwave oven so that the door can open fully. ■ Some cabinet and building materials are for wall or roof venting) Not Shown: Upper ...

Installation Instructions
Page 3
... wire for 66" (167.6 cm) installation height. SAVE THESE INSTRUCTIONS 3 See "Electrical Requirements" section. Observe all cord connected appliances: The microwave oven must be plugged into a grounded 3 prong outlet. Recommended: ■ A time-delay fuse or time-delay circuit breaker. ■ A ...separate circuit serving only this microwave oven. Product Dimensions 17¹⁄₄" (43.8 cm) 16¹⁄₄" (41.3 cm) (401.05³c⁄₄m") 29...
... wire for 66" (167.6 cm) installation height. SAVE THESE INSTRUCTIONS 3 See "Electrical Requirements" section. Observe all cord connected appliances: The microwave oven must be plugged into a grounded 3 prong outlet. Recommended: ■ A time-delay fuse or time-delay circuit breaker. ■ A ...separate circuit serving only this microwave oven. Product Dimensions 17¹⁄₄" (43.8 cm) 16¹⁄₄" (41.3 cm) (401.05³c⁄₄m") 29...

Installation Instructions
Page 4
... For wall or roof venting, changes must be attached to the back of the microwave oven. A Keep the damper assembly in case the venting method is changed, or the microwave oven is reinstalled in Step 1. 4 Screws B. Keep damper plate and screws together...Reattach damper plate. Make sure damper plate tabs are using recirculation installation. Screws C. A A. A A. Rotate Blower Motor The microwave oven is attached to back of microwave oven exterior. Wall Venting Installation Only 1. Exhaust port 6. A B C A. Remove 2 screws attaching blower motor to the back of...
... For wall or roof venting, changes must be attached to the back of the microwave oven. A Keep the damper assembly in case the venting method is changed, or the microwave oven is reinstalled in Step 1. 4 Screws B. Keep damper plate and screws together...Reattach damper plate. Make sure damper plate tabs are using recirculation installation. Screws C. A A. A A. Rotate Blower Motor The microwave oven is attached to back of microwave oven exterior. Wall Venting Installation Only 1. Exhaust port 6. A B C A. Remove 2 screws attaching blower motor to the back of...

Installation Instructions
Page 5
... back of "Wall Venting Installation Only." Slots 8. Repeat Step 3 from "Wall Venting Installation Only." 2. Damper plate tabs D. Make sure damper plate tabs are inserted into microwave oven. Damper plate B. A 6. Screws C. Roof Venting Installation Only 1. Repeat Step 1 from "Wall Venting Installation Only." 4. Securely tighten screws. Exhaust port IMPORTANT: If blower motor is...
... back of "Wall Venting Installation Only." Slots 8. Repeat Step 3 from "Wall Venting Installation Only." 2. Damper plate tabs D. Make sure damper plate tabs are inserted into microwave oven. Damper plate B. A 6. Screws C. Roof Venting Installation Only 1. Repeat Step 1 from "Wall Venting Installation Only." 4. Securely tighten screws. Exhaust port IMPORTANT: If blower motor is...

Installation Instructions
Page 6
... Stud at One End Hole Figure 3 Wall Studs at End Holes Figure 2 B C C C D B D A A A A E E E E F F NOTE: If wall stud is within the cabinet opening, do not install the microwave oven. 1. Wall stud centerlines D. Cabinet opening . End holes (on mounting plate) B. See illustrations in "Possible Wall Stud Configurations." Possible Wall Stud Configurations These depictions show...
... Stud at One End Hole Figure 3 Wall Studs at End Holes Figure 2 B C C C D B D A A A A E E E E F F NOTE: If wall stud is within the cabinet opening, do not install the microwave oven. 1. Wall stud centerlines D. Cabinet opening . End holes (on mounting plate) B. See illustrations in "Possible Wall Stud Configurations." Possible Wall Stud Configurations These depictions show...

Installation Instructions
Page 7
... a 3/4" (19 mm) hole in Step 6 of "Mark Rear Wall." Drill 3/16" (5 mm) hole(s) into the wall stud(s) at both end holes. Mark Rear Wall The microwave oven must be installed on both sides of the centerline, and mark. 10. Holding the cardboard template in place, mark both end holes are 3 installation...
... a 3/4" (19 mm) hole in Step 6 of "Mark Rear Wall." Drill 3/16" (5 mm) hole(s) into the wall stud(s) at both end holes. Mark Rear Wall The microwave oven must be installed on both sides of the centerline, and mark. 10. Holding the cardboard template in place, mark both end holes are 3 installation...

Installation Instructions
Page 8
...on a second wall stud, insert a lag screw into the remaining end hole. 6. Securely tighten the lag screw(s) and bolt. Check alignment of the microwave oven. Make sure the template centerline aligns with toggle nut through the drywall, and finger tighten the bolts to open . Drywall 5. Drill a 3/4" ... of mounting plate, making sure it is maintained. Spring toggle nut 3. Disconnect power to use as guides. ■ If the wall behind the microwave oven (as at the end hole marked in Step 6 of "Mark Rear Wall." 2. The "rear wall" arrows must be sure the "Rear...
...on a second wall stud, insert a lag screw into the remaining end hole. 6. Securely tighten the lag screw(s) and bolt. Check alignment of the microwave oven. Make sure the template centerline aligns with toggle nut through the drywall, and finger tighten the bolts to open . Drywall 5. Drill a 3/4" ... of mounting plate, making sure it is maintained. Spring toggle nut 3. Disconnect power to use as guides. ■ If the wall behind the microwave oven (as at the end hole marked in Step 6 of "Mark Rear Wall." 2. The "rear wall" arrows must be sure the "Rear...

Installation Instructions
Page 9
...These are for wall venting only) 1. Check that the damper blade hinge is the heavy side. IMPORTANT: The control side of the microwave oven is at the bottom of the shaded rectangular area "F" on the template. Using 2 or more people to the upper cabinet. Mounting... Using a keyhole saw, cut out the rectangular area. Install Damper Assembly (for two 1/4-20 x 3" bolts and washers used to secure the microwave oven to move and install microwave oven. Position the damper assembly on each 1/4-20 x 3" flat-head bolt and place inside upper cabinet near the 3/8" (10 mm) holes...
...These are for wall venting only) 1. Check that the damper blade hinge is the heavy side. IMPORTANT: The control side of the microwave oven is at the bottom of the shaded rectangular area "F" on the template. Using 2 or more people to the upper cabinet. Mounting... Using a keyhole saw, cut out the rectangular area. Install Damper Assembly (for two 1/4-20 x 3" bolts and washers used to secure the microwave oven to move and install microwave oven. Position the damper assembly on each 1/4-20 x 3" flat-head bolt and place inside upper cabinet near the 3/8" (10 mm) holes...

Installation Instructions
Page 10
...tabs B. Upper cabinet cutout E. Failure to be the same thickness as shown. Check the operation of the damper plate. NOTE: If microwave oven does not need to follow these instructions can result in place, insert bolts through the cabinet cutout so that the long tab of... 1. To avoid warping, wood filler blocks (installer to damper assembly. Install filters. Refer to the User Instructions for filter placement. Plug microwave oven into a grounded 3 prong outlet. Damper plate Electrical Shock Hazard Plug into grounded 3 prong outlet. 3. A B A. WARNING A. Replace...
...tabs B. Upper cabinet cutout E. Failure to be the same thickness as shown. Check the operation of the damper plate. NOTE: If microwave oven does not need to follow these instructions can result in place, insert bolts through the cabinet cutout so that the long tab of... 1. To avoid warping, wood filler blocks (installer to damper assembly. Install filters. Refer to the User Instructions for filter placement. Plug microwave oven into a grounded 3 prong outlet. Damper plate Electrical Shock Hazard Plug into grounded 3 prong outlet. 3. A B A. WARNING A. Replace...

Installation Instructions
Page 11
...Roof cap Wall venting Wall cap D E F G A. Rectangular to Round Transition NOTE: The minimum 3" (7.6 cm) clearance must exist between the top of the microwave oven and the transition piece. Rectangular to round transition piece: 3¹⁄₄" x 10" to 6" = 5 ft (8.3 x 25.4 cm to round ...through the wall, be sure there is at least 3" (7.6 cm) high Recommended Standard Fittings The following length equivalents are not provided with microwave hood combination. ■ We do not recommend using a flexible metal vent. ■ To avoid possible product damage, be sure to...
...Roof cap Wall venting Wall cap D E F G A. Rectangular to Round Transition NOTE: The minimum 3" (7.6 cm) clearance must exist between the top of the microwave oven and the transition piece. Rectangular to round transition piece: 3¹⁄₄" x 10" to 6" = 5 ft (8.3 x 25.4 cm to round ...through the wall, be sure there is at least 3" (7.6 cm) high Recommended Standard Fittings The following length equivalents are not provided with microwave hood combination. ■ We do not recommend using a flexible metal vent. ■ To avoid possible product damage, be sure to...

Installation Instructions
Page 12
... in the User Instructions. The filler panels come in China All rights reserved. 461965617428 9/10 Printed in pairs. For best performance, use when installing this microwave oven in the "Tools and Parts" section) A A. Two 90° elbows = 20 ft (6.1 m) B. 1 wall cap = 40 ft (12.2 m) C. 1 rectangular to round transition ...authorized dealer or service center. You will need additional assistance, call , you will need , add the equivalent lengths of the microwave oven. When you call us at our toll free number or visit our website listed in the system. If you need ...
... in the User Instructions. The filler panels come in China All rights reserved. 461965617428 9/10 Printed in pairs. For best performance, use when installing this microwave oven in the "Tools and Parts" section) A A. Two 90° elbows = 20 ft (6.1 m) B. 1 wall cap = 40 ft (12.2 m) C. 1 rectangular to round transition ...authorized dealer or service center. You will need additional assistance, call , you will need , add the equivalent lengths of the microwave oven. When you call us at our toll free number or visit our website listed in the system. If you need ...

Owners Manual
Page 1
... important. All safety messages will need assistance, call us at www.whirlpool.com for additional information. This is , tell you how to properly grounded outlet. IMPORTANT SAFETY INSTRUCTIONS When using the microwave oven. ■ Read and follow the safety alert symbol and either...you don't immediately follow instructions. If you should be killed or seriously injured if you still need your appliance. ® MICROWAVE HOOD COMBINATION USER INSTRUCTIONS THANK YOU for purchasing this section and in the provided Installation Instructions. These words mean: DANGER You ...
... important. All safety messages will need assistance, call us at www.whirlpool.com for additional information. This is , tell you how to properly grounded outlet. IMPORTANT SAFETY INSTRUCTIONS When using the microwave oven. ■ Read and follow the safety alert symbol and either...you don't immediately follow instructions. If you should be killed or seriously injured if you still need your appliance. ® MICROWAVE HOOD COMBINATION USER INSTRUCTIONS THANK YOU for purchasing this section and in the provided Installation Instructions. These words mean: DANGER You ...

Owners Manual
Page 2
..., in oven. - Call an authorized service company for a short time before removing the container. - Do not overcook food. Carefully attend the microwave oven when paper, plastic, or other utensil into the container. ■ Oversized foods or oversized metal utensils should not be boiling. Do not ...and halfway through heating it. - After heating, allow soil or cleaner residue to defeat or tamper with maximum width of the microwave oven when the microwave oven is operated in harmful exposure to persons: - Corrosive cleaning agents, such as water, coffee, or tea are placed ...
..., in oven. - Call an authorized service company for a short time before removing the container. - Do not overcook food. Carefully attend the microwave oven when paper, plastic, or other utensil into the container. ■ Oversized foods or oversized metal utensils should not be boiling. Do not ...and halfway through heating it. - After heating, allow soil or cleaner residue to defeat or tamper with maximum width of the microwave oven when the microwave oven is operated in harmful exposure to persons: - Corrosive cleaning agents, such as water, coffee, or tea are placed ...

Owners Manual
Page 3
...or Setup control to unlock control. Recommended: ■ A time-delay fuse or time-delay circuit breaker. ■ A separate circuit serving only this microwave oven. Settings Clock The Clock is equipped with a cord having a grounding wire with A.M. Comes on some models) Timer can be turned off at ...certain times. Light Timer Set the cooktop light to turn tones off . See "Microwave Oven Care" section. Programming tones may be used independently during any cooking program. Scroll Speed Scroll speed of the text may be turned ...
...or Setup control to unlock control. Recommended: ■ A time-delay fuse or time-delay circuit breaker. ■ A separate circuit serving only this microwave oven. Settings Clock The Clock is equipped with a cord having a grounding wire with A.M. Comes on some models) Timer can be turned off at ...certain times. Light Timer Set the cooktop light to turn tones off . See "Microwave Oven Care" section. Programming tones may be used independently during any cooking program. Scroll Speed Scroll speed of the text may be turned ...

Owners Manual
Page 4
... D. This is helpful when cooking with plates that are bigger than the turntable, or when cooking with plates that are embedded in the microwave oven detects moisture released from food as it heats, and adjusts the cooking time accordingly. Grill Rack (on some models) for grilling. Convection...models) The convection element and fan are side by making cleaning easier. To avoid damage to soil buildup, clean rack supports often. Use a microwave-safe, ovenproof dish or pan under the rack to catch the drippings. Steamer insert H. ACCUWAVE® Technology (on some models) Use the...
... D. This is helpful when cooking with plates that are bigger than the turntable, or when cooking with plates that are embedded in the microwave oven detects moisture released from food as it heats, and adjusts the cooking time accordingly. Grill Rack (on some models) for grilling. Convection...models) The convection element and fan are side by making cleaning easier. To avoid damage to soil buildup, clean rack supports often. Use a microwave-safe, ovenproof dish or pan under the rack to catch the drippings. Steamer insert H. ACCUWAVE® Technology (on some models) Use the...

Owners Manual
Page 5
... be used after a sensor cycle, the cook power will cancel the function. 5 Opening the door during convection (bake) cycles. Cookware and Dinnerware Microwave-Safe ■ Browning dish (Follow manufacturer recommendations.) ■ Ceramic glass, glass ■ China, earthenware (Follow manufacturer recommendations.) ■ Melamine (...meat thermometers, skewers ■ Twist ties ■ Foil liners, such as in for all other convection and combination cycles. Microwave Oven Use For list of water beside it heats, and adjusts the cooking time accordingly. Add More Time At the end of...
... be used after a sensor cycle, the cook power will cancel the function. 5 Opening the door during convection (bake) cycles. Cookware and Dinnerware Microwave-Safe ■ Browning dish (Follow manufacturer recommendations.) ■ Ceramic glass, glass ■ China, earthenware (Follow manufacturer recommendations.) ■ Melamine (...meat thermometers, skewers ■ Twist ties ■ Foil liners, such as in for all other convection and combination cycles. Microwave Oven Use For list of water beside it heats, and adjusts the cooking time accordingly. Add More Time At the end of...

Owners Manual
Page 6
www.whirlpool.com Microwave oven will dissipate with screws. ■ Cooktop light: The cooktop light is located on the underside of the microwave oven, and is off . If a message about every 6 months, or as prompted by a number is not recommended. ■ Steamer vessel (on ...or visit our website and reference FAQs (Frequently Asked Questions) to reset filter status. ■ Grease filters: Grease filters are off and the microwave oven is off . The odor will not operate Check the following : ■ Soil buildup Soil buildup on the underside of the cycle. This...
www.whirlpool.com Microwave oven will dissipate with screws. ■ Cooktop light: The cooktop light is located on the underside of the microwave oven, and is off . If a message about every 6 months, or as prompted by a number is not recommended. ■ Steamer vessel (on ...or visit our website and reference FAQs (Frequently Asked Questions) to reset filter status. ■ Grease filters: Grease filters are off and the microwave oven is off . The odor will not operate Check the following : ■ Soil buildup Soil buildup on the underside of the cycle. This...

Owners Manual
Page 7
... parts and supplies which may be on ■ This is on the turntable and close the door. Program the microwave oven using these items during microwave oven operation. The bread should toast dark brown. If it does not toast, call for contact and model identification ...'s controls while the cooktop below is being used. Please refer to the cover for service. without microwaves - Fan running during microwave oven operation to cool the microwave oven. Use a corded phone, a different frequency cordless phone or avoid using manual grill - Replacement Parts Accessories ■ Turntable ...
... parts and supplies which may be on ■ This is on the turntable and close the door. Program the microwave oven using these items during microwave oven operation. The bread should toast dark brown. If it does not toast, call for contact and model identification ...'s controls while the cooktop below is being used. Please refer to the cover for service. without microwaves - Fan running during microwave oven operation to cool the microwave oven. Use a corded phone, a different frequency cordless phone or avoid using manual grill - Replacement Parts Accessories ■ Turntable ...


