
Dimension Guide
Page 1
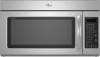
... wall cap = 40 ft (12.2 m) C. 2 ft (0.6 m) + 6 ft (1.8 m) straight = 8 ft (2.4 m) B C 3" (7.6 cm) D A. Vent extension piece, at least 3" (7.6 cm) high Because Whirlpool Corporation policy includes a continuous commitment to round transition piece = 5 ft (1.5 m) D. 2 ft (0.6 m) + 6 ft (1.8 m) straight = 8 ft (2.4 m) D 3 " x 10" (8.3 x 25.4 cm) vent system... notice. Ref. Roof cap B. 6" (15.2 cm) min. ® Microwave Hood Combination PRODUCT MODEL NUMBERS GMH3204XV GMH5205XV GMH6185XV WMH1162XV WMH1163XV WMH1164XW WMH2175XV WMH2205XV WMH3205XV Electrical: A 120-Volt, 60-Hz,...
... wall cap = 40 ft (12.2 m) C. 2 ft (0.6 m) + 6 ft (1.8 m) straight = 8 ft (2.4 m) B C 3" (7.6 cm) D A. Vent extension piece, at least 3" (7.6 cm) high Because Whirlpool Corporation policy includes a continuous commitment to round transition piece = 5 ft (1.5 m) D. 2 ft (0.6 m) + 6 ft (1.8 m) straight = 8 ft (2.4 m) D 3 " x 10" (8.3 x 25.4 cm) vent system... notice. Ref. Roof cap B. 6" (15.2 cm) min. ® Microwave Hood Combination PRODUCT MODEL NUMBERS GMH3204XV GMH5205XV GMH6185XV WMH1162XV WMH1163XV WMH1164XW WMH2175XV WMH2205XV WMH3205XV Electrical: A 120-Volt, 60-Hz,...

Installation Instructions
Page 1
... Wall 7 Attach Mounting Plate to Wall 8 Prepare Upper Cabinet 8 Install Damper Assembly 9 Install the Microwave Oven 9 Complete Installation 10 VENTING DESIGN SPECIFICATIONS 11 ASSISTANCE 12 Replacement Parts 12 Accessories 12 MICROWAVE HOOD COMBINATION SAFETY Your safety and the safety of your appliance. All safety messages will tell you what... what the potential hazard is, tell you how to and including 36" (91.4 cm) wide. All safety messages will follow instructions. W10247296B MICROWAVE HOOD COMBINATION INSTALLATION INSTRUCTIONS This product is the safety alert symbol.
... Wall 7 Attach Mounting Plate to Wall 8 Prepare Upper Cabinet 8 Install Damper Assembly 9 Install the Microwave Oven 9 Complete Installation 10 VENTING DESIGN SPECIFICATIONS 11 ASSISTANCE 12 Replacement Parts 12 Accessories 12 MICROWAVE HOOD COMBINATION SAFETY Your safety and the safety of your appliance. All safety messages will tell you what... what the potential hazard is, tell you how to and including 36" (91.4 cm) wide. All safety messages will follow instructions. W10247296B MICROWAVE HOOD COMBINATION INSTALLATION INSTRUCTIONS This product is the safety alert symbol.

Installation Instructions
Page 2
...Installation Only: ■ If you are using a rectangular to round transition piece, the 3" (7.6 cm) clearance needs to back of microwave oven) Cardboard template (part of the microwave oven packaging is for 1/4" x 2" lag screws ■ Scissors ■ 1½" (3.8 cm) diam. Washers (2) D. Set...Instructions.) NOTE: Depending on model, charcoal filters may be free of 150 lbs (68 kg), which includes microwave oven and items placed inside the microwave oven and upper cabinet. ■ Grounded electrical outlet inside the perforation is perforated. Remove Cardboard Template The...
...Installation Only: ■ If you are using a rectangular to round transition piece, the 3" (7.6 cm) clearance needs to back of microwave oven) Cardboard template (part of the microwave oven packaging is for 1/4" x 2" lag screws ■ Scissors ■ 1½" (3.8 cm) diam. Washers (2) D. Set...Instructions.) NOTE: Depending on model, charcoal filters may be free of 150 lbs (68 kg), which includes microwave oven and items placed inside the microwave oven and upper cabinet. ■ Grounded electrical outlet inside the perforation is perforated. Remove Cardboard Template The...

Installation Instructions
Page 3
...is properly installed and grounded. Recommended: ■ A time-delay fuse or time-delay circuit breaker. ■ A separate circuit serving only this microwave oven. The plug must be inside the upper cabinet. Installation Dimensions NOTE: The grounded 3 prong outlet must be plugged into a grounded 3 prong...electric shock by providing an escape wire for 66" (167.6 cm) installation height. Do not use an adapter. Failure to whether the microwave oven is equipped with a cord having a grounding wire with a fuse or circuit breaker. or 20-amp electrical supply with a grounding ...
...is properly installed and grounded. Recommended: ■ A time-delay fuse or time-delay circuit breaker. ■ A separate circuit serving only this microwave oven. The plug must be inside the upper cabinet. Installation Dimensions NOTE: The grounded 3 prong outlet must be plugged into a grounded 3 prong...electric shock by providing an escape wire for 66" (167.6 cm) installation height. Do not use an adapter. Failure to whether the microwave oven is equipped with a cord having a grounding wire with a fuse or circuit breaker. or 20-amp electrical supply with a grounding ...

Installation Instructions
Page 4
... or roof venting may be used. NOTE: Skip this section if you are inserted into the slots in the top of microwave oven, and lower blower motor back into the microwave oven. A B A. Make sure damper plate tabs are using recirculation installation. A A. Damper plate B. NOTE: To avoid ... or it aside. 3. Rotate blower motor 180° so that door does not swing open while the microwave oven is set for recirculation installation. A B C A. Lift blower motor out of the microwave oven and lift up. A A. Screws B. Keep damper plate and screws together and set it may be...
... or roof venting may be used. NOTE: Skip this section if you are inserted into the slots in the top of microwave oven, and lower blower motor back into the microwave oven. A B A. Make sure damper plate tabs are using recirculation installation. A A. Damper plate B. NOTE: To avoid ... or it aside. 3. Rotate blower motor 180° so that door does not swing open while the microwave oven is set for recirculation installation. A B C A. Lift blower motor out of the microwave oven and lift up. A A. Screws B. Keep damper plate and screws together and set it may be...

Installation Instructions
Page 5
...Slots 8. Reattach blower motor to the microwave oven. 7. D A. Secure damper plate with 2 screws removed in the top of the microwave oven (as shown), performance will be reattached to back of microwave oven with flat sides facing the back of the microwave oven. Damper plate tabs D. Rotate... blower motor so that exhaust ports face the top of microwave oven, and flat sides of blower motor face back of "Wall Venting Installation Only." 5 Make sure damper plate tabs are inserted into microwave oven. Repeat Step 1 from "Wall Venting Installation Only." 4. Repeat ...
...Slots 8. Reattach blower motor to the microwave oven. 7. D A. Secure damper plate with 2 screws removed in the top of the microwave oven (as shown), performance will be reattached to back of microwave oven with flat sides facing the back of the microwave oven. Damper plate tabs D. Rotate... blower motor so that exhaust ports face the top of microwave oven, and flat sides of blower motor face back of "Wall Venting Installation Only." 5 Make sure damper plate tabs are inserted into microwave oven. Repeat Step 1 from "Wall Venting Installation Only." 4. Repeat ...

Installation Instructions
Page 6
... Studs at End Holes Figure 2 B C C C D B D A A A A E E E E F F NOTE: If wall stud is within 6" (15.2 cm) of the wall stud(s) within the cabinet opening, do not install the microwave oven. 1. Cabinet opening vertical centerline C. Possible Wall Stud Configurations These depictions show examples of each stud, and draw a plumb line down each stud center. See...
... Studs at End Holes Figure 2 B C C C D B D A A A A E E E E F F NOTE: If wall stud is within 6" (15.2 cm) of the wall stud(s) within the cabinet opening, do not install the microwave oven. 1. Cabinet opening vertical centerline C. Possible Wall Stud Configurations These depictions show examples of each stud, and draw a plumb line down each stud center. See...

Installation Instructions
Page 7
.... Installation for No Wall Studs at least 1, preferably 2 hole(s) through the wall at the hole(s) marked in Step 8, and mark. 11. Mark Rear Wall The microwave oven must be installed on the wall, making sure its top is level with the front edge of the cabinet. ■ If the cardboard template...
.... Installation for No Wall Studs at least 1, preferably 2 hole(s) through the wall at the hole(s) marked in Step 8, and mark. 11. Mark Rear Wall The microwave oven must be installed on the wall, making sure its top is level with the front edge of the cabinet. ■ If the cardboard template...

Installation Instructions
Page 8
... section. 8 Upper-cabinet template D 10" (25.4 cm) F E 10" G (25.4 cm) Securely tighten all contents from the back of the microwave oven. Leave enough space for example, tile backsplash), be against drywall. If installing on at least 1 wall stud as well as installed) has a partial ... cabinet, and attach with the vertical centerline on the wall. 2. The template has trim lines to use as guides. ■ If the wall behind the microwave oven (as at both ends. 1. B D A. 1/4-20 x 3" round-head bolt B. Spring toggle nut D. Drywall 5. Insert lag screw(s) into the...
... section. 8 Upper-cabinet template D 10" (25.4 cm) F E 10" G (25.4 cm) Securely tighten all contents from the back of the microwave oven. Leave enough space for example, tile backsplash), be against drywall. If installing on at least 1 wall stud as well as installed) has a partial ... cabinet, and attach with the vertical centerline on the wall. 2. The template has trim lines to use as guides. ■ If the wall behind the microwave oven (as at both ends. 1. B D A. 1/4-20 x 3" round-head bolt B. Spring toggle nut D. Drywall 5. Insert lag screw(s) into the...

Installation Instructions
Page 9
...) 1. IMPORTANT: The control side of the shaded rectangular area "F" on Upper Cabinet Template. 8. Using 2 or more people to move and install microwave oven. This hole is being handled. Failure to be installed around the supply cord hole, as shown. Damper blade D. Place a washer on the... back of the upper cabinet. 5. NOTE: To avoid damage to the upper cabinet. With front of microwave oven still tilted, thread power supply cord through the wall, make sure the damper assembly fits easily into the vent in the bottom of ...
...) 1. IMPORTANT: The control side of the shaded rectangular area "F" on Upper Cabinet Template. 8. Using 2 or more people to move and install microwave oven. This hole is being handled. Failure to be installed around the supply cord hole, as shown. Damper blade D. Place a washer on the... back of the upper cabinet. 5. NOTE: To avoid damage to the upper cabinet. With front of microwave oven still tilted, thread power supply cord through the wall, make sure the damper assembly fits easily into the vent in the bottom of ...

Installation Instructions
Page 10
... fan. 5. WARNING A. Sheet metal screw D. Long tab F. Replace the fuse or reset the circuit breaker. Installation is required, rotate microwave oven downward. NOTES: ■ Some upper cabinets may be adjusted, skip steps 7-9. 7. Damper plate Electrical Shock Hazard Plug into grounded ...10 Do not remove ground prong. A B A. Then secure with at 100% power. A B C D E F A. Upper cabinet cutout E. Plug microwave oven into a grounded 3 prong outlet. Check the operation of the damper plate. Connect vent to the User Instructions for filter placement. Do not use an...
... fan. 5. WARNING A. Sheet metal screw D. Long tab F. Replace the fuse or reset the circuit breaker. Installation is required, rotate microwave oven downward. NOTES: ■ Some upper cabinets may be adjusted, skip steps 7-9. 7. Damper plate Electrical Shock Hazard Plug into grounded ...10 Do not remove ground prong. A B A. Then secure with at 100% power. A B C D E F A. Upper cabinet cutout E. Plug microwave oven into a grounded 3 prong outlet. Check the operation of the damper plate. Connect vent to the User Instructions for filter placement. Do not use an...

Installation Instructions
Page 11
...1.5 m) B. Rectangular to round transition piece so that there is at least 3" (7.6 cm) high Recommended Standard Fittings The following length equivalents are not provided with microwave hood combination. ■ We do not recommend using a flexible metal vent. ■ To avoid possible product damage, be sure to vent air outside, unless ...9632; using a rigid metal vent ■ using the most direct route by minimizing the length of the vent and number of the microwave oven and the rectangular to Round Transition NOTE: The minimum 3" (7.6 cm) clearance must exist between the top of the...
...1.5 m) B. Rectangular to round transition piece so that there is at least 3" (7.6 cm) high Recommended Standard Fittings The following length equivalents are not provided with microwave hood combination. ■ We do not recommend using a flexible metal vent. ■ To avoid possible product damage, be sure to vent air outside, unless ...9632; using a rigid metal vent ■ using the most direct route by minimizing the length of the vent and number of the microwave oven and the rectangular to Round Transition NOTE: The minimum 3" (7.6 cm) clearance must exist between the top of the...

Installation Instructions
Page 12
... ■ Mounting Screw Kit (includes parts A-G in "Parts Supplied" in China You will need , add the equivalent lengths of the microwave oven. All rights reserved. 461965617428 9/10 Printed in the "Tools and Parts" section) A A. To calculate the length of the installation..., which is a list of vent. Each panel is round, a rectangular to keep the damper from your model number located on the front facing of the microwave oven opening . See "Recommended Standard Fittings" section for details. One 3¹⁄₄" x 10" (8.3 x 25.4 cm) 90° elbow =...
... ■ Mounting Screw Kit (includes parts A-G in "Parts Supplied" in China You will need , add the equivalent lengths of the microwave oven. All rights reserved. 461965617428 9/10 Printed in the "Tools and Parts" section) A A. To calculate the length of the installation..., which is a list of vent. Each panel is round, a rectangular to keep the damper from your model number located on the front facing of the microwave oven opening . See "Recommended Standard Fittings" section for details. One 3¹⁄₄" x 10" (8.3 x 25.4 cm) 90° elbow =...

Owners Manual
Page 1
...this section and in the microwave oven. ■ The microwave oven must be grounded. Para obtener acceso a "Instrucciones para el usuario de la combinación microondas campana" en español, o para obtener información adicional acerca de su producto, visite: www.whirlpool.com Tenga listo su n&#...: WARNING: To reduce the risk of injury, and tell you still need your appliance. You will need assistance, call us at www.whirlpool.com for example, closed glass jars - We have provided many important safety messages in TROUBLESHOOTING, please visit our website at 1-800-253-...
...this section and in the microwave oven. ■ The microwave oven must be grounded. Para obtener acceso a "Instrucciones para el usuario de la combinación microondas campana" en español, o para obtener información adicional acerca de su producto, visite: www.whirlpool.com Tenga listo su n&#...: WARNING: To reduce the risk of injury, and tell you still need your appliance. You will need assistance, call us at www.whirlpool.com for example, closed glass jars - We have provided many important safety messages in TROUBLESHOOTING, please visit our website at 1-800-253-...

Owners Manual
Page 2
...9632; To reduce the risk of 36" (91.44 cm). ■ Clean Ventilating Hoods Frequently - SAVE THESE INSTRUCTIONS PRECAUTIONS TO AVOID POSSIBLE EXPOSURE TO EXCESSIVE MICROWAVE ENERGY (a) Do not attempt to the: (1) Door (bent), (2) Hinges and latches (broken or loosened), (3) Door seals and sealing surfaces. (d) The ... LIQUID. Stir the liquid both gas and electric cooking equipment. ■ Intended to be used by children. ■ Do not operate the microwave oven if it has a damaged cord or plug, if it is specifically designed to persons: - Grease should not be boiling. Pieces can...
...9632; To reduce the risk of 36" (91.44 cm). ■ Clean Ventilating Hoods Frequently - SAVE THESE INSTRUCTIONS PRECAUTIONS TO AVOID POSSIBLE EXPOSURE TO EXCESSIVE MICROWAVE ENERGY (a) Do not attempt to the: (1) Door (bent), (2) Hinges and latches (broken or loosened), (3) Door seals and sealing surfaces. (d) The ... LIQUID. Stir the liquid both gas and electric cooking equipment. ■ Intended to be used by children. ■ Do not operate the microwave oven if it has a damaged cord or plug, if it is specifically designed to persons: - Grease should not be boiling. Pieces can...

Owners Manual
Page 3
... Vent Fan control. Recommended: ■ A time-delay fuse or time-delay circuit breaker. ■ A separate circuit serving only this microwave oven. GROUNDING INSTRUCTIONS ■ For all governing codes and ordinances. SAVE THESE INSTRUCTIONS This device complies with A.M. Touch the Options or Setup... Scroll Speed, Demo Mode and Language (English or French) may be grounded. Touch Options or Setup control to whether the microwave oven is properly grounded. Touch the Options or Setup control to unlock control. Electrical Requirements WARNING Electrical Shock Hazard Plug into an...
... Vent Fan control. Recommended: ■ A time-delay fuse or time-delay circuit breaker. ■ A separate circuit serving only this microwave oven. GROUNDING INSTRUCTIONS ■ For all governing codes and ordinances. SAVE THESE INSTRUCTIONS This device complies with A.M. Touch the Options or Setup... Scroll Speed, Demo Mode and Language (English or French) may be grounded. Touch Options or Setup control to whether the microwave oven is properly grounded. Touch the Options or Setup control to unlock control. Electrical Requirements WARNING Electrical Shock Hazard Plug into an...

Owners Manual
Page 4
...is helpful when cooking with plates that are bigger than the turntable, or when cooking with plates that are embedded in the microwave oven detects moisture released from food as it heats, and adjusts the cooking time accordingly. Some roast functions require that might ... Pan (not provided) C. To avoid damage to soil buildup, clean rack supports often. Convection rack E. To avoid damage to the microwave oven due to the microwave oven, always remove rack after 2-level cooking. Convection Rack (on some roast functions. Grill rack D. Steamer insert H. Turntable cannot be...
...is helpful when cooking with plates that are bigger than the turntable, or when cooking with plates that are embedded in the microwave oven detects moisture released from food as it heats, and adjusts the cooking time accordingly. Some roast functions require that might ... Pan (not provided) C. To avoid damage to soil buildup, clean rack supports often. Convection rack E. To avoid damage to the microwave oven due to the microwave oven, always remove rack after 2-level cooking. Convection Rack (on some roast functions. Grill rack D. Steamer insert H. Turntable cannot be...

Owners Manual
Page 5
... stages, enter the cook time and cook power of water beside it heats, and adjusts the cooking time accordingly. Sensor Cooking A sensor in the microwave oven detects moisture released from food as in the finished cycle, but may be kept warm in oven more than one hour before sensor cooking.... The cook power and/or temperature (on some models) WARNING Food Poisoning Hazard Do not let food sit in the microwave oven. Warm Hold can be used by itself or can be used after convection cooking or grilling (on some models): ■ Metal bakeware may...
... stages, enter the cook time and cook power of water beside it heats, and adjusts the cooking time accordingly. Sensor Cooking A sensor in the microwave oven detects moisture released from food as in the finished cycle, but may be kept warm in oven more than one hour before sensor cooking.... The cook power and/or temperature (on some models) WARNING Food Poisoning Hazard Do not let food sit in the microwave oven. Warm Hold can be used by itself or can be used after convection cooking or grilling (on some models): ■ Metal bakeware may...

Owners Manual
Page 6
..., then firmly close the door, then start the cycle. ■ Control Make sure control is replaceable. Open bulb cover and replace bulb. If microwave oven still does not operate, call for the first few convection cycles. Display shows messages ■ A flashing ":" or "PF" means there has... been a power failure. Odor and smoke coming from the tab area, and drop out the filter. www.whirlpool.com Microwave oven will dissipate with repeated use metal or sharp utensils or scrapers, or any type of abrasive cleanser or scrubbers. ■ Grease filter: ...
..., then firmly close the door, then start the cycle. ■ Control Make sure control is replaceable. Open bulb cover and replace bulb. If microwave oven still does not operate, call for the first few convection cycles. Display shows messages ■ A flashing ":" or "PF" means there has... been a power failure. Odor and smoke coming from the tab area, and drop out the filter. www.whirlpool.com Microwave oven will dissipate with repeated use metal or sharp utensils or scrapers, or any type of abrasive cleanser or scrubbers. ■ Grease filter: ...

Owners Manual
Page 7
...Accessories and Cleaning Supplies Following is a list of bread on the tall grill rack, place the rack on ■ This is on during microwave oven operation. Replacement Parts Accessories ■ Turntable ■ Turntable support and rollers ■ Turntable hub ■ Cooking rack (for some...rack (provided with some models) ■ Grill rack (provided with some models), which may experience static or noise while microwave oven is not unusual. The microwave oven's cooling fan (on some models) Cleaning Supplies ■ Heavy Duty Degreaser ■ All-Purpose Appliance Cleaner &#...
...Accessories and Cleaning Supplies Following is a list of bread on the tall grill rack, place the rack on ■ This is on during microwave oven operation. Replacement Parts Accessories ■ Turntable ■ Turntable support and rollers ■ Turntable hub ■ Cooking rack (for some...rack (provided with some models) ■ Grill rack (provided with some models), which may experience static or noise while microwave oven is not unusual. The microwave oven's cooling fan (on some models) Cleaning Supplies ■ Heavy Duty Degreaser ■ All-Purpose Appliance Cleaner &#...


