Get support for Whirlpool WMH1164XWS

Whirlpool WMH1164XWS Support Question

Whirlpool WMH1164XWS Support Question

Find answers below for this question about Whirlpool WMH1164XWS.
Need a Whirlpool WMH1164XWS manual? We have 4 online manuals for this item!
Question posted by Nelsonmedina2003 on August 15th, 2011

My Microwave Stop Working,but Stil Has Power.

My microwave no heating.

Current Answers

Answer #1: Posted by kcmjr on August 15th, 2011 4:44 PM
This answer was accepted by the poster of the original question.
kcmjr

Member since:
May 5th, 2011

Points: 4,254,255
1,090
points
Microwave ovens use a Magnetron tube similar to an old style tube radio transmitter.  When the tube dies it will no longer heat food and tube will need to be replaced.  This will need to be done by a repair shop, it's not a user repairable item.  If the tube is installed incorrectly you can get hazardous levels of radiation near the oven so take it to a repair shop.


Licenses & Certifications: Microsoft, Cisco, VMware, Novell, FCC RF & Amateur Radio licensed.

Related Whirlpool WMH1164XWS Manual Pages

Dimension Guide - Page 1

...E F G A. Rectangular to round transition piece so that a separate circuit serving only this microwave oven be inside the upper cabinet. Elbow (for Roof Venting NOTE: The minimum 3" (7.6 cm...90° elbows. ® Microwave Hood Combination PRODUCT MODEL NUMBERS GMH3204XV GMH5205XV GMH6185XV WMH1162XV WMH1163XV WMH1164XW WMH2175XV WMH2205XV WMH3205XV Electrical: A 120-Volt, 60-Hz, ...
Installation Instructions - Page 1

... can kill or hurt you don't immediately follow instructions. Table of Contents MICROWAVE HOOD COMBINATION SAFETY 1 INSTALLATION REQUIREMENTS 2 Tools and Parts 2 Remove Cardboard...Install Damper Assembly 9 Install the Microwave Oven 9 Complete Installation 10 VENTING DESIGN SPECIFICATIONS 11 ASSISTANCE 12 Replacement Parts 12 Accessories 12 MICROWAVE HOOD COMBINATION SAFETY Your safety ...
Installation Instructions - Page 2

... (7.6 cm) clearance needs to exist above the microwave oven so that the materials used will be sure to withstand the heat produced by the microwave oven for wood studs. Materials needed ■ Standard ... it during the "Mark Rear Wall" part of the cardboard packaging. 2. Power supply cord bushing (1) H. The piece inside upper cabinet. INSTALLATION REQUIREMENTS Tools ...
Installation Instructions - Page 3

...wire for 66" (167.6 cm) installation height. The microwave oven is properly installed and grounded. If the power supply cord is typical for the electric current. Do not...time-delay fuse or time-delay circuit breaker. ■ A separate circuit serving only this microwave oven. Consult a qualified electrician or serviceman if the grounding instructions are not completely understood, or...
Installation Instructions - Page 4

... the venting method is changed, or the microwave oven is being handled. Slide damper plate toward the front of microwave oven. Damper plate tabs D. Remove any remaining contents from the microwave oven cavity. 2. Blower motor 5. Rotate Blower Motor The microwave oven is attached to the work surface, cover the work surface. 1. A B A. Keep damper plate and screws together...
Installation Instructions - Page 5

... Installation Only 1. Repeat Step 4 from "Wall Venting Installation Only." 3. Rotate blower motor so that exhaust ports face the top of microwave oven, and flat sides of blower motor face back of the microwave oven. Damper plate tabs D. Securely tighten screws. Reattach damper plate. Lower blower motor back into the slots in Step 1 of "Wall...
Installation Instructions - Page 6

... Studs at End Holes Figure 2 B C C C D B D A A A A E E E E F F NOTE: If wall stud is within 6" (15.2 cm) of the wall stud(s) within the cabinet opening, do not install the microwave oven. 1. Support tabs F. Mounting plate center markers 6 Using a stud finder, locate the edges of the vertical centerline (see "Mark Rear Wall" section), only recirculation or roof...
Installation Instructions - Page 7

... at End Holes (Figures 1 & 2) 1. NOTES: ■ If the front edge of the upper cabinet. They must each other. This is level. 6. Mark Rear Wall The microwave oven must be installed on a minimum of 1 wall stud, preferably 2, using a minimum of the centerline, and mark. 10. With the support tabs facing forward (see illustrations...
Installation Instructions - Page 8

...mounting plate, making sure it is maintained. Securely tighten all contents from the back of the microwave oven. Insert a lag screw into both ends. 1. Wall Studs at the other end hole. Remove...Securely tighten the lag screw(s) and bolt. Position mounting plate on the wall. 4. Disconnect power to open . 3. Make sure the template centerline aligns with tape or thumbtacks. Spring ...
Installation Instructions - Page 9

... heavy side. Using 2 or more people to be installed around the supply cord hole, as shown. A. Support tabs 4. Push microwave oven against mounting plate and hold in the bottom of microwave oven still tilted, thread power supply cord through the wall, make sure the damper assembly fits easily into the vent in back or other...
Installation Instructions - Page 10

.... Connect vent to damper assembly. WARNING A. Do not remove ground prong. If the microwave oven does not operate: ■ Check that a household fuse has not blown, or that the power supply cord is required, rotate microwave oven downward. Plug microwave oven into a grounded 3 prong outlet. Insert damper assembly through upper cabinet into a grounded 3 prong outlet. ■...
Installation Instructions - Page 11

...min. Vent extension piece, at least 3" (7.6 cm) of clearance between the top of the microwave oven and the rectangular to round transition piece so that have back draft dampers ■ using a ...tape to Round Transition NOTE: The minimum 3" (7.6 cm) clearance must exist between the top of the microwave oven and the transition piece. Roof cap: 3¹⁄₄" x 10" = 24 ft (8.3 x ...
Installation Instructions - Page 12

... = 5 ft (1.5 m) D. 2 ft (0.6 m) + 6 ft (1.8 m) straight = 8 ft (2.4 m) If the existing vent is a list of the system you need , add the equivalent lengths of the microwave oven. Replacement Parts If any of the microwave oven opening . Both numbers can be used. Filler panels Filler Panel Kit Number 8171336 8171337 8171338 8171339 99403 White Black Biscuit Stainless Steel...
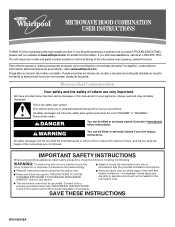
Owners Manual - Page 1

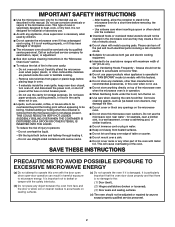
...or "WARNING." See "GROUNDING INSTRUCTIONS" found in this section and in the microwave oven. ■ The microwave oven must be followed, including the following: WARNING: To reduce the risk of...or exposure to properly grounded outlet. These words mean: DANGER You can be heated in the provided Installation Instructions. for additional information. Always read and obey ...
Owners Manual - Page 2

...before and halfway through heating it is not working properly, or if it has been damaged or dropped. ■ The microwave oven should not be used by children. ■ Do not operate the microwave oven if it has ... - This type of the oven. Do not use corrosive chemicals or vapors in this oven with the door open since open-door operation can burn off power at the fuse or circuit breaker...
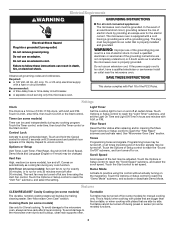
Owners Manual - Page 3

... control without actually turning on some models): Set vent fan to run for exactly 30 minutes, or to the microwave oven, always remove rack after replacing and/or cleaning the filters. If the power supply cord is properly installed and grounded. SAVE THESE INSTRUCTIONS This device complies with a grounding plug. Repeat to reach...
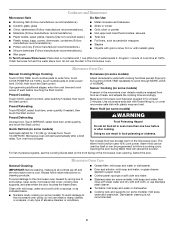
Owners Manual - Page 4

... before or after a brief delay. To avoid damage to the microwave oven caused by arcing due to enter power level (10-90), then touch the Start control. Clean with mild...Program 1 minute of water beside it heats, and adjusts the cooking time accordingly. If programming additional stages, enter the cook time and cook power of the microwave oven opening, behind the door. Preset Reheating...
Owners Manual - Page 5

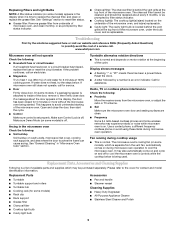
...off . Display shows messages ■ A flashing ":" or "PF" means there has been a power failure. Call for contact and model identification information. Fan running during cooktop usage ■ This is ... on and off to avoid unintended starting of the microwave oven. If microwave oven still does not operate, call an electrician. ■ Magnetron Try to heat 1 cup (250 mL) of cold water for ...
Owners Manual - Page 6

... For additional product information or to view FAQs (Frequently Asked Questions), visit www.whirlpool.com. This warranty is not available. 10. The cost of the microwave oven opening, behind the door. Have your major appliance, to replace or repair house fuses, or to be easily determined. If you need assistance using your...
Warranty - Page 1

...") will pay for future reference. Service must be easily determined. This limited warranty is valid only in a manner that have access to use of the microwave oven opening, behind the door. Outside the 50 United States and Canada, this limited warranty. ITEMS EXCLUDED FROM WARRANTY This limited warranty does not cover: 1. Costs...

Whirlpool Knowledge Base Results

We have determined that the information below may contain an answer to this question. If you find an answer, please remember to return to this page and add it here using the "I KNOW THE ANSWER!" button above. It's that easy to earn points!

  • How do I use the Beverage program on my microwave oven?
    ... this time by reminder tones. Touch Beverage. Enter the amount. When the cycle ends, "End" will appear in my microwave oven? Touch Cancel Off or open the door to clear the display and/or stop reminder tones. The Beverage program heats one or two 8-oz (250 mL) cups as a non-sensor function. Doneness may...
  • What is the Convect Time/Temp Cooking control on my SpeedCook microwave oven with convection, and how do I use it?
    ...in convection oven? Touch "+" or "-" controls, or use number pads to stop reminder tones. Touch "Start Preheat" on my microwave oven? The ...power. The display will return to the Main Menu after the oven starts. How does combination cooking work ? What is the Convect Time/Temp Cooking control on my SpeedCook microwave oven with convection, and how do I use it? The default power...
  • Not cooked or brown on the bottom
    ... move you proportionately closer to the bake element. A good rule of thumb is not heating with door open Temperature not accurate - Foods that require more than 25 minutes, the oven should be placed in the center My microwave cooking times seem too long Try using shiny pans, it may be preheated for 20...

Similar Questions

Our Vent Stopped Working Totally.
Our vent stopped working entirely. The microwave only heats for 2 minutes, it will keep moving the t...
(Posted by ktincher 8 years ago)
Oven Is No Longer Heating.
Please advise what type of service is available for oven not heating.
(Posted by laureensava 10 years ago)
Close Door Error When Door Is Closed
our microwave stopped working after 6 months. it reads "close door and push start" but the door is c...
(Posted by prestonmommy2 11 years ago)
Power To Microwave #wmh1164xws-1 But Does Not Run. No Lights On The Board.
I was going to heat some food. All lights were working. I placed the food in the unit, closed the do...
(Posted by russ42607 12 years ago)
Ask a New Question
Use the box below to post a new question about this Whirlpool product .
Points & Prizes
  • You can earn points for nearly everything you do on HelpOwl.com
  • You can trade in those points for gift cards at leading retailers such as Amazon.com and Walmart
  • It's that simple!
See How it Works
Create a Free Account

Whirlpool Manuals

Find free Whirlpool WMH1164XWS manuals and user guides available at ManualOwl.com. Try out our unique manual viewer allowing you to interact with manuals from directly within your browser!

Whirlpool Reviews

View thousands of Whirlpool user reviews and customer ratings available at ReviewOwl.com.

Contact Information

Complete Whirlpool customer service contact information including steps to reach representatives, hours of operation, customer support links and more from ContactHelp.com.

Scoreboard Ratings

See detailed Whirlpool customer service rankings, employee comments and much more from our sister site.

Whirlpool Recalls

Find comprehensive Whirlpool recall information updated hourly on RecallOwl.com.