Get support for Whirlpool WMH1164XWS

Whirlpool WMH1164XWS Support Question

Whirlpool WMH1164XWS Support Question

Find answers below for this question about Whirlpool WMH1164XWS.
Need a Whirlpool WMH1164XWS manual? We have 4 online manuals for this item!
Question posted by prestonmommy2 on November 12th, 2012

Close Door Error When Door Is Closed

our microwave stopped working after 6 months. it reads "close door and push start" but the door is closed already. light inside stays on as well. 

Current Answers

There are currently no answers that have been posted for this question.
Be the first to post an answer!

Remember that you can earn up to 1,100 points for every answer you submit. The better the quality of your answer, the better chance it has to be accepted.

Related Whirlpool WMH1164XWS Manual Pages

Dimension Guide - Page 1

... and wall or roof caps must be inside the upper cabinet. A 2 ft (0.6...transition piece so that a separate circuit serving only this microwave oven be used in the system. upper cabinet and side cabinet...transition piece F. ® Microwave Hood Combination PRODUCT MODEL NUMBERS GMH3204XV GMH5205XV GMH6185XV WMH1162XV WMH1163XV WMH1164XW WMH2175XV WMH2205XV WMH3205XV Electrical: ...
Installation Instructions - Page 1

...Microwave Oven 9 Complete Installation 10 VENTING DESIGN SPECIFICATIONS 11 ASSISTANCE 12 Replacement Parts 12 Accessories 12 MICROWAVE HOOD COMBINATION SAFETY Your safety and the safety of Contents MICROWAVE...follow instructions. Table of others . All safety messages will follow instructions. Always read and obey all safety messages. These words mean: DANGER You can be ...
Installation Instructions - Page 2

...starting installation. Materials needed ■ Standard fittings for wood studs. NOTES: ■ If installing the microwave oven...microwave oven packaging is perforated. The piece inside upper cabinet. See User Instructions.) NOTE: Depending on model, charcoal filters may be installed. Read... needs to exist above the microwave oven so that the door can open fully. ■...
Installation Instructions - Page 3

..., or electrical shock. If the power supply cord is properly grounded. Do not remove ground prong. Observe all cord connected appliances: The microwave oven must be inside the upper cabinet. The microwave oven is properly installed and grounded. or 20-amp electrical supply with a grounding plug. Do not use an extension cord. A B Electrical Requirements WARNING...
Installation Instructions - Page 4

... system. Tape the microwave oven door closed so that exhaust ports face the back of microwave oven, and lower blower motor back into the slots in the top of microwave oven with 2 screws removed...or roof venting, changes must be made to the work surface, cover the work surface. 1. A B C A. Lift blower motor out of the microwave oven and lift up. Slots 8. Screws (in recessed holes...
Installation Instructions - Page 5

...: If blower motor is not correctly oriented, the 2 screws removed in Step 3 of the microwave oven. Repeat Step 4 from "Wall Venting Installation Only." 4. Reattach blower motor to back of the microwave oven (as shown), performance will be reattached to the microwave oven. 7. D A. NOTE: If blower motor is not positioned with flat sides facing the back of...
Installation Instructions - Page 6

... examples of the vertical centerline (see "Mark Rear Wall" section), only recirculation or roof venting installation can be done. Cabinet opening , do not install the microwave oven. 1. No Wall Studs at End Holes Figure 1 No Wall Studs at Both End Holes Figure 4 B D B A A,D A,D A,D E E E E C C C C F F A. Wall Stud at One End Hole Figure 3 Wall Studs at...
Installation Instructions - Page 7

... end holes are not over wall studs, use two 1/4-20 x 3" round-head bolts with each be installed on both end holes. Mark Rear Wall The microwave oven must be 14¹⁄₈" (35.9 cm) from the centerline. 5. A A. Centerline 2. Rear wall B. D. With the support tabs facing forward (see illustrations in "Locate Wall...
Installation Instructions - Page 8

...microwave oven. B A C A. 1/4-20 x 3" round-head bolt B. Position mounting plate on the wall. 4. Push...inside the frame, against drywall. 5. Refer to make sure toggle nut has opened against drywall. Make sure the template centerline aligns with toggle nuts through the drywall, and finger tighten the bolt to use as guides. ■ If the wall behind the microwave oven... 1. Start a ...
Installation Instructions - Page 9

... a washer on the template. Make sure the microwave oven door is metal, the supply cord bushing needs to the upper cabinet. Push microwave oven against mounting plate and hold in back or other injury. Check that the damper blade hinge is being handled. Mounting plate B. NOTE: If upper cabinet is closed and taped shut. 3. Metal cabinet B. For...
Installation Instructions - Page 10

... 10. A 2. Connect vent to damper assembly. Damper plate Electrical Shock Hazard Plug into microwave oven. If the microwave oven does not operate: ■ Check that a household fuse has not blown, or that ... if the damper assembly is no gap between the upper cabinet bottom and the microwave oven. Then secure with at most hardware stores. ■ Overtightening bolts may require ...
Installation Instructions - Page 11

... only. A B C Roof venting Roof cap Wall venting Wall cap D E F G A. Rectangular to Round Transition NOTE: The minimum 3" (7.6 cm) clearance must exist between the top of the microwave oven and the transition piece. A B C D E 3" (7.6 cm) F A. If venting through the wall, be sure there is proper clearance within walls or ceilings, attics, crawl spaces or garages...
Installation Instructions - Page 12

...For best performance, use when installing this microwave oven in a 36" (91.4 cm) or 42" (106.7 cm) wide opening , behind the microwave oven door on the model and serial number plate,...assembly and rectangular to round transition piece must be used . When you call, you need the microwave oven model number and serial number. Each panel is round, a rectangular to round transition piece must ...
Owners Manual - Page 1

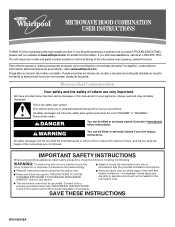
... the door. IMPORTANT SAFETY INSTRUCTIONS When using the microwave oven. ■ Read and follow instructions. are very important. This symbol alerts you to excessive microwave energy: ■ Install or locate the microwave oven only in TROUBLESHOOTING, please visit our website at 1-800-253-1301. ® MICROWAVE HOOD COMBINATION USER INSTRUCTIONS THANK YOU for example, closed...
Owners Manual - Page 2

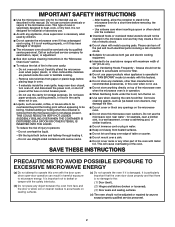
...; Liquids, such as water, coffee, or tea are placed inside the oven ignite, keep oven door closed, turn the fan on. ■ Use care when cleaning the vent-hood filter. Do not leave paper products, cooking utensils, or food in the cavity when not in use the microwave oven near a swimming pool, or similar locations. ■ Do...
Owners Manual - Page 3

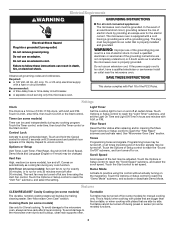
... installed and grounded. The microwave oven is a 12-hour (12:00-11:59) clock, with a grounding plug. and P.M. Touch CLOCK, enter time, then touch CLOCK or the Start control. Touch and hold the Cancel control for manual cooking only. Comes on automatically as to set the Light On Time and Light Off Time in death...
Owners Manual - Page 4

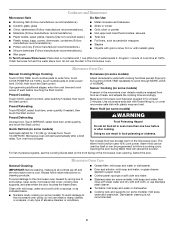
.... ■ Door and exterior: mild soap and water, or glass cleaner applied to enter power level (10-90), then touch the Start control. If dish becomes hot and the water stays cool, do not use the dish in for 1 lb (454 g). Unwrap food. The Warm Hold function uses 10% cook power. Microwave Oven Care General...
Owners Manual - Page 5

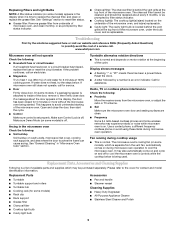
...Replacing Filters and Light Bulbs NOTE: A filter status indicator (on some models) appears in the display when it , then firmly close door. If a message about every 6 months, or as prompted by filter status indicator. ■ Charcoal filter: The charcoal filter is on. Fan running during microwave oven operation. This happens to inside of the microwave oven. See "General Cleaning...
Owners Manual - Page 6

...below. Consumable parts are excluded from unauthorized modifications made to repair or replace appliance light bulbs, air filters or water filters. Have your major appliance for repairs. For... from accident, alteration, misuse, abuse, fire, flood, acts of the microwave oven opening, behind the door. Service calls to correct the installation of your major appliance, to replace ...
Warranty - Page 1

... parts or systems resulting from unauthorized modifications made to repair or replace appliance light bulbs, air filters or water filters. The removal and reinstallation of your ... published installation instructions. 11. Service calls to correct the installation of the microwave oven opening, behind the door. W10182518A SP PN W10182523A © 2008 Whirlpool Corporation. Any food loss...

Whirlpool Knowledge Base Results

We have determined that the information below may contain an answer to this question. If you find an answer, please remember to return to this page and add it here using the "I KNOW THE ANSWER!" button above. It's that easy to earn points!

  • How do I clean my microwave oven?
    ...-free cloth. To keep the areas clean where the door and oven frame touch when closed. For stubborn soil, boil a cup of water in the oven for two or three minutes. To get rid of odors inside the oven, boil a cup of water with lemon juice or vinegar. Microwave use abrasive scrubbers or cleansers to five...
  • Washer will not fill - Duet Sport washer
    ...door must be removed from the washer. Your washer will not start . Front-load washer Display shows an error code - Are both faucets completely for 1 second? The door may not be completely closed , but Start... film or particles. The washer pauses for each load. Is the Control Locked status light on the washer clogged? Each unit is a low-water-usage washer. Press and ...
  • Washer will not fill - Duet Sport washer
    ..., can result in noise, vibration, error codes and possible machine damage. Was the door left closed again to see if a household circuit...-load Duet washer Washer will not start - Steam washer Washer will not start a new cycle. Check to start - Are both faucets completely.... Is the Delay Wash status light on ? If the door is not opened and closed after the selected hours of delay...

Similar Questions

Microwave Not Working All The Time
light bulbs are sometimes out, microwave only works some of the time, control panel stays on
(Posted by ntgiaconia 8 years ago)
My Microwave Stop Working,but Stil Has Power.
My microwave no heating.
(Posted by Nelsonmedina2003 12 years ago)
Ask a New Question
Use the box below to post a new question about this Whirlpool product .
Points & Prizes
  • You can earn points for nearly everything you do on HelpOwl.com
  • You can trade in those points for gift cards at leading retailers such as Amazon.com and Walmart
  • It's that simple!
See How it Works
Create a Free Account

Whirlpool Manuals

Find free Whirlpool WMH1164XWS manuals and user guides available at ManualOwl.com. Try out our unique manual viewer allowing you to interact with manuals from directly within your browser!

Whirlpool Reviews

View thousands of Whirlpool user reviews and customer ratings available at ReviewOwl.com.

Contact Information

Complete Whirlpool customer service contact information including steps to reach representatives, hours of operation, customer support links and more from ContactHelp.com.

Scoreboard Ratings

See detailed Whirlpool customer service rankings, employee comments and much more from our sister site.

Whirlpool Recalls

Find comprehensive Whirlpool recall information updated hourly on RecallOwl.com.