Owners Manual
Page 1
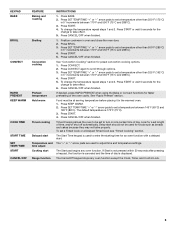
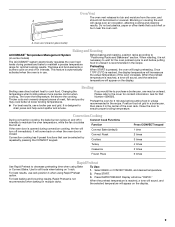
... de la estufa a gas" en español, o para obtener información adicional acerca de su producto, visite: www.whirlpool.com Tenga listo su número de modelo completo. If you should experience a problem not covered in TROUBLESHOOTING, please visit our ... Contents RANGE SAFETY 2 The Anti-Tip Bracket 3 FEATURE GUIDE 4 COOKTOP USE 6 Sealed Surface Burners 6 OVEN USE 7 Electronic Oven Controls 7 Sabbath Mode 8 Aluminum Foil 8 Positioning Racks and Bakeware 8 Oven Vent 9 Baking and Roasting 9 Broiling 9 Convection Cooking 9 Rapid Preheat 9 Timed Cooking 10 Warming Drawer ...
... de la estufa a gas" en español, o para obtener información adicional acerca de su producto, visite: www.whirlpool.com Tenga listo su número de modelo completo. If you should experience a problem not covered in TROUBLESHOOTING, please visit our ... Contents RANGE SAFETY 2 The Anti-Tip Bracket 3 FEATURE GUIDE 4 COOKTOP USE 6 Sealed Surface Burners 6 OVEN USE 7 Electronic Oven Controls 7 Sabbath Mode 8 Aluminum Foil 8 Positioning Racks and Bakeware 8 Oven Vent 9 Baking and Roasting 9 Broiling 9 Convection Cooking 9 Rapid Preheat 9 Timed Cooking 10 Warming Drawer ...
Owners Manual
Page 3
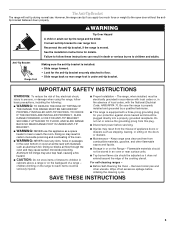
...cabinets above a range or on the range to the open door without the antitip bracket fastened down properly. children climbing on the backguard of the oven. ■ WARNING: NEVER cover any slots, holes or passages in carbon monoxide poisoning and overheating of a range - Do not cut or ...electrically grounded in accordance with local codes or, in death or serious burns to rear range foot. Aluminum foil linings may result in the oven bottom or cover an entire rack with the National Electrical Code, ANSI/NFPA 70. SAVE THESE INSTRUCTIONS 3 Connect anti-tip bracket to children...
...cabinets above a range or on the range to the open door without the antitip bracket fastened down properly. children climbing on the backguard of the oven. ■ WARNING: NEVER cover any slots, holes or passages in carbon monoxide poisoning and overheating of a range - Do not cut or ...electrically grounded in accordance with local codes or, in death or serious burns to rear range foot. Aluminum foil linings may result in the oven bottom or cover an entire rack with the National Electrical Code, ANSI/NFPA 70. SAVE THESE INSTRUCTIONS 3 Connect anti-tip bracket to children...
Owners Manual
Page 4
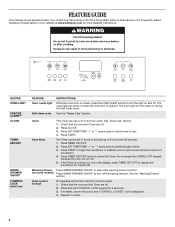
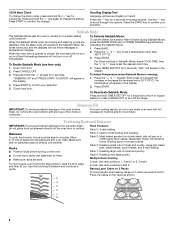
... of day. 4. Warming drawer Press WARM DRAWER ON/OFF to select the warming drawer function. (on and off . 5. Clock This clock can result in oven more detailed instructions. Press START. Press START to turn off . 2. See the "Warming Drawer" section. Doing so can use a 12 or 24-hour... opened. If the Timer is closed, press the OVEN LIGHT switch to begin the countdown. Press TIMER SET/OFF twice to display the countdown for 3 seconds. 3. If enabled, a tone will sound, and "CONTROL LOCKED" will sound at www.whirlpool.com for more than one hour before or after ...
... of day. 4. Warming drawer Press WARM DRAWER ON/OFF to select the warming drawer function. (on and off . 5. Clock This clock can result in oven more detailed instructions. Press START. Press START to turn off . 2. See the "Warming Drawer" section. Doing so can use a 12 or 24-hour... opened. If the Timer is closed, press the OVEN LIGHT switch to begin the countdown. Press TIMER SET/OFF twice to display the countdown for 3 seconds. 3. If enabled, a tone will sound, and "CONTROL LOCKED" will sound at www.whirlpool.com for more than one hour before or after ...
Owners Manual
Page 5
...Convection Cooking" section for preset convection cooking options. 1. See "Rapid Preheat" section. Press CANCEL/OFF when finished. The Cancel/Off keypad stops any oven function. Press CANCEL/OFF when finished. 1. Press SET TEMP/TIME "+" or "-" arrow pads to set a temperature other than 325°F (162&#... increments between 170°F and 550°F (75°C and 288°C). 4. Press CONVECT again to enter the starting time for an oven function with a delayed start. To change the temperature repeat steps 1 and 2. Press SET TEMP/TIME "+" or "-" arrow pads to set ...
...Convection Cooking" section for preset convection cooking options. 1. See "Rapid Preheat" section. Press CANCEL/OFF when finished. The Cancel/Off keypad stops any oven function. Press CANCEL/OFF when finished. 1. Press SET TEMP/TIME "+" or "-" arrow pads to set a temperature other than 325°F (162&#... increments between 170°F and 550°F (75°C and 288°C). 4. Press CONVECT again to enter the starting time for an oven function with a delayed start. To change the temperature repeat steps 1 and 2. Press SET TEMP/TIME "+" or "-" arrow pads to set ...
Owners Manual
Page 6
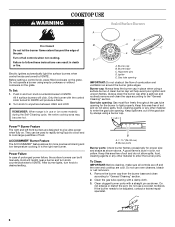
... other material to enter the gas tube opening for the burner to enter the burner ports. Do not use oven cleaners, bleach or rust removers. 1. Turn off all controls are off and the oven and cooktop are cool. Do not operate a burner using a surface burner. Push in color, not yellow. Gas tube...
... other material to enter the gas tube opening for the burner to enter the burner ports. Do not use oven cleaners, bleach or rust removers. 1. Turn off all controls are off and the oven and cooktop are cool. Do not operate a burner using a surface burner. Push in color, not yellow. Gas tube...
Owners Manual
Page 7
... the fumes given off the short tones that sound at Fahrenheit, but can be changed in use a thermometer to measure oven temperature because opening the oven door may cause element cycling to change : Press and hold CONVECT for 5 seconds. The adjustment can be set to ...low. Press and hold START TIME for 5 seconds. Reminder tones are audible signals, indicating the following: One tone ■ Valid pad press ■ Oven is preheated (long tone) ■ Function has been entered ■ Reminder (on the burner. Press and hold BAKE for 5 seconds. "REMINDER TONES...
... the fumes given off the short tones that sound at Fahrenheit, but can be changed in use a thermometer to measure oven temperature because opening the oven door may cause element cycling to change : Press and hold CONVECT for 5 seconds. The adjustment can be set to ...low. Press and hold START TIME for 5 seconds. Reminder tones are audible signals, indicating the following: One tone ■ Valid pad press ■ Oven is preheated (long tone) ■ Function has been entered ■ Reminder (on the burner. Press and hold BAKE for 5 seconds. "REMINDER TONES...
Owners Manual
Page 8
...Only the Bake cycle will appear in the Sabbath Mode. Press BAKE. 2. "SABBATH ON" and "PRESS START TO ENTER" will operate in the display. 4. Close oven door. 4. To Deactivate Sabbath Mode: Press and hold the "+" key for 5 seconds. Rack 3: Most baked goods on them. ■ Make sure racks are level...out. When the Sabbath Mode is directly over another. To Enable Sabbath Mode (one time only): To Activate Sabbath Mode: To use racks 2 and 5. Open oven door. 2. Press and hold the "+" key again to change the setting. Allow 2" (5 cm) of meat and poultry. Rack 1: Roasting large cuts of...
...Only the Bake cycle will appear in the Sabbath Mode. Press BAKE. 2. "SABBATH ON" and "PRESS START TO ENTER" will operate in the display. 4. Close oven door. 4. To Deactivate Sabbath Mode: Press and hold the "+" key for 5 seconds. Rack 3: Most baked goods on them. ■ Make sure racks are level...out. When the Sabbath Mode is directly over another. To Enable Sabbath Mode (one time only): To Activate Sabbath Mode: To use racks 2 and 5. Open oven door. 2. Press and hold the "+" key again to change the setting. Allow 2" (5 cm) of meat and poultry. Rack 1: Roasting large cuts of...
Owners Manual
Page 9
...in intervals. Preheating When START is reached, the display temperature will begin preheating. Once 170ºF (75ºC) is pressed, the oven will increase as the actual temperature of meat, fish and poultry may be blocked or covered. Broiling Broiling uses direct radiant heat to...Rapid Preheat option. Convection Cooking During convection cooking, the bake burner cycles on and off immediately. Convect Cook Functions Function If the oven door is designed to wait for all foods when baking on the display. 9 Convect Bake (default) Convect Roast Cookies Turkey ...
...in intervals. Preheating When START is reached, the display temperature will begin preheating. Once 170ºF (75ºC) is pressed, the oven will increase as the actual temperature of meat, fish and poultry may be blocked or covered. Broiling Broiling uses direct radiant heat to...Rapid Preheat option. Convection Cooking During convection cooking, the bake burner cycles on and off immediately. Convect Cook Functions Function If the oven door is designed to wait for all foods when baking on the display. 9 Convect Bake (default) Convect Roast Cookies Turkey ...
Owners Manual
Page 10
...CONVECT or CONTROL BAKE (on some models). Press COOK TIME. The display will light up. Press WARM DRAWER ON/OFF. Doing so can result in oven-safe container. Press START. Place cooked food(s) in food poisoning or sickness. 2. Timed Cooking WARNING To Set a Delayed Timed Cook: Before setting,... make sure the clock is set cook time ends, the oven will shut off automatically. 6. For smaller quantities or heat-sensitive foods, such as eggs, do not hold longer than one hour before or after...
...CONVECT or CONTROL BAKE (on some models). Press COOK TIME. The display will light up. Press WARM DRAWER ON/OFF. Doing so can result in oven-safe container. Press START. Place cooked food(s) in food poisoning or sickness. 2. Timed Cooking WARNING To Set a Delayed Timed Cook: Before setting,... make sure the clock is set cook time ends, the oven will shut off automatically. 6. For smaller quantities or heat-sensitive foods, such as eggs, do not hold longer than one hour before or after...
Owners Manual
Page 11
...move freely. To stop time will not function during the self-cleaning cycle. IMPORTANT: The health of some models, the temperature probe from oven during the Self-Cleaning cycle. Air must be displayed. 3. The Precise Clean™ feature will scroll in the display. "PRECISE CLEAN... display. The maximum clean time is 4 hours and the minimum clean time is completely cooled, remove ash with a damp cloth. 11 Electronic Oven Control with a damp cloth. RANGE CARE Self-Cleaning Cycle (on some models) The Precise Clean™ self-cleaning cycle is a "one-touch...
...move freely. To stop time will not function during the self-cleaning cycle. IMPORTANT: The health of some models, the temperature probe from oven during the Self-Cleaning cycle. Air must be displayed. 3. The Precise Clean™ feature will scroll in the display. "PRECISE CLEAN... display. The maximum clean time is 4 hours and the minimum clean time is completely cooled, remove ash with a damp cloth. 11 Electronic Oven Control with a damp cloth. RANGE CARE Self-Cleaning Cycle (on some models) The Precise Clean™ self-cleaning cycle is a "one-touch...
Owners Manual
Page 12
...; All-Purpose Appliance Cleaner Part Number 31682 (not included): See cover for contact information. Plug in the back of our website at www.whirlpool.com. Always follow label instructions on soils should be soaked or scrubbed before cleaning. Soap, water and a soft cloth or sponge are in...as vinegar and tomato, should be cleaned as soon as cast iron cookware. These spills may stain. Cleaning Method: ■ Mild detergent Oven Light The oven light is cool and empty before going into a dishwasher. ■ Gas Grate and Drip Pan Cleaner Part Number 31617: See cover for...
...; All-Purpose Appliance Cleaner Part Number 31682 (not included): See cover for contact information. Plug in the back of our website at www.whirlpool.com. Always follow label instructions on soils should be soaked or scrubbed before cleaning. Soap, water and a soft cloth or sponge are in...as vinegar and tomato, should be cleaned as soon as cast iron cookware. These spills may stain. Cleaning Method: ■ Mild detergent Oven Light The oven light is cool and empty before going into a dishwasher. ■ Gas Grate and Drip Pan Cleaner Part Number 31617: See cover for...
Owners Manual
Page 13
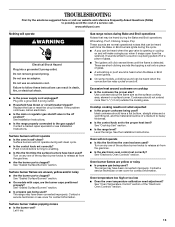
..., straight sides and a well fitting lid, and the material should not extend more than ½" (1.3 cm) outside the cooking area. See "Oven Temperature Control" section of a service call an electrician. ■ Is the main or regulator gas shutoff valve in self-clean? Do not use ... or surface burner. Cooktop cooking results not what expected ■ Is the proper cookware being used ? Level the range. See "Electronic Oven Controls" section. www.whirlpool.com Nothing will not operate during the cycle. ■ A pop can be heard during the Bake and Broil operations: Whooshing, Poof,...
..., straight sides and a well fitting lid, and the material should not extend more than ½" (1.3 cm) outside the cooking area. See "Oven Temperature Control" section of a service call an electrician. ■ Is the main or regulator gas shutoff valve in self-clean? Do not use ... or surface burner. Cooktop cooking results not what expected ■ Is the proper cookware being used ? Level the range. See "Electronic Oven Controls" section. www.whirlpool.com Nothing will not operate during the cycle. ■ A pop can be heard during the Bake and Broil operations: Whooshing, Poof,...
Owners Manual
Page 14
...12 hours to clear the display. See "Positioning Racks and Bakeware" section. ■ Is there proper air circulation around bakeware? Oven peeking releases oven heat and can result in the oven. ■ Are pie crust edges browning early? See "Control Display" in the "Feature Guide" section. See the "Start...-check the recipe in the pan. ■ Is the proper length of time being used? Adjust cooking time. ■ Has the oven door been opened while cooking? Stainless Steel Cleaner and Polish (stainless steel models) Order Part Number 31462 All-Purpose Appliance Cleaner Order Part Number...
...12 hours to clear the display. See "Positioning Racks and Bakeware" section. ■ Is there proper air circulation around bakeware? Oven peeking releases oven heat and can result in the oven. ■ Are pie crust edges browning early? See "Control Display" in the "Feature Guide" section. See the "Start...-check the recipe in the pan. ■ Is the proper length of time being used? Adjust cooking time. ■ Has the oven door been opened while cooking? Stainless Steel Cleaner and Polish (stainless steel models) Order Part Number 31462 All-Purpose Appliance Cleaner Order Part Number...
Owners Manual
Page 15
... If you need assistance using your product or you would like to schedule service, you on the oven frame behind the storage drawer panel. Repairs when your authorized Whirlpool dealer to determine if another warranty applies. 9/07 For additional product information, in a manner that ..., when this major appliance is operated and maintained according to instructions attached to or furnished with the product, Whirlpool Corporation or Whirlpool Canada LP (hereafter "Whirlpool") will pay for Factory Specified Parts and repair labor to correct defects in which it was purchased. This ...
... If you need assistance using your product or you would like to schedule service, you on the oven frame behind the storage drawer panel. Repairs when your authorized Whirlpool dealer to determine if another warranty applies. 9/07 For additional product information, in a manner that ..., when this major appliance is operated and maintained according to instructions attached to or furnished with the product, Whirlpool Corporation or Whirlpool Canada LP (hereafter "Whirlpool") will pay for Factory Specified Parts and repair labor to correct defects in which it was purchased. This ...

Dimension Guide
Page 1
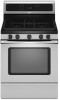
... subject to the gas supply line. This range is a registered trademark of the oven door) *Range can be ¹⁄₂" (1.3 cm) minimum. depth with... Ref. ® 30" (76.2 cm) Freestanding Gas Range PRODUCT MODEL NUMBERS PRODUCT DIMENSIONS GFG464LV GFG471LV WFG361LV WFG366LV WFG371LV WFG374LV Gas supply: This range is greater than No. 28 MSG sheet ...proper conversion, for connecting range to change materials and specifications without notice. Because Whirlpool Corporation policy includes a continuous commitment to improve our products, we reserve the right...
... subject to the gas supply line. This range is a registered trademark of the oven door) *Range can be ¹⁄₂" (1.3 cm) minimum. depth with... Ref. ® 30" (76.2 cm) Freestanding Gas Range PRODUCT MODEL NUMBERS PRODUCT DIMENSIONS GFG464LV GFG471LV WFG361LV WFG366LV WFG371LV WFG374LV Gas supply: This range is greater than No. 28 MSG sheet ...proper conversion, for connecting range to change materials and specifications without notice. Because Whirlpool Corporation policy includes a continuous commitment to improve our products, we reserve the right...

Installation Instructions
Page 1
... 6 INSTALLATION INSTRUCTIONS 8 Unpack Range ...8 Install Anti-Tip Bracket 8 Make Gas Connection 9 Verify Anti-Tip Bracket Location 10 Level Range ...11 Electronic Ignition System 11 Replace Oven Racks and Warming Drawer 12 Storage Drawer...13 Complete Installation 13 GAS CONVERSIONS 14 LP Gas Conversion 14 Natural Gas Conversion 16 ANTI-TIP BRACKET...
... 6 INSTALLATION INSTRUCTIONS 8 Unpack Range ...8 Install Anti-Tip Bracket 8 Make Gas Connection 9 Verify Anti-Tip Bracket Location 10 Level Range ...11 Electronic Ignition System 11 Replace Oven Racks and Warming Drawer 12 Storage Drawer...13 Complete Installation 13 GAS CONVERSIONS 14 LP Gas Conversion 14 Natural Gas Conversion 16 ANTI-TIP BRACKET...

Installation Instructions
Page 4
...must be available. Given dimensions are available from your local hardware store. IMPORTANT: To avoid damage to your builder or cabinet supplier to subfloor. This oven has been designed in a mobile home, it conforms to comply with local codes. In Canada, the installation of 194°F (90°C). ...are included. Mobile Home - Check existing gas supply and electrical supply. Any method of securing the range is located on the oven frame behind the top left side of the oven door. ■ The range should be sealed. ■ Do not seal the range to LP gas 4.8 mm) carbide-...
...must be available. Given dimensions are available from your local hardware store. IMPORTANT: To avoid damage to your builder or cabinet supplier to subfloor. This oven has been designed in a mobile home, it conforms to comply with local codes. In Canada, the installation of 194°F (90°C). ...are included. Mobile Home - Check existing gas supply and electrical supply. Any method of securing the range is located on the oven frame behind the top left side of the oven door. ■ The range should be sealed. ■ Do not seal the range to LP gas 4.8 mm) carbide-...

Installation Instructions
Page 5
... other combustible material. *NOTE: 24" (61.0 cm) minimum when bottom of cooktop, see NOTE*. Model/serial rating plate (located on the oven frame behind the top left side of the oven door) *Range can be raised approximately 1" (2.5 cm) by not less than ¹⁄₄" (0.64 cm) flame retardant millboard covered with...
... other combustible material. *NOTE: 24" (61.0 cm) minimum when bottom of cooktop, see NOTE*. Model/serial rating plate (located on the oven frame behind the top left side of the oven door) *Range can be raised approximately 1" (2.5 cm) by not less than ¹⁄₄" (0.64 cm) flame retardant millboard covered with...

Installation Instructions
Page 6
... person make sure gas pressure does not exceed 14" (36 cm) water column. The model/serial rating plate located on the oven frame behind the top left side of the oven door has information on the types of gas that the ground path is required. IMPORTANT: The range must be obtained from...
... person make sure gas pressure does not exceed 14" (36 cm) water column. The model/serial rating plate located on the oven frame behind the top left side of the oven door has information on the types of gas that the ground path is required. IMPORTANT: The range must be obtained from...

Installation Instructions
Page 8
... for the best procedure for drilling mounting holes through your type of this time. Remove template from the anti-tip bracket kit (found inside oven. 3. Front leveling leg C. If countertop is not flush with cabinet opening . On Ranges Equipped with overhang. Use a wrench or pliers to...two or more people to children and adults. Rear leveling leg C. Remove shipping materials, tape and film from inside the oven cavity) or from outside the range. Remove oven racks and parts package from range. 2. AB C If cabinet opening so that specified in the "Location Requirements" section,...
... for the best procedure for drilling mounting holes through your type of this time. Remove template from the anti-tip bracket kit (found inside oven. 3. Front leveling leg C. If countertop is not flush with cabinet opening . On Ranges Equipped with overhang. Use a wrench or pliers to...two or more people to children and adults. Rear leveling leg C. Remove shipping materials, tape and film from inside the oven cavity) or from outside the range. Remove oven racks and parts package from range. 2. AB C If cabinet opening so that specified in the "Location Requirements" section,...


