User Manual
Page 2
... 3 CLEANING THE LCD MONITOR 4 FEATURES...5 POWER SAVER ...5 PLUG & PLAY ...5 INSTALLATION ...6 PACKAGE CONTENTS ...6 1. TURN THE POWER ON ...6 CONTROL PANEL BUTTONS 7 OSD MENU FUNCTIONS...8 QUICK ADJUSTMENTS...9 DISPLAY MODES ...10 TROUBLESHOOTING ...11 NO POWER ...11 NO SCREEN IMAGE ...11 FUZZY IMAGE ...11 "OUT OF RANGE"...11 CANNOT FIND "PREFERRED" MODE ON MY DISPLAY PROPERTIES 11 IMAGE TOO BRIGHT OR TOO DARK 11 DISTORTED IMAGE ...11 IMAGE IS NOT CENTERED (SIZE IS NOT SCALED CORRECTLY 12 COLORS ARE INCORRECT 12 NO SOUND...12 HOW TO CONNECT A DVI-D INPUT TO...
... 3 CLEANING THE LCD MONITOR 4 FEATURES...5 POWER SAVER ...5 PLUG & PLAY ...5 INSTALLATION ...6 PACKAGE CONTENTS ...6 1. TURN THE POWER ON ...6 CONTROL PANEL BUTTONS 7 OSD MENU FUNCTIONS...8 QUICK ADJUSTMENTS...9 DISPLAY MODES ...10 TROUBLESHOOTING ...11 NO POWER ...11 NO SCREEN IMAGE ...11 FUZZY IMAGE ...11 "OUT OF RANGE"...11 CANNOT FIND "PREFERRED" MODE ON MY DISPLAY PROPERTIES 11 IMAGE TOO BRIGHT OR TOO DARK 11 DISTORTED IMAGE ...11 IMAGE IS NOT CENTERED (SIZE IS NOT SCALED CORRECTLY 12 COLORS ARE INCORRECT 12 NO SOUND...12 HOW TO CONNECT A DVI-D INPUT TO...
User Manual
Page 3
... LCD Monitor, video cables, or power cord. • If the LCD Monitor emits smoke, abnormal noise, or a strange odor, immediately turn it . • Place your LCD Monitor to be seriously injured if you operate the LCD Monitor Keep this user's manual for damage. Periodically inspect the cords and each end of time, unplug the LCD Monitor. Overloading Do not overload wall outlets, extension cords, or power strips. Ventilation Slots and openings on your LCD Monitor...
... LCD Monitor, video cables, or power cord. • If the LCD Monitor emits smoke, abnormal noise, or a strange odor, immediately turn it . • Place your LCD Monitor to be seriously injured if you operate the LCD Monitor Keep this user's manual for damage. Periodically inspect the cords and each end of time, unplug the LCD Monitor. Overloading Do not overload wall outlets, extension cords, or power strips. Ventilation Slots and openings on your LCD Monitor...
User Manual
Page 4
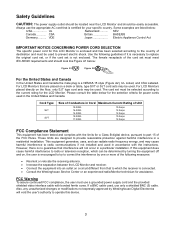
... the United States and Canada. For LCD Monitors placed directly on a circuit different from that are placed on , the user is certified for assistance. Some examples are designed to replace the original cord set, or if the cord set must use a grounded power supply cord and the provided shielded video interface cable with the instructions. SEV Canada CSA Britain BASE/BS Germany........... Please consult the table...
... the United States and Canada. For LCD Monitors placed directly on a circuit different from that are placed on , the user is certified for assistance. Some examples are designed to replace the original cord set, or if the cord set must use a grounded power supply cord and the provided shielded video interface cable with the instructions. SEV Canada CSA Britain BASE/BS Germany........... Please consult the table...
User Manual
Page 5
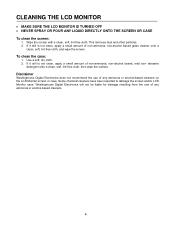
... the surface. Disclaimer Westinghouse Digital Electronics does not recommend the use of non-ammonia, non-alcohol based glass cleaner onto a clean, soft, lint-free cloth, and wipe the screen. Wipe the screen with a clean, soft, lint-free cloth. Use a soft, dry cloth. 2. Some chemical cleaners have been reported to damage the screen and/or LCD Monitor case. CLEANING THE LCD MONITOR • MAKE SURE THE LCD MONITOR IS TURNED OFF •...
... the surface. Disclaimer Westinghouse Digital Electronics does not recommend the use of non-ammonia, non-alcohol based glass cleaner onto a clean, soft, lint-free cloth, and wipe the screen. Wipe the screen with a clean, soft, lint-free cloth. Use a soft, dry cloth. 2. Some chemical cleaners have been reported to damage the screen and/or LCD Monitor case. CLEANING THE LCD MONITOR • MAKE SURE THE LCD MONITOR IS TURNED OFF •...

User Manual
Page 6
...; Bright Display Image • Ultra Fast Response Time • Built-in use your PC to save power, turn the LCD monitor to low voltage mode to set the function. To save electrical power. Plug & Play VESA Plug and Play eliminates the complicated and time-consuming installation process. If the LCD monitor has not been used with a VESA DPMS computer. Your computer system will return the original screen image. You can automatically adjust the LCD monitor. 5 The LCD monitor uses Display...
...; Bright Display Image • Ultra Fast Response Time • Built-in use your PC to save power, turn the LCD monitor to low voltage mode to set the function. To save electrical power. Plug & Play VESA Plug and Play eliminates the complicated and time-consuming installation process. If the LCD monitor has not been used with a VESA DPMS computer. Your computer system will return the original screen image. You can automatically adjust the LCD monitor. 5 The LCD monitor uses Display...
User Manual
Page 7
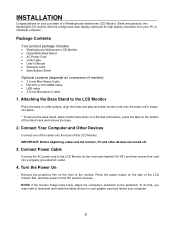
... product package includes: • Westinghouse Widescreen LCD Monitor • Detachable Base Stand • AC Power Cord • VGA Cable • User's Manual • Warranty Card • Specification Sheet Optional contents (depends on connectors of a Westinghouse widescreen LCD Monitor. IMPORTANT: Before beginning, make sure the monitor, PC and other devices are turned off. 3. Attaching the Base Stand to download and install the latest drivers for high display resolution from your computer. 6 Connect Power Cable Connect the AC power cord to the LCD Monitor (to the preferred.
... product package includes: • Westinghouse Widescreen LCD Monitor • Detachable Base Stand • AC Power Cord • VGA Cable • User's Manual • Warranty Card • Specification Sheet Optional contents (depends on connectors of a Westinghouse widescreen LCD Monitor. IMPORTANT: Before beginning, make sure the monitor, PC and other devices are turned off. 3. Attaching the Base Stand to download and install the latest drivers for high display resolution from your computer. 6 Connect Power Cable Connect the AC power cord to the LCD Monitor (to the preferred.

User Manual
Page 8
... the control button functions. W 4. X 5. 6. • Scroll up the OSD sub-menu list when the OSD is displayed. • Scroll down the OSD sub-menu list when the OSD is displayed. • Move a selection left when the OSD is displayed. • Move a selection right when the OSD is a list of the LCD Monitor to switch between different video inputs or enter/exit the OSD menu. • Power On and Off button. 7 Below is displayed...
... the control button functions. W 4. X 5. 6. • Scroll up the OSD sub-menu list when the OSD is displayed. • Scroll down the OSD sub-menu list when the OSD is displayed. • Move a selection left when the OSD is displayed. • Move a selection right when the OSD is a list of the LCD Monitor to switch between different video inputs or enter/exit the OSD menu. • Power On and Off button. 7 Below is displayed...
User Manual
Page 9
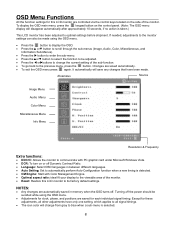
...) Source Image Menu Audio Menu Color Menu Miscellaneous Menu Info Menu Resolution & Frequency Extra functions: • DDC/CI: Allows the monitor to communicate with PC graphic card under Microsoft Windows Vista. • DCR: To turn on or off Dynamic Contract Ratio. • Language: Select OSD languages in memory when the OSD turns off. NOTES: • Any changes are saved for each individual signal timing. Changes are controlled via the control keys located on the control panel. (Note: The OSD menu display...
...) Source Image Menu Audio Menu Color Menu Miscellaneous Menu Info Menu Resolution & Frequency Extra functions: • DDC/CI: Allows the monitor to communicate with PC graphic card under Microsoft Windows Vista. • DCR: To turn on or off Dynamic Contract Ratio. • Language: Select OSD languages in memory when the OSD turns off. NOTES: • Any changes are saved for each individual signal timing. Changes are controlled via the control keys located on the control panel. (Note: The OSD menu display...

User Manual
Page 10
Quick Adjustments You can skip the Menu pages and display an adjustment scale directly by using the following button operations: • Brightness: Press the X Brightness button when the Menu is not displayed. • Contrast: Press the W Contrast button when the Menu is not displayed. • Auto Setting: Press the ▼ button when the Menu is not displayed. • Volume Control: Press the ▲ button when the Menu is not displayed to adjust volume. • Modes: Hold the ▲ button when the Menu is not displayed to switch between display modes. 9
Quick Adjustments You can skip the Menu pages and display an adjustment scale directly by using the following button operations: • Brightness: Press the X Brightness button when the Menu is not displayed. • Contrast: Press the W Contrast button when the Menu is not displayed. • Auto Setting: Press the ▼ button when the Menu is not displayed. • Volume Control: Press the ▲ button when the Menu is not displayed to adjust volume. • Modes: Hold the ▲ button when the Menu is not displayed to switch between display modes. 9
User Manual
Page 11
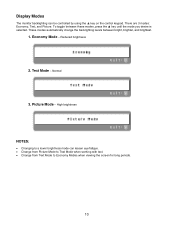
... brightness NOTES: • Changing to a lower brightness mode can be controlled by using the ▲ key on the control keypad. Normal 3. Economy Mode - Picture Mode - These modes automatically change the backlighting levels between these modes, press the ▲ key until the mode you desire is selected. Display Modes The monitor backlighting can lessen eye fatigue. • Change from Picture Mode to Text Mode when working with text. • Change from Text Mode to Economy Modes when viewing the screen...
... brightness NOTES: • Changing to a lower brightness mode can be controlled by using the ▲ key on the control keypad. Normal 3. Economy Mode - Picture Mode - These modes automatically change the backlighting levels between these modes, press the ▲ key until the mode you desire is selected. Display Modes The monitor backlighting can lessen eye fatigue. • Change from Picture Mode to Text Mode when working with text. • Change from Text Mode to Economy Modes when viewing the screen...
User Manual
Page 12
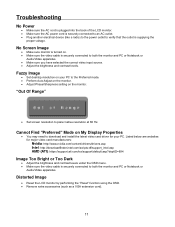
.../ics/support/default.asp?deptID=894 Image Too Bright or Too Dark • Adjust the brightness and contrast levels under the OSD menu. • Make sure the video cable is securely connected to verify that the outlet is supplying the proper voltage. Distorted Image • Reset the LCD monitor by performing the "Reset" function using the OSD. • Remove extra accessories (such as a VGA extension cord). 11 Troubleshooting No Power • Make sure the AC cord is plugged into...
.../ics/support/default.asp?deptID=894 Image Too Bright or Too Dark • Adjust the brightness and contrast levels under the OSD menu. • Make sure the video cable is securely connected to verify that the outlet is supplying the proper voltage. Distorted Image • Reset the LCD monitor by performing the "Reset" function using the OSD. • Remove extra accessories (such as a VGA extension cord). 11 Troubleshooting No Power • Make sure the AC cord is plugged into...
User Manual
Page 13
... and the DVI (or HDMI) input of the monitor. • Start PC, monitor will indicate a DVI signal once detected via its information OSD menu. • Audio input of OSD Menu. Colors Are Incorrect • Make sure the video cable is securely connected to its 3.5 mm stereo jack automatically. Image Is Not Centered (size is not scaled correctly) • Perform Auto Adjust. • Adjust the horizontal and/or vertical position using the OSD. No Sound • Check your audio connection. • Check your audio settings; Please visit...
... and the DVI (or HDMI) input of the monitor. • Start PC, monitor will indicate a DVI signal once detected via its information OSD menu. • Audio input of OSD Menu. Colors Are Incorrect • Make sure the video cable is securely connected to its 3.5 mm stereo jack automatically. Image Is Not Centered (size is not scaled correctly) • Perform Auto Adjust. • Adjust the horizontal and/or vertical position using the OSD. No Sound • Check your audio connection. • Check your audio settings; Please visit...

User Manual
Page 14
www.wde.com Westinghouse Digital Electronics Santa Fe Springs, CA SE-UM-2604-0701
www.wde.com Westinghouse Digital Electronics Santa Fe Springs, CA SE-UM-2604-0701


