

E500i-A1 User Manual
Page 24
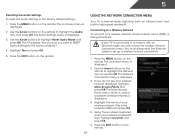
... for use. When you are connecting to your First Name, Last Name, Phone Number, ZIP Code, and E-mail Address using the on -screen keyboard. Choose signal Select cable device Select Input Cable Through a cable box HDMI-1 Please check your TV ready for Yahoo! Before you begin the first...each of the steps necessary to Live TV and press OK. Enter the network key using the on -screen keyboard, then highlight Connect and press OK. 5. Press the Power/Standby button on E500i only 7. Name this Input Save Cable_ Back Exit Help Skip *HDMI 4 available on the remote. Use the...
... for use. When you are connecting to your First Name, Last Name, Phone Number, ZIP Code, and E-mail Address using the on -screen keyboard. Choose signal Select cable device Select Input Cable Through a cable box HDMI-1 Please check your TV ready for Yahoo! Before you begin the first...each of the steps necessary to Live TV and press OK. Enter the network key using the on -screen keyboard, then highlight Connect and press OK. 5. Press the Power/Standby button on E500i only 7. Name this Input Save Cable_ Back Exit Help Skip *HDMI 4 available on the remote. Use the...
E500i-A1 User Manual
Page 34
Use the Arrow buttons on the remote to highlight Reset Audio Mode and press OK. Highlight Yes and press OK. 5. The on -screen keyboard, enter your wireless network (this is displayed. 3. Using the on -screen menu is connected to a wireless network whose network name (SSID) is being broadcast: If ...
Use the Arrow buttons on the remote to highlight Reset Audio Mode and press OK. Highlight Yes and press OK. 5. The on -screen keyboard, enter your wireless network (this is displayed. 3. Using the on -screen menu is connected to a wireless network whose network name (SSID) is being broadcast: If ...
E500i-A1 User Manual
Page 35
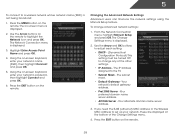
...settings. • IP Address - 5 To connect to a wireless network whose network name (SSID) is displayed. 2. Press the MENU button on -screen keyboard, enter your network's password, then highlight Connect and press OK. 6. Press the EXIT button on the remote. 29 Use the Arrow and OK buttons ...remote. The IP address assigned to highlight the Network icon and press OK. Highlight Enter Access Point Name and press OK. 4. The on -screen keyboard, enter your network's name (SSID), then highlight Connect and press OK. 5. Using the on -screen menu is displayed. 3. Changing the Advanced ...
...settings. • IP Address - 5 To connect to a wireless network whose network name (SSID) is displayed. 2. Press the MENU button on -screen keyboard, enter your network's password, then highlight Connect and press OK. 6. Press the EXIT button on the remote. 29 Use the Arrow and OK buttons ...remote. The IP address assigned to highlight the Network icon and press OK. Highlight Enter Access Point Name and press OK. 4. The on -screen keyboard, enter your network's name (SSID), then highlight Connect and press OK. 5. Using the on -screen menu is displayed. 3. Changing the Advanced ...
E500i-A1 User Manual
Page 42
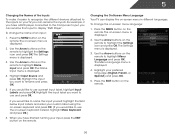
...Input Labels and press OK. The Menu Language menu is displayed. 3. For example, if you have finished naming your custom label using the on-screen keyboard and press OK. (If you would like to highlight Menu Language and press OK. Use the Arrow buttons on the remote to use and press...to the Component input, you want to rename and press OK. Input Labels TV TV_ 2. Use the Arrow buttons on the remote. 36 Show a soft keyboard for text entry for remotes without keyboards. 5. Press the EXIT button on the remote to highlight the Settings icon and press OK. The on -screen...
...Input Labels and press OK. The Menu Language menu is displayed. 3. For example, if you have finished naming your custom label using the on-screen keyboard and press OK. (If you would like to highlight Menu Language and press OK. Use the Arrow buttons on the remote to use and press...to the Component input, you want to rename and press OK. Input Labels TV TV_ 2. Use the Arrow buttons on the remote. 36 Show a soft keyboard for text entry for remotes without keyboards. 5. Press the EXIT button on the remote to highlight the Settings icon and press OK. The on -screen...
E500i-A1 User Manual
Page 51
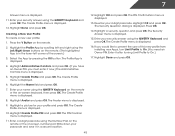
... press OK. The Create Profile menu is displayed. 10. The Create Profile menu is displayed. 6. Enter your security answer using the QWERTY Keyboard and press OK. Select the App by scrolling left corner of this new profile from installing new Apps, turn Limit Profile to On. (You...Enter it in the lower left and right using the Left/Right Arrow buttons on -screen number pad. Enter a 4-digit passcode using the QWERTY Keyboard on the remote or the on the remote. 2. The Security Answer menu is displayed. 13. The PIN Confirmation menu is displayed. 15. Highlight...
... press OK. The Create Profile menu is displayed. 10. The Create Profile menu is displayed. 6. Enter your security answer using the QWERTY Keyboard and press OK. Select the App by scrolling left corner of this new profile from installing new Apps, turn Limit Profile to On. (You...Enter it in the lower left and right using the Left/Right Arrow buttons on -screen number pad. Enter a 4-digit passcode using the QWERTY Keyboard on the remote or the on the remote. 2. The Security Answer menu is displayed. 13. The PIN Confirmation menu is displayed. 15. Highlight...
E500i-A1 Quick Start Guide
Page 11
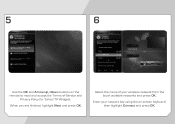
TV Widgets. 5 6 Use the OK and Arrow Up/Down buttons on the remote to read and accept the Terms of your network key using the on-screen keyboard, then highlight Connect and press OK. Enter your wireless network from the list of available networks and press OK. When you are finished, highlight Next and press OK. Select the name of Service and Privacy Policy for Yahoo!
TV Widgets. 5 6 Use the OK and Arrow Up/Down buttons on the remote to read and accept the Terms of your network key using the on-screen keyboard, then highlight Connect and press OK. Enter your wireless network from the list of available networks and press OK. When you are finished, highlight Next and press OK. Select the name of Service and Privacy Policy for Yahoo!
E500i-A1 Quick Start Guide
Page 12
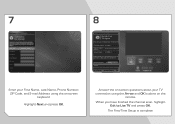
... the on-screen questions about your First Name, Last Name, Phone Number, ZIP Code, and E-mail Address using the Arrow and OK buttons on -screen keyboard. The First-Time Setup is complete. 7 8 SET-UP PROGRESS Set Up Your TV Signal How are you have finished the channel scan, highlight Exit to...
... the on-screen questions about your First Name, Last Name, Phone Number, ZIP Code, and E-mail Address using the Arrow and OK buttons on -screen keyboard. The First-Time Setup is complete. 7 8 SET-UP PROGRESS Set Up Your TV Signal How are you have finished the channel scan, highlight Exit to...


