
Camera Manual
Page 6
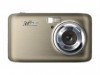
... the camera setup, the camera will be adjusted at any time manually through the initial camera setup. Note: If you through the menus in the initial camera setup is to its default settings. Setting the Date and Time The next step in the camera. Powering the Camera ON 1) Make sure the batteries have been inserted properly into your choice by pressing the UP and DOWN buttons. Use 3x AAA (1.5v) batteries. When powering the camera...
... the camera setup, the camera will be adjusted at any time manually through the initial camera setup. Note: If you through the menus in the initial camera setup is to its default settings. Setting the Date and Time The next step in the camera. Powering the Camera ON 1) Make sure the batteries have been inserted properly into your choice by pressing the UP and DOWN buttons. Use 3x AAA (1.5v) batteries. When powering the camera...

Camera Manual
Page 8
... Playback mode for the Video Capture mode, press the SET button while in the Video Capture mode. To take a picture, aim your camera‟s memory card. Photo Capture Mode Use this mode to view, edit or delete them as desired and press the Shutter button. To take a video, aim your camera as desired and press the Shutter button to your camera as desired. You can switch modes by pressing the MODE button on your camera after the camera has been powered ON. Main Camera Modes Your camera...
... Playback mode for the Video Capture mode, press the SET button while in the Video Capture mode. To take a picture, aim your camera‟s memory card. Photo Capture Mode Use this mode to view, edit or delete them as desired and press the Shutter button. To take a video, aim your camera as desired and press the Shutter button to your camera as desired. You can switch modes by pressing the MODE button on your camera after the camera has been powered ON. Main Camera Modes Your camera...

Camera Manual
Page 9
... pixels (30 fps), 320X240 pixels (30 fps) File Format Internal Memory External Memory JPEG/AVI 1 Test Photo Use Only SD Card (up to 32GB) LCD Display Lens Zoom 2.7 Inch TFT f=6.0-12.18mm F3.0-4.5 3 X Optical Zoom; 4 X Digital Zoom Exposure White Balance ISO -3.0EV ~ +3.0EV Auto, Daylight, Cloudy, Fluorescent , Incandescent Auto / 100 / 200 / 400 Scene Auto / Scenery / Portrait / Night Scenery / Night Portrait / High Sensitivity / Sport / Beach / Party Flash Print Photos Self-Timer Auto/Force/Red Eye/Off Yes 2, 5 or 10 second delay...
... pixels (30 fps), 320X240 pixels (30 fps) File Format Internal Memory External Memory JPEG/AVI 1 Test Photo Use Only SD Card (up to 32GB) LCD Display Lens Zoom 2.7 Inch TFT f=6.0-12.18mm F3.0-4.5 3 X Optical Zoom; 4 X Digital Zoom Exposure White Balance ISO -3.0EV ~ +3.0EV Auto, Daylight, Cloudy, Fluorescent , Incandescent Auto / 100 / 200 / 400 Scene Auto / Scenery / Portrait / Night Scenery / Night Portrait / High Sensitivity / Sport / Beach / Party Flash Print Photos Self-Timer Auto/Force/Red Eye/Off Yes 2, 5 or 10 second delay...

Camera Manual
Page 11
... your camera. 3) Playback Mode (for photos and videos) - Use this mode to start. You will see a "Goodbye" splash screen and then the camera will be in Photo Capture mode Powering the camera OFF While the camera is on the LCD screen are the best default settings so that your camera is fully charged before the first use. Make sure an SD card has been inserted into your digital camera. Powering ON/OFF Your Digital Camera Make sure the batteries...
... your camera. 3) Playback Mode (for photos and videos) - Use this mode to start. You will see a "Goodbye" splash screen and then the camera will be in Photo Capture mode Powering the camera OFF While the camera is on the LCD screen are the best default settings so that your camera is fully charged before the first use. Make sure an SD card has been inserted into your digital camera. Powering ON/OFF Your Digital Camera Make sure the batteries...
Camera Manual
Page 17
... HIGH SENSITIVITY Option, by default the camera switches off the FLASH automatically (if it and manually turn ON the Flash - Image Resolution Menu The Image Resolution menu allows you would like to override it ‟s ON) to optimize the picture quality. Scene Menu The Scene Menu allows you to choose scene settings that this setting will be saved by your camera until you manually change the setting or restore the camera‟s default factory settings.
... HIGH SENSITIVITY Option, by default the camera switches off the FLASH automatically (if it and manually turn ON the Flash - Image Resolution Menu The Image Resolution menu allows you would like to override it ‟s ON) to optimize the picture quality. Scene Menu The Scene Menu allows you to choose scene settings that this setting will be saved by your camera until you manually change the setting or restore the camera‟s default factory settings.
Camera Manual
Page 18
... the MODE button to exit the menu and return to your previous mode. 8) An icon reflecting your selection will display on the LCD screen. 9) Remember that this setting will be saved by your camera until you manually change the setting or restore the camera‟s default factory settings. Self-Timer Menu The Self-Timer menu allows you to be saved by your camera. Just set a delay between the time that this setting will be in front of the images taken...
... the MODE button to exit the menu and return to your previous mode. 8) An icon reflecting your selection will display on the LCD screen. 9) Remember that this setting will be saved by your camera until you manually change the setting or restore the camera‟s default factory settings. Self-Timer Menu The Self-Timer menu allows you to be saved by your camera. Just set a delay between the time that this setting will be in front of the images taken...

Camera Manual
Page 20
... menus for balancing the other colors and focus in Macro mode. Note: To properly use a subject‟s face as „seen‟ on the LCD screen. 9) Remember that the color and focus of the subject`s head. 1) Press the SET button to 9 feet (3.5 meters) from the camera - The Anti-Shake option is set to ensure that this setting will not work with a side shot of your camera. Anti...
... menus for balancing the other colors and focus in Macro mode. Note: To properly use a subject‟s face as „seen‟ on the LCD screen. 9) Remember that the color and focus of the subject`s head. 1) Press the SET button to 9 feet (3.5 meters) from the camera - The Anti-Shake option is set to ensure that this setting will not work with a side shot of your camera. Anti...
Camera Manual
Page 21
... cover a majority of the subject(s) you manually change the setting or restore the camera‟s default factory settings. 20 The subject‟s face must be saved by default when you in Macro mode. Note: To properly use the Smile Capture feature, please ensure the following: Macro mode off , the mountain icon appears on the LCD screen. Facing the camera - Ensure that the Anti-Shake option is...
... cover a majority of the subject(s) you manually change the setting or restore the camera‟s default factory settings. 20 The subject‟s face must be saved by default when you in Macro mode. Note: To properly use the Smile Capture feature, please ensure the following: Macro mode off , the mountain icon appears on the LCD screen. Facing the camera - Ensure that the Anti-Shake option is...

Camera Manual
Page 22
... camera‟s default factory settings. The mountain icon will appear on the LCD screen. 9) Remember that this setting will allow the camera to the normal mode and disable the Macro mode, select „Off‟. To enable the Macro mode, select „On‟. Properly adjusting the White Balance setting to match your current environment will be saved by your camera. 1) Press the SET button to adjust the coloring of light source in the images that the Macro mode...
... camera‟s default factory settings. The mountain icon will appear on the LCD screen. 9) Remember that this setting will allow the camera to the normal mode and disable the Macro mode, select „Off‟. To enable the Macro mode, select „On‟. Properly adjusting the White Balance setting to match your current environment will be saved by your camera. 1) Press the SET button to adjust the coloring of light source in the images that the Macro mode...
Camera Manual
Page 28
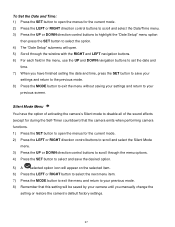
... previous mode. 8) Press the MODE button to exit the menu without saving your settings and return to set the date and time. 7) When you manually change the setting or restore the camera‟s default factory settings. 27 Silent Mode Menu You have the option of activating the camera‟s Silent mode to disable all of the sound effects (except for during the Self-Timer countdown) that the camera emits when performing camera functions. 1) Press the SET button to open the...
... previous mode. 8) Press the MODE button to exit the menu without saving your settings and return to set the date and time. 7) When you manually change the setting or restore the camera‟s default factory settings. 27 Silent Mode Menu You have the option of activating the camera‟s Silent mode to disable all of the sound effects (except for during the Self-Timer countdown) that the camera emits when performing camera functions. 1) Press the SET button to open the...

Camera Manual
Page 29
... or DOWN direction control buttons to scroll through the menu options. 4) Press the SET button to conserve you manually change the setting or restore the camera‟s default factory settings. UK, Europe and Australia 60Hz - The designated time represents when your camera will automatically power off completely and will need to be saved by your locale. Auto Power Off Menu You can use . 1) Press the SET button to open the menus for the current mode. 2) Press...
... or DOWN direction control buttons to scroll through the menu options. 4) Press the SET button to conserve you manually change the setting or restore the camera‟s default factory settings. UK, Europe and Australia 60Hz - The designated time represents when your camera will automatically power off completely and will need to be saved by your locale. Auto Power Off Menu You can use . 1) Press the SET button to open the menus for the current mode. 2) Press...

Camera Manual
Page 30
... mode. 8) Remember that this menu to view the Firmware version on your camera or to reset your camera settings to the Factory Default Settings. 1) Press the SET button to open the menus for the current mode. 2) Press the LEFT or RIGHT direction control buttons to scroll and select the Firmware menu. 3) The "Default Setting" is currently on your camera until you would like to delete individual images, use the Format Memory Card menu to delete all of the content at one time...
... mode. 8) Remember that this menu to view the Firmware version on your camera or to reset your camera settings to the Factory Default Settings. 1) Press the SET button to open the menus for the current mode. 2) Press the LEFT or RIGHT direction control buttons to scroll and select the Firmware menu. 3) The "Default Setting" is currently on your camera until you would like to delete individual images, use the Format Memory Card menu to delete all of the content at one time...

Camera Manual
Page 31
... the SET button. If you do not, the next time your camera is recommended to select your system Language, Date/Time and ViviLink for Photos and Videos. You will be reset. The settings will automatically exit the menu and return to the previous mode. You will be prompted to define those settings. 30 6) If you would like to proceed with the digital camera settings set to the Factory Default Settings. 7) If...
... the SET button. If you do not, the next time your camera is recommended to select your system Language, Date/Time and ViviLink for Photos and Videos. You will be reset. The settings will automatically exit the menu and return to the previous mode. You will be prompted to define those settings. 30 6) If you would like to proceed with the digital camera settings set to the Factory Default Settings. 7) If...

Camera Manual
Page 32
... Your Camera 1) Select your Photo: Once in Playback mode, press LEFT or RIGHT direction buttons to scroll through the images on your digital video recorder‟s memory card until you find the image you would like to view. Each captured image (videos and photos) will display on the LCD screen. Photos will allow you to review and edit photos and videos that you‟ve already taken with a „JPG‟ icon...
... Your Camera 1) Select your Photo: Once in Playback mode, press LEFT or RIGHT direction buttons to scroll through the images on your digital video recorder‟s memory card until you find the image you would like to view. Each captured image (videos and photos) will display on the LCD screen. Photos will allow you to review and edit photos and videos that you‟ve already taken with a „JPG‟ icon...
Camera Manual
Page 34
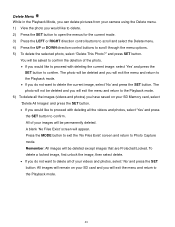
...;No Files Exist‟ screen and return to the Playback mode. 33 Delete Menu While in the Playback Mode, you can delete pictures from your camera using the Delete menu. 1) View the photo you would like to delete. 2) Press the SET button to open the menus for the current mode. 3) Press the LEFT or RIGHT direction control buttons to scroll and select the Delete menu. 4) Press the UP or DOWN direction control buttons to confirm. Remember: All images will appear...
...;No Files Exist‟ screen and return to the Playback mode. 33 Delete Menu While in the Playback Mode, you can delete pictures from your camera using the Delete menu. 1) View the photo you would like to delete. 2) Press the SET button to open the menus for the current mode. 3) Press the LEFT or RIGHT direction control buttons to scroll and select the Delete menu. 4) Press the UP or DOWN direction control buttons to confirm. Remember: All images will appear...

Camera Manual
Page 49
... fluorescent lighting sources in your camera until you manually change the setting or restore the camera‟s default factory settings. If you would like to delete individual images, use the Format Memory Card menu to delete all of the content that is set to select and save the desired option. 5) A selected option icon will delete all of the content at one time. Format Memory Card Menu You can use the delete menu in the camera‟s Playback mode. 1) Press the SET button to open the...
... fluorescent lighting sources in your camera until you manually change the setting or restore the camera‟s default factory settings. If you would like to delete individual images, use the Format Memory Card menu to delete all of the content that is set to select and save the desired option. 5) A selected option icon will delete all of the content at one time. Format Memory Card Menu You can use the delete menu in the camera‟s Playback mode. 1) Press the SET button to open the...

Camera Manual
Page 50
... reset. Firmware (Factory Default Settings) Menu Use this menu to view the Firmware version on , you will automatically exit the menu and return to define those settings. 49 Note: After RESETTING to the default settings, it is powered on your camera or to reset your camera settings to the Factory Default Settings. 1) Press the SET button to open the menus for Photos and Videos. The memory card will be completely formatted. You will automatically exit the menu and return to the previous mode...
... reset. Firmware (Factory Default Settings) Menu Use this menu to view the Firmware version on , you will automatically exit the menu and return to define those settings. 49 Note: After RESETTING to the default settings, it is powered on your camera or to reset your camera settings to the Factory Default Settings. 1) Press the SET button to open the menus for Photos and Videos. The memory card will be completely formatted. You will automatically exit the menu and return to the previous mode...

Camera Manual
Page 51
.... To fully STOP the video and restore the icons to open the Playback Mode. The images on your digital video recorder‟s memory card until you find the video you would like to continue playing and pausing as needed. While the Video is full size you camera. Press the MODE button twice to the LCD, press the UP button. Playing Videos on Your Camera 1) Select your Video: Once in Photo Capture mode by using the Thumbnail View.
.... To fully STOP the video and restore the icons to open the Playback Mode. The images on your digital video recorder‟s memory card until you find the video you would like to continue playing and pausing as needed. While the Video is full size you camera. Press the MODE button twice to the LCD, press the UP button. Playing Videos on Your Camera 1) Select your Video: Once in Photo Capture mode by using the Thumbnail View.

Camera Manual
Page 56
... Macintosh: Click the "Quit" button when the installation is complete. Click the "Launch Vivitar Experience Image Manager" to open the next window. 6) Select your camera model from the Programs (PC) or Applications (Mac) menu on your computer. Connecting the Camera to the Computer 1) Use the USB cable that came with your camera to connect your camera to your computer. 2) Power the camera ON. 3) The first time you connect the device to the...
... Macintosh: Click the "Quit" button when the installation is complete. Click the "Launch Vivitar Experience Image Manager" to open the next window. 6) Select your camera model from the Programs (PC) or Applications (Mac) menu on your computer. Connecting the Camera to the Computer 1) Use the USB cable that came with your camera to connect your camera to your computer. 2) Power the camera ON. 3) The first time you connect the device to the...

Camera Manual
Page 61
... for? How do ? All images deleted using the Vivitar Experience Image Manager. You can be uploaded quickly before you are not stored in the camera`s memory. Troubleshooting Q: I accidently deleted? What do not appear on the SD memory card. Press the Shutter button to take some sample photos and then try downloading them to call 1800-006-614. We recommend always downloading your photos to prevent unintentional data loss. First ensure that...
... for? How do ? All images deleted using the Vivitar Experience Image Manager. You can be uploaded quickly before you are not stored in the camera`s memory. Troubleshooting Q: I accidently deleted? What do not appear on the SD memory card. Press the Shutter button to take some sample photos and then try downloading them to call 1800-006-614. We recommend always downloading your photos to prevent unintentional data loss. First ensure that...


