
Quick Start Guide
Page 1
In order for you to capture images with your camera: 2. Quick Start Guide Vivitar ViviCam 5018 Digital Camera 1. Memory cards are not included and need to insert an SD Memory card (up to be purchased separately. Open and install 2 AAA alkaline batteries into the battery compartment on the bottom of the camera: 3. Know your camera you will need to 8GB).
In order for you to capture images with your camera: 2. Quick Start Guide Vivitar ViviCam 5018 Digital Camera 1. Memory cards are not included and need to insert an SD Memory card (up to be purchased separately. Open and install 2 AAA alkaline batteries into the battery compartment on the bottom of the camera: 3. Know your camera you will need to 8GB).
Camera Manual
Page 2
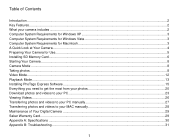
...Windows XP 3 Computer System Requirements for Windows Vista 3 Computer System Requirements for Macintosh 3 A Quick Look at Your Camera...4 Preparing Your Camera for Use...5 Installing SD Memory Card...6 Starting Your Camera ...8 Camera Mode ...8 Taking photos ...8 Video Mode ...12 Playback Mode...13 Installing PhoTags Express Software...15 Everything you need to get the ...and videos to your PC manually 27 Transferring photos and videos to your MAC manually 28 Maintenance of Your Digital Camera ...29 Sakar Warranty Card...29 Appendix A: Specifications ...30 Appendix B: Troubleshooting...31 1
...Windows XP 3 Computer System Requirements for Windows Vista 3 Computer System Requirements for Macintosh 3 A Quick Look at Your Camera...4 Preparing Your Camera for Use...5 Installing SD Memory Card...6 Starting Your Camera ...8 Camera Mode ...8 Taking photos ...8 Video Mode ...12 Playback Mode...13 Installing PhoTags Express Software...15 Everything you need to get the ...and videos to your PC manually 27 Transferring photos and videos to your MAC manually 28 Maintenance of Your Digital Camera ...29 Sakar Warranty Card...29 Appendix A: Specifications ...30 Appendix B: Troubleshooting...31 1
Camera Manual
Page 3
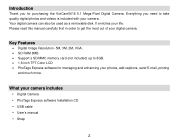
... in order to get the most out of your digital camera. Key Features Digital Image Resolution- 5M, 3M, 2M, VGA. SD RAM 8MB. Support s SD/MMC memory card (not included) up to 8GB. 1.8 inch TFT Color LCD PhoTags Express software for purchasing the ViviCam5018 5.1 Mega-Pixel Digital Camera...
... in order to get the most out of your digital camera. Key Features Digital Image Resolution- 5M, 3M, 2M, VGA. SD RAM 8MB. Support s SD/MMC memory card (not included) up to 8GB. 1.8 inch TFT Color LCD PhoTags Express software for purchasing the ViviCam5018 5.1 Mega-Pixel Digital Camera...
Camera Manual
Page 6
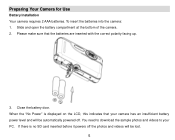
... has an insufficient battery power level and will be automatically powered off the photos and videos will be lost. 5 When the "No Power" is no SD card inserted before it powers off . To insert the batteries into the camera: 1. Please make sure that your PC. If there is displayed on the LCD...
... has an insufficient battery power level and will be automatically powered off the photos and videos will be lost. 5 When the "No Power" is no SD card inserted before it powers off . To insert the batteries into the camera: 1. Please make sure that your PC. If there is displayed on the LCD...
Camera Manual
Page 7
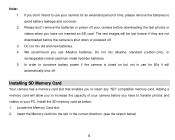
... to your PC. Do not mix alkaline, standard (carbon-zinc), or rechargeable (nickel-cadmium metal hydride) batteries. Installing SD Memory Card Your camera has a memory card slot that enables you use for an extended period of your camera for 60s it will automatically shut off . If you...sketch below : 1. Do not mix old and new batteries. In order to avoid battery leakage and corrosion. Install the SD memory card as below ) 6 Adding a memory card will be lost forever if they are not downloaded before you to increase the capacity of time, please remove the batteries...
... to your PC. Do not mix alkaline, standard (carbon-zinc), or rechargeable (nickel-cadmium metal hydride) batteries. Installing SD Memory Card Your camera has a memory card slot that enables you use for an extended period of your camera for 60s it will automatically shut off . If you...sketch below : 1. Do not mix old and new batteries. In order to avoid battery leakage and corrosion. Install the SD memory card as below ) 6 Adding a memory card will be lost forever if they are not downloaded before you to increase the capacity of time, please remove the batteries...
Camera Manual
Page 8
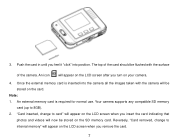
.... Note: 1. Your camera supports any compatible SD memory card (up to card" will appear on the LCD screen when you turn on your camera. 4. 3. The top of the camera. An icon will appear on the LCD screen after you insert the card indicating that photos and videos will be stored...feel it "click" into the camera all the images taken with the surface of the card should be flushed with the camera will now be stored on the SD memory card. An external memory card is inserted into position. Reversely, "Card removed, change to 8GB). 2. Push the card in until you remove the...
.... Note: 1. Your camera supports any compatible SD memory card (up to card" will appear on the LCD screen when you turn on your camera. 4. 3. The top of the camera. An icon will appear on the LCD screen after you insert the card indicating that photos and videos will be stored...feel it "click" into the camera all the images taken with the surface of the card should be flushed with the camera will now be stored on the SD memory card. An external memory card is inserted into position. Reversely, "Card removed, change to 8GB). 2. Push the card in until you remove the...
Camera Manual
Page 9
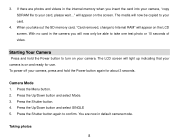
... When you take one test photo or 10 seconds of video. With no card in the camera you insert the card into your card. 4. To power off your camera, press and hold the Power button to take out the SD memory card, "Card removed, change to your camera, "copy SDRAM file to confirm. Press the... now only be copied to Internal RAM" will appear on the LCD screen. The media will light up indicating that your camera is on your card, please wait..." Camera Mode 1. Press the Menu button. 2. 3. The LCD screen will now be able to turn on and ready for about 3 seconds. ...
... When you take one test photo or 10 seconds of video. With no card in the camera you insert the card into your card. 4. To power off your camera, press and hold the Power button to take out the SD memory card, "Card removed, change to your camera, "copy SDRAM file to confirm. Press the... now only be copied to Internal RAM" will appear on the LCD screen. The media will light up indicating that your camera is on your card, please wait..." Camera Mode 1. Press the Menu button. 2. 3. The LCD screen will now be able to turn on and ready for about 3 seconds. ...
Camera Manual
Page 10
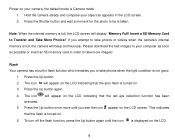
... icon will beep continuously. Press the Up button once more images! If you attempt to your camera, the default mode is Camera mode. 1. Insert a SD Memory Card to take more until the icon is forced on. 6. Flash Your camera has a built in flash function which enables you see the icon appear on... the LCD indicating that the flash is displayed on the LCD screen. Hold the camera steady and compose your object as possible or insert an SD memory card in order to Transfer and Take More Photos!"
... icon will beep continuously. Press the Up button once more images! If you attempt to your camera, the default mode is Camera mode. 1. Insert a SD Memory Card to take more until the icon is forced on. 6. Flash Your camera has a built in flash function which enables you see the icon appear on... the LCD indicating that the flash is displayed on the LCD screen. Hold the camera steady and compose your object as possible or insert an SD memory card in order to Transfer and Take More Photos!"
Camera Manual
Page 12
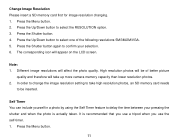
.... 2. Press the Shutter button again to be of the following resolutions 5M/3M/2M/VGA. 5. High resolution photos will take high resolution photos, an SD memory card needs to confirm your pressing the shutter and when the photo is recommended that you use a tripod when you use the self-timer. 1. In order... more camera memory capacity than lower resolution photos. 2. The corresponding icon will affect the photo quality. It is actually taken. Change Image Resolution Please insert a SD memory card first for image resolution changing. 1.
.... 2. Press the Shutter button again to be of the following resolutions 5M/3M/2M/VGA. 5. High resolution photos will take high resolution photos, an SD memory card needs to confirm your pressing the shutter and when the photo is recommended that you use a tripod when you use the self-timer. 1. In order... more camera memory capacity than lower resolution photos. 2. The corresponding icon will affect the photo quality. It is actually taken. Change Image Resolution Please insert a SD memory card first for image resolution changing. 1.
Camera Manual
Page 13
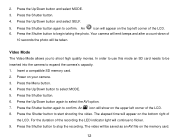
... corner of the LCD. 8. For the duration of the LCD. Press the Up/Down button and select SELF. 5. In order to use this mode an SD card needs to be inserted into the camera to stop the recording. Press the Shutter button to expand the camera's capacity. 1. Video Mode The Video Mode... emit beeps and after a count-down of 10 seconds the photo will be taken. Press the Shutter button to start shooting the video. Insert a compatible SD memory card. 2. The video will be saved as an AVI file on your camera. 3. Press the Menu button. 4. Power on the memory...
... corner of the LCD. 8. For the duration of the LCD. Press the Up/Down button and select SELF. 5. In order to use this mode an SD card needs to be inserted into the camera to stop the recording. Press the Shutter button to expand the camera's capacity. 1. Video Mode The Video Mode... emit beeps and after a count-down of 10 seconds the photo will be taken. Press the Shutter button to start shooting the video. Insert a compatible SD memory card. 2. The video will be saved as an AVI file on your camera. 3. Press the Menu button. 4. Power on the memory...
Camera Manual
Page 14
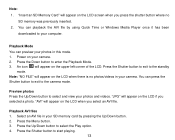
...Shutter button to select and view your camera. An icon will appear on the LCD when there is no SD memory was previously inserted. 2. "JPG" will appear on the LCD if you select an AVI file. ..."AVI" will appear on the LCD when you selected a photo. "Insert an SD Memory Card" will appear on the upper left corner of the LCD. Power on the LCD screen when you press .... Note: "NO FILE" will appear on your computer. You can preview your photos in your SD memory card by using Quick Time or Windows Media Player once it has been downloaded to your camera. 2. ...
...Shutter button to select and view your camera. An icon will appear on the LCD when there is no SD memory was previously inserted. 2. "JPG" will appear on the LCD if you select an AVI file. ..."AVI" will appear on the LCD when you selected a photo. "Insert an SD Memory Card" will appear on the upper left corner of the LCD. Power on the LCD screen when you press .... Note: "NO FILE" will appear on your computer. You can preview your photos in your SD memory card by using Quick Time or Windows Media Player once it has been downloaded to your camera. 2. ...
Camera Manual
Page 16
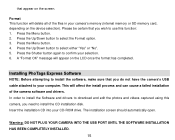
... confirm your computer. that appear on the LCD once the format has completed. Insert the installation CD into your camera's memory (internal memory or SD memory card, depending on the device selection). This will delete all of the camera software and drivers. Format This function will affect the install process and can...
... confirm your computer. that appear on the LCD once the format has completed. Insert the installation CD into your camera's memory (internal memory or SD memory card, depending on the device selection). This will delete all of the camera software and drivers. Format This function will affect the install process and can...

Camera Manual
Page 31
Attention: Service Department 195 Carter Drive Edison, NJ 08817 You may also visit www.sakar.com for further assistance if necessary or call our tech support department toll free at (877) 397-8200. Appendix A: Specifications Sensor Image resolution Lens Internal memory External memory Flash Self-timer Power saving Battery Transmission interface Working temperature Computer system CMOS sensor 5M, 3M, 2M, VGA f=7.23mm, F2.8 SD RAM 8MB Support SD card up to 8GB Auto/force on/red eye reduction/off 10S 60S 2*AAA batteries USB V1.1 0~40℃ Window XP/ Vista/ Mac OS X (10.2.6 or higher) 30
Attention: Service Department 195 Carter Drive Edison, NJ 08817 You may also visit www.sakar.com for further assistance if necessary or call our tech support department toll free at (877) 397-8200. Appendix A: Specifications Sensor Image resolution Lens Internal memory External memory Flash Self-timer Power saving Battery Transmission interface Working temperature Computer system CMOS sensor 5M, 3M, 2M, VGA f=7.23mm, F2.8 SD RAM 8MB Support SD card up to 8GB Auto/force on/red eye reduction/off 10S 60S 2*AAA batteries USB V1.1 0~40℃ Window XP/ Vista/ Mac OS X (10.2.6 or higher) 30


