
User Guide
Page 30
... 62 Recovering without changing the internal storage drive partitions 64 Recovering to a custom size partition 67 Creating recovery DVDs/media 69 Restoring from recovery DVDs/media 72 Erasing the Internal Storage Drive 74 Checking the internal storage drive operating status 75 Installing drivers and applications 76 Using the Toshiba Dual Pointing Device 76 Using the touch pad 77 Adjusting touch pad settings 81 Scrolling with the touch pad 81 Control buttons 82 Disabling or enabling the touch pad 82 Using external display devices 82 Selecting video cables 83 Connecting an HDMI...
... 62 Recovering without changing the internal storage drive partitions 64 Recovering to a custom size partition 67 Creating recovery DVDs/media 69 Restoring from recovery DVDs/media 72 Erasing the Internal Storage Drive 74 Checking the internal storage drive operating status 75 Installing drivers and applications 76 Using the Toshiba Dual Pointing Device 76 Using the touch pad 77 Adjusting touch pad settings 81 Scrolling with the touch pad 81 Control buttons 82 Disabling or enabling the touch pad 82 Using external display devices 82 Selecting video cables 83 Connecting an HDMI...
User Guide
Page 33
... 147 Connect 148 Secure 149 Protect & Fix 150 Optimize 151 TOSHIBA Application Installer 152 Setting passwords 153 Using an instant password 153 Using a supervisor password 154 Using a user password 155 TOSHIBA Face Recognition Utility 157 TOSHIBA Security Assist 158 TOSHIBA PC Diagnostic Tool Utility 160 TOSHIBA HDD Protection Utility 161 Mouse Utility 162 TOSHIBA Hardware Setup 163 TOSHIBA Sleep Utility 165 Starting the TOSHIBA Sleep Utility 165 USB Sleep and Charge 165 Enabling/Disabling USB Sleep and Charge 167 Power supply mode settings 167 TOSHIBA Button Support 168
... 147 Connect 148 Secure 149 Protect & Fix 150 Optimize 151 TOSHIBA Application Installer 152 Setting passwords 153 Using an instant password 153 Using a supervisor password 154 Using a user password 155 TOSHIBA Face Recognition Utility 157 TOSHIBA Security Assist 158 TOSHIBA PC Diagnostic Tool Utility 160 TOSHIBA HDD Protection Utility 161 Mouse Utility 162 TOSHIBA Hardware Setup 163 TOSHIBA Sleep Utility 165 Starting the TOSHIBA Sleep Utility 165 USB Sleep and Charge 165 Enabling/Disabling USB Sleep and Charge 167 Power supply mode settings 167 TOSHIBA Button Support 168
User Guide
Page 52
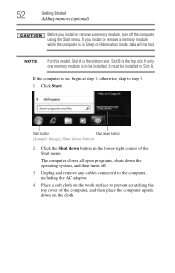
... in Sleep or Hibernation mode, data will be installed in the lower-right corner of the Start menu. If the computer is the top slot. NOTE For this model, Slot A is to be installed, it must be lost. The computer closes all open programs, shuts down the operating system, and then turns off the computer using the Start menu. If only one memory module is the bottom slot. Start button...
... in Sleep or Hibernation mode, data will be installed in the lower-right corner of the Start menu. If the computer is the top slot. NOTE For this model, Slot A is to be installed, it must be lost. The computer closes all open programs, shuts down the operating system, and then turns off the computer using the Start menu. If only one memory module is the bottom slot. Start button...

User Guide
Page 59
... 129. 6 Turn the computer right side up. For more information on inserting the main battery, see "Inserting a charged battery" on a carpet or other soft material can block the vents located at the underside of the computer. Slot B Slot A (Sample Illustration) Removing the memory module 4 Replace the memory module slot cover and secure it out of the slot. Getting Started 59 Adding memory (optional) 3 Gently lift the memory module to a power outlet (even...
... 129. 6 Turn the computer right side up. For more information on inserting the main battery, see "Inserting a charged battery" on a carpet or other soft material can block the vents located at the underside of the computer. Slot B Slot A (Sample Illustration) Removing the memory module 4 Replace the memory module slot cover and secure it out of the slot. Getting Started 59 Adding memory (optional) 3 Gently lift the memory module to a power outlet (even...

User Guide
Page 60
... Description This option restores the original factory image to your internal storage drive, returning your permission. If unsure, cancel and try again. TECHNICAL NOTE: You must have at least one memory module installed for the computer to perform the action, click Continue; If the computer does not recognize the memory configuration, turn off the computer and remove the memory module slot cover (complete steps 1-8 in "Installing a memory module" on...
... Description This option restores the original factory image to your internal storage drive, returning your permission. If unsure, cancel and try again. TECHNICAL NOTE: You must have at least one memory module installed for the computer to perform the action, click Continue; If the computer does not recognize the memory configuration, turn off the computer and remove the memory module slot cover (complete steps 1-8 in "Installing a memory module" on...

User Guide
Page 83
... cable to the manual that came with the television or display device for more information. Getting Started 83 Using external display devices ❖ An external monitor via the DisplayPort™* (DisplayPort™-compatible monitor or DisplayPort adaptors required) RGB (Monitor) port DisplayPort™* or HDMI™ Out port* *Available on certain models (Sample Illustration) Video ports on the external device. Your computer will automatically detect the external display device. Connecting an HDMI™-compatible television or display device...
... cable to the manual that came with the television or display device for more information. Getting Started 83 Using external display devices ❖ An external monitor via the DisplayPort™* (DisplayPort™-compatible monitor or DisplayPort adaptors required) RGB (Monitor) port DisplayPort™* or HDMI™ Out port* *Available on certain models (Sample Illustration) Video ports on the external device. Your computer will automatically detect the external display device. Connecting an HDMI™-compatible television or display device...
User Guide
Page 176
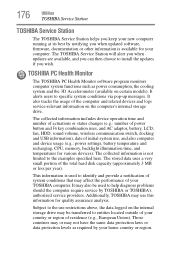
... affect the performance of initial system use this information for various devices). TOSHIBA PC Health Monitor The TOSHIBA PC Health Monitor software program monitors computer system functions such as required by your TOSHIBA computer. The collected information includes device operation time and number of actuations or status changes (e.g.: number of power button and Fn key combination uses, and AC adaptor, battery, LCD, fan, HDD, sound volume, wireless communication switch, docking and USB information), date of your home country...
... affect the performance of initial system use this information for various devices). TOSHIBA PC Health Monitor The TOSHIBA PC Health Monitor software program monitors computer system functions such as required by your TOSHIBA computer. The collected information includes device operation time and number of actuations or status changes (e.g.: number of power button and Fn key combination uses, and AC adaptor, battery, LCD, fan, HDD, sound volume, wireless communication switch, docking and USB information), date of your home country...
User Guide
Page 185
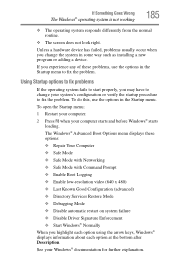
... these options: ❖ Repair Your Computer ❖ Safe Mode ❖ Safe Mode with Networking ❖ Safe Mode with Command Prompt ❖ Enable Boot Logging ❖ Enable low-resolution video (640 x 480) ❖ Last Known Good Configuration (advanced) ❖ Directory Services Restore Mode ❖ Debugging Mode ❖ Disable automatic restart on system failure ❖ Disable Driver Signature Enforcement ❖ Start Windows® Normally When you may have to change the system in the Startup menu to fix the problem...
... these options: ❖ Repair Your Computer ❖ Safe Mode ❖ Safe Mode with Networking ❖ Safe Mode with Command Prompt ❖ Enable Boot Logging ❖ Enable low-resolution video (640 x 480) ❖ Last Known Good Configuration (advanced) ❖ Directory Services Restore Mode ❖ Debugging Mode ❖ Disable automatic restart on system failure ❖ Disable Driver Signature Enforcement ❖ Start Windows® Normally When you may have to change the system in the Startup menu to fix the problem...

User Guide
Page 190
... typing, strange things happen or nothing happens, the problem may be related to the keyboard manufacturer's Web site. You have registered a password, press any key, type the password and press Enter. The keyboard you have connected an external keyboard and the operating system displays one or more keyboard error messages. You may need to activate the screen. Display problems Here are using a different make sure the display priority is registered, press any key to update your keyboard driver...
... typing, strange things happen or nothing happens, the problem may be related to the keyboard manufacturer's Web site. You have registered a password, press any key, type the password and press Enter. The keyboard you have connected an external keyboard and the operating system displays one or more keyboard error messages. You may need to activate the screen. Display problems Here are using a different make sure the display priority is registered, press any key to update your keyboard driver...
User Guide
Page 195
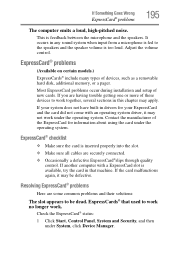
...; status: 1 Click Start, Control Panel, System and Security, and then under the operating system. ExpressCard® checklist ❖ Make sure the card is feedback between the microphone and the speakers. Contact the manufacturer of these devices to work no longer work together, several sections in drivers for information about using the card under System, click Device Manager. Resolving ExpressCard® problems Here are having trouble getting one...
...; status: 1 Click Start, Control Panel, System and Security, and then under the operating system. ExpressCard® checklist ❖ Make sure the card is feedback between the microphone and the speakers. Contact the manufacturer of these devices to work no longer work together, several sections in drivers for information about using the card under System, click Device Manager. Resolving ExpressCard® problems Here are having trouble getting one...

User Guide
Page 232
... instead of keys that represents a function, file, or program. HDMI-CEC (HDMI Consumer Electronics Control)-One A/V component can set system options or control system parameters, such as the battery save mode. (2) A key or combination of using this function, if connected with HDMI cables. internal device-See device. See also World Wide Web. hot key-(1) A feature in which only every other services. K keyboard shortcut-A key or combination of keys that you turn on the screen that activates a memory resident program...
... instead of keys that represents a function, file, or program. HDMI-CEC (HDMI Consumer Electronics Control)-One A/V component can set system options or control system parameters, such as the battery save mode. (2) A key or combination of using this function, if connected with HDMI cables. internal device-See device. See also World Wide Web. hot key-(1) A feature in which only every other services. K keyboard shortcut-A key or combination of keys that you turn on the screen that activates a memory resident program...
User Guide
Page 240
240 Index safety precautions 130 setting notifications 123 taking care of 130 battery indicator light 122 BIOS Setup see TOSHIBA Hardware Setup button eco Utility™ 127 eject, optical disc drive 110 power 49 Shut down 52, 90 start 136 C Call2Recycle™ battery 133 caring for your computer 98 changing battery 128 character keys 102 charging the battery 47 cleaning the computer 98 click 82 communications network connection 138 set up 137 computer caring for...
240 Index safety precautions 130 setting notifications 123 taking care of 130 battery indicator light 122 BIOS Setup see TOSHIBA Hardware Setup button eco Utility™ 127 eject, optical disc drive 110 power 49 Shut down 52, 90 start 136 C Call2Recycle™ battery 133 caring for your computer 98 changing battery 128 character keys 102 charging the battery 47 cleaning the computer 98 click 82 communications network connection 138 set up 137 computer caring for...
User Guide
Page 242
... hot key disabling or enabling wireless devices 220 display brightness 219 Hibernation mode 217 keyboard overlays 222 Lock (Instant security) 214 optical disk drive 212 Output (Display switch) 218 power plan 215 Sleep mode 216 using to set a power plan 126 volume mute 213 zoom 222 zoom in 222 zoom out 222 Hot Key Cards 210 Hot key functions 212 I icon desktop 135 moving to desktop 135 recycle bin 135 safety 39 inserting ExpressCard® 141 installation memory module 51 installing a charged battery 129 battery...
... hot key disabling or enabling wireless devices 220 display brightness 219 Hibernation mode 217 keyboard overlays 222 Lock (Instant security) 214 optical disk drive 212 Output (Display switch) 218 power plan 215 Sleep mode 216 using to set a power plan 126 volume mute 213 zoom 222 zoom in 222 zoom out 222 Hot Key Cards 210 Hot key functions 212 I icon desktop 135 moving to desktop 135 recycle bin 135 safety 39 inserting ExpressCard® 141 installation memory module 51 installing a charged battery 129 battery...
User Guide
Page 247
... power 49 U USB Sleep and Charge cannot use 205 USB Wakeup function does not work 206 USB-compatible printer 86 user password, deleting 156 user password, setting 155 using a microphone 139 computer lock 99 DVDs 109 expansion port 145 ExpressCard® 141 Hibernation mode 92 hot key to set a power plan 126 Memory card reader 142 optical disc drive 109 Shut down command 90 Sleep mode 95 TOSHIBA eco power plan 127 touch pad 77 Web Camera 140 using the keyboard 101 using the Toshiba Dual Pointing Device 76 Utilities 146 V video projector adjusting display...
... power 49 U USB Sleep and Charge cannot use 205 USB Wakeup function does not work 206 USB-compatible printer 86 user password, deleting 156 user password, setting 155 using a microphone 139 computer lock 99 DVDs 109 expansion port 145 ExpressCard® 141 Hibernation mode 92 hot key to set a power plan 126 Memory card reader 142 optical disc drive 109 Shut down command 90 Sleep mode 95 TOSHIBA eco power plan 127 touch pad 77 Web Camera 140 using the keyboard 101 using the Toshiba Dual Pointing Device 76 Utilities 146 V video projector adjusting display...
User Manual
Page 18
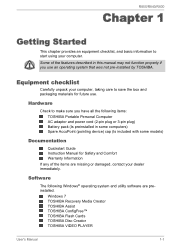
... (pointing device) cap (Is included with some models) Documentation Quickstart Guide Instruction Manual for future use an operating system that was not pre-installed by TOSHIBA. Software The following items: TOSHIBA Portable Personal Computer AC adaptor and power cord (2-pin plug or 3-pin plug) Battery pack (Is preinstalled in this manual may not function properly if you have all the following Windows® operating system and utility software are...
... (pointing device) cap (Is included with some models) Documentation Quickstart Guide Instruction Manual for future use an operating system that was not pre-installed by TOSHIBA. Software The following items: TOSHIBA Portable Personal Computer AC adaptor and power cord (2-pin plug or 3-pin plug) Battery pack (Is preinstalled in this manual may not function properly if you have all the following Windows® operating system and utility software are...
User Manual
Page 70
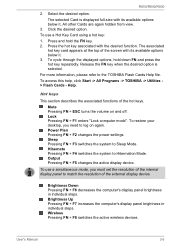
...'s display panel brightness in individual steps. User's Manual 3-5 To use a simultaneous mode, you need to log on and off. The associated hot key card appears at the top of the screen with its available options below it . 3. For more information, please refer to match the resolution of the hot keys. R850/R840/R830 2. Click the desired option. To access this help, click Start -> All Programs -> TOSHIBA -> Utilities > Flash Cards - Power Plan Pressing FN + F2 changes...
...'s display panel brightness in individual steps. User's Manual 3-5 To use a simultaneous mode, you need to log on and off. The associated hot key card appears at the top of the screen with its available options below it . 3. For more information, please refer to match the resolution of the hot keys. R850/R840/R830 2. Click the desired option. To access this help, click Start -> All Programs -> TOSHIBA -> Utilities > Flash Cards - Power Plan Pressing FN + F2 changes...
User Manual
Page 103
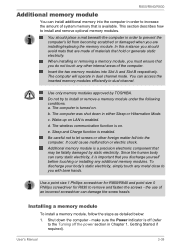
... by TOSHIBA. make sure the Power indicator is important that is turned on. This section describes how to the Turning off (refer to install and remove optional memory modules. The computer was shut down the computer - Additional memory module is enabled. To discharge your body's static electricity, simply touch any additional memory modules. User's Manual 3-38 You should avoid mats that are installing/replacing the memory module. Insert the two memory modules into Slot A and Slot B respectively...
... by TOSHIBA. make sure the Power indicator is important that is turned on. This section describes how to the Turning off (refer to install and remove optional memory modules. The computer was shut down the computer - Additional memory module is enabled. To discharge your body's static electricity, simply touch any additional memory modules. User's Manual 3-38 You should avoid mats that are installing/replacing the memory module. Insert the two memory modules into Slot A and Slot B respectively...
User Manual
Page 160
... loose wires and all cables to ensure they are using a software package you should check any error messages against the operating system documentation. In addition, if a problem recurs, the log you hear any messages or random characters? keyboard, hard disk drive, display panel, touch pad, touch pad control buttons - as this will give you clues that all connecting cables are they stay on the display? Make a screenshot of error messages. Do you have...
... loose wires and all cables to ensure they are using a software package you should check any error messages against the operating system documentation. In addition, if a problem recurs, the log you hear any messages or random characters? keyboard, hard disk drive, display panel, touch pad, touch pad control buttons - as this will give you clues that all connecting cables are they stay on the display? Make a screenshot of error messages. Do you have...
User Manual
Page 166
... setting within the TOSHIBA HW Setup utility please refer to start the computer again. if so remove it and try to resolve the problem, contact TOSHIBA Support. The files on the hard disk drive may have come from hard disk drive Slow performance Procedure Check to the operating system's documentation or online Help File for further information on the computer's display panel. User's Manual 6-8 Markings appear on operating and using the Defragmentation utility...
... setting within the TOSHIBA HW Setup utility please refer to start the computer again. if so remove it and try to resolve the problem, contact TOSHIBA Support. The files on the hard disk drive may have come from hard disk drive Slow performance Procedure Check to the operating system's documentation or online Help File for further information on the computer's display panel. User's Manual 6-8 Markings appear on operating and using the Defragmentation utility...
User Manual
Page 175
... display panel or the external monitor may not display when turned on again. When the external monitor is set for a firm cable connection between the LAN jack and the LAN hub. Remember to see if the external monitor is connected. User's Manual 6-17 LAN Problem Procedure Cannot access LAN Check for the internal display only. R850/R840/R830 Problem Procedure No display Try adjusting the contrast and brightness controls on LAN does not work Make sure the AC adaptor is connected. If problems persist, consult your LAN...
... display panel or the external monitor may not display when turned on again. When the external monitor is set for a firm cable connection between the LAN jack and the LAN hub. Remember to see if the external monitor is connected. User's Manual 6-17 LAN Problem Procedure Cannot access LAN Check for the internal display only. R850/R840/R830 Problem Procedure No display Try adjusting the contrast and brightness controls on LAN does not work Make sure the AC adaptor is connected. If problems persist, consult your LAN...


