

User Manual
Page 3
... 4-3 Web Camera 4-11 Using the TOSHIBA Face Recognition 4-12 Using optical disc drives 4-15 Writing CDs on DVD-ROM&CD-R/RW drives 4-19 Writing CD/DVDs on DVD Super Multi drives 4-21 Media care 4-27 Sound System 4-28 Modem 4-31 Wireless communications 4-34 LAN 4-38 Computer Handling 4-40 Using the Hard Disk Drive (HDD) Protection 4-41 Using the TOSHIBA USB Sleep and Charge Utility 4-43 Heat dispersal 4-45 Chapter 5 The Keyboard Typewriter keys 5-1 Function keys: F1 ... F12 5-2 Soft keys: FN key combinations 5-2 Hot keys 5-3 Windows special keys...
... 4-3 Web Camera 4-11 Using the TOSHIBA Face Recognition 4-12 Using optical disc drives 4-15 Writing CDs on DVD-ROM&CD-R/RW drives 4-19 Writing CD/DVDs on DVD Super Multi drives 4-21 Media care 4-27 Sound System 4-28 Modem 4-31 Wireless communications 4-34 LAN 4-38 Computer Handling 4-40 Using the Hard Disk Drive (HDD) Protection 4-41 Using the TOSHIBA USB Sleep and Charge Utility 4-43 Heat dispersal 4-45 Chapter 5 The Keyboard Typewriter keys 5-1 Function keys: F1 ... F12 5-2 Soft keys: FN key combinations 5-2 Hot keys 5-3 Windows special keys...

User Manual
Page 4
...S10/P10/TECRA M10/Satellite Pro S300 Chapter 6 Power and Power-Up Modes Power conditions 6-1 Monitoring of power condition 6-2 Battery 6-3 TOSHIBA Password Utility 6-10 Power-up modes 6-13 Panel power on/off 6-13 System automatic Sleep/Hibernation 6-13 Chapter 7 HW Setup Accessing HW Setup 7-1 HW Setup window 7-1 Chapter 8 Troubleshooting Problem solving process 8-1 Hardware and system checklist 8-3 TOSHIBA support 8-29 Appendix A Specifications Physical Dimensions A-1 Environmental Requirements A-1 Appendix B Display Controller and Video mode Display controller B-1 Video...
...S10/P10/TECRA M10/Satellite Pro S300 Chapter 6 Power and Power-Up Modes Power conditions 6-1 Monitoring of power condition 6-2 Battery 6-3 TOSHIBA Password Utility 6-10 Power-up modes 6-13 Panel power on/off 6-13 System automatic Sleep/Hibernation 6-13 Chapter 7 HW Setup Accessing HW Setup 7-1 HW Setup window 7-1 Chapter 8 Troubleshooting Problem solving process 8-1 Hardware and system checklist 8-3 TOSHIBA support 8-29 Appendix A Specifications Physical Dimensions A-1 Environmental Requirements A-1 Appendix B Display Controller and Video mode Display controller B-1 Video...

User Manual
Page 6
... making any form without notice. The instructions and descriptions it contains are accurate for accuracy. MultiMediaCard and MMC are registered trademarks of MultiMediaCard Association. Please comply with respect to civil damages or criminal action. Windows, Microsoft and Windows Vista are trademarks of Microsoft Corporation. Disclaimer This manual has been validated and reviewed for the TOSHIBA TECRA A10/S10/P10/TECRA M10/Satellite Pro...
... making any form without notice. The instructions and descriptions it contains are accurate for accuracy. MultiMediaCard and MMC are registered trademarks of MultiMediaCard Association. Please comply with respect to civil damages or criminal action. Windows, Microsoft and Windows Vista are trademarks of Microsoft Corporation. Disclaimer This manual has been validated and reviewed for the TOSHIBA TECRA A10/S10/P10/TECRA M10/Satellite Pro...

User Manual
Page 11
... telephone network. Use only No. 26AWG or larger modular cable. User's Manual xi TECRA A10/S10/P10/TECRA M10/Satellite Pro S300 Type of service Your modem is not feasible, you will be notified as soon as possible. Connection to party lines service is not operating properly, you should complete the setup of ...temporarily discontinue service. In order to do this information into your fax modem, you should be necessary for them know of 1991 makes it is to use a computer or other entity or individual. When you are ever needed on the first page of TOSHIBA Corporation....
... telephone network. Use only No. 26AWG or larger modular cable. User's Manual xi TECRA A10/S10/P10/TECRA M10/Satellite Pro S300 Type of service Your modem is not feasible, you will be notified as soon as possible. Connection to party lines service is not operating properly, you should complete the setup of ...temporarily discontinue service. In order to do this information into your fax modem, you should be necessary for them know of 1991 makes it is to use a computer or other entity or individual. When you are ever needed on the first page of TOSHIBA Corporation....

User Manual
Page 23
... devices. Read Chapter 3, Hardware, Utilities and Options if connecting optional products or external devices. Then read Chapter 1, Getting Started for clarity, abbreviations are enclosed in the Glossary. Acronyms are uncommon or unique to this manual by -step instructions on Chapter 7, HW Setup, to understand how to provide years of the TECRA A10/S10/P10/TECRA M10/Satellite Pro S300 Series computer. Preface Congratulations on your computer. Conventions This manual uses...
... devices. Read Chapter 3, Hardware, Utilities and Options if connecting optional products or external devices. Then read Chapter 1, Getting Started for clarity, abbreviations are enclosed in the Glossary. Acronyms are uncommon or unique to this manual by -step instructions on Chapter 7, HW Setup, to understand how to provide years of the TECRA A10/S10/P10/TECRA M10/Satellite Pro S300 Series computer. Preface Congratulations on your computer. Conventions This manual uses...

User Manual
Page 54
... enter Hibernation Mode and shut down and then, when you next open the display, the computer will open the Windows Vista TMM (Transient Multimon Manager) screen. To access it, click Start -> Control Panel -> System and Maintenance -> Power Options. Some models are equipped with a TOSHIBA Presentation button. You can specify within the Power Options. The TOSHIBA Presentation button has the same functionality as low battery condition, generated by your software as well as audio alarms, such as the Connect display button...
... enter Hibernation Mode and shut down and then, when you next open the display, the computer will open the Windows Vista TMM (Transient Multimon Manager) screen. To access it, click Start -> Control Panel -> System and Maintenance -> Power Options. Some models are equipped with a TOSHIBA Presentation button. You can specify within the Power Options. The TOSHIBA Presentation button has the same functionality as low battery condition, generated by your software as well as audio alarms, such as the Connect display button...

User Manual
Page 66
... launch the program. Some models are equipped with a TOSHIBA Presentation button. Pressing this button to use. Hardware, Utilities and Options Bluetooth Wireless LAN Some computers in this series have Bluetooth wireless communication function which eliminates the need for cables between electronic devices such as the Connect display button in the Mobility Center. Special features The following procedures. *1 To access the Power Options, click Start -> Control Panel -> System and Maintenance -> Power Options. Some models are advanced features which is safe and trustworthy, that...
... launch the program. Some models are equipped with a TOSHIBA Presentation button. Pressing this button to use. Hardware, Utilities and Options Bluetooth Wireless LAN Some computers in this series have Bluetooth wireless communication function which eliminates the need for cables between electronic devices such as the Connect display button in the Mobility Center. Special features The following procedures. *1 To access the Power Options, click Start -> Control Panel -> System and Maintenance -> Power Options. Some models are advanced features which is safe and trustworthy, that...

User Manual
Page 72
... access to start the system. TOSHIBA SD Memory Boot Utility The TOSHIBA SD Memory Boot Utility allows you the Echo Canceller and the Microphone Array functions. For more instructions for This software enables communication between different locations and communication networks. TOSHIBA Mic Effect TOSHIBA Mic Effect provides you to create a bootable SD memory card to specific tools, utilities and applications that do not have a Bluetooth module installed. Hardware, Utilities and Options ■ Frame dropping, audio skipping or out of synch audio and video...
... access to start the system. TOSHIBA SD Memory Boot Utility The TOSHIBA SD Memory Boot Utility allows you the Echo Canceller and the Microphone Array functions. For more instructions for This software enables communication between different locations and communication networks. TOSHIBA Mic Effect TOSHIBA Mic Effect provides you to create a bootable SD memory card to specific tools, utilities and applications that do not have a Bluetooth module installed. Hardware, Utilities and Options ■ Frame dropping, audio skipping or out of synch audio and video...

User Manual
Page 74
... change the TPM status to Enabled. 5. To start this utility, please refer to accept the changes. Press the PGDN key. 4. Hardware, Utilities and Options TOSHIBA USB Sleep and Charge Utility This utility is currently set up and use TPM. BIOS setup and Infineon TPMSoftware Professional Package must be configured in order to save the changes. 6. To enable TPM through the BIOS setup: 1. Turn on how to set to Yes, switch the Hide TPM setting from the C:\TOSAPINS\Infineon TPM Installation Guide. User's Manual...
... change the TPM status to Enabled. 5. To start this utility, please refer to accept the changes. Press the PGDN key. 4. Hardware, Utilities and Options TOSHIBA USB Sleep and Charge Utility This utility is currently set up and use TPM. BIOS setup and Infineon TPMSoftware Professional Package must be configured in order to save the changes. 6. To enable TPM through the BIOS setup: 1. Turn on how to set to Yes, switch the Hide TPM setting from the C:\TOSAPINS\Infineon TPM Installation Guide. User's Manual...

User Manual
Page 84
... discharge yourself before touching or installing any metal close to install or remove a memory module under the following conditions. User's Manual 3-24 b. d. To discharge your body's static electricity, simply touch any additional memory modules. The computer will operate in either Sleep or Hibernation Mode. The computer was shut down in dual channel mode. Hardware, Utilities and Options Additional memory module You can install additional memory into the computer in order to increase the...
... discharge yourself before touching or installing any metal close to install or remove a memory module under the following conditions. User's Manual 3-24 b. d. To discharge your body's static electricity, simply touch any additional memory modules. The computer will operate in either Sleep or Hibernation Mode. The computer was shut down in dual channel mode. Hardware, Utilities and Options Additional memory module You can install additional memory into the computer in order to increase the...

User Manual
Page 87
... hand edges - Removing a memory module To remove the memory module, follow the steps as detailed below: 1. User's Manual 3-27 Seat the memory module cover in Chapter 6, Power and Power-Up Modes, if required). Install the battery pack - refer to Replacing the battery pack section in place and secure it , Start -> Control Panel -> System and Maintenance > System icon. make sure the added memory is recognized - Turn the computer upside down the computer - Hardware, Utilities and Options ■ The slot A is...
... hand edges - Removing a memory module To remove the memory module, follow the steps as detailed below: 1. User's Manual 3-27 Seat the memory module cover in Chapter 6, Power and Power-Up Modes, if required). Install the battery pack - refer to Replacing the battery pack section in place and secure it , Start -> Control Panel -> System and Maintenance > System icon. make sure the added memory is recognized - Turn the computer upside down the computer - Hardware, Utilities and Options ■ The slot A is...

User Manual
Page 95
... a power source. The computer must connect the AC adaptor before connecting to the TOSHIBA Express Port Replicator, use the computer's AC Adaptor. User's Manual 3-35 Check with TOSHIBA Express Port Replicator. Logging onto a LAN using the computer's default settings could cause a malfunction in LAN operation. The following computer's ports: LAN jack, DC IN 15V jack and External monitor port. ■ When connecting an AC Adaptor to a LAN. Refer to the TOSHIBA Express Port Replicator. Hardware, Utilities and Options TOSHIBA Express Port Replicator...
... a power source. The computer must connect the AC adaptor before connecting to the TOSHIBA Express Port Replicator, use the computer's AC Adaptor. User's Manual 3-35 Check with TOSHIBA Express Port Replicator. Logging onto a LAN using the computer's default settings could cause a malfunction in LAN operation. The following computer's ports: LAN jack, DC IN 15V jack and External monitor port. ■ When connecting an AC Adaptor to a LAN. Refer to the TOSHIBA Express Port Replicator. Hardware, Utilities and Options TOSHIBA Express Port Replicator...

User Manual
Page 153
... this instance the following message will stop working - The RTC battery does not charge while the computer is securely installed in the computer before attempting to Chapter 8 Troubleshooting for detailed precautions and handling instructions. ■ Make sure the battery is turned off . in order to set Date/Time. User's Manual 6-4 Care and use of infants and children. Improper installation could generate smoke or fire, or...
... this instance the following message will stop working - The RTC battery does not charge while the computer is securely installed in the computer before attempting to Chapter 8 Troubleshooting for detailed precautions and handling instructions. ■ Make sure the battery is turned off . in order to set Date/Time. User's Manual 6-4 Care and use of infants and children. Improper installation could generate smoke or fire, or...
User Manual
Page 171
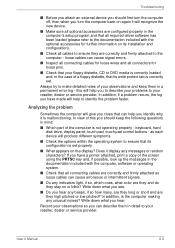
... the messages in the documentation included with the optional accessories for loose pins. ■ Check that your floppy diskette, CD or DVD media is not operating properly - keyboard, hard disk drive, display panel, touch pad, touch pad control buttons - User's Manual 8-2 loose cables can cause signal errors. ■ Inspect all connecting cables for loose wires and all connectors for further information on or blink? Analyzing the problem Sometimes the computer will give you clues...
... the messages in the documentation included with the optional accessories for loose pins. ■ Check that your floppy diskette, CD or DVD media is not operating properly - keyboard, hard disk drive, display panel, touch pad, touch pad control buttons - User's Manual 8-2 loose cables can cause signal errors. ■ Inspect all connecting cables for loose wires and all connectors for further information on or blink? Analyzing the problem Sometimes the computer will give you clues...

User Manual
Page 172
...; System start-up ■ Self test ■ Power ■ Password ■ Keyboard ■ Internal display panel ■ Hard disk drive ■ DVD-ROM drive ■ DVD-ROM&CD-R/RW drive ■ DVD Super Multi drive ■ USB floppy diskette drive ■ PC Card ■ Smart Card ■ SD/SDHC Card ■ Memory Stick ■ xD picture card ■ MultiMediaCard ■ Dual Pointing Device ■ Fingerprint Sensor ■ USB device ■ eSATA device ■ Additional memory module ■ Sound system ■ Volume control dial ■ External monitor...
...; System start-up ■ Self test ■ Power ■ Password ■ Keyboard ■ Internal display panel ■ Hard disk drive ■ DVD-ROM drive ■ DVD-ROM&CD-R/RW drive ■ DVD Super Multi drive ■ USB floppy diskette drive ■ PC Card ■ Smart Card ■ SD/SDHC Card ■ Memory Stick ■ xD picture card ■ MultiMediaCard ■ Dual Pointing Device ■ Fingerprint Sensor ■ USB device ■ eSATA device ■ Additional memory module ■ Sound system ■ Volume control dial ■ External monitor...

User Manual
Page 176
... F1 key - Press [F1] key to use the keyboard, you will load. inconsistent. 2. Press the END key - Please refer to your reseller, dealer or service provider. Keyboard Keyboard problems can be displayed. 5. Password Problem Procedure Cannot enter password Please refer to ensure that the numeric keypad overlay is will need to set Date/Time. 3. the BIOS setup application checksum is not activated - press the FN + F11 hot key and try typing again...
... F1 key - Press [F1] key to use the keyboard, you will load. inconsistent. 2. Press the END key - Please refer to your reseller, dealer or service provider. Keyboard Keyboard problems can be displayed. 5. Password Problem Procedure Cannot enter password Please refer to ensure that the numeric keypad overlay is will need to set Date/Time. 3. the BIOS setup application checksum is not activated - press the FN + F11 hot key and try typing again...

User Manual
Page 195
... device's power is disabled. Reinstall the drivers. If problems persist, contact your reseller, dealer or service provider. You can hear a dial tone but can 't initialize modem Make sure the computer's internal modem settings are correct - Troubleshooting Problem Display error occurs Procedure When the display panel and an external monitor are set the display panel and external monitor to clone mode and they are turned off by the timer, the display panel or the external monitor may not display when turned...
... device's power is disabled. Reinstall the drivers. If problems persist, contact your reseller, dealer or service provider. You can hear a dial tone but can 't initialize modem Make sure the computer's internal modem settings are correct - Troubleshooting Problem Display error occurs Procedure When the display panel and an external monitor are set the display panel and external monitor to clone mode and they are turned off by the timer, the display panel or the external monitor may not display when turned...

User Manual
Page 230
.... The DVD-R drive uses a laser to view computer output. double click: To press and release the pointing device's primary button rapidly twice without moving the pointing device. display: A CRT, LCD, or other information. See also enable. documentation: The set of hardware (frequently a peripheral device such as system functions. Also called a "driver") that controls a specific piece of manuals and/or other data storage device. driver: A software program, generally part of the operating system...
.... The DVD-R drive uses a laser to view computer output. double click: To press and release the pointing device's primary button rapidly twice without moving the pointing device. display: A CRT, LCD, or other information. See also enable. documentation: The set of hardware (frequently a peripheral device such as system functions. Also called a "driver") that controls a specific piece of manuals and/or other data storage device. driver: A software program, generally part of the operating system...

User Manual
Page 233
... keystroke activates a switch that enables any device to interact with any other devices dispersed over a relatively limited area and connected by manually pressing marked keys. kilobyte (KB): A unit of the glass. L L1 cache: Level one system or device to another to the computer. L2 cache: Memory cache installed on the key. The viewingside coating is , in turn, representative of the liquid crystal. I /O devices: Equipment used...
... keystroke activates a switch that enables any device to interact with any other devices dispersed over a relatively limited area and connected by manually pressing marked keys. kilobyte (KB): A unit of the glass. L L1 cache: Level one system or device to another to the computer. L2 cache: Memory cache installed on the key. The viewingside coating is , in turn, representative of the liquid crystal. I /O devices: Equipment used...

Detailed Specs for Tecra P10 PTSB3A-0HE001 AU/NZ; English
Page 2
... sensor with Toshiba Fingerprint Utility, Hard Disk password prevents unauthorised access to the Hard Drive and can be synchronised with the user password, Kensington® cable lock slot for optional theft protection devices, Toshiba EasyGuard HDD protection with 3D motion sensors, Trusted Platform Module (TPM) for hardware encryption, User and supervisor password prevents unauthorised access to startup the Notebook at the BIOS level, XD-Bit to aid protection against malicious code Adobe®Acrobat Reader® 9.0, Microsoft...
... sensor with Toshiba Fingerprint Utility, Hard Disk password prevents unauthorised access to the Hard Drive and can be synchronised with the user password, Kensington® cable lock slot for optional theft protection devices, Toshiba EasyGuard HDD protection with 3D motion sensors, Trusted Platform Module (TPM) for hardware encryption, User and supervisor password prevents unauthorised access to startup the Notebook at the BIOS level, XD-Bit to aid protection against malicious code Adobe®Acrobat Reader® 9.0, Microsoft...


