
User Guide
Page 5
Telephone Company Procedures The goal of service may request that temporary discontinuance of the telephone company is to make changes in a margin at (949) 859-4273. If Problems Arise If this equipment, for any person to use a computer or other electronic device, including Fax machines, to the fax software instructions installed on this change. But if advanced notice is not practical...
Telephone Company Procedures The goal of service may request that temporary discontinuance of the telephone company is to make changes in a margin at (949) 859-4273. If Problems Arise If this equipment, for any person to use a computer or other electronic device, including Fax machines, to the fax software instructions installed on this change. But if advanced notice is not practical...
User Guide
Page 28
... 47 Opening the display panel 47 Your computer's features and specifications ....48 Turning on the power 48 Adding memory (optional 49 Installing a memory module 50 Removing a memory module 55 Checking total memory 57 Hard Drive Recovery Utilities 58 Creating Recovery CDs/DVDs 58 Hard Disk Drive Recovery options 60 Hard Disk Drive Recovery using the Recovery media 64 Installing drivers and applications 65 Using the Toshiba Dual Pointing Device 66 Using the TouchPad 66 Scrolling with the TouchPad 67 Control buttons 67 Disabling or enabling the TouchPad 67 Using external display...
... 47 Opening the display panel 47 Your computer's features and specifications ....48 Turning on the power 48 Adding memory (optional 49 Installing a memory module 50 Removing a memory module 55 Checking total memory 57 Hard Drive Recovery Utilities 58 Creating Recovery CDs/DVDs 58 Hard Disk Drive Recovery options 60 Hard Disk Drive Recovery using the Recovery media 64 Installing drivers and applications 65 Using the Toshiba Dual Pointing Device 66 Using the TouchPad 66 Scrolling with the TouchPad 67 Control buttons 67 Disabling or enabling the TouchPad 67 Using external display...
User Guide
Page 50
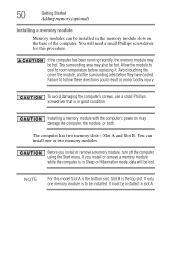
... is in Sleep or Hibernation mode, data will need a small Phillips screwdriver for this model Slot A is the bottom slot. The surrounding area may also be hot. Before you install or remove a memory module while the computer is in the memory module slots on may be hot. 50 Getting Started Adding memory (optional) Installing a memory module Memory modules can install one memory module is the top slot. Avoid touching the cover, the module, and the surrounding area before replacing it must...
... is in Sleep or Hibernation mode, data will need a small Phillips screwdriver for this model Slot A is the bottom slot. The surrounding area may also be hot. Before you install or remove a memory module while the computer is in the memory module slots on may be hot. 50 Getting Started Adding memory (optional) Installing a memory module Memory modules can install one memory module is the top slot. Avoid touching the cover, the module, and the surrounding area before replacing it must...
User Guide
Page 55
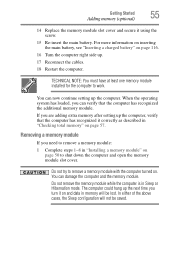
... it using the screw. 15 Re-insert the main battery. When the operating system has loaded, you need to remove a memory module: 1 Complete steps 1-8 in "Installing a memory module" on page 50 to remove a memory module with the computer turned on page 57. For more information on inserting the main battery, see "Inserting a charged battery" on and data in Sleep or Hibernation mode. In either of the above cases, the Sleep configuration...
... it using the screw. 15 Re-insert the main battery. When the operating system has loaded, you need to remove a memory module: 1 Complete steps 1-8 in "Installing a memory module" on page 50 to remove a memory module with the computer turned on page 57. For more information on inserting the main battery, see "Inserting a charged battery" on and data in Sleep or Hibernation mode. In either of the above cases, the Sleep configuration...
User Guide
Page 57
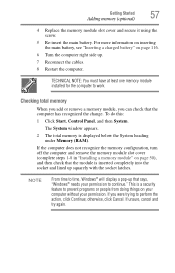
Getting Started 57 Adding memory (optional) 4 Replace the memory module slot cover and secure it using the screw. 5 Re-insert the main battery. NOTE From time to perform the action, click Continue; Checking total memory When you add or remove a memory module, you were trying to time, Windows® will display a pop-up that says, "Windows® needs your permission. If unsure, cancel and try again. The System window appears...
Getting Started 57 Adding memory (optional) 4 Replace the memory module slot cover and secure it using the screw. 5 Re-insert the main battery. NOTE From time to perform the action, click Continue; Checking total memory When you add or remove a memory module, you were trying to time, Windows® will display a pop-up that says, "Windows® needs your permission. If unsure, cancel and try again. The System window appears...
User Guide
Page 60
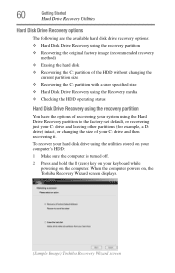
... options: ❖ Hard Disk Drive Recovery using the recovery partition ❖ Recovering the original factory image (recommended recovery method) ❖ Erasing the hard disk ❖ Recovering the C: partition of the HDD without changing the current partition size ❖ Recovering the C: partition with a user specified size ❖ Hard Disk Drive Recovery using the Recovery media ❖ Checking the HDD operating status Hard Disk Drive Recovery using the recovery partition You have the options of your keyboard while powering on , the Toshiba Recovery Wizard screen displays...
... options: ❖ Hard Disk Drive Recovery using the recovery partition ❖ Recovering the original factory image (recommended recovery method) ❖ Erasing the hard disk ❖ Recovering the C: partition of the HDD without changing the current partition size ❖ Recovering the C: partition with a user specified size ❖ Hard Disk Drive Recovery using the Recovery media ❖ Checking the HDD operating status Hard Disk Drive Recovery using the recovery partition You have the options of your keyboard while powering on , the Toshiba Recovery Wizard screen displays...
User Guide
Page 147
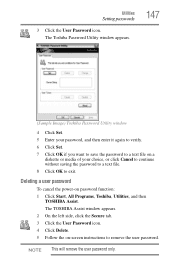
..., or click Cancel to continue without saving the password to a text file. 8 Click OK to remove the user password. The TOSHIBA Assist window appears. 2 On the left side, click the Secure tab. 3 Click the User Password icon. 4 Click Delete. 5 Follow the on password function: 1 Click Start, All Programs, Toshiba, Utilities, and then TOSHIBA Assist. Utilities Setting passwords 3 Click the User Password icon. Deleting a user password To cancel the power-on -screen instructions to exit.
..., or click Cancel to continue without saving the password to a text file. 8 Click OK to remove the user password. The TOSHIBA Assist window appears. 2 On the left side, click the Secure tab. 3 Click the User Password icon. 4 Click Delete. 5 Follow the on password function: 1 Click Start, All Programs, Toshiba, Utilities, and then TOSHIBA Assist. Utilities Setting passwords 3 Click the User Password icon. Deleting a user password To cancel the power-on -screen instructions to exit.
User Guide
Page 157
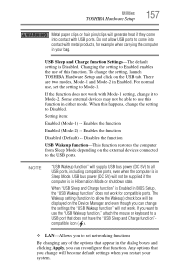
... USB bus power (DC 5V) to Mode-2. Setting item: Enabled (Mode-1) -- Enables the function Disabled (Default) -- Any options that function. If you want to use the "USB Wakeup function," attach the mouse or keyboard to a USB port that does not have the "USB Sleep and Charge function"compatible icon ( ). ❖ LAN-Allows you can change the setting to Disabled. Enables the function Enabled (Mode-2) -- Do not allow the Wakeup) check box will be displayed on the USB tab. USB Sleep and Charge function Settings-The default setting is in Enabled. Some external devices...
... USB bus power (DC 5V) to Mode-2. Setting item: Enabled (Mode-1) -- Enables the function Disabled (Default) -- Any options that function. If you want to use the "USB Wakeup function," attach the mouse or keyboard to a USB port that does not have the "USB Sleep and Charge function"compatible icon ( ). ❖ LAN-Allows you can change the setting to Disabled. Enables the function Enabled (Mode-2) -- Do not allow the Wakeup) check box will be displayed on the USB tab. USB Sleep and Charge function Settings-The default setting is in Enabled. Some external devices...
User Guide
Page 174
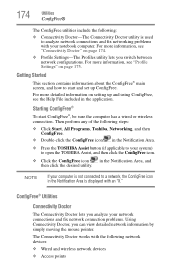
... you analyze your computer is displayed with an "X." 174 Utilities ConfigFree® The ConfigFree utilities include the following: ❖ Connectivity Doctor-The Connectivity Doctor utility is used to a network, the ConfigFree icon in the Notification Area is not connected to analyze network connections and fix networking problems with the following network devices: ❖ Wired and wireless network devices ❖ Access points NOTE If your network connections and fix network connection problems. Using Connectivity Doctor, you switch between network configurations.
... you analyze your computer is displayed with an "X." 174 Utilities ConfigFree® The ConfigFree utilities include the following: ❖ Connectivity Doctor-The Connectivity Doctor utility is used to a network, the ConfigFree icon in the Notification Area is not connected to analyze network connections and fix networking problems with the following network devices: ❖ Wired and wireless network devices ❖ Access points NOTE If your network connections and fix network connection problems. Using Connectivity Doctor, you switch between network configurations.
User Guide
Page 175
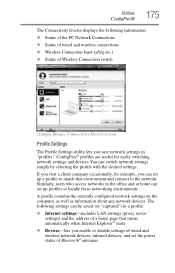
... information about any network devices. ConfigFree® profiles are useful for example, you can switch network settings simply by selecting the profile with the desired settings. Utilities ConfigFree® 175 The Connectivity Doctor displays the following settings can set up a profile to match that opens automatically when Internet Explorer® starts ❖ Devices-lets you enable or disable settings of wired and wireless network devices, infrared devices, and set the power status of Bluetooth® antennas
... information about any network devices. ConfigFree® profiles are useful for example, you can switch network settings simply by selecting the profile with the desired settings. Utilities ConfigFree® 175 The Connectivity Doctor displays the following settings can set up a profile to match that opens automatically when Internet Explorer® starts ❖ Devices-lets you enable or disable settings of wired and wireless network devices, infrared devices, and set the power status of Bluetooth® antennas

User Guide
Page 181
... start . ❖ The operating system responds differently from an AC adaptor that is rated for less current (amperage) than that the AC adaptor is the correct unit for your work routine, you are familiar with Networking The Windows® Advanced Boot Options menu displays these problems, use the options in some way such as installing a new program or adding a device. The Windows® operating system is not working...
... start . ❖ The operating system responds differently from an AC adaptor that is rated for less current (amperage) than that the AC adaptor is the correct unit for your work routine, you are familiar with Networking The Windows® Advanced Boot Options menu displays these problems, use the options in some way such as installing a new program or adding a device. The Windows® operating system is not working...
User Guide
Page 185
... instructions in "Removing a memory module" on page 55. 4 Reinstall the memory module, following the instructions in "Installing a memory module" on page 50, and making sure the module is seated properly. 5 Check for the error again. 6 If the error recurs, remove the memory module entirely and check for updating the driver or rolling back the driver in the lower-right part of the Start menu. If only one device to Windows® online Help. Slot B is not using functions...
... instructions in "Removing a memory module" on page 55. 4 Reinstall the memory module, following the instructions in "Installing a memory module" on page 50, and making sure the module is seated properly. 5 Check for the error again. 6 If the error recurs, remove the memory module entirely and check for updating the driver or rolling back the driver in the lower-right part of the Start menu. If only one device to Windows® online Help. Slot B is not using functions...
User Guide
Page 187
... a device, such as a PC Card or memory module, that the program does not assign different meanings to the Lock button in while the computer was turned on . Using the computer's TouchPad: 1 Click Start, and then click the arrow next to any of the Start menu. After a period of keyboard. For more information on maintaining battery power, see "Charging batteries" on , press Fn + F10 to turn off the cursor control mode light...
... a device, such as a PC Card or memory module, that the program does not assign different meanings to the Lock button in while the computer was turned on . Using the computer's TouchPad: 1 Click Start, and then click the arrow next to any of the Start menu. After a period of keyboard. For more information on maintaining battery power, see "Charging batteries" on , press Fn + F10 to turn off the cursor control mode light...
User Guide
Page 188
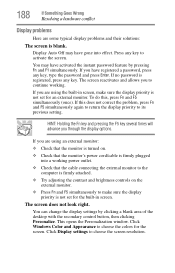
... a password, press any key, type the password and press Enter. If you are some typical display problems and their solutions: The screen is firmly plugged into effect. Click Windows Color and Appearance to its previous setting. If you to choose the screen resolution. If you through the display options. Click Display settings to continue working power outlet. ❖ Check that the monitor's power cord/cable is blank. This opens the Personalization window...
... a password, press any key, type the password and press Enter. If you are some typical display problems and their solutions: The screen is firmly plugged into effect. Click Windows Color and Appearance to its previous setting. If you to choose the screen resolution. If you through the display options. Click Display settings to continue working power outlet. ❖ Check that the monitor's power cord/cable is blank. This opens the Personalization window...

User Guide
Page 197
... assigned to the Internet. If, for setting and managing SSIDs. ❖ Check the Control Panel's Hardware and Sound Device Manager to verify that it has network access, and can connect to the access point you should confer with the Wi-Fi® adapter. ❖ If another computer is loaded. SSIDs are attempting to open the command prompt. 4 Enter IPCONFIG /ALL and press Enter. Toshiba provides a Client Manager utility for example...
... assigned to the Internet. If, for setting and managing SSIDs. ❖ Check the Control Panel's Hardware and Sound Device Manager to verify that it has network access, and can connect to the access point you should confer with the Wi-Fi® adapter. ❖ If another computer is loaded. SSIDs are attempting to open the command prompt. 4 Enter IPCONFIG /ALL and press Enter. Toshiba provides a Client Manager utility for example...

User Guide
Page 234
... running and have the operating system automatically recognize the change. LAN (local area network) - A 3.5-inch diskette that enables any device to help improve processing speed. Internet - L L1 (level one) cache - L2 (level two) cache - K keyboard shortcut - When you turn on the motherboard to interact with the Fn key can set system options or control system parameters, such as a mouse. A key or combination of keys that provides electronic...
... running and have the operating system automatically recognize the change. LAN (local area network) - A 3.5-inch diskette that enables any device to help improve processing speed. Internet - L L1 (level one) cache - L2 (level two) cache - K keyboard shortcut - When you turn on the motherboard to interact with the Fn key can set system options or control system parameters, such as a mouse. A key or combination of keys that provides electronic...

User Guide
Page 240
... battery changing 114 charge indicator light 46, 107 charge not lasting 186 charging 44, 46 conserving power 111 disposal 119 low charge 109 monitoring power 46, 107 240 not charging 186 notifications 110 power plan 216 power plan hot key 113 real-time clock (RTC) 104 removing 114 BIOS Setup see TOSHIBA Hardware Setup Bridge Media Adapter inserting memory media 134 removing memory media 134 button power 49, 59 start 123 C CD playing an audio 98 CD, using 95 character keys 86 charging the battery 46 checking device...
... battery changing 114 charge indicator light 46, 107 charge not lasting 186 charging 44, 46 conserving power 111 disposal 119 low charge 109 monitoring power 46, 107 240 not charging 186 notifications 110 power plan 216 power plan hot key 113 real-time clock (RTC) 104 removing 114 BIOS Setup see TOSHIBA Hardware Setup Bridge Media Adapter inserting memory media 134 removing memory media 134 button power 49, 59 start 123 C CD playing an audio 98 CD, using 95 character keys 86 charging the battery 46 checking device...
User Guide
Page 241
... connecting to a power source 44 connection set up 125 control buttons 67 Ctrl keys 87 D desktop creating new icon 122 major features 122 desktop exploration 121 desktop icons 122 Device Manager 184 checking properties 184 devices keyboard 70 mouse 70 Disk Defragmenter 190 disk drive corrupted/damaged data files 191 missing files/trouble accessing a disk 190 running slow 190 diskette drive cannot insert a diskette 191 cannot read a diskette 191 connecting 72 external, connecting 72 display...
... connecting to a power source 44 connection set up 125 control buttons 67 Ctrl keys 87 D desktop creating new icon 122 major features 122 desktop exploration 121 desktop icons 122 Device Manager 184 checking properties 184 devices keyboard 70 mouse 70 Disk Defragmenter 190 disk drive corrupted/damaged data files 191 missing files/trouble accessing a disk 190 running slow 190 diskette drive cannot insert a diskette 191 cannot read a diskette 191 connecting 72 external, connecting 72 display...
User Guide
Page 243
... monitor 68 connecting 68 not working 188 mouse installing 70 mouse utility 153 N network accessing 125 Connect to the Internet Wizard 125 networking wireless 124 Notification Area 123 O opening the display panel 47 optical disc positioning 97 optical discs handling 97 inserting 96 removing 100 optical drive problems 191 troubleshooting 191 using 95 optical media creating 99 other documentation 38 overlay keys 88 P password deleting a supervisor 146 disabling a user 147 setting a user 146 supervisor set up 145 types 144 passwords instant, using 144 setting 144 PC Card...
... monitor 68 connecting 68 not working 188 mouse installing 70 mouse utility 153 N network accessing 125 Connect to the Internet Wizard 125 networking wireless 124 Notification Area 123 O opening the display panel 47 optical disc positioning 97 optical discs handling 97 inserting 96 removing 100 optical drive problems 191 troubleshooting 191 using 95 optical media creating 99 other documentation 38 overlay keys 88 P password deleting a supervisor 146 disabling a user 147 setting a user 146 supervisor set up 145 types 144 passwords instant, using 144 setting 144 PC Card...
User Guide
Page 244
... Device Manager 184 disk drive is slow 190 display is blank 188 external display not working 189 external monitor 188 faulty memory 185 hardware conflict 183 high-pitched noise 193 Internet bookmarked site not found 182 Internet connection is slow 182 keyboard not responding 179 missing files/trouble accessing a disk 190 modem not receiving or transmitting 196 no sound 192 non-system disk or disk error 180 PC Card 193 checklist 193 error occurs 195 hot...
... Device Manager 184 disk drive is slow 190 display is blank 188 external display not working 189 external monitor 188 faulty memory 185 hardware conflict 183 high-pitched noise 193 Internet bookmarked site not found 182 Internet connection is slow 182 keyboard not responding 179 missing files/trouble accessing a disk 190 modem not receiving or transmitting 196 no sound 192 non-system disk or disk error 180 PC Card 193 checklist 193 error occurs 195 hot...


