User Manual
Page 5
... utility commission, public service commission or corporation commission for repair or limited warranty information, please contact Toshiba Corporation, Toshiba America Information Systems, Inc. Also, you to make changes in their equipment, operations...software instructions installed on the first page of the sending machine or such business, other entity, or individual. (The telephone number provided may be necessary for which charges exceed local or long-distance transmission charges.) In order to program this change. If Problems Arise If this equipment, for information. If trouble...
... utility commission, public service commission or corporation commission for repair or limited warranty information, please contact Toshiba Corporation, Toshiba America Information Systems, Inc. Also, you to make changes in their equipment, operations...software instructions installed on the first page of the sending machine or such business, other entity, or individual. (The telephone number provided may be necessary for which charges exceed local or long-distance transmission charges.) In order to program this change. If Problems Arise If this equipment, for information. If trouble...

User Manual
Page 28
... 47 Opening the display panel 47 Your computer's features and specifications ....48 Turning on the power 48 Adding memory (optional 49 Installing a memory module 50 Removing a memory module 54 Checking total memory 56 Hard Drive Recovery Utilities 56 Creating Recovery CDs/DVDs 57 Hard Disk Drive Recovery options 58 Hard Disk Drive Recovery using the Recovery media 63 Installing drivers and applications 64 Using the Toshiba Dual Pointing Device 64 Using the TouchPad 65 Scrolling with the TouchPad 66 Control buttons 66 Disabling or enabling the TouchPad 66 Using external display...
... 47 Opening the display panel 47 Your computer's features and specifications ....48 Turning on the power 48 Adding memory (optional 49 Installing a memory module 50 Removing a memory module 54 Checking total memory 56 Hard Drive Recovery Utilities 56 Creating Recovery CDs/DVDs 57 Hard Disk Drive Recovery options 58 Hard Disk Drive Recovery using the Recovery media 63 Installing drivers and applications 64 Using the Toshiba Dual Pointing Device 64 Using the TouchPad 65 Scrolling with the TouchPad 66 Control buttons 66 Disabling or enabling the TouchPad 66 Using external display...

User Manual
Page 50
... be installed in slot A. Avoid touching the cover, the module, and the surrounding area before replacing it must be hot. If you install or remove a memory module, turn off computer or Shut Down window appears. 2 Click Turn Off or Shut Down. The computer has two memory slots-Slot A and Slot B. NOTE For this procedure. If only one or two memory modules. Failure to be installed, it . The Turn off the computer using the Start menu...
... be installed in slot A. Avoid touching the cover, the module, and the surrounding area before replacing it must be hot. If you install or remove a memory module, turn off computer or Shut Down window appears. 2 Click Turn Off or Shut Down. The computer has two memory slots-Slot A and Slot B. NOTE For this procedure. If only one or two memory modules. Failure to be installed, it . The Turn off the computer using the Start menu...
User Manual
Page 51
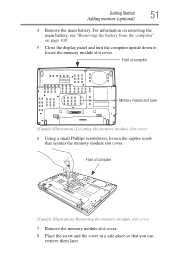
... Memory module slot cover (Sample Illustration) Locating the memory module slot cover 6 Using a small Phillips screwdriver, loosen the captive screw that you can retrieve them later. Getting Started 51 Adding memory (optional) 4 Remove the main battery. For information on removing the main battery, see "Removing the battery from the computer" on page 109. 5 Close the display panel and turn the computer upside down to locate the memory module slot cover. Front of computer (Sample Illustration) Removing the memory module slot cover 7 Remove the memory module slot cover...
... Memory module slot cover (Sample Illustration) Locating the memory module slot cover 6 Using a small Phillips screwdriver, loosen the captive screw that you can retrieve them later. Getting Started 51 Adding memory (optional) 4 Remove the main battery. For information on removing the main battery, see "Removing the battery from the computer" on page 109. 5 Close the display panel and turn the computer upside down to locate the memory module slot cover. Front of computer (Sample Illustration) Removing the memory module slot cover 7 Remove the memory module slot cover...

User Manual
Page 54
... the cables. 18 Restart the computer. Removing a memory module If you are adding extra memory after setting up the computer, verify that the computer has recognized the additional memory module. 54 Getting Started Adding memory (optional) NOTE For this model, Slot A is the top slot. TECHNICAL NOTE: You must be installed in slot A. 14 Replace the memory module slot cover and secure it correctly as described in "Installing a memory module" on page 110. 16 Turn...
... the cables. 18 Restart the computer. Removing a memory module If you are adding extra memory after setting up the computer, verify that the computer has recognized the additional memory module. 54 Getting Started Adding memory (optional) NOTE For this model, Slot A is the top slot. TECHNICAL NOTE: You must be installed in slot A. 14 Replace the memory module slot cover and secure it correctly as described in "Installing a memory module" on page 110. 16 Turn...
User Manual
Page 55
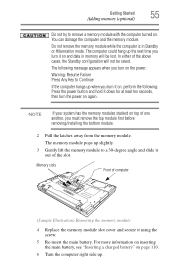
... inserting the main battery, see "Inserting a charged battery" on . In either of computer (Sample Illustration) Removing the memory module 4 Replace the memory module slot cover and secure it using the screw. 5 Re-insert the main battery. Memory slots Front of the above cases, the Standby configuration will be saved. The memory module pops up slightly. 3 Gently lift the memory module to remove a memory module with the computer turned on page 110. 6 Turn the computer right...
... inserting the main battery, see "Inserting a charged battery" on . In either of computer (Sample Illustration) Removing the memory module 4 Replace the memory module slot cover and secure it using the screw. 5 Re-insert the main battery. Memory slots Front of the above cases, the Standby configuration will be saved. The memory module pops up slightly. 3 Gently lift the memory module to remove a memory module with the computer turned on page 110. 6 Turn the computer right...

User Manual
Page 56
... remove the memory module slot cover (complete steps 1-8 in "Installing a memory module" on page 50), and then check that the computer has recognized the change. Hard Drive Recovery Utilities (Available on page 57. 56 Getting Started Hard Drive Recovery Utilities 7 Reconnect the cables. 8 Restart the computer. Checking total memory When you add or remove a memory module, you can check that the module is strongly recommended that you to work. For more information on creating Recovery media see "Creating Recovery CDs/DVDs...
... remove the memory module slot cover (complete steps 1-8 in "Installing a memory module" on page 50), and then check that the computer has recognized the change. Hard Drive Recovery Utilities (Available on page 57. 56 Getting Started Hard Drive Recovery Utilities 7 Reconnect the cables. 8 Restart the computer. Checking total memory When you add or remove a memory module, you can check that the module is strongly recommended that you to work. For more information on creating Recovery media see "Creating Recovery CDs/DVDs...
User Manual
Page 66
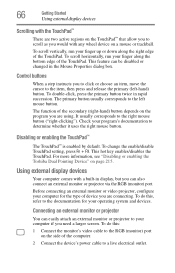
... right mouse button. For more information, see "Disabling or enabling the Toshiba Dual Pointing Device" on the side of the TouchPad. To do this , refer to the documentation for the type of the secondary (right-hand) button depends on a mouse or trackball. To do this : 1 Connect the monitor's video cable to the RGB (monitor) port on page 215. 66 Getting Started Using external display devices Scrolling with the TouchPad™ There are two active...
... right mouse button. For more information, see "Disabling or enabling the Toshiba Dual Pointing Device" on the side of the TouchPad. To do this , refer to the documentation for the type of the secondary (right-hand) button depends on a mouse or trackball. To do this : 1 Connect the monitor's video cable to the RGB (monitor) port on page 215. 66 Getting Started Using external display devices Scrolling with the TouchPad™ There are two active...
User Manual
Page 144
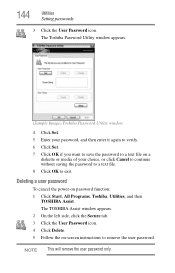
... click Cancel to continue without saving the password to a text file. 8 Click OK to remove the user password. 144 Utilities Setting passwords 3 Click the User Password icon. The TOSHIBA Assist window appears. 2 On the left side, click the Secure tab. 3 Click the User Password icon. 4 Click Delete. 5 Follow the on password function: 1 Click Start, All Programs, Toshiba, Utilities, and then TOSHIBA Assist. Deleting a user password To cancel the power-on -screen instructions to exit.
... click Cancel to continue without saving the password to a text file. 8 Click OK to remove the user password. 144 Utilities Setting passwords 3 Click the User Password icon. The TOSHIBA Assist window appears. 2 On the left side, click the Secure tab. 3 Click the User Password icon. 4 Click Delete. 5 Follow the on password function: 1 Click Start, All Programs, Toshiba, Utilities, and then TOSHIBA Assist. Deleting a user password To cancel the power-on -screen instructions to exit.
User Manual
Page 177
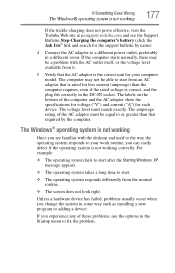
... a hardware device has failed, problems usually occur when you experience any of the AC adaptor must match exactly. The voltage level must be a problem with the desktop and used to the way the operating system responds to fix the problem. If the computer starts normally, there may not be able to a different power outlet, preferably in the Startup menu to your computer model...
... a hardware device has failed, problems usually occur when you experience any of the AC adaptor must match exactly. The voltage level must be a problem with the desktop and used to the way the operating system responds to fix the problem. If the computer starts normally, there may not be able to a different power outlet, preferably in the Startup menu to your computer model...

User Manual
Page 186
...-in screen, make sure the display priority is not set for an external monitor. The Settings tab allows you to activate the screen. To reduce the amount of the way the screen produces colors. If you are using an external monitor: ❖ Check that the monitor is turned on. ❖ Check that the cable connecting the external monitor to the computer is firmly attached. ❖ Try adjusting the contrast and brightness controls...
...-in screen, make sure the display priority is not set for an external monitor. The Settings tab allows you to activate the screen. To reduce the amount of the way the screen produces colors. If you are using an external monitor: ❖ Check that the monitor is turned on. ❖ Check that the cable connecting the external monitor to the computer is firmly attached. ❖ Try adjusting the contrast and brightness controls...
User Manual
Page 196
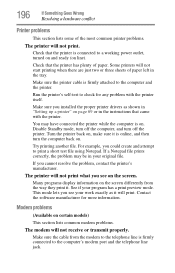
... any problem with the printer. Make sure the printer cable is connected to print a short test file using Notepad. For example, you cannot resolve the problem, contact the printer's manufacturer. If you could create and attempt to a working power outlet, turned on and ready (on certain models) This section lists common modem problems. The modem will not print. You may be in "Setting up...
... any problem with the printer. Make sure the printer cable is connected to print a short test file using Notepad. For example, you cannot resolve the problem, contact the printer's manufacturer. If you could create and attempt to a working power outlet, turned on and ready (on certain models) This section lists common modem problems. The modem will not print. You may be in "Setting up...
User Manual
Page 199
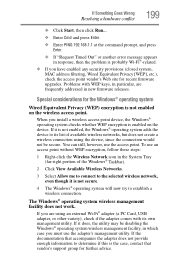
... available wireless networks, but does not create a wireless connection using an external Wi-Fi® adapter (a PC Card, USB adapter, or other variety), check if the adapter comes with WEP keys, in particular, are using the device, since the connection would not be disabling the Windows® operating system wireless management facility, in new firmware releases. Problems with its list of the Windows® Taskbar). 2 Click View Available Wireless Networks. 3 Select Allow me to connect to the selected wireless network, even...
... available wireless networks, but does not create a wireless connection using an external Wi-Fi® adapter (a PC Card, USB adapter, or other variety), check if the adapter comes with WEP keys, in particular, are using the device, since the connection would not be disabling the Windows® operating system wireless management facility, in new firmware releases. Problems with its list of the Windows® Taskbar). 2 Click View Available Wireless Networks. 3 Select Allow me to connect to the selected wireless network, even...
User Manual
Page 204
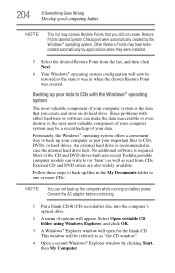
...) disc into recent Toshiba portable computer models can make the data inaccessible or even destroy it was in when the chosen Restore Point was created. 204 If Something Goes Wrong Develop good computing habits NOTE This list may contain Restore Points that you did not create. An external hard drive is required. Select Open writable CD folder using Windows Explorer, and click OK. 3 A Windows® Explorer window...
...) disc into recent Toshiba portable computer models can make the data inaccessible or even destroy it was in when the chosen Restore Point was created. 204 If Something Goes Wrong Develop good computing habits NOTE This list may contain Restore Points that you did not create. An external hard drive is required. Select Open writable CD folder using Windows Explorer, and click OK. 3 A Windows® Explorer window...
User Manual
Page 228
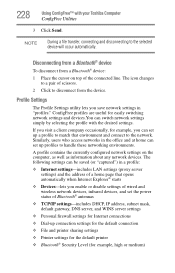
... default printer ❖ Bluetooth® Security Level (for example, you enable or disable settings of wired and wireless network devices, infrared devices, and set the power status of the connected line. 228 Using ConfigFree™ with the desired settings. The following settings can be saved (or "captured") in a profile: ❖ Internet settings-includes LAN settings (proxy server settings) and the address of a home page that opens automatically when Internet Explorer® starts ❖ Devices...
... default printer ❖ Bluetooth® Security Level (for example, you enable or disable settings of wired and wireless network devices, infrared devices, and set the power status of the connected line. 228 Using ConfigFree™ with the desired settings. The following settings can be saved (or "captured") in a profile: ❖ Internet settings-includes LAN settings (proxy server settings) and the address of a home page that opens automatically when Internet Explorer® starts ❖ Devices...
User Manual
Page 246
... using a pointing device such as a mouse. Memory cache installed on the network. A group of display that represents a function, file, or program. A type of computers or other on the motherboard to interact with the Fn key can set system options or control system parameters, such as the battery save mode. (2) A key or combination of the display, creating light and dark pixels. Compare non-interlaced. K keyboard shortcut - A filter over a relatively limited area and connected...
... using a pointing device such as a mouse. Memory cache installed on the network. A group of display that represents a function, file, or program. A type of computers or other on the motherboard to interact with the Fn key can set system options or control system parameters, such as the battery save mode. (2) A key or combination of the display, creating light and dark pixels. Compare non-interlaced. K keyboard shortcut - A filter over a relatively limited area and connected...
User Manual
Page 252
... up files 81 battery alarms 106 changing 108 charge indicator light 46, 103 charge not lasting 184 charging 44, 46 conserving power 106 252 disposal 114 low charge 105 monitoring power 46, 103 not charging 184 power profile 212 power profile hot key 108 real-time clock (RTC) 100 removing 109 BIOS Setup see TOSHIBA Hardware Setup Bridge Media Adapter inserting memory media 131 removing memory media 132 button power 49, 58 start 118 C CD creating 95 playing an audio 94 CD, using 91 channels...
... up files 81 battery alarms 106 changing 108 charge indicator light 46, 103 charge not lasting 184 charging 44, 46 conserving power 106 252 disposal 114 low charge 105 monitoring power 46, 103 not charging 184 power profile 212 power profile hot key 108 real-time clock (RTC) 100 removing 109 BIOS Setup see TOSHIBA Hardware Setup Bridge Media Adapter inserting memory media 131 removing memory media 132 button power 49, 58 start 118 C CD creating 95 playing an audio 94 CD, using 91 channels...
User Manual
Page 253
... a power source 44 connection set up 122 control buttons 66 Ctrl keys 83 D desktop creating new icon 117 major features 117 desktop exploration 116 desktop icons 117 Device Manager 181 checking properties 182 disabling a device 182 devices keyboard 68 mouse 68 Disk Defragmenter 188 disk drive corrupted/damaged data files 189 missing files/trouble accessing a disk 188 running slow 188 diskette drive cannot insert a diskette 189 cannot read a diskette 189 connecting 70 external, connecting 70 display...
... a power source 44 connection set up 122 control buttons 66 Ctrl keys 83 D desktop creating new icon 117 major features 117 desktop exploration 116 desktop icons 117 Device Manager 181 checking properties 182 disabling a device 182 devices keyboard 68 mouse 68 Disk Defragmenter 188 disk drive corrupted/damaged data files 189 missing files/trouble accessing a disk 188 running slow 188 diskette drive cannot insert a diskette 189 cannot read a diskette 189 connecting 70 external, connecting 70 display...
User Manual
Page 255
... Windows® keys 83 troubleshooting 185 using 82 keyboard, external 68 keyboard, full-size 82 L lock computer, using 79 M main battery removing 109 memory adding 49 problem solving 183 removing expansion slot cover 51 memory module inserting 52 installation 50 removing 55 microphone 126 modem connecting to telephone line 120 determining COM port 119 problem solving 196, 197 resetting port to default settings 119 upgrading 119 monitor 66 connecting 66 not working 186 mouse installing 68 mouse utility 153 N network accessing 121 Dial-Up Networking Wizard 121 networking wireless 123 O opening...
... Windows® keys 83 troubleshooting 185 using 82 keyboard, external 68 keyboard, full-size 82 L lock computer, using 79 M main battery removing 109 memory adding 49 problem solving 183 removing expansion slot cover 51 memory module inserting 52 installation 50 removing 55 microphone 126 modem connecting to telephone line 120 determining COM port 119 problem solving 196, 197 resetting port to default settings 119 upgrading 119 monitor 66 connecting 66 not working 186 mouse installing 68 mouse utility 153 N network accessing 121 Dial-Up Networking Wizard 121 networking wireless 123 O opening...
User Manual
Page 256
... 184 battery not charging 184 cannot insert diskette in drive 189 cannot read a diskette 189 changing display properties 187 checking device properties 182 computer hangs when PC Card inserted 192, 195 computer will not power up 175 contacting Toshiba 207 corrupted/damaged data files 189 Device Manager 181 disabling a device 182 disk drive is slow 188 display is blank 186 external display not working 187 external monitor 186 faulty memory 183 hardware conflict...
... 184 battery not charging 184 cannot insert diskette in drive 189 cannot read a diskette 189 changing display properties 187 checking device properties 182 computer hangs when PC Card inserted 192, 195 computer will not power up 175 contacting Toshiba 207 corrupted/damaged data files 189 Device Manager 181 disabling a device 182 disk drive is slow 188 display is blank 186 external display not working 187 external monitor 186 faulty memory 183 hardware conflict...


