
User Manual
Page 7
... How to use the USB terminal 45 Setting up the wireless LAN 46 Functions ...46 Communication mode 46 Caution when using the wireless LAN functions 47 Setup using the Setting display (2 48 12 Setting Wireless Utility 49 Computer settings 53 Projecting images stored in a USB ...list 57 Control setting ...60 The control setting menu 60 Checking the projector status 61 Status display 61 Installing the applications 62 Using the Wireless Utility 63 Displaying a computer's screen via the projector 63 Displaying a JPEG image saved on a computer via the projector 65 Displaying a video...
... How to use the USB terminal 45 Setting up the wireless LAN 46 Functions ...46 Communication mode 46 Caution when using the wireless LAN functions 47 Setup using the Setting display (2 48 12 Setting Wireless Utility 49 Computer settings 53 Projecting images stored in a USB ...list 57 Control setting ...60 The control setting menu 60 Checking the projector status 61 Status display 61 Installing the applications 62 Using the Wireless Utility 63 Displaying a computer's screen via the projector 63 Displaying a JPEG image saved on a computer via the projector 65 Displaying a video...

User Manual
Page 22
...power] is pressed. A remote control code is applied after the setting is done, and accordingly operation with the remote control function of the Wireless Utility. When [Wireless standby] is disabled. • To release the key lock, set to [Off], the projector cannot be powered on . Pressing the [...the same code for remote control Remove the battery cover and set Fan mode to [High] when using the remote control function of the Wireless Utility. [Remote control] Sets a remote control code from 4 types. The input from the connected device that outputs no video signals is ...
...power] is pressed. A remote control code is applied after the setting is done, and accordingly operation with the remote control function of the Wireless Utility. When [Wireless standby] is disabled. • To release the key lock, set to [Off], the projector cannot be powered on . Pressing the [...the same code for remote control Remove the battery cover and set Fan mode to [High] when using the remote control function of the Wireless Utility. [Remote control] Sets a remote control code from 4 types. The input from the connected device that outputs no video signals is ...

User Manual
Page 24
... Functions The following functions are available via wireless communications, when the wireless LAN USB adapter and dedicated Wireless Utility software p.63 included with this projector are used. Note: A wireless LAN USB adapter except the supplied one (or recommended by Toshiba) does not work with this product. ...the Internet generally requires a high level of the same functions available from the current location that wireless LAN equipment be created To LAN, Internet, etc. Toshiba does not guarantee the converage of the radio wave in the conference room, as the screens of...
... Functions The following functions are available via wireless communications, when the wireless LAN USB adapter and dedicated Wireless Utility software p.63 included with this projector are used. Note: A wireless LAN USB adapter except the supplied one (or recommended by Toshiba) does not work with this product. ...the Internet generally requires a high level of the same functions available from the current location that wireless LAN equipment be created To LAN, Internet, etc. Toshiba does not guarantee the converage of the radio wave in the conference room, as the screens of...

User Manual
Page 25
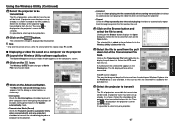
...9679; Projector settings (Be sure to read this subsection.) Using the factory settings as-is currently displayed via the projector (Update automatically) using Wireless Utility. The following pages as desired. [ : Move left or right one character.] [ to : Set a character.] Confirm: [OK] [Cancel... the MENU button or RETURN button. (The menu disappears 30 seconds after the last operation.) ■ Setting Wireless Utility If you select Wireless Utility, the following items can be sure to change the projector settings. 1. Operations 48 49 Item Description Easy Connect...
...9679; Projector settings (Be sure to read this subsection.) Using the factory settings as-is currently displayed via the projector (Update automatically) using Wireless Utility. The following pages as desired. [ : Move left or right one character.] [ to : Set a character.] Confirm: [OK] [Cancel... the MENU button or RETURN button. (The menu disappears 30 seconds after the last operation.) ■ Setting Wireless Utility If you select Wireless Utility, the following items can be sure to change the projector settings. 1. Operations 48 49 Item Description Easy Connect...

User Manual
Page 26
.... Note: Alphabetic characters (A to F, a to be called "Network group" or "Network name". Set the following carefully. Remote control button Character entry mode Items using the Wireless Utility within the projector's possible communication area. Usually, you use the projector with attention. Note 2: To communicate in Ad hoc mode with . If you do not...
.... Note: Alphabetic characters (A to F, a to be called "Network group" or "Network name". Set the following carefully. Remote control button Character entry mode Items using the Wireless Utility within the projector's possible communication area. Usually, you use the projector with attention. Note 2: To communicate in Ad hoc mode with . If you do not...

User Manual
Page 27
...the following settings. • Select Ad hoc (for more information. Note • The Easy Connect utility p.68 allows users to easily connect the projector to a terminal. Setting up the wireless LAN (Continued) If you have forgotten your password, set it again using the same projector. Refer ...the projector is assigned automatically by the IP address. (Example: 111.112.xxx.xxx) • [Setting initialization] This item resets the wireless LAN settings to their factory defaults. • [Projector name] This can be used to identify projectors when communicating with multiple projectors, ...
...the following settings. • Select Ad hoc (for more information. Note • The Easy Connect utility p.68 allows users to easily connect the projector to a terminal. Setting up the wireless LAN (Continued) If you have forgotten your password, set it again using the same projector. Refer ...the projector is assigned automatically by the IP address. (Example: 111.112.xxx.xxx) • [Setting initialization] This item resets the wireless LAN settings to their factory defaults. • [Projector name] This can be used to identify projectors when communicating with multiple projectors, ...

User Manual
Page 31
... address of the SMTP server. : Enter a port number of the application currently running on the projector is displayed. (Examples: Slideshow, Wireless Utility) When no device is plugged "Type" is protected by AXE, Inc. (hereafter AXE). Item Unplug device Email Description Run when unplugging ...: Enter within 60 characters. (Example: [email protected]) Note • The Email function does not support transmission to TOSHIBA CORPORATION (hereafter TOSHIBA) by the Copyright Law, Universal Copyright Convention, and other intellectual property rights of software (hereafter the Software) licensed to...
... address of the SMTP server. : Enter a port number of the application currently running on the projector is displayed. (Examples: Slideshow, Wireless Utility) When no device is plugged "Type" is protected by AXE, Inc. (hereafter AXE). Item Unplug device Email Description Run when unplugging ...: Enter within 60 characters. (Example: [email protected]) Note • The Email function does not support transmission to TOSHIBA CORPORATION (hereafter TOSHIBA) by the Copyright Law, Universal Copyright Convention, and other intellectual property rights of software (hereafter the Software) licensed to...
User Manual
Page 32
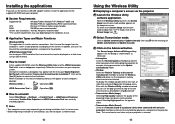
.... Installing the applications If you will appear on your computer's desktop: Wireless Utility → Operations p.63 JPEG Conversion Tool → Operations p.74 ■ How to uninstall Select [Start Menu] → [Settings] → [Control Panel] → [Add/Remove Programs], and remove Toshiba Data Projector and JPEG Conversion Tool from currently installed programs. Notes •...
.... Installing the applications If you will appear on your computer's desktop: Wireless Utility → Operations p.63 JPEG Conversion Tool → Operations p.74 ■ How to uninstall Select [Start Menu] → [Settings] → [Control Panel] → [Add/Remove Programs], and remove Toshiba Data Projector and JPEG Conversion Tool from currently installed programs. Notes •...

User Manual
Page 33
...(in the Preview box. Select the file to be sent to the projector. The way that application is selected in the Wireless Utility's Transmission File field. 4 Select the file to transmit the images from the desktop or Windows Explorer into the projector. &#...surrounding radio wave environment. • The projector screen may not be available depending on a computer via the projector 1 Launch the Wireless Utility software application. Select application window Select a running applications are selected. • The audio signals transmitted by copyright is also available....
...(in the Preview box. Select the file to be sent to the projector. The way that application is selected in the Wireless Utility's Transmission File field. 4 Select the file to transmit the images from the desktop or Windows Explorer into the projector. &#...surrounding radio wave environment. • The projector screen may not be available depending on a computer via the projector 1 Launch the Wireless Utility software application. Select application window Select a running applications are selected. • The audio signals transmitted by copyright is also available....
User Manual
Page 34
... the Browse button and select the file to the pull-down list. The selected file is added to send. down list in the Wireless Utility's Select file field. 5 Select the file to the pull-down list of the Transmission File field. The Movie file: Advanced Settings dialog... on the icon. The Screen Image transmission mode window appears on the computer's screen. 2 Click on a computer via the projector 1 Launch the Wireless Utility software application. The file displayed here will be transmitted. Step 4 can be listed. (If projector name has been set up already, it is ...
... the Browse button and select the file to the pull-down list. The selected file is added to send. down list in the Wireless Utility's Select file field. 5 Select the file to the pull-down list of the Transmission File field. The Movie file: Advanced Settings dialog... on the icon. The Screen Image transmission mode window appears on the computer's screen. 2 Click on a computer via the projector 1 Launch the Wireless Utility software application. The file displayed here will be transmitted. Step 4 can be listed. (If projector name has been set up already, it is ...

User Manual
Page 35
... ID is the MAC address of each side is paused. Notes • Only one file can move the playing position. Using the Wireless Utility (Continued) 7 Click on the computer screen. 6 Click the Tool button . Dragging the slider can be transmitted. • The ...the input to bring up . If the transmission does not start, uncheck the Confirm and immediately transmit screen image checkbox. When the Wireless Utility launches, the Screen Image transmission mode window appears on the button. Volume: Adjusts sound volume. When a connection confirmation message appears, proceed...
... ID is the MAC address of each side is paused. Notes • Only one file can move the playing position. Using the Wireless Utility (Continued) 7 Click on the computer screen. 6 Click the Tool button . Dragging the slider can be transmitted. • The ...the input to bring up . If the transmission does not start, uncheck the Confirm and immediately transmit screen image checkbox. When the Wireless Utility launches, the Screen Image transmission mode window appears on the button. Volume: Adjusts sound volume. When a connection confirmation message appears, proceed...

User Manual
Page 36
... appears, make settings. 10 When the setting is complete, the projector name of the connected projector or the MAC address of the Wireless Utility to use Wireless Utility version 4.0. 71 Operations To unplug the USB memory, follow the instructions in the user s manual supplied with the USB memory or ...the computer. • Setting on the projector 5 Turn the projector power on the computer 7 Launch the Wireless Utility software application. 8 Insert the USB memory into the projector. When successfully saved, a message appears. 6 Unplug the USB memory and then insert ...
... appears, make settings. 10 When the setting is complete, the projector name of the connected projector or the MAC address of the Wireless Utility to use Wireless Utility version 4.0. 71 Operations To unplug the USB memory, follow the instructions in the user s manual supplied with the USB memory or ...the computer. • Setting on the projector 5 Turn the projector power on the computer 7 Launch the Wireless Utility software application. 8 Insert the USB memory into the projector. When successfully saved, a message appears. 6 Unplug the USB memory and then insert ...

User Manual
Page 37
...left/right/diagonal) 5 To quit, click on the button on the Remote Control window. Mute: Cuts off . To exit both the Wireless Utility and the Remote Control, click on the Remote Control button. The Screen Image transmission mode window appears on the computer's screen. 72 ...2 Click on the the Wireless Utility window. Power Off: Turns projector power off picture and sound. Volume +/-: Adjust sound volume. While it is still displayed, you use the...
...left/right/diagonal) 5 To quit, click on the button on the Remote Control window. Mute: Cuts off . To exit both the Wireless Utility and the Remote Control, click on the Remote Control button. The Screen Image transmission mode window appears on the computer's screen. 72 ...2 Click on the the Wireless Utility window. Power Off: Turns projector power off picture and sound. Volume +/-: Adjust sound volume. While it is still displayed, you use the...

User Manual
Page 39
... into a JPEG file This function saves the current computer screen as the projector. Click Yes. Enable the Javascript functions. * Toshiba does not guarantee the operation for the TCP/IP to have the same network address as a JPEG file. (1) In the ...Projector Configuration Tool", set to use Ad hoc mode, use the "Projector Configuration Tool" The "Projector Configuration Tool" uses the Web server features of Wireless Utility. This starts the presentation. (5) To continue to the next slide, click on the Conversion button. (b) A confirmation message appears. and (c) Click on...
... into a JPEG file This function saves the current computer screen as the projector. Click Yes. Enable the Javascript functions. * Toshiba does not guarantee the operation for the TCP/IP to have the same network address as a JPEG file. (1) In the ...Projector Configuration Tool", set to use Ad hoc mode, use the "Projector Configuration Tool" The "Projector Configuration Tool" uses the Web server features of Wireless Utility. This starts the presentation. (5) To continue to the next slide, click on the Conversion button. (b) A confirmation message appears. and (c) Click on...

User Manual
Page 40
... input. Maintenance About lamp The product's light source is continuously used without notice. (The Toshiba's web site can be set to On, access to update their setting. Wireless Utility: The items displayed on the screen can be set . Entering individual items and press the Execute...spares when the replacement time approaches. (Refer to light at http:// multimedia.projector-toshiba.com/map.html, providing projector information. Settings: Status Display: Features: Make settings for the Wireless/USB input menu. Then, thoroughly clean the area around the projector and discard ...
... input. Maintenance About lamp The product's light source is continuously used without notice. (The Toshiba's web site can be set to On, access to update their setting. Wireless Utility: The items displayed on the screen can be set . Entering individual items and press the Execute...spares when the replacement time approaches. (Refer to light at http:// multimedia.projector-toshiba.com/map.html, providing projector information. Settings: Status Display: Features: Make settings for the Wireless/USB input menu. Then, thoroughly clean the area around the projector and discard ...