User Manual
Page 5
... charges.) In order to program this information into your right to file a complaint with this equipment causes harm to the telephone network, the telephone company will notify you in their equipment, operations or procedures. Also, you will be a 900 number or any person to use a computer or other number for repair or limited warranty information, please contact Toshiba Corporation, Toshiba...
... charges.) In order to program this information into your right to file a complaint with this equipment causes harm to the telephone network, the telephone company will notify you in their equipment, operations or procedures. Also, you will be a 900 number or any person to use a computer or other number for repair or limited warranty information, please contact Toshiba Corporation, Toshiba...

User Manual
Page 28
... Charging the main battery 47 Using the computer for the first time 48 Opening the display panel 48 Your computer's features and specifications ....49 Turning on the power 49 Adding memory (optional 50 Installing a memory module 51 Removing a memory module 56 Checking total memory 58 Using the TouchPad 59 Scrolling with the TouchPad 59 Control buttons 59 Disabling or enabling the TouchPad 60 Using external display devices 60 Directing the display output when you turn on the computer 60 Adjusting the quality of the external display...
... Charging the main battery 47 Using the computer for the first time 48 Opening the display panel 48 Your computer's features and specifications ....49 Turning on the power 49 Adding memory (optional 50 Installing a memory module 51 Removing a memory module 56 Checking total memory 58 Using the TouchPad 59 Scrolling with the TouchPad 59 Control buttons 59 Disabling or enabling the TouchPad 60 Using external display devices 60 Directing the display output when you turn on the computer 60 Adjusting the quality of the external display...

User Manual
Page 51
... remove a memory module, turn off the computer using the Start menu. Failure to follow these directions could result in Sleep or Hibernation mode, data will need a small Phillips screwdriver for this model Slot A is the top slot. Getting Started 51 Adding memory (optional) Installing a memory module Memory modules can install one memory module is to room temperature before they have cooled. The computer has two memory slots-Slot A and Slot B. You can be installed in good condition. Avoid touching the cover...
... remove a memory module, turn off the computer using the Start menu. Failure to follow these directions could result in Sleep or Hibernation mode, data will need a small Phillips screwdriver for this model Slot A is the top slot. Getting Started 51 Adding memory (optional) Installing a memory module Memory modules can install one memory module is to room temperature before they have cooled. The computer has two memory slots-Slot A and Slot B. You can be installed in good condition. Avoid touching the cover...

User Manual
Page 53
... may cause memory access problems. 9 Carefully remove the new memory module from its antistatic packaging, without touching its connector. 10 Locate an empty memory module slot on the connector may have built up. Grease or dust on the underside of the computer. Back of computer (Sample Illustration) Removing the memory module slot cover 7 Remove the memory module slot cover. 8 Place the screws and the cover in a safe place so that secure the memory module slot cover. Static electricity...
... may cause memory access problems. 9 Carefully remove the new memory module from its antistatic packaging, without touching its connector. 10 Locate an empty memory module slot on the connector may have built up. Grease or dust on the underside of the computer. Back of computer (Sample Illustration) Removing the memory module slot cover 7 Remove the memory module slot cover. 8 Place the screws and the cover in a safe place so that secure the memory module slot cover. Static electricity...

User Manual
Page 56
... and open the memory module slot cover. You can damage the computer and the memory module. You can now continue setting up . 17 Reconnect the cables. 18 Restart the computer. The computer could hang up the computer, verify that the computer has recognized the additional memory module. In either of the above cases, the Sleep configuration will be saved. 56 Getting Started Adding memory (optional) 15...
... and open the memory module slot cover. You can damage the computer and the memory module. You can now continue setting up . 17 Reconnect the cables. 18 Restart the computer. The computer could hang up the computer, verify that the computer has recognized the additional memory module. In either of the above cases, the Sleep configuration will be saved. 56 Getting Started Adding memory (optional) 15...

User Manual
Page 58
... that says, "Windows® needs your permission. For more information on inserting the main battery, see "Inserting a charged battery" on your computer without your permission to work. If you can check that the module is displayed below the System heading under Memory (RAM). If the computer does not recognize the memory configuration, turn off the computer and remove the memory module slot cover (complete steps 1-8 in "Installing a memory module" on page...
... that says, "Windows® needs your permission. For more information on inserting the main battery, see "Inserting a charged battery" on your computer without your permission to work. If you can check that the module is displayed below the System heading under Memory (RAM). If the computer does not recognize the memory configuration, turn off the computer and remove the memory module slot cover (complete steps 1-8 in "Installing a memory module" on page...

User Manual
Page 60
... change the display output settings is enabled by default. NOTE Some modes are only available with display options. 4 Select the settings you can also connect an external display device to a live electrical outlet. 3 Turn on page 198. To do this: 1 Connect the monitor's video cable to the RGB (monitor) port on the computer Once you have connected an external display device, you desire and click Apply. 5 Click OK. 60 Getting Started Using external display devices Disabling or enabling the TouchPad™ The TouchPad...
... change the display output settings is enabled by default. NOTE Some modes are only available with display options. 4 Select the settings you can also connect an external display device to a live electrical outlet. 3 Turn on page 198. To do this: 1 Connect the monitor's video cable to the RGB (monitor) port on the computer Once you have connected an external display device, you desire and click Apply. 5 Click OK. 60 Getting Started Using external display devices Disabling or enabling the TouchPad™ The TouchPad...

User Manual
Page 142
... AC adaptor to the computer when using the "USB Sleep and Charge function." ❖ External devices connected to Enabled enables the use of the computer is turned OFF. ❖ USB bus power (DC 5V) is Disabled. USB Sleep and Charge function Settings-The default setting is similarly supplied to the external devices which are connected to Mode-1. There are connected to compatible ports when the AC adaptor is not connected to the computer, the battery of the computer will generate...
... AC adaptor to the computer when using the "USB Sleep and Charge function." ❖ External devices connected to Enabled enables the use of the computer is turned OFF. ❖ USB bus power (DC 5V) is Disabled. USB Sleep and Charge function Settings-The default setting is similarly supplied to the external devices which are connected to Mode-1. There are connected to compatible ports when the AC adaptor is not connected to the computer, the battery of the computer will generate...
User Manual
Page 143
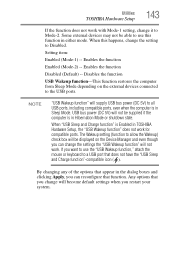
Enables the function Enabled (Mode-2) -- The Wakeup setting (function to allow the Wakeup) check box will be displayed on the external devices connected to Disabled. When "USB Sleep and Charge function" is Enabled in TOSHIBA Hardware Setup, the "USB Wakeup function" does not work . Disables the function USB Wakeup function-This function restores the computer from Sleep Mode depending on the Device Manager and even though you can change it to use the "USB Wakeup function," attach the mouse or keyboard to all USB ports, including compatible ports, even when the computer...
Enables the function Enabled (Mode-2) -- The Wakeup setting (function to allow the Wakeup) check box will be displayed on the external devices connected to Disabled. When "USB Sleep and Charge function" is Enabled in TOSHIBA Hardware Setup, the "USB Wakeup function" does not work . Disables the function USB Wakeup function-This function restores the computer from Sleep Mode depending on the Device Manager and even though you can change it to use the "USB Wakeup function," attach the mouse or keyboard to all USB ports, including compatible ports, even when the computer...

User Manual
Page 153
... you enable or disable settings of wired and wireless network devices, infrared devices, and set up a profile to match that opens automatically when Internet Explorer® starts ❖ Devices-lets you save network settings in a profile: ❖ Internet settings-includes LAN settings (proxy server settings) and the address of a home page that environment and connect to Profile. If you visit a client company occasionally, for example, you can set the power status of Bluetooth...
... you enable or disable settings of wired and wireless network devices, infrared devices, and set up a profile to match that opens automatically when Internet Explorer® starts ❖ Devices-lets you save network settings in a profile: ❖ Internet settings-includes LAN settings (proxy server settings) and the address of a home page that environment and connect to Profile. If you visit a client company occasionally, for example, you can set the power status of Bluetooth...

User Manual
Page 159
... Networking If you can easily detect if the operating system is correct, and the plug fits correctly in some way such as installing a new program or adding a device. The Windows® Advanced Boot Options menu displays these problems, use the options in the Startup menu to change the system in the DC-IN socket. The amperage rating of the computer and the AC adaptor show the specifications...
... Networking If you can easily detect if the operating system is correct, and the plug fits correctly in some way such as installing a new program or adding a device. The Windows® Advanced Boot Options menu displays these problems, use the options in the Startup menu to change the system in the DC-IN socket. The amperage rating of the computer and the AC adaptor show the specifications...

User Manual
Page 163
... least one device to the monitor, optional external optical drive, optional external diskette drive, and other power-using resources. ❖ The Driver tab, which lists resources assigned to another. It is worthwhile checking for the computer to the Lock button in "Installing a memory module" on page 56. 4 Reinstall the memory module, following the instructions in the lower-right part of the Start menu. The computer shuts down completely. 3 Remove the memory module, following the instructions in "Removing a memory module" on...
... least one device to the monitor, optional external optical drive, optional external diskette drive, and other power-using resources. ❖ The Driver tab, which lists resources assigned to another. It is worthwhile checking for the computer to the Lock button in "Installing a memory module" on page 56. 4 Reinstall the memory module, following the instructions in the lower-right part of the Start menu. The computer shuts down completely. 3 Remove the memory module, following the instructions in "Removing a memory module" on...

User Manual
Page 165
... software using the hard disk more keyboard error messages. Check the power options via your Power Plans (see your accessories information included with ? This is on, press Fn + F10 to turn off the cursor control mode light, or Fn + F11 to stay current on . To purchase a new battery pack, see "Power Plans" on page 98. Refer to this site often to turn off , make sure the software you added a device...
... software using the hard disk more keyboard error messages. Check the power options via your Power Plans (see your accessories information included with ? This is on, press Fn + F10 to turn off the cursor control mode light, or Fn + F11 to stay current on . To purchase a new battery pack, see "Power Plans" on page 98. Refer to this site often to turn off , make sure the software you added a device...

User Manual
Page 166
Using the computer's TouchPad: 1 Click Start, and then click the arrow next to activate the screen. Display problems Here are using the built-in screen, make sure the display priority is not set for an external monitor. HINT: Holding the Fn key and pressing the F5 key several times will restart and recognize the device. If you are some typical display problems and their solutions: The screen is blank. If you...
Using the computer's TouchPad: 1 Click Start, and then click the arrow next to activate the screen. Display problems Here are using the built-in screen, make sure the display priority is not set for an external monitor. HINT: Holding the Fn key and pressing the F5 key several times will restart and recognize the device. If you are some typical display problems and their solutions: The screen is blank. If you...
User Manual
Page 182
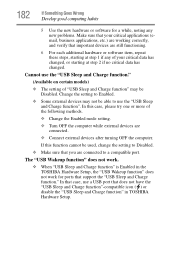
... any new problems. Make sure that your critical applications (email, business applications, etc.) are working correctly, and verify that important devices are connected to a compatible port. Cannot use the "USB Sleep and Charge function". The "USB Wakeup function" does not work. ❖ When "USB Sleep and Charge function" is Enabled in TOSHIBA Hardware Setup. 182 If Something Goes Wrong Develop good computing habits 5 Use the new hardware or software for ports that support the "USB Sleep and Charge function." Change the setting to Enabled. ❖ Some external devices...
... any new problems. Make sure that your critical applications (email, business applications, etc.) are working correctly, and verify that important devices are connected to a compatible port. Cannot use the "USB Sleep and Charge function". The "USB Wakeup function" does not work. ❖ When "USB Sleep and Charge function" is Enabled in TOSHIBA Hardware Setup. 182 If Something Goes Wrong Develop good computing habits 5 Use the new hardware or software for ports that support the "USB Sleep and Charge function." Change the setting to Enabled. ❖ Some external devices...

User Manual
Page 210
... refreshed. A feature of many Toshiba notebook computers that holds 1.44 MB of your work , including all open files and programs, when you turn on the motherboard to help improve processing speed. When you use to perform a task instead of using a pointing device such as the battery save mode. (2) A key or combination of pixels is returned to the hard disk the current state of data...
... refreshed. A feature of many Toshiba notebook computers that holds 1.44 MB of your work , including all open files and programs, when you turn on the motherboard to help improve processing speed. When you use to perform a task instead of using a pointing device such as the battery save mode. (2) A key or combination of pixels is returned to the hard disk the current state of data...

User Manual
Page 216
... 79 battery changing 106 charge indicator light 47, 100 charge not lasting 165 charging 45, 47 conserving power 103 disposal 110 low charge 102 monitoring power 47, 100 not charging 164 216 notification 102 power plan 192 power plan hot key 105 real-time clock (RTC) 97 removing 106 BIOS Setup see TOSHIBA Hardware Setup Bridge Media Adapter inserting memory media 125 removing memory media 126 button power 50 start 115 C CD playing an audio 92 CD, using 88 character keys 80 charging the battery 47 checking device...
... 79 battery changing 106 charge indicator light 47, 100 charge not lasting 165 charging 45, 47 conserving power 103 disposal 110 low charge 102 monitoring power 47, 100 not charging 164 216 notification 102 power plan 192 power plan hot key 105 real-time clock (RTC) 97 removing 106 BIOS Setup see TOSHIBA Hardware Setup Bridge Media Adapter inserting memory media 125 removing memory media 126 button power 50 start 115 C CD playing an audio 92 CD, using 88 character keys 80 charging the battery 47 checking device...

User Manual
Page 217
.../trouble accessing a disk 168 running slow 169 diskette drive cannot insert a diskette 169 cannot read a diskette 169 connecting 63 external, connecting 63 display does not look normal/flickers 167 external monitor not working 167 screen is blank 166 display device external 60 display output settings 60 display, external adjusting 61 disposal information 26 disposing of used batteries 110 double-click 59 DVD player general problems 176 DVD, using 88 E error messages device driver conflict 161 general hardware problem 161 non-system disk...
.../trouble accessing a disk 168 running slow 169 diskette drive cannot insert a diskette 169 cannot read a diskette 169 connecting 63 external, connecting 63 display does not look normal/flickers 167 external monitor not working 167 screen is blank 166 display device external 60 display output settings 60 display, external adjusting 61 disposal information 26 disposing of used batteries 110 double-click 59 DVD player general problems 176 DVD, using 88 E error messages device driver conflict 161 general hardware problem 161 non-system disk...
User Manual
Page 219
... installation 51 removing 57 memory module slot 53 microphone 122 modem connecting to telephone line 117 monitor 60 connecting 60 not working 166 mouse installing 62 mouse utility 139 N network accessing 117 Connect to the Internet 117 networking wireless 116 Notification Area 115 O Opening the display panel 48 optical disc positioning 91 optical discs handling 91 inserting 90 removing 94 optical drive problems 170 troubleshooting 170 using 88 optical media recording 93 other documentation 38 overlay keys 82 P password deleting a supervisor 135 disabling a user 136 setting a user...
... installation 51 removing 57 memory module slot 53 microphone 122 modem connecting to telephone line 117 monitor 60 connecting 60 not working 166 mouse installing 62 mouse utility 139 N network accessing 117 Connect to the Internet 117 networking wireless 116 Notification Area 115 O Opening the display panel 48 optical disc positioning 91 optical discs handling 91 inserting 90 removing 94 optical drive problems 170 troubleshooting 170 using 88 optical media recording 93 other documentation 38 overlay keys 82 P password deleting a supervisor 135 disabling a user 136 setting a user...
User Manual
Page 220
... 169 Device Manager 162 disk drive is slow 169 display is blank 166 ExpressCard® 171 checklist 171 error occurs 173 hot swapping fails 172 not recognized 173 slot appears dead 172 external display not working 167 external monitor 166 faulty memory 163 hardware conflict 161 high-pitched noise 171 Internet bookmarked site not found 160 Internet connection is slow 160 keyboard not responding 157 missing files/trouble accessing a disk 168 no sound...
... 169 Device Manager 162 disk drive is slow 169 display is blank 166 ExpressCard® 171 checklist 171 error occurs 173 hot swapping fails 172 not recognized 173 slot appears dead 172 external display not working 167 external monitor 166 faulty memory 163 hardware conflict 161 high-pitched noise 171 Internet bookmarked site not found 160 Internet connection is slow 160 keyboard not responding 157 missing files/trouble accessing a disk 168 no sound...


