User Manual
Page 44
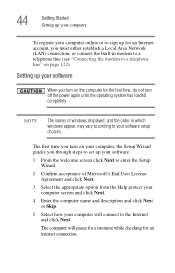
...will connect to a telephone line" on your computer, the Setup Wizard guides you through steps to set up your software. 1 From the welcome screen click Next to enter the Setup Wizard. 2 Confirm acceptance of windows displayed, and the order in which windows appear, may vary according to your...page 122). NOTE The names of Microsoft's End User License Agreement and click Next. 3 Select the appropriate option from the Help protect your computer screen and click Next. 4 Enter the computer name and description and click Next or Skip. 5 Select how your software When you must either establish a...
...will connect to a telephone line" on your computer, the Setup Wizard guides you through steps to set up your software. 1 From the welcome screen click Next to enter the Setup Wizard. 2 Confirm acceptance of windows displayed, and the order in which windows appear, may vary according to your...page 122). NOTE The names of Microsoft's End User License Agreement and click Next. 3 Select the appropriate option from the Help protect your computer screen and click Next. 4 Enter the computer name and description and click Next or Skip. 5 Select how your software When you must either establish a...

User Manual
Page 45
.... 6 Follow the remaining screen prompts to the Toshiba Web site at www.register.toshiba.com at that time, you periodic updates, announcements, and special offers applicable to a network, consult your system administrator before you click the final screen, your computer restarts automatically.... completed during the initial start up process of your computer. Getting Started Registering your computer with Toshiba Product registration is strongly recommended, and allows Toshiba to continue. Click Next to send you can be connected to complete Product Registration will display ...
.... 6 Follow the remaining screen prompts to the Toshiba Web site at www.register.toshiba.com at that time, you periodic updates, announcements, and special offers applicable to a network, consult your system administrator before you click the final screen, your computer restarts automatically.... completed during the initial start up process of your computer. Getting Started Registering your computer with Toshiba Product registration is strongly recommended, and allows Toshiba to continue. Click Next to send you can be connected to complete Product Registration will display ...

User Manual
Page 51
Over a period of time, and depending on your PC. When the computer is operated on battery power, the screen will deteriorate. Sample opening the display panel To avoid damaging the display panel, do not force it beyond the point where it moves easily and ...never lift the computer by the display panel. Small bright dots may appear on your screen display when you may appear on the usage of the computer, the brightness of the screen technology. Getting Started Using the computer for the first time 51 2 Lift the display panel. This is...
Over a period of time, and depending on your PC. When the computer is operated on battery power, the screen will deteriorate. Sample opening the display panel To avoid damaging the display panel, do not force it beyond the point where it moves easily and ...never lift the computer by the display panel. Small bright dots may appear on your screen display when you may appear on the usage of the computer, the brightness of the screen technology. Getting Started Using the computer for the first time 51 2 Lift the display panel. This is...

User Manual
Page 54
... the TouchPad™ The TouchPad, the small, smooth square cutout located in the preferred direction. NOTE Before adding external devices or memory, Toshiba recommends setting up your finger from left . Your computer has two memory module slots. NOTE Because the TouchPad is sensitive to touch and ... finger across the TouchPad from right to move your finger several times across the screen often means having to left to right. ❖ To move the cursor with your computer, or visit accessories.toshiba.com. Both slots are located under the keyboard and should only be accessed by...
... the TouchPad™ The TouchPad, the small, smooth square cutout located in the preferred direction. NOTE Before adding external devices or memory, Toshiba recommends setting up your finger from left . Your computer has two memory module slots. NOTE Because the TouchPad is sensitive to touch and ... finger across the TouchPad from right to move your finger several times across the screen often means having to left to right. ❖ To move the cursor with your computer, or visit accessories.toshiba.com. Both slots are located under the keyboard and should only be accessed by...

User Manual
Page 56
You can also use a hot key to disable or enable the TouchPad. Sample TouchPAD ON/OFF screen 5 Select Disable or Enable, whichever is appropriate. 6 Click Apply. 7 Click OK. The TouchPAD ON/OFF tab view window appears. The Mouse Properties window closes. 8 Close the Printers and Other Hardware window. 9 Close the Control Panel window. 56 Getting Started Using the TouchPad™ 3 Click the Mouse icon. 4 Click the TouchPAD ON/OFF tab. See "Disabling or enabling the TouchPad" on page 232.
You can also use a hot key to disable or enable the TouchPad. Sample TouchPAD ON/OFF screen 5 Select Disable or Enable, whichever is appropriate. 6 Click Apply. 7 Click OK. The TouchPAD ON/OFF tab view window appears. The Mouse Properties window closes. 8 Close the Printers and Other Hardware window. 9 Close the Control Panel window. 56 Getting Started Using the TouchPad™ 3 Click the Mouse icon. 4 Click the TouchPAD ON/OFF tab. See "Disabling or enabling the TouchPad" on page 232.

User Manual
Page 57
... for the type of the computer. 2 Connect the device's power cable to a live electrical outlet. 3 Turn on the left side of device you need a larger screen. Connecting an external monitor or projector You can choose to your operating system and devices. To do this : 1 Connect the monitor's video cable to change...
... for the type of the computer. 2 Connect the device's power cable to a live electrical outlet. 3 Turn on the left side of device you need a larger screen. Connecting an external monitor or projector You can choose to your operating system and devices. To do this : 1 Connect the monitor's video cable to change...
User Manual
Page 59
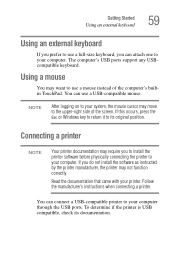
... Started Using an external keyboard 59 Using an external keyboard If you prefer to use a full-size keyboard, you can use a mouse instead of the screen. To determine if the printer is USB compatible, check its original position.
... Started Using an external keyboard 59 Using an external keyboard If you prefer to use a full-size keyboard, you can use a mouse instead of the screen. To determine if the printer is USB compatible, check its original position.
User Manual
Page 61
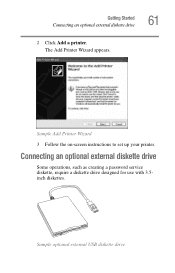
The Add Printer Wizard appears. Sample optional external USB diskette drive Sample Add Printer Wizard 3 Follow the on-screen instructions to set up your printer. Connecting an optional external diskette drive Some operations, such as creating a password service diskette, require a diskette drive designed for use with 3.5inch diskettes. Getting Started Connecting an optional external diskette drive 61 2 Click Add a printer.
The Add Printer Wizard appears. Sample optional external USB diskette drive Sample Add Printer Wizard 3 Follow the on-screen instructions to set up your printer. Connecting an optional external diskette drive Some operations, such as creating a password service diskette, require a diskette drive designed for use with 3.5inch diskettes. Getting Started Connecting an optional external diskette drive 61 2 Click Add a printer.

User Manual
Page 67
NOTE For more information about the Power Saver utility, see "Toshiba Power Saver" on the Setup Action tab. Getting Started Turning off the computer 67 3 Click on page 154. Sample setup action settings screen 4 Select the options you want from the drop-down lists. ❖ When I press the power button Set this option to Shut down if you want the computer to shut down when you press the power button. ❖ When I close the lid Set this option to Shut down if you want the computer to shut down when you close the display panel. 5 Click Apply. 6 Click OK.
NOTE For more information about the Power Saver utility, see "Toshiba Power Saver" on the Setup Action tab. Getting Started Turning off the computer 67 3 Click on page 154. Sample setup action settings screen 4 Select the options you want from the drop-down lists. ❖ When I press the power button Set this option to Shut down if you want the computer to shut down when you press the power button. ❖ When I close the lid Set this option to Shut down if you want the computer to shut down when you close the display panel. 5 Click Apply. 6 Click OK.

User Manual
Page 69
... Started Turning off light glows blue. NOTE For more information about the Power Saver utility, see "Toshiba Power Saver" on /off the computer 69 1 Click Start, Control Panel, then click Performance and Maintenance. 2 Click the Toshiba Power Saver icon. 3 Click the Setup Action tab. 4 Select Hibernation for the options you want. ❖... Hibernation mode when you press the power button. ❖ When I close the lid Set this option to Hibernate if you want the computer to the screen(s) you close the display panel. 5 Click Apply. 6 Click OK.
... Started Turning off light glows blue. NOTE For more information about the Power Saver utility, see "Toshiba Power Saver" on /off the computer 69 1 Click Start, Control Panel, then click Performance and Maintenance. 2 Click the Toshiba Power Saver icon. 3 Click the Setup Action tab. 4 Select Hibernation for the options you want. ❖... Hibernation mode when you press the power button. ❖ When I close the lid Set this option to Hibernate if you want the computer to the screen(s) you close the display panel. 5 Click Apply. 6 Click OK.

User Manual
Page 71
.... Closing the display panel After you have turned off the computer, close the display panel. 5 Click Apply. 6 Click OK. The computer returns to the screen(s) you can start up the computer from Standby mode To start it into Standby mode when you close the display panel to keep dust and... dirt out of the computer. NOTE For more information about the Power Saver utility, see "Toshiba Power Saver" on /off light glows blue. If you place the computer in Standby mode by opening the display panel. Getting Started Turning off the...
.... Closing the display panel After you have turned off the computer, close the display panel. 5 Click Apply. 6 Click OK. The computer returns to the screen(s) you can start up the computer from Standby mode To start it into Standby mode when you close the display panel to keep dust and... dirt out of the computer. NOTE For more information about the Power Saver utility, see "Toshiba Power Saver" on /off light glows blue. If you place the computer in Standby mode by opening the display panel. Getting Started Turning off the...

User Manual
Page 82
..., type just the program name. For example, to the right of computing. Saving your work Before you turn off the computer, save your work on -screen instructions. Sample Run dialog box 2 In the Run dialog box: ❖ If you know the location, you do not know the program's location, type the...
..., type just the program name. For example, to the right of computing. Saving your work Before you turn off the computer, save your work on -screen instructions. Sample Run dialog box 2 In the Run dialog box: ❖ If you know the location, you do not know the program's location, type the...

User Manual
Page 87
... 1 is set to play region 1 (North America) DVD-ROMs. If you play DVDs while running the computer on any other region. These features include wide-screen movies, multiple language tracks, digital surround sound, multiple camera angles, and interactive menus. The drive will only play DVDs from that you play in the...
... 1 is set to play region 1 (North America) DVD-ROMs. If you play DVDs while running the computer on any other region. These features include wide-screen movies, multiple language tracks, digital surround sound, multiple camera angles, and interactive menus. The drive will only play DVDs from that you play in the...
User Manual
Page 92
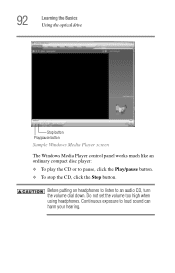
Continuous exposure to pause, click the Play/pause button. ❖ To stop the CD, click the Stop button. Do not set the volume too high when using headphones. 92 Learning the Basics Using the optical drive Stop button Play/pause button Sample Windows Media Player screen The Windows Media Player control panel works much like an ordinary compact disc player: ❖ To play the CD or to loud sound can harm your hearing. Before putting on headphones to listen to an audio CD, turn the volume dial down.
Continuous exposure to pause, click the Play/pause button. ❖ To stop the CD, click the Stop button. Do not set the volume too high when using headphones. 92 Learning the Basics Using the optical drive Stop button Play/pause button Sample Windows Media Player screen The Windows Media Player control panel works much like an ordinary compact disc player: ❖ To play the CD or to loud sound can harm your hearing. Before putting on headphones to listen to an audio CD, turn the volume dial down.
User Manual
Page 117
... do not indicate any change in the Windows® operating system. Chapter 4 Exploring Your Computer's Features In this guide may appear slightly different from the screens displayed by your notebook computer. You use its features to start programs, find documents, set up system components, and perform most other computing tasks. Exploring...
... do not indicate any change in the Windows® operating system. Chapter 4 Exploring Your Computer's Features In this guide may appear slightly different from the screens displayed by your notebook computer. You use its features to start programs, find documents, set up system components, and perform most other computing tasks. Exploring...

User Manual
Page 129
... the service. ❖ Internet chat rooms A chat room is a Web site that offers a place where people with others in groups, by others on their computer screens. ❖ Internet news groups A news group is similar to a chat room, but instead of your own, you perform many tasks. ❖ Internet email To send...
... the service. ❖ Internet chat rooms A chat room is a Web site that offers a place where people with others in groups, by others on their computer screens. ❖ Internet news groups A news group is similar to a chat room, but instead of your own, you perform many tasks. ❖ Internet email To send...

User Manual
Page 131
Positioning bar Sample Sound Recorder screen Record Stop Play Skip forward Skip backward 3 Click the Record button. 4 Speak normally into the microphone. 5 When you just recorded, click the Play button. 7 To ...
Positioning bar Sample Sound Recorder screen Record Stop Play Skip forward Skip backward 3 Click the Record button. 4 Speak normally into the microphone. 5 When you just recorded, click the Play button. 7 To ...
User Manual
Page 144
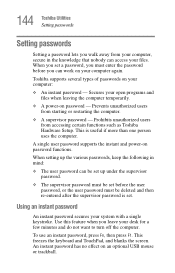
... must be set before you leave your computer again. Prevents unauthorized users from accessing certain functions such as Toshiba Hardware Setup. To use an instant password, press Fn, then press F1. A single user password supports... . Secures your files. Prohibits unauthorized users from starting or restarting the computer. ❖ A supervisor password - 144 Toshiba Utilities Setting passwords Setting passwords Setting a password lets you walk away from your computer, secure in mind: ❖...the computer. This freezes the keyboard and TouchPad, and blanks the screen.
... must be set before you leave your computer again. Prevents unauthorized users from accessing certain functions such as Toshiba Hardware Setup. To use an instant password, press Fn, then press F1. A single user password supports... . Secures your files. Prohibits unauthorized users from starting or restarting the computer. ❖ A supervisor password - 144 Toshiba Utilities Setting passwords Setting passwords Setting a password lets you walk away from your computer, secure in mind: ❖...the computer. This freezes the keyboard and TouchPad, and blanks the screen.
User Manual
Page 145
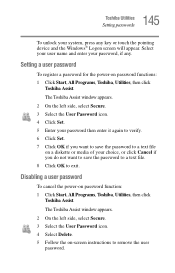
Select your user name and enter your choice, or click Cancel if you want to save the password to a text file on -screen instructions to exit. The Toshiba Assist window appears. 2 On the left side, select Secure. 3 Select the User Password icon. 4 Select Delete. 5 Follow the... key or touch the pointing device and the Windows® Logon screen will appear. Setting a user password To register a password for the power-on password function: 1 Click Start, All Programs, Toshiba, Utilities, then click Toshiba Assist. The Toshiba Assist window appears. 2 On the left side, select Secure. ...
Select your user name and enter your choice, or click Cancel if you want to save the password to a text file on -screen instructions to exit. The Toshiba Assist window appears. 2 On the left side, select Secure. 3 Select the User Password icon. 4 Select Delete. 5 Follow the... key or touch the pointing device and the Windows® Logon screen will appear. Setting a user password To register a password for the power-on password function: 1 Click Start, All Programs, Toshiba, Utilities, then click Toshiba Assist. The Toshiba Assist window appears. 2 On the left side, select Secure. ...
User Manual
Page 148
... Fn-esse, you can assign any Windows® program without using the Start menu. 148 Toshiba Utilities Fn-esse® 2 On the left side, select Secure. 3 Select the Supervisor Password icon. 4 Select Delete. 5 Follow the on-screen instructions to choose Fn-esse also has several keys, known as hot keys, that perform...
... Fn-esse, you can assign any Windows® program without using the Start menu. 148 Toshiba Utilities Fn-esse® 2 On the left side, select Secure. 3 Select the Supervisor Password icon. 4 Select Delete. 5 Follow the on-screen instructions to choose Fn-esse also has several keys, known as hot keys, that perform...


