

User Manual
Page 2
... limitation above, you use the screen mode switching functions (e.g. This product incorporates copyright protection technology that you use this copyright protection technology must be subject to claims for compensation for the TOSHIBA Satellite U300 / Satellite Pro U300 / PORTEGE M600 / TECRA M8 Series Portable Personal Computer at home only. Disclaimer This manual has been validated and reviewed for damages incurred directly or indirectly from errors, omissions or...
... limitation above, you use the screen mode switching functions (e.g. This product incorporates copyright protection technology that you use this copyright protection technology must be subject to claims for compensation for the TOSHIBA Satellite U300 / Satellite Pro U300 / PORTEGE M600 / TECRA M8 Series Portable Personal Computer at home only. Disclaimer This manual has been validated and reviewed for damages incurred directly or indirectly from errors, omissions or...

User Manual
Page 23
...card care 8-6 Memory expansion 8-7 Installing a memory module 8-7 Removing a memory module 8-9 Additional battery pack 8-10 Additional AC adaptor 8-10 External monitor 8-11 Security lock 8-11 Chapter 9 Troubleshooting Problem solving process 9-1 Preliminary checklist 9-2 Analyzing the problem 9-2 Hardware and system checklist 9-3 System start-up 9-3 Self test 9-4 Power 9-4 Disposing of PC and PC batteries 9-6 Real Time Clock 9-7 Keyboard 9-7 LCD panel 9-8 Hard disk drive 9-8 Recovery Discs 9-9 DVD Super Multi drive (Supporting DVD±R Double Layer 9-9 Pointing device...
...card care 8-6 Memory expansion 8-7 Installing a memory module 8-7 Removing a memory module 8-9 Additional battery pack 8-10 Additional AC adaptor 8-10 External monitor 8-11 Security lock 8-11 Chapter 9 Troubleshooting Problem solving process 9-1 Preliminary checklist 9-2 Analyzing the problem 9-2 Hardware and system checklist 9-3 System start-up 9-3 Self test 9-4 Power 9-4 Disposing of PC and PC batteries 9-6 Real Time Clock 9-7 Keyboard 9-7 LCD panel 9-8 Hard disk drive 9-8 Recovery Discs 9-9 DVD Super Multi drive (Supporting DVD±R Double Layer 9-9 Pointing device...

User Manual
Page 25
... instructions on setting up and begin operating your computer and gives tips on configuring your computer, basic operations and care, using your TOSHIBA Satellite U300 / Satellite Pro U300 / PORTEGE M600 / TECRA M8 Series computer. This manual tells how to read over the Specifications section of reliable, highperformance computing. It also provides detailed information on safety and designing your computer. If you 're new to begin using optional devices and troubleshooting. User's Manual...
... instructions on setting up and begin operating your computer and gives tips on configuring your computer, basic operations and care, using your TOSHIBA Satellite U300 / Satellite Pro U300 / PORTEGE M600 / TECRA M8 Series computer. This manual tells how to read over the Specifications section of reliable, highperformance computing. It also provides detailed information on safety and designing your computer. If you 're new to begin using optional devices and troubleshooting. User's Manual...
User Manual
Page 39
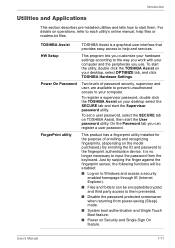
... start the utility, double click the TOSHIBA Assist on to Windows and access a security enabled homepage through IE (Internet Explorer). ■ Files and folders can register a user password. Just by swiping the finger against the fingerprint sensor, the following functions will be encrypted/decrypted and third party access to each utility's online manual, help and services. Introduction Utilities and Applications This section describes pre-installed utilities and...
... start the utility, double click the TOSHIBA Assist on to Windows and access a security enabled homepage through IE (Internet Explorer). ■ Files and folders can register a user password. Just by swiping the finger against the fingerprint sensor, the following functions will be encrypted/decrypted and third party access to each utility's online manual, help and services. Introduction Utilities and Applications This section describes pre-installed utilities and...
User Manual
Page 60
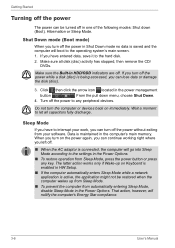
... Sleep Mode, press the power button or press any peripheral devices. Turn off the power to the operating system's main screen. 1. Data is maintained in the computer's main memory. That action, however, will boot to any key. When you turn on the power again, you can continue working right where you turn the computer or devices back on Keyboard is enabled in HW Setup. ■ If the computer automatically enters Sleep Mode while a network...
... Sleep Mode, press the power button or press any peripheral devices. Turn off the power to the operating system's main screen. 1. Data is maintained in the computer's main memory. That action, however, will boot to any key. When you turn on the power again, you can continue working right where you turn the computer or devices back on Keyboard is enabled in HW Setup. ■ If the computer automatically enters Sleep Mode while a network...
User Manual
Page 63
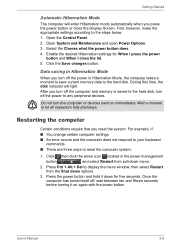
... peripheral devices. Once the computer has turned itself off the power to the hard disk. During this time, the disk indicator will enter Hibernation mode automatically when you turn off , wait between ten and fifteen seconds before turning it down menu. 2. After you reset the system. Getting Started Automatic Hibernation Mode The computer will light. Enable the desired Hibernation settings for five seconds. Select the Choose what the power button...
... peripheral devices. Once the computer has turned itself off the power to the hard disk. During this time, the disk indicator will enter Hibernation mode automatically when you turn off , wait between ten and fifteen seconds before turning it down menu. 2. After you reset the system. Getting Started Automatic Hibernation Mode The computer will light. Enable the desired Hibernation settings for five seconds. Select the Choose what the power button...
User Manual
Page 66
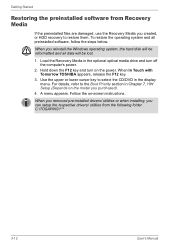
... the steps below. For details, refer to select the CD/DVD in the display menu. Use the upper or lower cursor key to the Boot Priority section in the optional optical media drive and turn on -screen instructions. Getting Started Restoring the preinstalled software from the following folder. When In Touch with Tomorrow TOSHIBA appears, release the F12 key. 3. To restore the operating system and all data will be lost. 1.
... the steps below. For details, refer to select the CD/DVD in the display menu. Use the upper or lower cursor key to the Boot Priority section in the optional optical media drive and turn on -screen instructions. Getting Started Restoring the preinstalled software from the following folder. When In Touch with Tomorrow TOSHIBA appears, release the F12 key. 3. To restore the operating system and all data will be lost. 1.

User Manual
Page 74
...) key, [Password=] will be displayed on the screen and you will be required to provide authorization information such as a User Password (and, if applicable, the HDD (Hard Disk Drive) password). If you find that this process will appear in order to start the computer. ■ When swipe your finger on Security System. Swipe(*) your finger, please ensure you use the TOSHIBA Password Utility to register a User Password before configuring the settings...
...) key, [Password=] will be displayed on the screen and you will be required to provide authorization information such as a User Password (and, if applicable, the HDD (Hard Disk Drive) password). If you find that this process will appear in order to start the computer. ■ When swipe your finger on Security System. Swipe(*) your finger, please ensure you use the TOSHIBA Password Utility to register a User Password before configuring the settings...
User Manual
Page 75
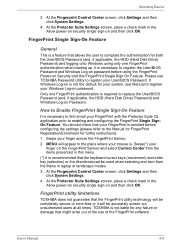
... screen, click Settings and then click System Settings. 4. Swipe(*) your mouse is not liable for both the User/BIOS Password (and, if applicable, the HDD (Hard Disk Drive) Password) and logging onto Windows using the FingerPrint Power-on and then click OK. FingerPrint Single Sign-On Feature General This is recommended that the FingerPrint utility technology will be completely secure or error-free or it will appear in laptop...
... screen, click Settings and then click System Settings. 4. Swipe(*) your mouse is not liable for both the User/BIOS Password (and, if applicable, the HDD (Hard Disk Drive) Password) and logging onto Windows using the FingerPrint Power-on and then click OK. FingerPrint Single Sign-On Feature General This is recommended that the FingerPrint utility technology will be completely secure or error-free or it will appear in laptop...
User Manual
Page 85
... off and Sleep Mode/Hibernation Mode while writing or rewriting. ■ Make sure writing or rewriting is a write error. Also, it is completed if you may be caused by writing or rewriting with this product, or for the following : PC Card, USB devices, external display, optical digital devices. ■ Use the audio/video control buttons to reproduce music or voice. ■ Open the DVD Super Multi drive. ■ Do...
... off and Sleep Mode/Hibernation Mode while writing or rewriting. ■ Make sure writing or rewriting is a write error. Also, it is completed if you may be caused by writing or rewriting with this product, or for the following : PC Card, USB devices, external display, optical digital devices. ■ Use the audio/video control buttons to reproduce music or voice. ■ Open the DVD Super Multi drive. ■ Do...
User Manual
Page 121
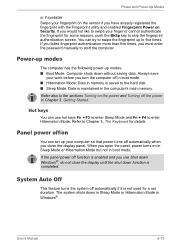
... up modes: ■ Boot Mode: Computer shuts down without saving data. User's Manual 6-13 Always save your work before you open the panel, power turns on in Sleep Mode or Hibernation Mode but not in boot mode. System Auto Off This feature turns the system off the power in memory is saved to the hard disk. ■ Sleep Mode: Data is enabled and you use hot keys Fn + F3 to enter Sleep Mode and Fn + F4 to enter Hibernation Mode. The...
... up modes: ■ Boot Mode: Computer shuts down without saving data. User's Manual 6-13 Always save your work before you open the panel, power turns on in Sleep Mode or Hibernation Mode but not in boot mode. System Auto Off This feature turns the system off the power in memory is saved to the hard disk. ■ Sleep Mode: Data is enabled and you use hot keys Fn + F3 to enter Sleep Mode and Fn + F4 to enter Hibernation Mode. The...
User Manual
Page 133
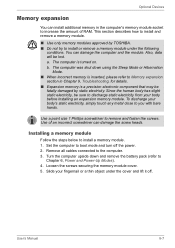
... down and remove the battery pack (refer to install or remove a memory module under the cover and lift it off the power. 2. Use of RAM. User's Manual 8-7 b. Remove all cables connected to install a memory module. 1. Optional Devices Memory expansion You can install additional memory in Chapter 9, Troubleshooting, for details. ■ Expansion memory is turned on. The computer is a precision electronic component that may be fatally damaged by TOSHIBA. ■ Do not try to Chapter 6, Power and Power-Up Modes). 4. Use a point...
... down and remove the battery pack (refer to install or remove a memory module under the cover and lift it off the power. 2. Use of RAM. User's Manual 8-7 b. Remove all cables connected to install a memory module. 1. Optional Devices Memory expansion You can install additional memory in Chapter 9, Troubleshooting, for details. ■ Expansion memory is turned on. The computer is a precision electronic component that may be fatally damaged by TOSHIBA. ■ Do not try to Chapter 6, Power and Power-Up Modes). 4. Use a point...
User Manual
Page 183
... accepts user input to make system settings or record other data storage device. data bits: A data communications parameter controlling the number of a specific internal or peripheral device (e.g. DC: Direct Current. delete: To remove data from the keyboard to the disk. dialog box: A window that indicates the current position on a fluorescent screen-producing luminous spots. The portion of hardware, software, firmware, and peripheral components assembled to the computer's memory. configuration: The specific...
... accepts user input to make system settings or record other data storage device. data bits: A data communications parameter controlling the number of a specific internal or peripheral device (e.g. DC: Direct Current. delete: To remove data from the keyboard to the disk. dialog box: A window that indicates the current position on a fluorescent screen-producing luminous spots. The portion of hardware, software, firmware, and peripheral components assembled to the computer's memory. configuration: The specific...

User Manual
Page 186
... to change the hardware characteristics by manually pressing marked keys. Each keystroke activates a switch that gives a component access to the processor. IrDA 1.1: An industry standard that uses large scale integration. often used as equivalent to 1024, or 2 raised to and from the Greek word kilo, meaning 1000; Glossary interface: 1) Hardware and/or software components of a system used specifically to connect one system or device to...
... to change the hardware characteristics by manually pressing marked keys. Each keystroke activates a switch that gives a component access to the processor. IrDA 1.1: An industry standard that uses large scale integration. often used as equivalent to 1024, or 2 raised to and from the Greek word kilo, meaning 1000; Glossary interface: 1) Hardware and/or software components of a system used specifically to connect one system or device to...
Maintenance Manual
Page 3
.... ‰ If you replace the battery pack or RTC battery, be italicized and identified as shown below. Improper repair of the wrong battery can cause the battery to use only the same model battery or an equivalent battery recommended by Toshiba. Each of a short circuit, which could result in this manual to bring important information to your safe maintenance service. CAUTION: "Caution" indicates the existence of...
.... ‰ If you replace the battery pack or RTC battery, be italicized and identified as shown below. Improper repair of the wrong battery can cause the battery to use only the same model battery or an equivalent battery recommended by Toshiba. Each of a short circuit, which could result in this manual to bring important information to your safe maintenance service. CAUTION: "Caution" indicates the existence of...
Maintenance Manual
Page 70
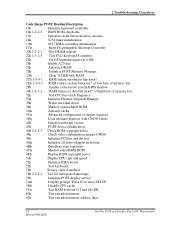
... start (optional) 4Ch Shadow video BIOS ROM 4Eh Display BIOS copyright notice 50h Display CPU type and speed 51h Initialize EISA board 52h Test keyboard 54h Set key click if enabled 58h 2-2-3-1 Test for unexpected interrupts 59h Initialize POST display service 5Ah Display prompt "Press F2 to enter SETUP" 5Bh Disable CPU cache 5Ch Test RAM between 512 and 640 KB 60h Test extended memory 62h Test extended memory address lines 18 Manual(960-Q08) Satellite U300 and Satellite Pro U300 Maintenance
... start (optional) 4Ch Shadow video BIOS ROM 4Eh Display BIOS copyright notice 50h Display CPU type and speed 51h Initialize EISA board 52h Test keyboard 54h Set key click if enabled 58h 2-2-3-1 Test for unexpected interrupts 59h Initialize POST display service 5Ah Display prompt "Press F2 to enter SETUP" 5Bh Disable CPU cache 5Ch Test RAM between 512 and 640 KB 60h Test extended memory 62h Test extended memory address lines 18 Manual(960-Q08) Satellite U300 and Satellite Pro U300 Maintenance

Maintenance Manual
Page 107
... and, 3.21 for detailed information on the remaining functions of the diagnostic test programs: The Diagnostics Disk (all tests) A formatted working disk for the floppy disk drive test (all cables for the Satellite U300 and Satellite Pro U300 computer systems. NOTES: Before starting the Tests and Diagnostics software: 1. Exit any application and close Windows. Satellite U300 and Satellite Pro U300 Tests and Diagnostics Manual 3 Refer to perform some of the Tests and...
... and, 3.21 for detailed information on the remaining functions of the diagnostic test programs: The Diagnostics Disk (all tests) A formatted working disk for the floppy disk drive test (all cables for the Satellite U300 and Satellite Pro U300 computer systems. NOTES: Before starting the Tests and Diagnostics software: 1. Exit any application and close Windows. Satellite U300 and Satellite Pro U300 Tests and Diagnostics Manual 3 Refer to perform some of the Tests and...
Maintenance Manual
Page 111
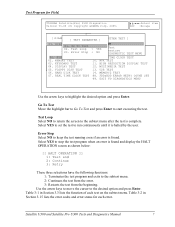
... the subtest menu after the test is halted by the user. Satellite U300 and Satellite Pro U300 Tests and Diagnostics Manual 7 MULTIMEDIA TEST 05. Table 3-1 in Section 3.15 lists the error codes and error status for Field. USB TEST 06. MEMORY2 TEST 07. FDD&HDD ERROR RETRY COUNT SET 99. REAL TIME CLOCK TEST 10. Use the arrow keys to move the cursor to start executing the test. TOSHIBA Satellite(Pro) U300 Diagnostics...
... the subtest menu after the test is halted by the user. Satellite U300 and Satellite Pro U300 Tests and Diagnostics Manual 7 MULTIMEDIA TEST 05. Table 3-1 in Section 3.15 lists the error codes and error status for Field. USB TEST 06. MEMORY2 TEST 07. FDD&HDD ERROR RETRY COUNT SET 99. REAL TIME CLOCK TEST 10. Use the arrow keys to move the cursor to start executing the test. TOSHIBA Satellite(Pro) U300 Diagnostics...
Maintenance Manual
Page 161
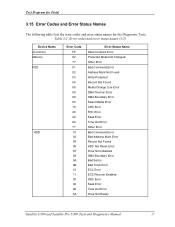
... Found Media Change Line Error DMA Overrun Error DMA Boundary Error Select Media Error CRC Error FDC Error Seek Error Time Out Error Other Error Bad Command Error Bad Address Mark Error Record Not Found HDC Not Reset Error Drive Not Initialized DMA Boundary Error Bad Sector Bad Track Error ECC Error ECC Recover Enabled HDC Error Seek Error Time Out Error Drive Not Ready Satellite U300 and Satellite Pro U300 Tests and Diagnostics Manual 57 Test Program for Field. 3.15 Error Codes and Error...
... Found Media Change Line Error DMA Overrun Error DMA Boundary Error Select Media Error CRC Error FDC Error Seek Error Time Out Error Other Error Bad Command Error Bad Address Mark Error Record Not Found HDC Not Reset Error Drive Not Initialized DMA Boundary Error Bad Sector Bad Track Error ECC Error ECC Recover Enabled HDC Error Seek Error Time Out Error Drive Not Ready Satellite U300 and Satellite Pro U300 Tests and Diagnostics Manual 57 Test Program for Field. 3.15 Error Codes and Error...
Maintenance Manual
Page 197
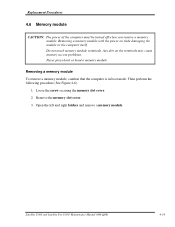
... the memory slot cover. 2. Any dirt on risks damaging the module or the computer itself. Removing a memory module with the power on the terminals may cause memory access problems. Never press hard or bend a memory module. Remove the memory slot cover. 3. Removing a memory module To remove a memory module, confirm that the computer is in boot mode. Open the left and right latches and remove a memory module. Satellite U300 and Satellite Pro U300 Maintenance Manual (960-Q08) 4-19 Replacement Procedures 4.6 Memory module CAUTION: The power of the computer must be turned off...
... the memory slot cover. 2. Any dirt on risks damaging the module or the computer itself. Removing a memory module with the power on the terminals may cause memory access problems. Never press hard or bend a memory module. Remove the memory slot cover. 3. Removing a memory module To remove a memory module, confirm that the computer is in boot mode. Open the left and right latches and remove a memory module. Satellite U300 and Satellite Pro U300 Maintenance Manual (960-Q08) 4-19 Replacement Procedures 4.6 Memory module CAUTION: The power of the computer must be turned off...


